The aroma of a perfectly roasted turkey fills the air, a warm, comforting scent that evokes festive gatherings and cherished traditions. It's a culinary feat that often leaves even seasoned cooks a bit nervous, especially when faced with a hefty 16 lb bird. But don't worry, I'm here to guide you through every step, from prepping to carving, with insider tips and tricks to ensure a mouthwatering masterpiece.
(Part 1) Prepping for Success: Setting the Stage for a Delicious Roast
The Turkey: A Close Inspection and Preparation
Before you even think about seasoning, it's crucial to give your turkey a thorough inspection. First things first, make absolutely sure it's completely thawed. We're talking no ice crystals, no frozen patches, just a fully thawed bird. While you're at it, take a moment to visually assess the turkey. Does it have any off colours, a slimy texture, or any sort of unpleasant odour? If you notice any of these things, it's best to return the turkey and grab a fresh one. Safety first, always!
Once you've given the turkey the all-clear, it's time to pat it dry with paper towels, both inside and out. This crucial step helps the skin crisp up beautifully during roasting, giving it that irresistible golden-brown colour.
Seasoning with Love: A Symphony of Flavours
Now, let's get into the fun part: seasoning. Personally, I prefer to keep things simple. A good quality salt and pepper are the backbone of any good roast, and I always add a sprinkle of dried herbs like rosemary and sage. A pinch of garlic powder adds an extra layer of flavour, but remember, a little goes a long way. You can experiment with other spices if you'd like, but don't overdo it. The key here is to enhance the turkey's natural flavour, not overwhelm it.
Stuffing or No Stuffing? A Matter of Preference
Here we arrive at the age-old debate: to stuff or not to stuff? I'm personally a firm believer in the "no stuffing" camp. Stuffing tends to make the turkey cook unevenly, and can sometimes be a bit of a safety concern if not cooked thoroughly. However, if you're a staunch supporter of stuffing, by all means, go for it! Just make sure to cook it separately for safety reasons.
The Bird's New Home: The roasting pan
Finding the right roasting pan for your turkey is like finding the perfect shoe. It needs to be the right size and shape to accommodate the bird comfortably, allowing for good air circulation and even cooking. If you don't have a dedicated roasting pan, invest in one. It's a worthwhile investment for any serious cook. And remember, you'll need a roasting rack to lift the turkey off the bottom of the pan. This prevents the turkey from sitting in its own juices and allows air to flow all around, resulting in a beautifully browned, crispy skin.
(Part 2) The Roasting Ritual: A Time-Honoured Tradition
The Time is Now: Setting the Oven Temperature
Preheat your oven to 325°F (160°C). This is the ideal temperature for a juicy, evenly cooked turkey, no matter the size. I've tried experimenting with different temperatures, but this one consistently delivers the best results, a happy medium that ensures a perfect balance of tenderness and browning.
Butter Up the Bird: A Delicious Massage
Now, let's give our turkey a little TLC. Rub the entire bird generously with butter or olive oil. This creates a protective barrier, preventing the turkey from drying out during roasting and resulting in a lovely, golden-brown skin. Don't forget to coat the inside of the cavity as well. Then, sprinkle your chosen seasoning liberally over the entire bird, making sure it's evenly distributed.
Into the Oven: The Grand Entrance
Carefully place the turkey, breast side up, onto the rack in the roasting pan. A kitchen towel can be a lifesaver here, allowing you to gently lift the turkey and place it without any spills.
Don't Forget: The Timetable
For a 16 lb turkey, you'll need to roast it for approximately 3-4 hours. But how do you know when it's truly done? This is where our trusty meat thermometer comes into play.
The Thermometer: A Culinary Hero
The meat thermometer is your best friend in this whole process. Insert it into the thickest part of the thigh, making sure it doesn't touch any bone. The turkey is perfectly cooked when the internal temperature reaches 165°F (74°C). Resist the temptation to cut into the turkey before checking the temperature. Patience is key here.
The Waiting Game: Resting is Essential
Once the turkey has reached the desired temperature, don't rush to carve it. Let it rest for at least 30 minutes, preferably covered with foil. This allows the juices to redistribute evenly throughout the bird, resulting in a much more tender, succulent turkey.
(Part 3) Beyond the Basics: Mastering the Art of the Roast
The Art of Basting: Keeping the Bird Moist
Basting is a simple yet effective technique that elevates your roast to new heights. Every 30-45 minutes, use a ladle or a turkey baster to generously baste the bird with the pan juices. This keeps the turkey moist and flavorful, ensuring a delicious, juicy result.
The Cover Up: A Foil Strategy
After the first hour of roasting, cover the turkey loosely with foil. This prevents the skin from over-browning and helps keep the bird from drying out. The foil creates a steamy environment, promoting even cooking and tenderization.
Dealing with the Fat: A Delicate Dance
As the turkey roasts, fat will render out and accumulate in the roasting pan. You can carefully skim off some of the excess fat, but don't remove it all. The fat provides a delicious base for the gravy, adding richness and depth of flavour.
(Part 4) Gravy: The Final Touches
Making Gravy: From the Pan Juices
Gravy is the finishing touch, a symphony of flavours that perfectly complements the roasted turkey. Here's how to create a delicious gravy from the pan juices:
1. Skim off the excess fat: Use a spoon or ladle to carefully skim off most of the fat from the pan juices. You want to leave a bit of fat for flavour, but remove the excess for a lighter gravy.
2. Deglaze the pan: Add a cup or two of water or stock to the pan and use a wooden spoon to scrape the bottom, loosening up any delicious bits of turkey that have stuck.
3. Bring to a simmer: Simmer the juices for a few minutes, allowing them to thicken and reduce.
4. Strain the gravy: Use a fine-mesh sieve to strain the gravy, removing any solids.
5. Season to taste: Add salt, pepper, and any other spices you like to your gravy. I often add a pinch of fresh herbs like parsley or thyme.
A Gravy Tip: Flour for Thickening
For a thicker gravy, whisk a tablespoon or two of flour with a few tablespoons of cold water to create a slurry. Slowly whisk this slurry into the simmering gravy, cooking until it reaches the desired thickness.
(Part 5) Carving with Confidence: The Big Reveal
Tools of the Trade: A Sharp Knife
Carving a roasted turkey is a skill that requires a bit of practice, but with the right tools and a few simple techniques, anyone can achieve professional results. A sharp carving knife is essential, one with a long, thin blade that glides smoothly through the meat.
The Technique: From Breast to Legs
1. Start with the breast: Using your carving knife, make a series of thin slices along the breast, cutting through the skin and down to the bone. Work your way across the entire breast, lifting each slice as you go.
2. Remove the legs: Carve the legs from the body, separating them at the joint.
3. Separate the thighs: Remove the thighs from the drumsticks by cutting along the joint.
4. Carve the wings: Cut the wings at the joint, and you're done!
The Presentation: A Festive Feast
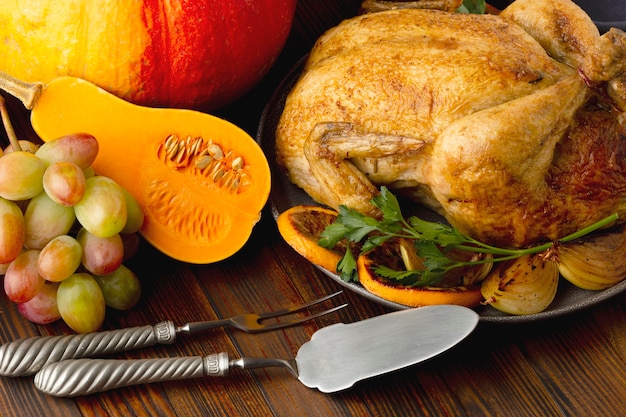
Arrange the carved turkey on a platter, making sure to present it attractively. The meat should be arranged in an aesthetically pleasing way, showcasing the beautiful golden-brown skin. Serve the turkey with your delicious homemade gravy and any additional garnishes you like, such as fresh herbs, cranberry sauce, or even a sprig of rosemary.
(Part 6) turkey leftovers: Don't Waste a Bite
A Feast for the Days to Come: Leftover Love
Leftover turkey is a culinary treasure, a gift that keeps on giving. You can use it for sandwiches, salads, soups, or even in a turkey pot pie. I personally love a classic turkey and cranberry sandwich, a perfect way to relive the festive flavours for a few more days.
Storing Leftovers: Keep it Safe
Refrigerate any leftover turkey within 2 hours of cooking. Store it in an airtight container and use it within 3-4 days.
Freezing Turkey: For Future Delights
You can freeze leftover turkey for up to 2-3 months, extending the festive feast even further. Wrap it tightly in freezer-safe packaging to prevent freezer burn.
(Part 7) Turkey Cooking Time: A Comprehensive Guide
roasting time: A Helpful Table
To ensure a perfectly cooked turkey, understanding the roasting time is crucial. This table provides a helpful guide for different turkey weights:
| Turkey Weight (lbs) | Roasting Time (hours) |
|---|---|
| 8-12 | 2-3 |
| 12-16 | 3-4 |
| 16-20 | 4-5 |
| 20-24 | 5-6 |
Cooking Time Adjustment: Stuffing Matters
If you're stuffing your turkey, add an extra 30-45 minutes to the roasting time to ensure the stuffing cooks through completely.
The Temperature Check: Safety First
Always use a meat thermometer to check the turkey's internal temperature. It should reach 165°F (74°C) in the thickest part of the thigh.
(Part 8) FAQs: Answering Your Turkey Questions
1. Can I use a turkey breast instead of a whole turkey?
Absolutely! A turkey breast is a great option for smaller gatherings or if you prefer a leaner cut of meat. The cooking time will be significantly shorter, typically around 1-2 hours. Just follow the same roasting instructions, adjusting the time according to the size of the breast.
2. What if my turkey is too big for my roasting pan?
If your roasting pan is too small to accommodate the turkey, don't fret! You can use a large baking sheet instead. Just make sure to place a rack in the baking sheet to lift the turkey off the bottom. This ensures proper air circulation and even cooking.
3. What's the best way to keep the turkey moist?
Basting regularly with the pan juices and covering the turkey with foil during the last part of the roasting process are excellent methods for keeping the turkey moist and preventing over-browning.
4. What can I do with the leftover turkey bones?
Don't throw those turkey bones away! They are a treasure trove of flavour for a delicious stock. Simply simmer the bones in water with vegetables for a few hours, then strain the stock. You'll have a flavorful base for soups, stews, or even risottos.
5. How do I know if my turkey is done?
The most reliable way to determine if your turkey is done is to use a meat thermometer. The internal temperature should reach 165°F (74°C) in the thickest part of the thigh. You can also check for doneness by inserting a fork into the thickest part of the thigh. If the juices run clear, the turkey is done.
Now, you're armed with all the knowledge and confidence you need to tackle that 16 lb turkey. Just follow these steps, and you'll be serving up a delicious, perfectly roasted turkey that will be the star of your festive feast!
Everyone is watching

Perfect Rice Every Time: The Ultimate Guide to Cooking Rice
Cooking TipsAs a self-proclaimed foodie, I've always been a bit obsessed with rice. It's the foundation of countless cuisi...

Ultimate Guide to Cooking the Perfect Thanksgiving Turkey
Cooking TipsThanksgiving. Just the word conjures up images of overflowing tables laden with delicious food, the scent of r...

The Ultimate Guide to Cooking Asparagus: Tips, Techniques, and Recipes
Cooking TipsAsparagus. The mere mention of this spring delicacy conjures up images of vibrant green spears, crisp and burs...

Can You Cook Spaghetti with Gasoline? (The Shocking Truth)
Cooking TipsWe've all seen those crazy internet trends. You know, the ones that make you wonder, "Did someone actually try...

Chorizo and Eggs Recipe: The Ultimate Guide
Cooking TipsRight, let’s talk about chorizo and eggs. You know, that classic Spanish dish that's always a winner. It's th...