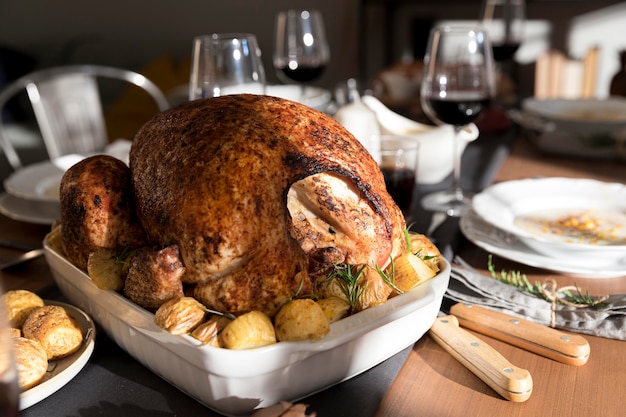
Ah, the turkey. The centerpiece of many festive meals, the king of the roast, and a symbol of deliciousness. But cooking a 12-pound turkey isn’t just about throwing it in the oven and hoping for the best. It's a journey, a culinary adventure that requires planning, precision, and a touch of know-how.
I've certainly had my fair share of turkey cooking mishaps, from dry, tough birds to uneven cooking. But over the years, I’ve learned a thing or two about how to make a truly spectacular turkey, one that's juicy, flavorful, and impressive enough to satisfy even the most discerning palate.
Let's embark on this turkey cooking adventure together. I'll guide you through every step, from the initial planning to the moment you carve that glorious bird and bask in the warmth of satisfied smiles around the table.
Part 1: Setting the Stage for Success

Before you even think about the oven, you need to lay the groundwork for a perfect turkey. This is where meticulous planning comes in.
1. The All-Important Brine
Brining is a topic that sparks endless debates in the culinary world. Some swear by it, others scoff at its necessity. I stand firmly in the "brine-loving" camp. A good brine is like giving your turkey a spa treatment. It infuses the meat with moisture and flavor, creating a tender, succulent result.
Brining Basics
The science behind brining is simple: you're essentially immersing the turkey in a salt-water solution. Salt draws moisture from the surrounding environment, penetrating the muscle fibers and plumping them up. The result? A juicy, flavorful turkey that defies dryness.
A Simple Brine Recipe
1 Gallon of Water: The base for our brine.
1 Cup of Kosher Salt: A key ingredient for moisture and flavor.
?? Cup of Brown Sugar: Adds a touch of sweetness and helps to balance the saltiness.
1 Tablespoon of Black Peppercorns: Provides a subtle peppery kick.
1 Bay Leaf: Adds a touch of earthy aroma.
1 Sprig of Rosemary: A classic herb pairing for turkey, offering a slightly piney aroma.
Brine Preparation
1. Bring the water to a boil. This helps to dissolve the salt and sugar more quickly.
2. Stir in the salt and sugar. Make sure they dissolve completely before proceeding.
3. Cool the brine completely. It's essential to use a cold brine, as a warm brine can cook the turkey prematurely.
4. Submerge the turkey. Place the turkey in a large container and pour the cooled brine over it. Cover the container and refrigerate for at least 4 hours, but ideally overnight.
2. Temperature Control is Key
cooking a turkey is all about maintaining a precise temperature. You want to cook it slowly and evenly to ensure it’s cooked through and juicy without drying out.
Oven Temperature
Target Temperature: Set your oven to 325°F (160°C). This provides a consistent heat for a slow, even cook.
internal temperature
Doneness: Your turkey is cooked through when the internal temperature reaches 165°F (74°C) in the thickest part of the thigh.
Using a meat thermometer
A meat thermometer is your best friend in turkey cooking. It’s the only way to ensure your turkey is cooked to perfection. Don’t rely on just the timer – always check the temperature with a meat thermometer.
3. Timing Is Everything
Determining the cooking time for your 12-pound turkey is essential, but it's not an exact science. Here are the key factors that influence cooking time:
Size of the Bird
Bigger Birds Take Longer: A larger turkey will take longer to cook than a smaller one.
Oven Variations
Calibration is Key: Ovens can vary in temperature, so you may need to adjust your cooking time based on your oven’s performance.
The Stuffing Factor
Stuffing Adds Time: If you're stuffing your turkey, you'll need to add extra cooking time to ensure the stuffing reaches the appropriate temperature.
Part 2: The Day of the Roast
The day has arrived! It's time to get your hands dirty (but not literally, please) and prepare your turkey for the oven.
1. Prepping Your Turkey
Before you start cooking, give your turkey a good pat-down. Remove any excess moisture with paper towels. This will help to ensure a crisp skin.
Seasoning Secrets
Simplicity Wins: Salt and pepper are classic seasonings for a reason. They enhance the natural flavors of the turkey without overpowering them.
A Flavorful Trio: A touch of garlic powder and onion powder adds a subtle depth of flavor.
Citrus Zest: A sprinkle of lemon or orange zest adds a bright, citrusy touch.
Herbaceous Delight: Fresh or dried herbs like rosemary, thyme, and sage complement the turkey beautifully.
2. Setting the Stage
The right placement in the oven is crucial for even cooking.
The Importance of a Rack
Air Circulation is Key: Use a roasting rack to elevate the turkey. This allows hot air to circulate around the bird evenly.
Positioning for Success
Center Stage: Position the turkey in the center of the oven to ensure heat distribution.
Part 3: The Big Cook-Off
The moment you've been waiting for: time to roast!
1. The Roast Begins
Carefully place your prepped turkey in the preheated oven.
The Cooking Time
Estimated Time: A 12-pound turkey typically takes 3 to 4 hours to cook.
Monitoring the Process
Don’t Over-Open: Opening the oven door too frequently can release heat and slow down the cooking process.
Use Your Thermometer: Check the temperature in the thickest part of the thigh every hour or so.
2. Basting for Moisture and Flavor
Basting your turkey is a bit of an art. It's not absolutely essential, but it can make a big difference in achieving a moist, flavorful bird.
The Basting Technique
Pan Drippings: Use a spoon to scoop up the pan drippings and baste the turkey every 30 to 45 minutes.
Basting Frequency
To Your Taste: Feel free to baste as often as you like, or not at all. It's a matter of personal preference.
3. The Importance of Rest
Once your turkey is cooked, resist the urge to carve it right away. Give it a rest for 15-20 minutes before carving.
Resting Benefits
Juicy Results: Resting allows the juices to redistribute throughout the meat, ensuring a juicier, more flavorful turkey.
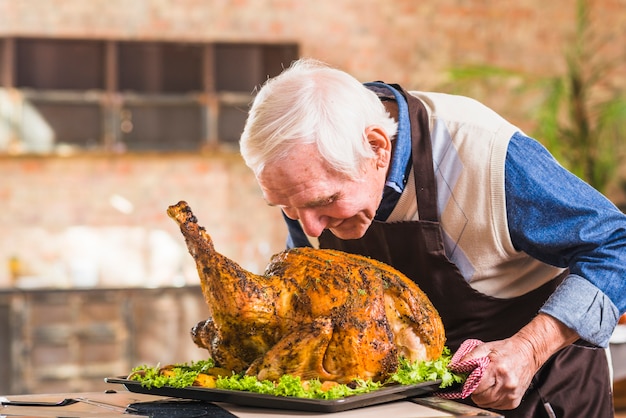
Part 4: Carving Your Culinary Masterpiece
The final act in your turkey journey: carving. You're almost there!
1. Gather Your Tools
You'll need a few essential tools to make carving a breeze.
Sharp Tools are Essential
A Sharp Carving Knife: Choose a knife with a long, thin blade that's sharp enough to cut through both skin and bone.
A Large Cutting Board: Select a cutting board that's large enough to accommodate your turkey.
A Serving Platter: Choose a platter that's big enough to hold all the carved turkey.
2. The Carving Steps
Now, it's time to put those carving skills to the test!
The Carving Process
1. Remove the Legs: Carefully cut the legs at the joint where they connect to the body.
2. Separate Thighs and Drumsticks: Cut along the bone to separate the thighs from the drumsticks.
3. Remove the Wings: Cut the wings at the joint where they connect to the body.
4. Carve the Breast: Start at the breastbone and slice thin slices of breast meat, working your way down the bone.
Part 5: turkey leftovers: A Culinary Treasure
Let's be honest, the real magic often happens after the main event. Turkey leftovers are a culinary treasure trove, ripe with possibilities.
1. Storage is Key
Refrigerate Properly: Store your leftover turkey in the refrigerator for up to 4 days.
Wrap Tightly: Wrap the turkey tightly in plastic wrap or aluminum foil.
2. Leftover Magic
The possibilities for turkey leftovers are endless!
Leftover Ideas
turkey sandwiches: A classic for a reason, turkey sandwiches are a quick and easy way to enjoy leftover turkey.
turkey soup: A warm, comforting bowl of turkey soup is perfect for a chilly day.
turkey salad: A versatile and delicious option that can be enjoyed as a sandwich filling, salad topping, or even a wrap.
turkey pot pie: A comforting and satisfying pot pie is perfect for a cozy dinner.
Part 6: turkey tips and Tricks
Here's a collection of tips and tricks to help you avoid turkey troubles and create a truly delicious feast.
1. Avoid Overcooking
Overcooking is the enemy of a juicy turkey. It can turn a tender bird into a dry, disappointing meal.
Preventing Dryness
Check the Temperature: Use a meat thermometer to ensure the turkey is cooked through without overcooking.
Remove Early: Remove the turkey from the oven when it reaches 165°F (74°C) in the thickest part of the thigh.
2. The Brining Boost
Brining your turkey is one of the best ways to ensure a moist and flavorful bird. It's a simple, effective technique that makes a significant difference.
Don’t Skip the Brine
Moisture and Flavor: Brining adds moisture and flavor to the turkey, making it juicy and tender.
3. The Stuffing Saga
Stuffing your turkey can add a delicious element to your meal, but it's important to do it safely.
Stuffing Safety
Cook It Separately: The safest way to cook stuffing is to cook it separately in a casserole dish.
Don't Stuff the Bird: If you do stuff the bird, make sure to cook it to an internal temperature of 165°F (74°C).
Part 7: Troubleshooting Turkey Troubles
Even the most experienced cooks can encounter some turkey challenges. Here's a guide to tackling common issues.
1. Dry Turkey
No one wants a dry turkey. It's a culinary disaster that can leave you with a disappointing meal.
Preventing Dryness
Don't Overcook It: Overcooking is the primary cause of dry turkey.
Brine Your Bird: Brining adds moisture to the turkey, making it juicier.
Baste Regularly: Basting with pan drippings helps to keep the turkey moist.
2. Tough turkey skin
A tough turkey skin can make for a less-than-satisfying eating experience.
Achieving Crisp Skin
High Heat: Roasting at a higher temperature can help to crisp up the skin.
Pat It Dry: Pat the turkey skin dry before roasting. This helps to achieve a crispier skin.
3. Undercooked Breast
You want to make sure your turkey is cooked through, especially the breast.
Ensuring Even Cooking
Check the Temperature: Use a meat thermometer to check the temperature in the thickest part of the thigh.
Continue Cooking: If the breast is undercooked, continue cooking the turkey for another 30 minutes.
Part 8: FAQs
Let's address some frequently asked questions about turkey cooking to clarify any lingering doubts.
1. Can I Freeze My Turkey?
Yes, you can freeze a whole turkey. It's best to freeze it for up to 2 months.
2. How Do I Thaw My Turkey?
The safest way to thaw a frozen turkey is in the refrigerator. Allow 24 hours for every 5 pounds of turkey.
3. Should I Cover My Turkey While Cooking?
You don't need to cover your turkey while cooking. It will cook more evenly without a cover.
4. What Do I Do With the Turkey Carcass?
Don't throw it out! Use the turkey carcass to make a delicious turkey stock.
5. How Long Can I Store Leftover Turkey?
You can store leftover turkey in the refrigerator for up to 4 days.
Remember, turkey cooking is a journey, not a race. With a little planning, attention to detail, and a pinch of patience, you'll be serving a stunning, flavorful turkey that will be the star of your festive meal. Enjoy the process and the delicious results!
Everyone is watching

Prime Rib Roast Cooking Time Chart: Per Pound Guide
Cooking TipsPrime rib roast. Just the name conjures images of lavish dinners, crackling fires, and hearty laughter. It’s ...

How Long to Bake Potatoes in the Oven (Perfect Every Time)
Cooking TipsBaked potatoes are a staple in my kitchen. They're incredibly versatile, delicious, and surprisingly easy to m...

Perfect Rice Every Time: The Ultimate Guide to Cooking Rice
Cooking TipsAs a self-proclaimed foodie, I've always been a bit obsessed with rice. It's the foundation of countless cuisi...

The Ultimate Guide to Cooking Asparagus: Tips, Techniques, and Recipes
Cooking TipsAsparagus. The mere mention of this spring delicacy conjures up images of vibrant green spears, crisp and burs...

Ultimate Guide to Cooking the Perfect Thanksgiving Turkey
Cooking TipsThanksgiving. Just the word conjures up images of overflowing tables laden with delicious food, the scent of r...