Ah, the turkey. A majestic bird, a symbol of festive gatherings, and a culinary challenge that can leave even the most seasoned cook a little nervous. Especially when you're dealing with a 19-pound behemoth! It's a daunting task, I know, but with the right approach, you can conquer this beast and produce a turkey that's not just cooked, but absolutely sensational. I'm talking about a turkey so good, your guests will be singing your praises. And believe me, I've learned a thing or two over the years, including a few turkey disasters! Let's dive in and get you on the path to turkey triumph.
Part 1: Choosing Your Weapon

Let's start at the beginning: choosing your turkey. This is like picking your weapon in a culinary battle. It's a crucial first step and can greatly influence the outcome. You have a few key decisions to make: fresh or frozen, brined or unbrined? Each option has its advantages and disadvantages, so let's explore them.
Fresh vs. Frozen
Personally, I'm a big fan of fresh turkeys. They just seem to have a more vibrant flavour, and the aroma while roasting is heavenly. But, I'll admit, fresh turkeys are usually a bit pricier and you might need to get to the butcher early to snag the size you want. frozen turkeys are a good alternative - they're readily available and often more budget-friendly. Just remember, you'll need to allow plenty of time for thawing, so don't leave it to the last minute!
Brined vs. Unbrined
Now, we come to brining. This is where you soak the turkey in a salty solution before roasting. It's a bit more work, but for good reason. The salt draws out moisture from the turkey, then pulls it back in, resulting in meat that's incredibly moist and tender. It's a real game-changer if you want a juicy turkey. But be warned, a brined turkey can get a bit messy! So, if you're not keen on a little extra cleanup, an unbrined turkey might be the way to go.
Part 2: Prepping Your Bird for Battle

You've got your turkey, it's thawed and ready for action. Now it's time for the pre-battle prep. It's not as intimidating as it sounds. In fact, it's where you can unleash your inner culinary artist!
Pat It Dry, Like a True Champion
First, pat the turkey dry inside and out. This helps the skin get nice and crispy, giving you that golden-brown perfection. I use paper towels, making sure to get into all the nooks and crannies. Remember, it's all about removing excess moisture. If you leave it there, it'll steam rather than crisp, and nobody wants a soggy turkey.
Seasoning: The Secret Weapon
Now, the fun part - seasoning! This is where you can really make your turkey shine. I'm a simple guy, so I stick to a blend of salt, pepper, and herbs like rosemary and thyme. It's a classic for a reason. But feel free to get creative. Garlic powder, paprika, even a touch of chili powder can add a burst of flavour. Be generous, but don't overdo it. You want to enhance the turkey's natural flavor, not drown it out.
Stuffing: A Delicate Dance
If you're stuffing your turkey, do it right before roasting. It's important to cook stuffing to 165 degrees Fahrenheit, just like the turkey, so make sure it's cooked thoroughly. I find that stuffing is best done loosely, allowing air to circulate and cook it evenly. If you pack it in too tightly, it might not cook properly and could end up being a bit soggy.
Part 3: Roasting: The Grand Finale

Right, the moment you've been waiting for - roasting! This is the culmination of all your hard work, and it's where things can get a little tricky. But don't worry, I'll guide you through it.
The Oven: A Fiery Ally
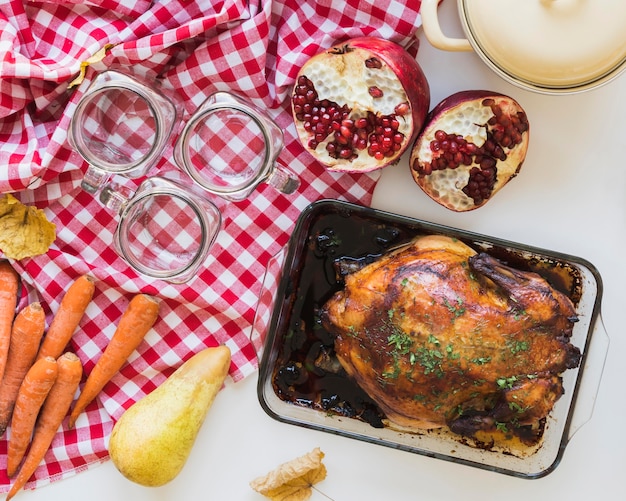
Preheat your oven to 325 degrees Fahrenheit. A preheated oven ensures even cooking. You want that heat to envelop the turkey, cooking it from all sides. Now, grab a large roasting pan – one that's big enough to hold your turkey comfortably, with a little room to spare for those delicious drippings.
Basting: A Touch of TLC
While the turkey is roasting, you'll want to baste it every 30 minutes or so with the pan drippings. This is like giving your turkey a little TLC. The drippings are full of flavor, and basting helps keep the turkey moist. Don't overdo it though, or the skin will stay soft instead of getting that beautiful crisp.
The turkey thermometer: Your Trusted Advisor
This is the key to making sure your turkey is cooked perfectly. It's your trusted advisor, guiding you through the cooking process. Insert a meat thermometer into the thickest part of the thigh, making sure it doesn't touch any bone. You want the turkey to reach an internal temperature of 165 degrees Fahrenheit. This ensures that the turkey is safe to eat and that all those delicious juices are locked in.
Part 4: The Resting Ritual: Patience is Key
Once the turkey is cooked, don't rush to carve it! Let it rest for at least 15 minutes before carving. This is where patience pays off. It allows the juices to redistribute throughout the meat, resulting in a more juicy and flavorful turkey. It's a little like letting a great wine breathe – it enhances the flavor.
Cover It Up: A Warm Embrace
While the turkey is resting, cover it loosely with foil. This helps to keep it warm and moist, making sure it doesn't dry out. It's a warm embrace for your culinary creation. You'll be surprised how much the turkey continues to cook during this resting time.
Part 5: Carving: A Culinary Performance
Now for the fun part – carving the turkey. It's a bit of a show, so try to be as impressive as possible! It's your moment to shine. A sharp knife is key, folks!
The Art of Carving: A Masterclass
Start by carving the legs and thighs. Then, cut the breasts into thin slices. Use a spoon to remove any stuffing from the cavity. Arrange the turkey beautifully on a platter, and you're ready to serve! I like to arrange the turkey with the breast facing up, the legs and thighs on either side, and a garnish of rosemary sprigs or parsley for a touch of elegance. It's all about presentation, folks!
Part 6: Serving: The Grand Reveal
Here comes the grand finale – serving the turkey. This is your moment to shine, so make it memorable!
The Sidekick Stars
You can't forget about the sides! They're the supporting actors that make your turkey the star. I like to serve my turkey with classic side dishes like mashed potatoes, gravy, cranberry sauce, and stuffing. They're like the classic ensemble cast of a great film. But feel free to get creative and add some modern twists, like a roasted vegetable medley or a salad with a vinaigrette dressing. It's all about creating a balanced and flavorful ensemble.
Part 7: Tips and Tricks: The Insider Secrets
Over the years, I've learned a few tips and tricks that help me get the most out of roasting a turkey. Here are a few of my favorites – the insider secrets that make the difference between a good turkey and a legendary one.
- Use a turkey roasting rack: This helps to lift the turkey off the bottom of the pan, allowing air to circulate around it for more even cooking. It's like giving your turkey a little air conditioning.
- Don't overcrowd the pan: If you're roasting a large turkey, make sure you use a pan that's big enough to accommodate it without overcrowding. You want the turkey to have space to cook evenly. It's like giving your turkey a little room to breathe.
- Use a meat thermometer: This is the only way to know for sure if the turkey is cooked through. Don't rely on just looking at it. It's like having a doctor check on your turkey's health.
- Let the turkey rest: Resting the turkey after cooking is crucial for juiciness and flavor. It's like giving your turkey a chance to recover from its culinary adventure.
- Save the pan drippings: You can use the pan drippings to make a delicious gravy. It's like turning your turkey's sweat into liquid gold.
- Use a kitchen timer: This will help you keep track of the cooking time and make sure you baste the turkey regularly. It's like having a personal assistant for your turkey.
Part 8: Troubleshooting: Dealing with Unexpected Twists
Things don't always go according to plan, even for experienced cooks. It's like a surprise plot twist in a good movie. Here are some common problems you might encounter and how to fix them. Don't panic, there's always a solution!
Dry Turkey: The Moisture Crisis
If your turkey is dry, it's likely that you overcooked it. To prevent this, make sure you use a meat thermometer and cook the turkey to the proper temperature. You can also try brining the turkey before roasting. It's like giving your turkey a moisture boost.
Undercooked Turkey: A Culinary Cliffhanger
If your turkey is undercooked, it's important to cook it for longer. Make sure you check the internal temperature with a meat thermometer. Don't be afraid to roast it for a little longer if it's not quite done yet. It's like extending the movie a bit to get a proper ending.
Burnt Skin: A Bit Too Crispy
If the turkey skin is burnt, it's likely that you roasted it at too high of a temperature. Try lowering the oven temperature to 325 degrees Fahrenheit for the next roast. You can also try tenting the turkey with foil during the last hour of cooking to prevent the skin from burning. It's like putting a sunshade on your turkey.
Uneven Cooking: A Case of Inconsistency
If the turkey is not cooking evenly, it could be because the oven is not preheated properly or the turkey is overcrowded in the pan. Make sure you preheat your oven and give the turkey enough space to cook evenly. It's like giving your turkey the perfect stage for its culinary performance.
Part 9: FAQs: The Big Questions Answered
I've answered some of the questions I get asked most frequently about turkey roasting. It's like having a Q&A session with a turkey expert.
1. How long do I need to cook a 19 pound turkey?
The general rule of thumb is to cook a turkey for 15 minutes per pound at 325 degrees Fahrenheit. So, for a 19 pound turkey, you would cook it for about 285 minutes, or 4 hours and 45 minutes. But remember, it's always best to use a meat thermometer to make sure the turkey is cooked through.
2. How do I know when my turkey is done?
The turkey is done when the internal temperature reaches 165 degrees Fahrenheit in the thickest part of the thigh, making sure it doesn't touch any bone. You can use a meat thermometer to check the temperature.
3. What do I do if my turkey is overcooked?
If your turkey is overcooked, it will be dry. You can try adding some gravy or sauce to the turkey to make it more moist. You can also try using the turkey meat in other dishes, like a turkey salad or a turkey soup. It's like giving your overcooked turkey a second chance.
4. What if I'm not sure what kind of turkey to buy?
If you're not sure what kind of turkey to buy, ask your butcher for recommendations. They can help you choose a turkey that's the right size for your needs and can also tell you what kind of turkey they recommend for different cooking methods. It's like having a personal shopper for your turkey.
5. What is the best way to store leftover turkey?
Leftover turkey should be stored in the refrigerator in an airtight container. It will keep for 3-4 days. You can also freeze leftover turkey for up to 2 months. Just make sure to wrap it tightly in freezer-safe plastic wrap or foil. It's like putting your turkey in a time capsule.
Part 10: Final Thoughts: A Culinary Triumph
Roasting a turkey is a bit of a challenge, but it's so rewarding when you get it right. You'll have a delicious meal that will impress your guests. Just remember to choose a good turkey, prep it properly, roast it carefully, and let it rest before carving. And most importantly, have fun with it!
Remember, if you've got any questions or need any extra guidance, don't hesitate to reach out. I'm here to help you create a turkey that'll be the talk of the town!
Everyone is watching

Perfect Rice Every Time: The Ultimate Guide to Cooking Rice
Cooking TipsAs a self-proclaimed foodie, I've always been a bit obsessed with rice. It's the foundation of countless cuisi...

Ultimate Guide to Cooking the Perfect Thanksgiving Turkey
Cooking TipsThanksgiving. Just the word conjures up images of overflowing tables laden with delicious food, the scent of r...

The Ultimate Guide to Cooking Asparagus: Tips, Techniques, and Recipes
Cooking TipsAsparagus. The mere mention of this spring delicacy conjures up images of vibrant green spears, crisp and burs...

Can You Cook Spaghetti with Gasoline? (The Shocking Truth)
Cooking TipsWe've all seen those crazy internet trends. You know, the ones that make you wonder, "Did someone actually try...

Chorizo and Eggs Recipe: The Ultimate Guide
Cooking TipsRight, let’s talk about chorizo and eggs. You know, that classic Spanish dish that's always a winner. It's th...
