The anticipation of Christmas dinner is almost palpable. The aroma of roasting turkey fills the air, the family gathers around, and the promise of a delicious feast is on everyone's mind. But let's be honest, cooking a turkey can be a bit of a nerve-wracking experience. I’ve certainly been there, with turkeys emerging from the oven a bit pink one time, and dry as a bone the next. But over the years, I’ve developed a foolproof method for achieving turkey perfection. In this guide, I'll share my insider tips and tricks, from selecting the perfect bird to mastering the art of basting and carving, ensuring a memorable Christmas dinner for everyone.
(Part 1) Choosing Your Turkey: A Foundation for Success
1. Size Matters: Finding the Right Fit
The first crucial step is choosing the right-sized turkey. You want a bird that’s large enough to feed everyone comfortably without leaving anyone feeling shortchanged. A 4-5kg turkey is typically ideal for a family of four to six. However, British appetites are notoriously generous, so if you’re expecting a larger crowd, a 6-7kg bird might be a better choice. It's always better to have a little extra than not enough, especially when it comes to Christmas dinner!
2. Fresh or Frozen: Making the Decision
Now, the age-old question: fresh or frozen turkey? This is a matter of personal preference. I personally favor fresh turkeys, as they tend to have a more delicate flavor and retain moisture better. They also offer a slight advantage in terms of cooking time. However, frozen turkeys are perfectly acceptable and offer more flexibility for planning. If you choose frozen, just remember to defrost it thoroughly in the refrigerator for a few days before cooking. If you find yourself in a bind, you can defrost a turkey in a cold water bath, changing the water every 30 minutes.
3. The Perfect Bird: Looking for Quality
When you’re selecting your turkey, keep your eyes peeled for a few key characteristics. First, look for a plump bird with a healthy, even color—neither too pale nor too dark. Avoid any turkeys with bruises, signs of damage, or discoloration, as these can indicate poor quality. Remember, you want a bird that will cook evenly and result in a succulent and flavorful final product.
(Part 2) Preparing Your Turkey: Setting the Stage
1. Brining for Moisture: A Delicious Secret
Brining is a technique that involves immersing the turkey in a salt solution for several hours. This process works magic, helping to retain moisture and enhance flavor. The result is a turkey that’s incredibly juicy and tender, a true delight for everyone at the table. You can create a simple brine by dissolving salt in water, or get creative by adding herbs, spices, and citrus fruits for an extra layer of flavor. I personally love adding a few sprigs of rosemary and thyme to my brine, along with some orange zest. It infuses the turkey with a beautiful fragrance and subtle citrus notes.
2. Pat it Dry: The Importance of Moisture Control
Once you've finished brining (if you've chosen to), pat the turkey dry with paper towels. This step is vital for achieving crispy skin during cooking. It allows the skin to brown beautifully and adds a delightful texture contrast to the tender meat.
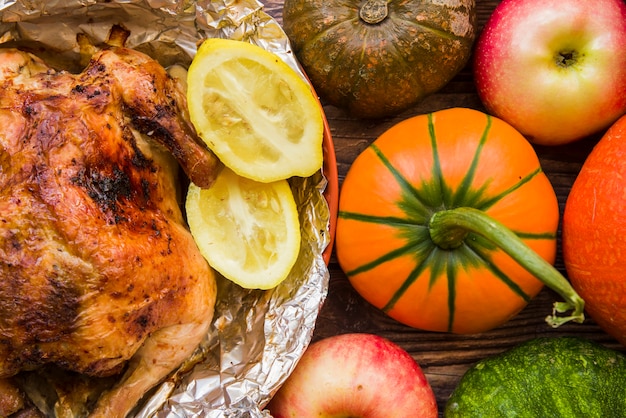
3. Stuffing the Bird: A Flavorful Tradition
Ah, stuffing—the quintessential Christmas companion to turkey. It adds a delicious dimension to the meal, but it’s important to do it right. Firstly, don’t overstuff the turkey. Leave some space for air to circulate, allowing the stuffing to cook evenly and prevent the turkey from becoming soggy. Secondly, make sure your stuffing is cooked thoroughly. You can cook the stuffing separately or inside the turkey, but ensure it reaches an internal temperature of 74°C (165°F) using a meat thermometer. If you’re cooking it separately, cook it completely through before adding it to the cavity of the turkey.
(Part 3) Cooking Your Turkey: The Heart of the Process

1. Oven Temperature: Finding the Perfect Heat
For a traditional roast turkey, the ideal oven temperature is 180°C (350°F). However, you may need to adjust the temperature slightly if you’re using a smaller turkey. Keep in mind that oven temperatures can vary, so always use a meat thermometer to confirm the internal temperature of your turkey. It’s better to be safe than sorry!
2. roasting time: Calculating the Perfect Duration
The roasting time for a turkey depends directly on its size. As a general rule, allow approximately 20 minutes per 450g (1lb) of turkey. For example, a 4kg turkey will need around 2 hours and 40 minutes of cooking time. Don’t be tempted to rush the process, as this could lead to undercooked meat, which could pose a food safety risk.
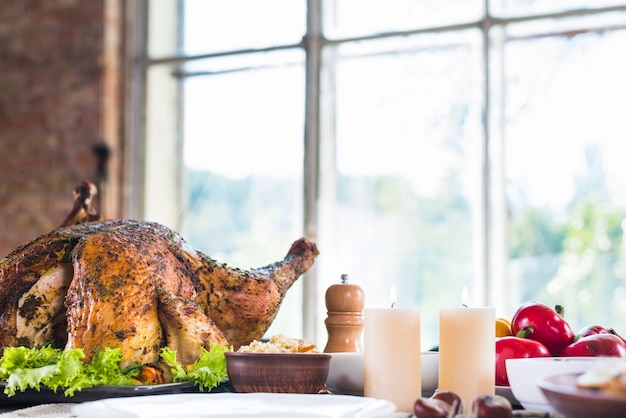
3. Basting for Juicy Results: The Art of Flavor Enhancement
Basting your turkey is a crucial step that ensures it remains moist and flavorful throughout the cooking process. You can use turkey drippings, butter, or a combination of both. I like to create a flavorful basting mixture with butter, herbs, and a squeeze of lemon juice. It adds a beautiful depth of flavor. Baste the turkey every 30 minutes or so, ensuring you cover the breast and legs. You’ll be amazed at how much difference it makes!
4. The Importance of Rest: Allowing the Juices to Redistribute
Once the turkey is cooked, it’s vital to let it rest for at least 30 minutes before carving. This step allows the juices to redistribute throughout the meat, resulting in a juicier and more flavorful bird. You can cover the turkey with foil to keep it warm while it rests.
(Part 4) Checking for Doneness: Ensuring Perfection
1. The Meat Thermometer: Your Trusted Guide
The most accurate way to check if your turkey is cooked through is by using a meat thermometer. The turkey is ready when the internal temperature reaches 74°C (165°F) in the thickest part of the thigh. Don't insert the thermometer into the stuffing, as this will provide an inaccurate reading.
2. Other Signs of Doneness: Visual Cues
If you don’t have a meat thermometer, you can rely on a few other signs of doneness. The juices should run clear when you pierce the thickest part of the thigh with a knife. The leg should move easily when you wiggle it gently. And the skin should be a beautiful golden brown and crisp.
(Part 5) Carving Your Turkey: A Masterful Presentation
1. Equipment: The Tools of the Trade
You'll need a sharp carving knife and a carving fork for this task. If you’re using a carving board, make sure it’s large enough to accommodate the turkey comfortably.
2. The Technique: A Step-by-Step Guide
Start by carving the breast meat. Place the turkey breast side up on the carving board and carefully slice the meat away from the bone. Use the carving fork to hold the breast in place as you carve. Next, carve the legs and thighs. Finally, remove the wing bones and carve the wings.
(Part 6) Serving Your Turkey: A Feast for the Senses
1. Presentation: A Visual Delight
Once you’ve carved your turkey, arrange it beautifully on a platter. You can serve it with traditional accompaniments like gravy, stuffing, cranberry sauce, and an array of vegetables.
2. Leftovers: Culinary Creativity
Don’t let those leftover turkey bones go to waste! Use them to create a delicious and flavorful turkey stock. Simply simmer them with vegetables and herbs for a few hours. This stock is a fantastic base for soups, stews, and sauces. And of course, don't forget to save some leftover turkey for sandwiches, salads, or other delicious dishes.
(Part 7) Turkey Cooking Temperatures: A Handy Guide
For your convenience, here’s a table summarizing the ideal turkey cooking temperatures:
| Part of the Turkey | Internal Temperature (°C) | Internal Temperature (°F) |
|---|---|---|
| Breast | 74 | 165 |
| Thigh | 82 | 180 |
| Stuffing | 74 | 165 |
(Part 8) Common turkey cooking mistakes: Avoiding Pitfalls
1. Overcrowding the Oven: Ensuring Even Cooking
If you're roasting your turkey in a crowded oven, it won't cook evenly. Make sure there's enough space around the turkey for air to circulate freely, allowing it to cook uniformly.
2. Not Resting the Turkey: A Key to Juiciness
As I mentioned earlier, it's essential to let the turkey rest for at least 30 minutes before carving. This allows the juices to redistribute, resulting in a juicier and more flavorful turkey.
3. Undercooked Turkey: Food Safety First
Undercooked turkey is a serious food safety concern, so it’s vital to check the internal temperature of your turkey with a meat thermometer. Don't rely on the turkey looking cooked, as the colour can be deceiving. Always err on the side of caution and make sure the internal temperature reaches the recommended level.
4. Overcooked Turkey: Achieving Optimal Tenderness
Overcooking a turkey is a common mistake that can result in a dry and tough bird. Remember, it’s better to err on the side of undercooked than overcooked, as you can always cook it a bit longer if necessary.
(Part 9) Tips for a perfect roast Turkey: Elevating Your Game
1. Don't Overstuff the Bird: Ensuring Even Cooking
Stuffing the turkey too tightly can prevent it from cooking evenly. Leave some room for air to circulate, allowing the stuffing to cook thoroughly.
2. Use a Meat Thermometer: Your Culinary Ally
A meat thermometer is your most reliable tool for checking the internal temperature of your turkey. Don't rely solely on the turkey looking cooked, as the colour can be deceiving.
3. Baste Regularly: Enriching Flavor and Moisture
Basting helps to keep the turkey moist and flavorful. Use turkey drippings, butter, or a combination of both.
4. Let the Turkey Rest: Maximizing Juiciness
After cooking, let the turkey rest for at least 30 minutes before carving. This allows the juices to redistribute, resulting in a juicier and more flavorful bird.
(Part 10) FAQs: Addressing Common Questions
1. Can I cook my turkey in a slow cooker?
Yes, you can cook a turkey in a slow cooker, but it will take much longer than roasting it in the oven. You’ll need to use a smaller turkey and cook it on low heat for 6-8 hours. This method is great for a tender and flavorful turkey, but it’s important to remember that the cooking time will be significantly longer.
2. Can I freeze my cooked turkey?
Yes, you can freeze cooked turkey, but it's best to freeze it in smaller portions for easier thawing and usage. Make sure to wrap it tightly in freezer-safe plastic wrap or aluminum foil to prevent freezer burn.
3. How long can I store cooked turkey in the refrigerator?
Cooked turkey can be stored in the refrigerator for up to 4 days. It’s best to keep it in the coldest part of the fridge, ensuring proper preservation.
4. What are some alternative ways to cook turkey?
You can also cook turkey by grilling, smoking, or frying. Each method has its own unique flavor and texture, offering a variety of culinary experiences.
5. What are some delicious ways to use leftover turkey?
Leftover turkey can be transformed into a multitude of delicious dishes, including sandwiches, salads, soups, stews, and casseroles. You can also create turkey hash or a comforting turkey pot pie.
And there you have it – a comprehensive guide to cooking the perfect turkey. Now go forth and conquer Christmas dinner, my friends. Remember, by following these tips, you're sure to create a delicious and memorable feast that will leave your guests truly impressed. Happy cooking!
Everyone is watching

Prime Rib Roast Cooking Time Chart: Per Pound Guide
Cooking TipsPrime rib roast. Just the name conjures images of lavish dinners, crackling fires, and hearty laughter. It’s ...

How Long to Bake Potatoes in the Oven (Perfect Every Time)
Cooking TipsBaked potatoes are a staple in my kitchen. They're incredibly versatile, delicious, and surprisingly easy to m...

Perfect Rice Every Time: The Ultimate Guide to Cooking Rice
Cooking TipsAs a self-proclaimed foodie, I've always been a bit obsessed with rice. It's the foundation of countless cuisi...

The Ultimate Guide to Cooking Asparagus: Tips, Techniques, and Recipes
Cooking TipsAsparagus. The mere mention of this spring delicacy conjures up images of vibrant green spears, crisp and burs...

Ultimate Guide to Cooking the Perfect Thanksgiving Turkey
Cooking TipsThanksgiving. Just the word conjures up images of overflowing tables laden with delicious food, the scent of r...