Ah, turkey breast! The humble yet versatile centerpiece of countless holiday feasts and weeknight dinners. It's a kitchen staple for a reason – it's delicious, relatively affordable, and incredibly adaptable to various cooking methods. But let's be honest, nailing the perfect turkey breast can feel a bit like navigating a culinary minefield. Getting the timing right, the temperature just so, and making sure it doesn't end up dry – it can be tricky!
Well, fear not, my culinary comrades! I'm here to demystify the art of turkey breast cooking. Over the years, I've roasted, baked, braised, and grilled my fair share of these beauties, and I'm ready to share all the secrets I've learned along the way. We'll explore the anatomy of a turkey breast, dive deep into different cooking methods, and break down cooking times for different cuts. By the end of this guide, you'll be a turkey breast master, confident in whipping up a succulent, flavor-packed masterpiece every time. Let's get cooking!
Part 1: Getting to Know Your Turkey Breast

Just like any good chef knows their ingredients, understanding the anatomy of a turkey breast is crucial. It helps you choose the right cut, determine the appropriate cooking time, and understand how different parts cook differently.
Unveiling the Different Cuts
The turkey breast comes in a few different cuts, each with its own unique characteristics and best uses.
- Whole Turkey Breast: The classic, bone-in option, usually weighing between 8-10 pounds. It's perfect for larger gatherings, as it yields impressive portions.
- Boneless Turkey Breast: A more convenient option for smaller families or weeknight meals, boneless turkey breasts typically weigh between 3-5 pounds. They're also easier to carve.
- turkey breast tenderloins: These are the smaller, more tender cuts from the breast, perfect for quick grilling or pan-frying. They're usually around 1-2 pounds.
Weight Matters: The Key to Timing
The weight of your turkey breast is crucial for determining the correct cooking time. It's always a good idea to check the packaging for the weight, as it can vary significantly. A larger breast will naturally take longer to cook than a smaller one.
Shape Matters Too: Understanding Cooking Variations
The shape of your turkey breast can also affect cooking time. A thicker, more rounded breast will take longer to cook than a thinner, more elongated one. This is because the heat needs to penetrate a greater volume of meat.
Part 2: Choosing the Right Cooking Method for Your Turkey Breast

Now that you're familiar with the different types of turkey breasts, let's explore the various cooking methods available. Each method offers unique benefits and flavors, so choosing the right one depends on your preference, the type of turkey breast, and the occasion.
The Classic: Roasting for a crispy skin and Juicy Interior
Roasting is the traditional way to cook a turkey breast, resulting in a beautifully browned, crispy skin and a juicy interior. The key to a successful roast is using a high initial temperature to promote browning, then lowering the temperature to ensure even cooking. This slow and steady heat helps create a succulent result.
I've found that using a meat thermometer is absolutely essential for roasting. It takes the guesswork out of ensuring the turkey breast is cooked through to a safe internal temperature of 165°F (74°C) without overdoing it.
A Gentle Approach: Baking for a Tender, Moist Breast
Baking is similar to roasting, but often involves a slightly lower temperature. It's a fantastic choice for smaller turkey breasts or when you're aiming for a more moist result. The gentle heat helps retain moisture and prevents the breast from drying out.
Patience and Flavor: Braising for a Melt-in-Your-Mouth Experience
Braising involves searing the turkey breast in a pan to create a flavorful crust, then simmering it in liquid (stock, wine, or a combination of both) until it's incredibly tender. This method is perfect for tougher, bone-in cuts, as it breaks down the connective tissue, resulting in a melt-in-your-mouth texture. The braising liquid also infuses the meat with incredible flavor, making it truly irresistible.
Fast and Flavorful: Grilling and Pan-Frying for Quick Weeknight Meals
Grilling and pan-frying are great choices for smaller cuts like turkey breast tenderloins. They offer a quick and easy way to cook a delicious meal. Both methods result in a nice sear, adding a delightful crispy exterior while keeping the interior juicy. The key is not to overcook these tender cuts, as they can dry out quickly.
Part 3: Mastering Turkey Breast Cooking Times: A Comprehensive Guide

Alright, let's get down to the nitty-gritty: the cooking times. This is where the magic happens, ensuring your turkey breast is perfectly cooked without being overdone. But remember, these are just general guidelines. Cooking times can vary depending on your oven or grill, the size and shape of your turkey breast, and your personal preferences.
Turkey Breast Cooking Times Chart: Your Essential Guide
| Cut | Weight (lbs) | Cooking Time (minutes per pound) |
|---|---|---|
| Whole Turkey Breast (bone-in) | 8-10 | 15-20 |
| Boneless Turkey Breast | 3-5 | 18-22 |
| Turkey Breast Tenderloins | 1-2 | 10-12 |
Remember: Always use a meat thermometer to confirm your turkey breast has reached the safe internal temperature of 165°F (74°C). This ensures it's cooked through and safe to eat.
Part 4: Temperature Considerations: Ensuring a Safe and Delicious Result
Just like with any meat, the internal temperature of your turkey breast is crucial for safety and flavor. You want to make sure it reaches a safe temperature without overcooking it, resulting in a dry and flavorless meal.
The Meat Thermometer: Your Kitchen Best Friend
A meat thermometer is your most valuable tool when cooking turkey breast. It takes the guesswork out of ensuring the meat is cooked through and safe to eat. Insert the thermometer into the thickest part of the breast, making sure to avoid any bones, and check the temperature.
The Importance of Resting: A Crucial Step for Juiciness
Once your turkey breast has reached the desired internal temperature, let it rest for 10-15 minutes before carving. This crucial step allows the juices to redistribute throughout the meat, resulting in a more succulent and flavorful turkey. It's a simple step that makes a big difference in the final result.
Part 5: Unlocking the Art of Roasting: A Step-by-Step Guide
Roasting is a classic method for a reason – it delivers a perfectly browned, crispy skin and a juicy interior. Let's break down the process step by step, ensuring you achieve a magnificent roast every time.
Prepping for a perfect roast: Setting the Stage for Success
Before you even think about preheating your oven, prep your turkey breast properly. Start by patting it dry with paper towels, then generously season it with salt, pepper, and any herbs or spices you desire. I love using a simple blend of garlic powder, onion powder, and dried thyme. For extra crispiness, you can also rub the skin with a little olive oil or melted butter.
roasting techniques: From High Heat to Low and Slow
For a classic roast, place the turkey breast in a roasting pan and roast it at a high temperature (400°F/200°C) for the first 30 minutes. This high heat helps promote browning and crisp the skin. Then, reduce the oven temperature to 325°F/160°C and continue roasting until the internal temperature reaches 165°F/74°C.
Basting: A Key to Moisture and Flavor
Basting the turkey breast with pan drippings or broth during cooking helps keep it moist and flavorful. You can do this every 30 minutes or so, using a spoon or baster to generously coat the breast with the flavorful liquid.
Roasting Alternatives: Adding a Touch of Creativity
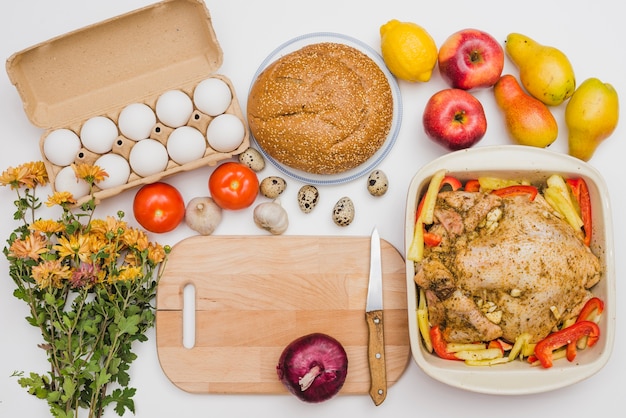
If you're feeling adventurous, try roasting your turkey breast on a bed of vegetables for added flavor and moisture. The vegetables will release their own juices, adding depth and richness to the turkey breast. You can also wrap the breast in foil during the first part of the cooking time to prevent it from drying out. Just be sure to remove the foil for the last 30 minutes to allow the skin to crisp up.
Part 6: Embracing the Baking Technique: A Gentle Touch for Tenderness
Baking is a wonderful alternative to roasting, particularly for smaller turkey breasts. It's a gentler method, resulting in a moist and tender bird. Let's explore the key steps to a successful bake.
Prepping for Baking: A Simple Yet Important Step
Just like with roasting, proper prepping is key. Pat the turkey breast dry, season it generously with your favorite seasonings, and place it in a baking dish.
Baking Temperatures: Finding the Right Heat for a Tender Breast
For a moist and juicy turkey breast, bake it at a lower temperature, around 325°F/160°C. This allows the meat to cook slowly and evenly without drying out.
Baking Time: Understanding the Variables
The baking time will vary depending on the size of your turkey breast. Use the cooking times chart above as a general guideline and always check the internal temperature with a meat thermometer.
baking tips: Enhancing Your Baking Technique
To prevent your turkey breast from drying out, you can add a little bit of broth or water to the bottom of the baking dish. The moisture will help create a more tender, flavorful bird. For an extra flavorful bake, try adding some sliced onions or garlic to the bottom of the dish. They'll release their aroma and create a delicious sauce for the turkey.
Part 7: The Art of Braising: Patience and Flavor Lead to a Culinary Masterpiece
Braising is a truly transformative method for cooking turkey breast, especially for bone-in cuts. It involves searing the meat to create a flavorful crust, then simmering it in liquid until it's impossibly tender. The result is a beautifully tender and flavorful turkey breast that's practically falling off the bone.
Searing for Flavor: Creating a Delicious Crust
Start by searing your turkey breast in a large skillet or dutch oven over medium-high heat. Use a little oil to prevent sticking. Sear the breast for 5-7 minutes on each side, until it's nicely browned. This sear adds a delicious flavor and texture to the meat.
Braising Liquid: A Symphony of Flavor
Once the breast is seared, transfer it to a large pot or Dutch oven. Add your braising liquid – this could be stock, wine, or even a combination of both. For extra depth of flavor, add aromatics like onions, garlic, carrots, and herbs. The liquid will infuse the turkey breast with incredible flavor, creating a truly delectable dish.
Simmering to Tenderness: The Key to a Melt-in-Your-Mouth Texture
Bring the liquid to a simmer, then reduce the heat and cover the pot. Simmer the turkey breast for 1-2 hours, or until it's tender. The slow simmering process allows the connective tissue to break down, resulting in a melt-in-your-mouth texture. Check the internal temperature with a meat thermometer to make sure it's reached 165°F/74°C.
Serving Braised Turkey: A Culinary Triumph
Once the turkey breast is cooked, remove it from the pot and let it rest for 10-15 minutes before carving. This allows the juices to redistribute, resulting in a more succulent and flavorful turkey. The braising liquid can be strained and served as a delicious sauce, adding another layer of flavor to your meal.
Part 8: Grilling and Pan-Frying Turkey Breast Tenderloins: Quick, Easy, and Delicious
Turkey breast tenderloins are small, tender cuts of meat perfect for grilling or pan-frying. They cook quickly, making them a great option for a weeknight meal. Let's explore the techniques for grilling and pan-frying these versatile cuts.
Grilling Turkey Breast Tenderloins: A Flavorful Outdoor Feast
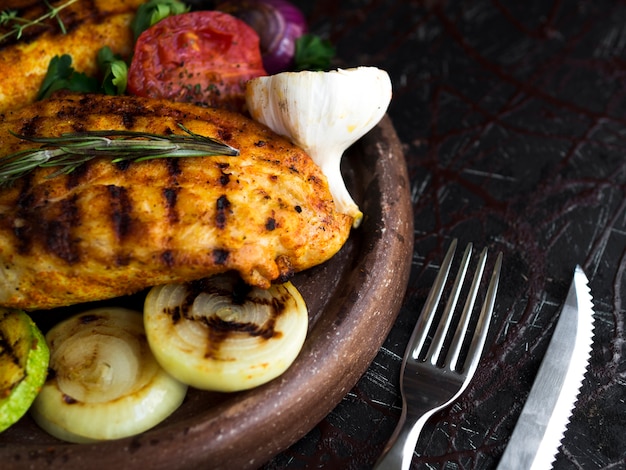
For grilling, preheat your grill to medium-high heat. Season the tenderloins with salt, pepper, and any other spices you like. Grill them for 4-6 minutes per side, or until they're cooked through and have nice grill marks. The char from the grill adds a delightful smoky flavor.
Pan-Frying Turkey Breast Tenderloins: A Quick and Easy Weeknight Meal
To pan-fry, heat a good quality pan over medium-high heat. Add a little oil to the pan and then add the tenderloins. Cook them for 4-6 minutes per side, or until they're cooked through and have a crispy exterior. The pan-frying technique creates a wonderfully crispy exterior while keeping the interior juicy.
Serving Grilled or Pan-Fried Turkey: A Delicious Finale
Serve your grilled or pan-fried turkey breast tenderloins with your favorite sides, such as roasted vegetables, salad, or mashed potatoes. The tenderloins pair beautifully with a variety of flavors, making them a versatile addition to any meal.
Part 9: Tips and Tricks for Turkey Breast Success: Elevate Your culinary skills
Now that you've mastered the fundamentals of turkey breast cooking, let's explore some tips and tricks that will take your culinary skills to the next level.
- Don't Overcook It! Turkey breast can easily become dry and tough if it's overcooked. Always use a meat thermometer to ensure it's cooked through but not dry. Remember, the internal temperature should reach 165°F (74°C).
- Let It Rest! Resting your turkey breast for 10-15 minutes after cooking allows the juices to redistribute, resulting in a more succulent and flavorful meat. This simple step is essential for ensuring a juicy and satisfying result.
- Use a Roasting Rack! A roasting rack helps to ensure that the turkey breast cooks evenly and allows for better airflow, resulting in crispy skin. It elevates the roasting process, creating a truly magnificent result.
- Don't Be Afraid to Experiment! Feel free to experiment with different seasonings, herbs, and spices to create your own unique flavor combinations. Explore new flavor profiles and discover your personal favorites.
Part 10: FAQs: Addressing Your Turkey Breast Queries
Here are some frequently asked questions about turkey breast cooking:
Q: How do I know if my turkey breast is cooked through?
A: The best way to know for sure is to use a meat thermometer. Insert it into the thickest part of the breast, avoiding any bones, and make sure the temperature reaches 165°F/74°C.
Q: What can I do if my turkey breast is dry?
A: If your turkey breast is a bit dry, you can try adding a little bit of gravy or pan drippings to it. You can also try wrapping it in foil and letting it rest for a few more minutes to allow the juices to redistribute.
Q: How long can I store cooked turkey breast?
A: Cooked turkey breast can be stored in the refrigerator for 3-4 days. You can also freeze it for up to 2 months.
Q: What are some good side dishes to serve with turkey breast?
A: Turkey breast goes well with a variety of side dishes, including mashed potatoes, roasted vegetables, stuffing, cranberry sauce, and salad. It's a versatile protein that pairs well with numerous flavors.
Q: What can I do with leftover turkey breast?
A: Leftover turkey breast can be used in a variety of dishes, such as sandwiches, salads, soups, or casseroles. You can also dice it up and add it to pasta dishes or pizza. It's a great ingredient for transforming leftovers into new and exciting meals.
I hope this comprehensive guide has equipped you with the knowledge and confidence to conquer turkey breast cooking. Remember, practice makes perfect, and the more you cook it, the more comfortable you'll become with the process. So go forth, my culinary friends, and create some delicious turkey breast feasts! Happy cooking!
Everyone is watching

Prime Rib Roast Cooking Time Chart: Per Pound Guide
Cooking TipsPrime rib roast. Just the name conjures images of lavish dinners, crackling fires, and hearty laughter. It’s ...

How Long to Bake Potatoes in the Oven (Perfect Every Time)
Cooking TipsBaked potatoes are a staple in my kitchen. They're incredibly versatile, delicious, and surprisingly easy to m...

Perfect Rice Every Time: The Ultimate Guide to Cooking Rice
Cooking TipsAs a self-proclaimed foodie, I've always been a bit obsessed with rice. It's the foundation of countless cuisi...

The Ultimate Guide to Cooking Asparagus: Tips, Techniques, and Recipes
Cooking TipsAsparagus. The mere mention of this spring delicacy conjures up images of vibrant green spears, crisp and burs...

Ultimate Guide to Cooking the Perfect Thanksgiving Turkey
Cooking TipsThanksgiving. Just the word conjures up images of overflowing tables laden with delicious food, the scent of r...
