Let's be honest, the thought of cooking a turkey breast can be a bit daunting, right? You're picturing a dry, rubbery bird, and you're not sure how to avoid it. But fear not, my friend! I'm here to help you conquer the art of turkey breast cooking and produce a juicy, tender masterpiece that will have everyone begging for seconds.
This guide is your one-stop shop for everything turkey breast, from choosing the perfect bird to mastering the art of carving. I'll share my personal tips and tricks, drawn from years of experience, to ensure you achieve succulent results. Buckle up, this journey is packed with delicious information!
(Part 1) Choosing Your Turkey Breast: The Foundation of Flavor

The key to a delicious turkey breast lies in selecting the right one. It's like picking out the perfect ingredient for a recipe—the quality matters! So, grab your shopping basket and let's go on a turkey-hunting expedition.
Size Matters: Picking the Perfect Size for Your Gathering
First things first, let's talk size. Think about the number of hungry mouths you're feeding. A small breast, around 3-4 pounds, is perfect for a cozy dinner for two or a small family gathering. If you're hosting a larger party, go for a breast that's 6-8 pounds. And for those epic thanksgiving feasts, you can even find behemoths that weigh upwards of 10 pounds!
Boneless or Bone-In: It's a Matter of Preference
Now comes the bone-in or boneless debate. Personally, I'm a fan of boneless breasts—they're easier to cook and carve. But don't underestimate the allure of bone-in breasts. They offer a more intense flavor and a crispier skin. It all boils down to your personal preference and what you're looking for in your turkey breast.
Inspecting for Quality: Looking for Signs of a perfect turkey Breast
Once you've chosen the right size, it's time to get down to the nitty-gritty. A good turkey breast should be plump and firm to the touch, with a layer of fat covering the skin. The fat acts like a natural moisturizer, keeping the breast juicy during cooking. Avoid breasts that are dry or have any discoloration, as these are signs of poor quality.
(Part 2) Preparing Your Turkey Breast: Setting the Stage for Success

You've got your turkey breast, now it's time to get it ready for its starring role! This preparation stage is crucial, setting the stage for a flavorful and juicy outcome.
Rinse and Pat Dry: A Clean Slate for Flavor
Start by giving your turkey breast a good rinse under cold water. This washes away any loose bits and excess moisture, creating a clean slate for seasoning. Pat it dry thoroughly with paper towels, ensuring it's ready to absorb all those delicious flavors.
Seasoning: A Symphony of Flavors
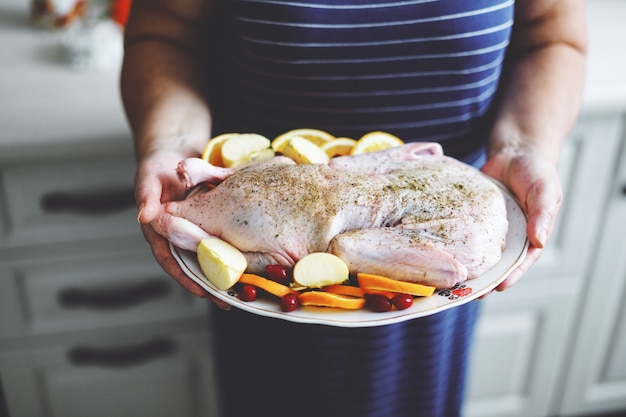
Now comes the fun part—seasoning! This is where your creativity can really shine. Start with a good base of salt and pepper, then let your taste buds guide you. I like to add a touch of paprika for vibrant color and some thyme for a warm, earthy aroma. Experiment with your favorite herbs and spices to create a flavor profile that's truly your own. Remember, you can never have too many flavors!
Brining: The Secret to Extra Juiciness
Brining, a technique that involves soaking the turkey in a salty solution, is a controversial topic in the cooking world. Some swear by it, while others consider it unnecessary. I'm a firm believer in the power of brining. It works wonders for keeping the turkey breast incredibly moist and tender. If you're short on time, a quick brine is a great option. Just mix salt, sugar, and water in a large bowl, submerge the turkey breast, and let it chill in the fridge for a few hours. The result? A luxuriously juicy turkey breast that's sure to please even the pickiest palates.
(Part 3) Cooking Your Turkey Breast: Roasting, the Classic Method

Now we're getting to the heart of things—the cooking! Roasting is the traditional way to cook a turkey breast, and for good reason. It's simple, straightforward, and produces a beautifully golden-brown bird.
Oven Temperature and Time: Striking the Perfect Balance
First, set your oven to 325°F (160°C). Now, let's talk timing. The cooking time depends on the weight of your turkey breast. Use this handy table as a guide:
| Weight (lbs) | Cooking Time (Minutes) |
|---|---|
| 3-4 | 90-120 |
| 6-8 | 120-150 |
| 8-10 | 150-180 |
Using a roasting pan: Creating the Perfect Environment
Grab a roasting pan that's big enough to comfortably hold your turkey breast. Place a roasting rack inside the pan to elevate the breast, ensuring even cooking and allowing the hot air to circulate all around.
Basting: Adding a Touch of Moisture and Flavor
Here's where you can add another layer of flavor and juiciness. During the cooking process, baste your turkey breast every 30-45 minutes with melted butter, olive oil, or chicken broth. This helps keep the breast moist, enhances the flavor, and creates a beautiful, golden-brown finish.
(Part 4) Cooking Your Turkey Breast: Beyond Roasting
Don't let the allure of roasting limit your creativity! There are other amazing ways to cook a turkey breast, each offering unique flavors and textures.
Grilling: Adding a Smoky Kiss
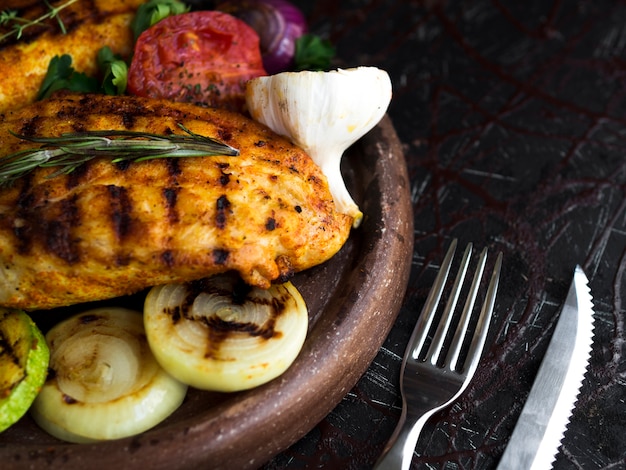
Love that smoky BBQ taste? Grilling your turkey breast is a brilliant way to achieve those irresistible char marks and add a touch of rustic charm. Pre-heat your grill to medium heat, place the turkey breast on the grill, and cook for about 1 hour and 15 minutes, flipping halfway through. Just be sure to keep a watchful eye, as grills can vary in temperature.
slow cooking: Tenderness to the Core
For an incredibly tender turkey breast, slow cooking is your go-to method. It's perfect for those busy weekdays when you want a hands-off approach. Simply place your turkey breast in the slow cooker, add some broth and your favorite seasonings, and let it cook on low for 6-8 hours. The result? A melt-in-your-mouth turkey breast that practically falls apart at the touch.
Pan-Frying: A crispy skin and Juicy Interior
If you crave that crispy skin and succulent meat, pan-frying is the way to go. Heat some olive oil in a large skillet over medium heat. Gently place the turkey breast in the skillet, making sure it has enough room to lay flat. Cook for about 10 minutes per side, or until golden brown and cooked through. The key here is to use a skillet large enough to accommodate the breast comfortably, allowing for even browning.
(Part 5) Testing for Doneness: Avoiding Dry Turkey
No one wants to end up with a dry, overcooked turkey breast. So, how do you know when it's cooked to perfection? There are a few reliable methods to check for doneness:
Using a meat thermometer: The Most Reliable Method
This is the most accurate way to ensure your turkey breast is cooked through. Insert a meat thermometer into the thickest part of the breast, making sure it doesn't touch any bone. Your turkey breast is perfectly cooked when it reaches 165°F (74°C).
The "Pop-Up" Thermometer: A Built-in Convenience
Some turkey breasts come with a pop-up thermometer built right into the center. When the turkey is cooked to the proper temperature, the thermometer will pop up, signaling that it's safe to eat.
The "Touch Test": A Simple Check
This method is a little less precise but can still be helpful. Gently press the center of the turkey breast. If it feels firm and springy, it's cooked. If it's soft and wobbly, it needs a little more time in the oven or on the grill.
(Part 6) Resting Your Turkey Breast: Letting the Juices Redistribute
Once your turkey breast is cooked to perfection, resist the urge to carve it immediately! Allow it to rest for at least 10 minutes before carving. This crucial step allows the juices to redistribute throughout the meat, resulting in a more tender and juicy breast. You can loosely cover it with aluminum foil to keep it warm and prevent it from drying out.
(Part 7) Carving Your Turkey Breast: The Art of Precision
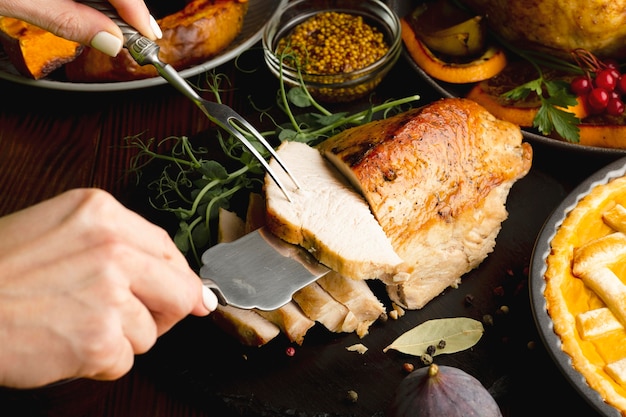
The grand finale! You've cooked your turkey breast beautifully, rested it, and now it's time to carve. This is where you get to showcase your culinary skills and transform that magnificent bird into stunning slices.
Using a Sharp Knife: The Key to Effortless Carving
A sharp knife is essential for effortless carving and perfectly even slices. A dull knife will make your life miserable and leave you with uneven, ragged pieces. So, grab your sharpest knife and get ready to carve like a pro!
Slicing Against the Grain: A Secret for Tenderness
Here's the secret to achieving tender and juicy slices. When carving, cut across the grain of the meat, not with it. Cutting with the grain will make the meat tough and stringy. So, make sure you're slicing across the direction of the muscle fibers for the best results.
(Part 8) Serving Your Turkey Breast: A Culinary Triumph
The moment of truth! Your turkey breast has been cooked to perfection, rested, and carved beautifully. Now it's time to serve up this culinary masterpiece!
The Perfect Accompaniments: Complementary Flavors
Turkey breast is incredibly versatile, so you can pair it with a wide range of sides. I love serving it with creamy mashed potatoes, savory stuffing, rich gravy, tangy cranberry sauce, and roasted vegetables. The options are endless!
Garnishing for an Extra Touch: Adding Visual Appeal
A little bit of garnish can elevate your turkey breast from good to great. Try adding some fresh herbs like parsley or thyme, a few lemon slices, or a sprig of rosemary. These additions add visual appeal and a burst of flavor to your dish.
FAQs: Addressing Common Turkey Breast Queries
1. Can I cook a turkey breast frozen?
It's not recommended to cook a turkey breast frozen. It won't cook evenly and could be undercooked in the center, putting your health at risk. Always defrost your turkey breast thoroughly in the refrigerator before cooking. This ensures it cooks evenly and safely.
2. What if my turkey breast is overcooked?
Don't fret if you happen to overcook your turkey breast. It's still edible! It might be a little dry, but it can still be delicious. Try slicing it thinly to make it more manageable and use gravy to add extra moisture.
3. How long can I store leftover turkey breast?
Leftover turkey breast can be stored in the refrigerator for 3-4 days. Make sure to store it in an airtight container to prevent it from absorbing other flavors in the refrigerator.
4. Can I freeze leftover turkey breast?
Absolutely! Leftover turkey breast can be frozen for up to 2 months. To freeze it, wrap it tightly in plastic wrap, then aluminum foil, and store it in a freezer-safe bag. Thaw it in the refrigerator overnight before reheating.
5. What are some good recipes for leftover turkey breast?
Leftover turkey breast is a culinary chameleon, perfect for transforming into a variety of dishes. You can create delightful turkey sandwiches, a light and refreshing turkey salad, a hearty turkey soup, or even adventurous turkey enchiladas!
With this comprehensive guide, you're now armed with the knowledge and confidence to cook a turkey breast that will impress your family and friends. So, put on your apron, gather your ingredients, and get ready to create a culinary masterpiece! Happy cooking!
Everyone is watching

Prime Rib Roast Cooking Time Chart: Per Pound Guide
Cooking TipsPrime rib roast. Just the name conjures images of lavish dinners, crackling fires, and hearty laughter. It’s ...

How Long to Bake Potatoes in the Oven (Perfect Every Time)
Cooking TipsBaked potatoes are a staple in my kitchen. They're incredibly versatile, delicious, and surprisingly easy to m...

Perfect Rice Every Time: The Ultimate Guide to Cooking Rice
Cooking TipsAs a self-proclaimed foodie, I've always been a bit obsessed with rice. It's the foundation of countless cuisi...

The Ultimate Guide to Cooking Asparagus: Tips, Techniques, and Recipes
Cooking TipsAsparagus. The mere mention of this spring delicacy conjures up images of vibrant green spears, crisp and burs...

Ultimate Guide to Cooking the Perfect Thanksgiving Turkey
Cooking TipsThanksgiving. Just the word conjures up images of overflowing tables laden with delicious food, the scent of r...
