Let's face it, there's nothing quite like the smoky, juicy perfection of a perfectly cooked chicken breast. And when you're talking about Traeger grills, those delicious aromas just seem to amplify tenfold. But let's be real, sometimes grilling chicken can feel like a gamble. You're never quite sure if it'll come out tender, juicy, and perfectly cooked, or dry and disappointing. I've been there, trust me. I've had my fair share of rubbery chicken disasters, especially when trying to master the low and slow smoking method on my Traeger. But after countless experiments, a few burnt offerings, and some serious trial and error, I've finally cracked the code for the perfect Traeger chicken breast at 225. This is your ultimate guide to achieving that juicy, succulent chicken you've always dreamed of, and trust me, you won't find a better recipe out there.
Part 1: Setting the Stage for Success

Prepping Your Traeger: A Clean Slate for Flavor
First things first, let's get your Traeger ready for action. Imagine it like preparing your kitchen before you start cooking. We want a clean, ready-to-go space for those delicious flavors to shine. So, give your grill grate a good scrub to ensure it's spotless. A clean grate means your chicken won't stick and will cook evenly, maximizing that beautiful browning. Next, check your wood pellet hopper. Make sure you have a decent supply of pellets ready to go. After all, those pellets are the heart and soul of your Traeger's smoky magic.
Now, let's talk about preheating. Preheating your Traeger to 225 degrees Fahrenheit is essential for consistent cooking. Think of it like preheating your oven. You don't want to throw your chicken on a cold grill, it's just asking for trouble. You can check the temperature using your grill's built-in thermometer, or, for a more precise reading, I recommend using a probe thermometer. Personally, I always like to double-check, just to be safe.
Choosing Your Wood Pellets: A Symphony of Smoke
Alright, the next step is selecting your wood pellets. This is where things get exciting! Different wood pellets impart unique flavors to your chicken, so it's a chance to be creative. I'm a big fan of hickory and applewood. Hickory offers a classic, strong smoky flavor, while applewood adds a sweet, delicate note. The combination of the two is perfect in my opinion, creating a symphony of smoke. But hey, experiment! Maybe you'll find a blend you love even more.
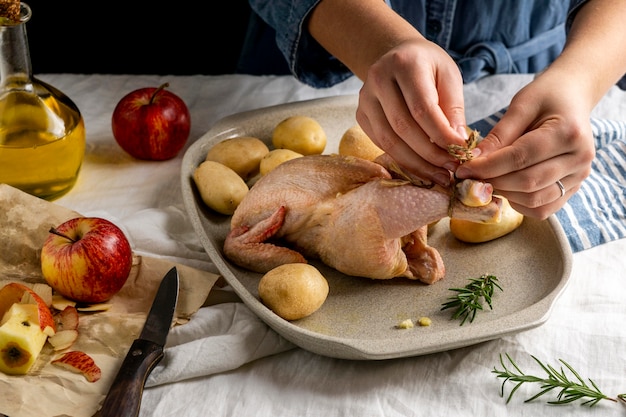
Preparing the Chicken: The Foundation for Juicy Goodness
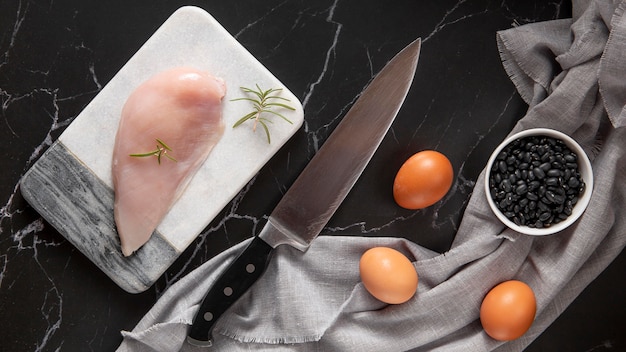
Now, let's get to the star of the show – the chicken breasts. boneless, skinless chicken breasts are my go-to choice for Traeger grilling. They're versatile, easy to cook, and perfect for any occasion. I usually buy them in bulk and freeze them, saving time and money in the long run. But if you're feeling fancy, fresh from the butcher is always an option.
Before you start cooking, give those chicken breasts a good pat dry with paper towels. We want to make sure they're dry to prevent steaming and ensure they cook evenly. Now, here's where the real magic happens – brining. Brining is a game-changer for juicy, flavorful chicken. It's a simple process that unlocks a whole new level of tenderness and flavor. Just add a cup of salt to a gallon of cold water and submerge your chicken breasts for 30 minutes to an hour. The salt draws moisture from the surrounding environment and into the chicken, helping to lock in the juices and prevent dryness. Plus, it adds a touch of subtle seasoning.
Part 2: The Art of Low and Slow Smoking
The Low and Slow Method: Unveiling the Magic
With your Traeger preheated and your chicken brined, you're ready to start smoking! Now, remember, we're going low and slow at 225 degrees Fahrenheit. This is the key to unlocking that perfect, tender texture and rich, smoky flavor. Think of it like a slow dance between the chicken and the smoke. It's a gentle, patient process that yields extraordinary results.
For the cook time, think about 30-40 minutes per pound of chicken. However, this is just a guideline. The thickness of your chicken breasts and the temperature of your grill can influence the cooking time. So, it's crucial to be a bit flexible and rely on a trusty meat thermometer to check for doneness.
The Role of the Thermometer: Your Culinary Compass
Speaking of thermometers, this is where you really need to invest in a good one. It's your culinary compass, guiding you towards perfect chicken, no dry surprises allowed. Aim for an internal temperature of 165 degrees Fahrenheit. This is the magic number for safe and delicious chicken.
Now, let's talk about the two main types of thermometers: probe and digital. A probe thermometer is a great option for continuous monitoring. You insert the probe into the thickest part of your chicken, and it will give you a real-time temperature reading. It's like having a watchful eye on your chicken throughout the entire smoking process. A digital thermometer is a quick and easy way to get a temperature reading. Just insert the tip into the chicken and you'll have your answer within seconds. It's perfect for quick checks as your chicken cooks. Ultimately, it comes down to personal preference. Choose the thermometer that best suits your cooking style and needs.
Part 3: Letting the Chicken Rest: A Moment of Tranquility
The Importance of Resting: A Culinary Pause for Flavor
Your chicken has reached 165 degrees Fahrenheit. That's a major victory! But before you carve it up and dive in, resist the urge! Take a minute to let your chicken rest for 10-15 minutes. It might seem like a small detail, but this resting period is a crucial part of the process. Think of it as a culinary pause, giving the juices a chance to redistribute throughout the chicken. This results in a more flavorful, juicy, and tender final product.
While your chicken is resting, take this time to prepare your side dishes and sauce. I love serving my smoked chicken with roasted vegetables and a tangy barbecue sauce. But get creative! The world is your oyster when it comes to pairing flavors.
Part 4: Carving and Serving: A Culinary Celebration
Carving: The Final Act of Preparation
After your chicken has had its moment of tranquility, it's time to carve it up. Use a sharp knife and cut the chicken breasts into slices. Arrange them on a platter and proudly present your masterpiece.
If you're feeling adventurous, try making a simple pan sauce. Deglaze the pan with some red wine or chicken broth and simmer it for a few minutes. This will create a flavorful sauce to drizzle over your chicken, adding an extra touch of deliciousness.
Part 5: Troubleshooting Common Chicken Mishaps: A Guide to Success
Dry Chicken: Bringing Back the Moisture
So, you followed all my instructions, but your chicken is dry? Don't despair! It happens to the best of us. Let's troubleshoot this common chicken mishap. First, check the internal temperature with your thermometer. Make sure you're not overcooking it. 165 degrees Fahrenheit is the sweet spot. You can also try brining your chicken for a longer period, or experiment with a more moist cooking method, like poaching or steaming, if dryness is a recurring issue.
Unevenly Cooked Chicken: A Balancing Act
Unevenly cooked chicken can be a frustrating experience. It happens when the chicken breasts are different sizes or the grill temperature isn't even. To ensure even cooking, try using a grill mat, or arrange the chicken breasts so they're roughly the same thickness.
Burnt Chicken: Avoiding the Smoky Mishap
Burnt chicken is a classic grilling mistake. To avoid this smoky mishap, make sure your Traeger is preheated to the correct temperature and keep a watchful eye on your chicken while it's cooking. Don't be afraid to adjust the temperature if needed.
Part 6: Beyond the Traeger: Other Delicious Chicken Paths
Oven Baking: A Simple and Reliable Method
Let's be real, not everyone has a Traeger at home. But that doesn't mean you have to sacrifice delicious chicken! The oven is a trusty sidekick when it comes to cooking chicken. Preheat your oven to 375 degrees Fahrenheit and place your chicken breasts on a baking sheet. Roast them for about 20-25 minutes, or until they reach an internal temperature of 165 degrees Fahrenheit.
Pan-Frying: A Quick and Flavorful Choice
Pan-frying is another quick and easy way to cook chicken breasts. Heat a skillet over medium heat and add a little oil. Place your chicken breasts in the skillet and cook for about 5-7 minutes per side, or until they are golden brown and cooked through.
Grilling: A Classic Approach
You can also grill chicken breasts on a traditional gas or charcoal grill. Preheat your grill to medium heat and place your chicken breasts on the grill. Cook them for about 5-7 minutes per side, or until they're cooked through.
Part 7: Elevating Your Chicken: Delicious Serving Suggestions
Salads: Fresh and Flavorful
grilled chicken breasts add a protein punch and smoky flavor to salads. They complement fresh vegetables beautifully. Try a classic Caesar salad, or a vibrant Greek salad.
Sandwiches: A Culinary Classic
Who doesn't love a good chicken sandwich? grilled chicken breasts are a versatile filling, perfect for any type of sandwich. Try a classic chicken salad sandwich, or a gourmet grilled chicken breast sandwich with avocado, bacon, and aioli.
Wraps: Easy and Delicious
Grilled chicken breasts are also perfect for wraps. They add a protein boost and a smoky flavor that pairs well with various fillings. Try a spinach and feta wrap, or a classic chicken Caesar wrap.
pasta dishes: A Satisfying Meal
Grilled chicken breasts can transform your pasta dishes into a satisfying and delicious meal. Try a creamy chicken and broccoli pasta, or a more adventurous pesto chicken pasta.
Part 8: Making It Last: Storing and ReheatingStorage: Keeping Your Chicken Fresh
You've got your perfectly cooked Traeger chicken breasts, and you want to enjoy them for days to come. No problem! Let them cool completely, then place them in an airtight container and refrigerate for up to 3-4 days. You can also freeze them for up to 2-3 months.
Reheating: Restoring the Flavor
To reheat your chicken breasts, you can microwave them on low for a few minutes, or you can reheat them in the oven at 350 degrees fahrenheit for about 15 minutes.
Part 9: FAQs: Answering Your Chicken Queries
What temperature should I cook chicken breasts at on a Traeger?
The ideal temperature for cooking chicken breasts on a Traeger is 225 degrees Fahrenheit. This low and slow cooking method ensures the chicken is cooked through and remains juicy and tender.
How long does it take to cook a chicken breast on a Traeger?
The cook time for chicken breasts on a Traeger depends on their size and thickness. A general rule of thumb is about 30-40 minutes per pound. Always check the internal temperature with a meat thermometer to ensure it's cooked through.
What type of wood pellets should I use for chicken?
You have a variety of wood pellets to choose from for chicken. Some popular options include hickory, applewood, pecan, and cherry. I personally enjoy a blend of hickory and applewood for a smoky flavor that's not too overpowering.
What are some good side dishes to serve with Traeger chicken breasts?
Smoked chicken breasts pair well with a variety of side dishes. Some popular options include roasted vegetables, corn on the cob, potato salad, coleslaw, and mac and cheese.
What should I do if my chicken is dry?
If your chicken is dry, you might be overcooking it. Make sure to check the internal temperature with a meat thermometer and ensure it's not exceeding 165 degrees Fahrenheit. You can also try brining your chicken for a longer period, or using a more moist cooking method, like poaching or steaming.
Part 10: Final Thoughts: A culinary journey Awaits
There you have it! Your complete guide to achieving the perfect Traeger chicken breast at 225. Get your smoker ready, grab those chicken breasts, and get ready to impress your family and friends with a delicious and easy meal. Happy grilling!
Everyone is watching

Perfect Rice Every Time: The Ultimate Guide to Cooking Rice
Cooking TipsAs a self-proclaimed foodie, I've always been a bit obsessed with rice. It's the foundation of countless cuisi...

Ultimate Guide to Cooking the Perfect Thanksgiving Turkey
Cooking TipsThanksgiving. Just the word conjures up images of overflowing tables laden with delicious food, the scent of r...

The Ultimate Guide to Cooking Asparagus: Tips, Techniques, and Recipes
Cooking TipsAsparagus. The mere mention of this spring delicacy conjures up images of vibrant green spears, crisp and burs...

Can You Cook Spaghetti with Gasoline? (The Shocking Truth)
Cooking TipsWe've all seen those crazy internet trends. You know, the ones that make you wonder, "Did someone actually try...

Chorizo and Eggs Recipe: The Ultimate Guide
Cooking TipsRight, let’s talk about chorizo and eggs. You know, that classic Spanish dish that's always a winner. It's th...