Right, let’s talk brisket. Now, I've been a bit of a barbecue enthusiast for years, and there’s nothing quite like the satisfaction of nailing a perfect brisket. But let’s be honest, it can be a bit of a tricky beast. It’s a big cut of meat, it takes ages to cook, and getting it right can feel like a bit of a gamble.
But fear not, fellow meat-lovers! This is your ultimate guide to conquering the Traeger brisket, and I’m going to share all the tips and tricks I’ve learned along the way. Whether you’re a seasoned smoker or a complete newbie, we’re going to break down everything you need to know to make a brisket so tender it practically melts in your mouth.
(Part 1) Choosing the Right Brisket
The Cut: Point vs. Flat
Right, first things first, we need to choose the right brisket. Now, you’ve got two main options: the point and the flat. The point is the thicker, more fatty part of the brisket, while the flat is leaner and flatter. Both have their own unique qualities, and it really comes down to personal preference.
I personally love the point for its rich flavour and incredible tenderness. It’s the perfect cut for a show-stopping centrepiece, but it can be a bit more challenging to cook evenly. The point often needs a longer cook time to ensure the fat renders down properly. The flat, on the other hand, is a bit more manageable and tends to be leaner, making it a good choice for folks who prefer a less fatty brisket. The flat cooks faster and is more forgiving if you're a beginner.
Size Matters
Now, let’s talk size. I generally go for a brisket that’s around 12-15 pounds, as it’s big enough to feed a crowd and gives you plenty of meat to work with. It also makes sense for longer cook times. However, if you’re cooking for a smaller group, you can always opt for a smaller brisket. Just remember, the longer the brisket, the longer it will take to cook.
Picking the Perfect Brisket:
- Check for Marbling: Look for a brisket with good marbling, which is the white streaks of fat running through the meat. It’s the fat that gives the brisket its flavour and juiciness. You want a good balance of lean meat and fat.
- Feel the Texture: A good brisket should have a firm but slightly springy texture. Avoid any briskets that feel mushy or have a strong odour. A slightly firm texture indicates freshness.
- Ask Questions: Don’t be afraid to ask the butcher for advice. They can help you choose the right brisket based on your needs and preferences. A good butcher will be happy to guide you.
(Part 2) Prepping the Brisket:
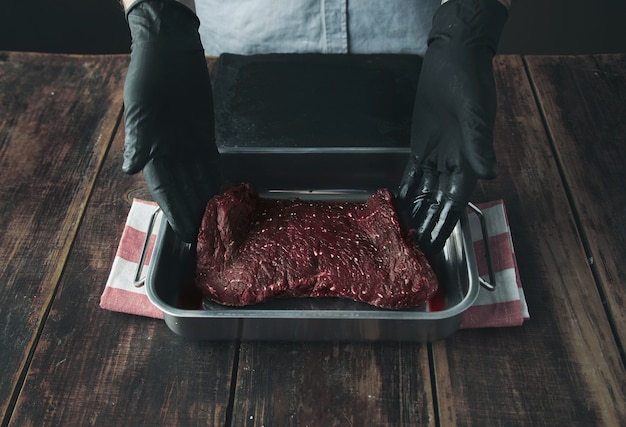
Trimming the Fat
Before we start cooking, we need to trim the brisket. The amount of fat you trim depends on your preference. I like to trim it down to about 1/4 inch, but some people prefer to leave more fat on. Trimming the fat helps ensure even cooking and prevents excessive greasiness.
The Salt Rub:
Right, now it’s time for the rub. A good salt rub is the foundation of any good brisket. It’s a simple mix of salt, pepper, and a few other spices to give it a kick. But you can get creative with different rubs, like paprika, garlic powder, onion powder, chili powder, or even brown sugar.
Here's a basic salt rub recipe:
1 tablespoon kosher salt
1 teaspoon black pepper
1 teaspoon garlic powder
1 teaspoon onion powder
1 teaspoon paprika
Mix all the ingredients together and rub generously all over the brisket, ensuring the entire surface is covered.
The Wrap:
Now, I like to wrap the brisket in butcher paper after a few hours of cooking. This helps to trap moisture and steam the meat, resulting in a more tender brisket. The butcher paper acts as a natural barrier to prevent moisture loss and promotes even cooking.
(Part 3) Setting Up the Traeger

Choosing the Right Wood
Now, one of the beautiful things about a Traeger is the smoke flavour you can infuse into your food. For brisket, I tend to go for a mix of hickory and mesquite wood. These woods provide a classic smoky flavour that complements the richness of the brisket. But you can experiment with different woods to find your favourite combination. Other good options include oak, pecan, and cherry.
Setting the Temperature
The key to a perfect brisket is low and slow cooking. For a Traeger, I recommend setting the temperature to around 225 degrees Fahrenheit (107 degrees Celsius). This temperature allows the connective tissue in the brisket to break down, resulting in a tender, juicy, and flavorful product.
The Setup:
- Clean the Grill: Make sure your Traeger is clean and ready to go. You’ll want to remove any leftover ash or debris. This ensures even heat distribution and prevents any unwanted flavors from transferring to the brisket.
- Add Wood: Add your chosen wood chips or pellets to the hopper.
- Preheat: Preheat the Traeger to the desired temperature. It's important to allow the Traeger to reach the desired temperature before placing the brisket on the grill.
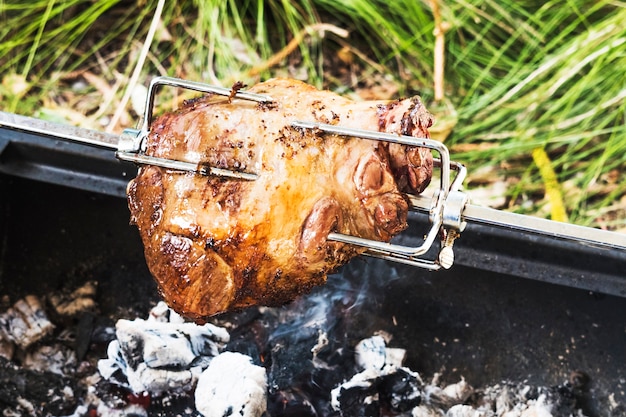
(Part 4) The First Smoke:
Time for the Brisket:
Alright, with the grill preheated and the brisket prepped, it’s time to place it on the Traeger. We’re looking to get a good sear on the brisket before we let it smoke. The sear helps develop a crispy bark and enhances the overall flavor.
First Smoke Duration:
The initial smoke will typically last about 4-6 hours. The meat will start to turn a beautiful shade of brown and the aroma of smoke will fill the air.
Temperature Monitoring:
I highly recommend using a meat thermometer to monitor the internal temperature of the brisket. You can use a probe thermometer that stays inserted in the brisket, or a wireless thermometer with a remote display. You can also use a remote probe thermometer, allowing you to monitor the temperature without opening the Traeger and disrupting the cooking process.
(Part 5) The Wrap
Signs to Wrap:
After those initial hours of smoking, you’ll notice the brisket starts to develop a nice bark, a crust on the outside. It’s time to wrap it up! The bark should be firm and have a slightly crispy texture.
The Wrapping Technique:
I’ve found butcher paper is the best option for wrapping. It’s breathable and allows the brisket to steam, resulting in a more tender and juicy product. Wrap the brisket tightly in butcher paper, ensuring all sides are covered.
Post-Wrap:
Once it's wrapped, the brisket will continue to cook for another 3-4 hours. The wrapping helps to trap moisture and accelerate the cooking process.
(Part 6) The Stall:
What is the Stall?
You’ll notice that the temperature of the brisket will plateau at a certain point, this is known as the stall. It’s caused by the moisture in the meat turning to steam, which slows down the cooking process.
How to Tackle the Stall:
Don’t fret, the stall is a natural part of the brisket cooking process. Simply continue cooking at a low temperature, and eventually the brisket will push through the stall and continue cooking. You can also try misting the brisket with water or apple cider vinegar to help accelerate the process.
(Part 7) The Bark:
A Perfect Bark:
A good bark is a sign of a well-cooked brisket. It should be a nice, dark brown and have a slightly crispy texture. A good bark not only adds to the aesthetic appeal of the brisket but also enhances the flavor.
Achieving a Beautiful Bark:
You can enhance the bark by brushing the brisket with a mixture of apple cider vinegar and water during the initial smoking phase. This helps to caramelize the sugars on the surface of the brisket, creating a more intense flavor and a deeper colour.
(Part 8) The Final Phase:
The texas crutch:
The Texas Crutch is a technique used to accelerate the cooking process and ensure even cooking. It involves wrapping the brisket in foil after a few hours of smoking. The foil creates a steamy environment that helps to tenderize the meat and speeds up the cooking process. However, it can also lead to a less pronounced bark.
Rest Time is Key:
After cooking, it’s crucial to let the brisket rest for at least 2 hours before slicing. This allows the juices to redistribute throughout the meat, resulting in a more tender and juicy brisket. The resting process allows the juices to redistribute evenly throughout the meat.
(Part 9) Slicing and Serving
Slicing Against the Grain:
To achieve the most tender and juicy brisket, you need to slice it against the grain. The grain is the direction of the muscle fibers in the meat. Slicing against the grain helps break down the muscle fibers, resulting in a more tender texture.
How to Serve:
You can serve brisket with a variety of sides, such as baked beans, coleslaw, potato salad, and cornbread. You can also serve it with sauces, like barbecue sauce or horseradish sauce.
FAQs
1. What are the different ways to make brisket?
Brisket can be cooked in a variety of ways, including smoking, grilling, braising, and roasting. However, the most popular method is smoking, as it allows the brisket to develop a deep, rich flavour and a tender, juicy texture.
2. What’s the best temperature for smoking brisket?
The ideal temperature for smoking brisket is between 225-250 degrees Fahrenheit (107-121 degrees Celsius). This low and slow cooking method allows the meat to cook evenly and break down the tough connective tissues.
3. How do I know when my brisket is done?
You can use a meat thermometer to check the internal temperature of the brisket. It should reach an internal temperature of 195-205 degrees Fahrenheit (91-96 degrees Celsius) for a tender and juicy brisket.
4. What happens if my brisket is overcooked?
If you overcook your brisket, it will become dry and tough. If the brisket gets to a temperature that's too high, the fat will render out and the meat will dry out.
5. What are some tips for making brisket?
Here are a few tips for making a perfect brisket:
- Choose a high-quality brisket: The quality of the brisket will greatly impact the final outcome. Look for a brisket with good marbling and a firm but slightly springy texture.
- Trim the fat: Trimming the fat will help to prevent the brisket from becoming too greasy.
- Use a good rub: A flavorful rub will enhance the flavor of the brisket.
- Cook low and slow: Brisket requires a long, slow cooking process to break down the tough connective tissues.
- Monitor the temperature: Use a meat thermometer to monitor the internal temperature of the brisket and ensure it reaches the desired temperature.
- Rest the brisket: Allow the brisket to rest for at least 2 hours before slicing to allow the juices to redistribute.
- Slice against the grain: Slicing against the grain will result in a tender and juicy brisket.
So there you have it, a comprehensive guide to conquering the Traeger brisket. Now, go forth, my friends, and grill like champions. Remember, it’s all about patience, attention to detail, and a dash of love. Happy smoking!
Everyone is watching

Prime Rib Roast Cooking Time Chart: Per Pound Guide
Cooking TipsPrime rib roast. Just the name conjures images of lavish dinners, crackling fires, and hearty laughter. It’s ...

How Long to Bake Potatoes in the Oven (Perfect Every Time)
Cooking TipsBaked potatoes are a staple in my kitchen. They're incredibly versatile, delicious, and surprisingly easy to m...

Perfect Rice Every Time: The Ultimate Guide to Cooking Rice
Cooking TipsAs a self-proclaimed foodie, I've always been a bit obsessed with rice. It's the foundation of countless cuisi...

The Ultimate Guide to Cooking Asparagus: Tips, Techniques, and Recipes
Cooking TipsAsparagus. The mere mention of this spring delicacy conjures up images of vibrant green spears, crisp and burs...

Ultimate Guide to Cooking the Perfect Thanksgiving Turkey
Cooking TipsThanksgiving. Just the word conjures up images of overflowing tables laden with delicious food, the scent of r...