Ah, pot roast. The very name evokes images of warmth, comfort, and those satisfyingly hearty meals that stick with you long after the last bite. It's a dish that's often considered a culinary relic, but trust me, it's far from outdated. It's a timeless classic, packed with potential for amazing flavour, and with a bit of guidance, it's surprisingly easy to master. Don't let the thought of long cooking times scare you off, because the beauty of pot roast lies in its slow, gentle transformation. It's about patience, about allowing time for the flavours to meld and the meat to become impossibly tender.
Over the years, I've developed a method for making pot roast that's almost foolproof. It's a blend of tried-and-true techniques, with a dash of creativity thrown in for good measure. I'm going to walk you through every step, from selecting the perfect cut to crafting a deeply flavorful sauce, and everything in between. And don't worry, I'll even share a few of my secret tips and tricks along the way. By the end of this guide, you'll be a pot roast pro, ready to impress even the most discerning palates!
(Part 1) The Star of the Show: Choosing the Perfect Cut

The first crucial decision is choosing the right cut of meat. It's the foundation of your dish, and it's going to have a huge impact on the final result. I've experimented with various cuts, but my personal favourite is a chuck roast. It's the classic choice for pot roast for a reason. The marbling, that beautiful network of fat interspersed throughout the meat, is key. It melts away during cooking, keeping the roast moist and tender while also adding richness to the flavour.
Finding the Best Pot Roast at the Butcher's
For the best selection, head to your local butcher. They're real experts, and they'll often be happy to help you choose the perfect cut. Look for a piece that's at least 2-3 pounds, enough to feed a family or leave you with leftovers for delicious sandwiches. Ask them to show you the marbling – you want a good balance throughout the cut, not just in one area. The butcher will also be able to tell you what cooking method they recommend for the particular piece of meat you've chosen.
(Part 2) Preparing the Pot Roast for Oven-Roasting Glory

Now you've got your star player, it's time to get it ready for the oven. Don't worry, this part is quick and simple.
Trimming the Excess Fat
Start by giving your pot roast a quick trim. You're not looking to remove all the fat, just any large chunks that stick out excessively. This helps the roast cook more evenly and prevents it from becoming overly greasy.
Seasoning with Love
Next, comes the fun part – seasoning! This is where you get to infuse your pot roast with flavour. I like to keep it simple with salt, pepper, and a generous sprinkling of garlic powder. The garlic adds a lovely depth and aroma. But feel free to experiment! Paprika adds a subtle warmth, cumin provides an earthy note, and rosemary brings a touch of freshness. Dried onion flakes can also work wonders, adding a hint of sweetness. Just remember, don't be shy with the seasoning. It's better to err on the side of boldness than to be timid. A well-seasoned pot roast is the key to a truly satisfying meal.
A Quick Brown for a Crusty Finish
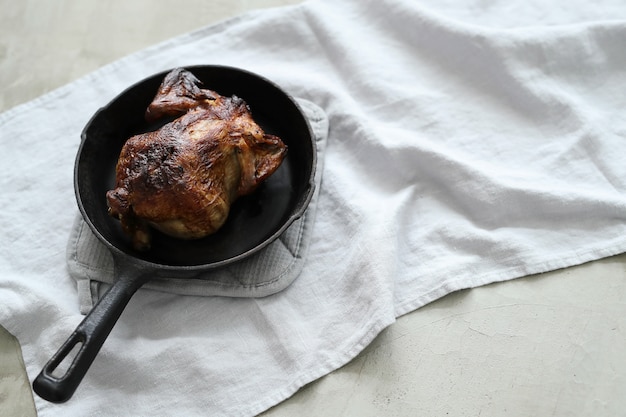
Now for the browning! This step isn't absolutely necessary, but it makes a world of difference. It's all about creating a delicious, crispy crust on the exterior of the roast. Heat a generous amount of oil in a large, oven-proof skillet over high heat. You want the oil to be smoking hot. Carefully place the seasoned pot roast into the skillet, and sear it for about 3 minutes on each side. You'll notice a beautiful golden brown colour developing as you sear. This process seals in the juices and adds a fantastic depth of flavour. If you don't have an oven-proof skillet, no worries, you can sear in a regular skillet and then transfer it to a roasting pan.
(Part 3) Building a Flavourful Base for Your Roast

You've prepared your pot roast, but now it needs a stage to shine on. We're going to create a flavourful base, a rich broth that will act as a vehicle for the meat to cook in.
The Importance of Vegetables
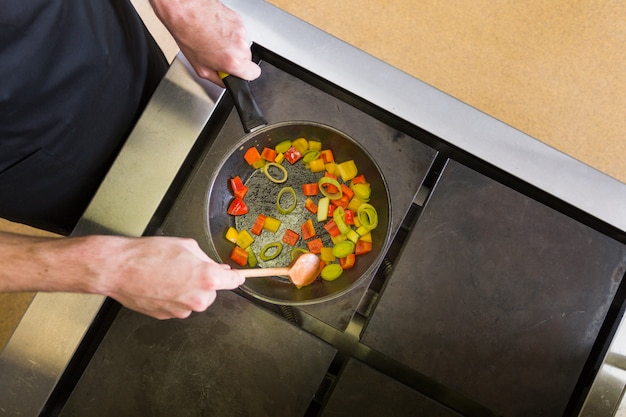
I'm a strong believer in using vegetables in your pot roast. They not only add colour and texture but also contribute a depth of flavour that's simply unparalleled. My go-to trio is onions, carrots, and celery – they're the backbone of a good pot roast, creating a symphony of sweetness and savouriness. Feel free to get creative, though! Potatoes and parsnips add a touch of earthiness, and root vegetables like turnips and rutabagas offer a unique sweetness. Just make sure you chop them into roughly the same size as your pot roast, ensuring they cook evenly.
The Power of Liquids
Next, the liquids! This is where you can truly unleash your culinary creativity. My personal favourites are red wine, beef broth, or a combination of both. The liquid is essential for keeping the meat moist and creating a rich sauce. Adding a splash of Worcestershire sauce for a savory punch, or a touch of tomato paste for a hint of sweetness, really elevates the flavour.
Creating a Flavourful Base in the Oven
Now, it's time to assemble your flavour base! Transfer your seared pot roast to a large roasting pan. Arrange the chopped vegetables around the roast and pour in your chosen liquid. For an extra touch of magic, add a few sprigs of fresh herbs like rosemary or thyme. They release their fragrance as the roast cooks, infusing the entire dish with a captivating aroma. At this point, it's time to cover the roasting pan.
(Part 4) Oven-Roasting: The Art of Slow and Steady
Here we are, the heart of the process, the oven-roasting! It's time to let the magic of slow and steady cooking work its wonders.
The Low and Slow Approach
The key to a melt-in-your-mouth pot roast is low and slow cooking. Preheat your oven to 325°F (160°C). This gentle heat allows the meat to tenderise slowly and the flavours to deepen, creating a truly remarkable dish. A general rule of thumb is to cook for about 2 hours per pound. So, if you're working with a 3-pound pot roast, you're looking at roughly 6 hours of cooking time. But, don't be afraid to adjust the time based on your preference and the size of your roast.
The Importance of Covering
Cover the roasting pan tightly with a lid, if possible. This creates a moist environment that helps the meat cook evenly and prevents it from drying out. You can also use a piece of parchment paper or aluminum foil if you don't have a lid. The idea is to trap the steam and moisture, allowing the meat to cook gently. Throughout the cooking process, you'll need to check the roast and test for tenderness.
(Part 5) Checking and Testing: Making Sure it's Perfect
You've got your pot roast in the oven, but it's not a "set it and forget it" situation. You need to keep an eye on it, ensuring it's cooking beautifully.
Checking for Tenderness
After about 2 hours of cooking, give the roast a gentle poke with a fork. If it offers little resistance and feels unbelievably tender, you're on the right track. If it's still a bit tough, give it another hour or two. It's like a test drive for your pot roast, making sure it's ready for its starring role.
Testing for Doneness
You can also check the internal temperature using a meat thermometer. Aim for an internal temperature of 130°F (54°C) for medium-rare, or 140°F (60°C) for medium. Remember, the temperature will continue to rise slightly after you remove the roast from the oven, so you can remove it when it's about 5-10 degrees below your desired temperature. It will continue to cook as it rests, resulting in perfectly cooked pot roast. But, if you're unsure, always use a meat thermometer!
(Part 6) Resting: A Crucial Step for Juicy Perfection
You've reached the end of your oven-roasting journey, but the journey's not quite over yet. There's one final, crucial step: resting. This is where the magic really happens!
Why Resting is So Important
Resting allows the juices that have been pushed to the surface during cooking to redistribute throughout the meat. This results in an incredibly juicy and tender pot roast. Imagine a sponge. When you squeeze it, the water comes out, but when you release the pressure, the water is reabsorbed. It's the same with meat. Resting allows the juices to be reabsorbed, creating a marvelously succulent outcome.
How Long to Rest
Rest your pot roast for at least 15-20 minutes before carving and serving. This gives those precious juices ample time to redistribute, resulting in a truly impressive dish. While it's resting, you can prepare the sauce, potatoes, or any other sides you're planning on serving.
(Part 7) Carving and Serving: A Feast for the Senses
The moment has arrived! Your pot roast has rested, and it's time to reveal its deliciousness. Get your carving knife and fork ready, and let's carve and serve!
Carving with Care
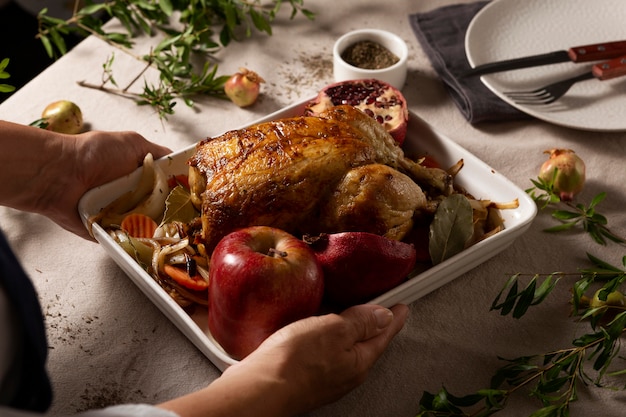
Use a sharp carving knife to slice the pot roast into thin, even slices. You can arrange the slices on a platter with the vegetables and some of the sauce. Don't forget to scoop out some of that delicious sauce from the roasting pan and serve it alongside your pot roast. It's the perfect complement to the tender meat.
Serving with Sides
A beautifully presented platter of perfectly cooked pot roast is a sight to behold, but it needs the right company to shine. mashed potatoes, creamy polenta, or a simple green salad are my go-to companions. Roasted vegetables like Brussels sprouts, carrots, or potatoes add another dimension of flavor and texture. Ultimately, the sides are up to your personal preference and what you've got on hand. Just make sure to create a delicious and satisfying harmony on your plate.
(Part 8) Leftovers: Delicious Delights and Second Chances
You've savoured every bite of your pot roast, but chances are you'll have some leftovers. And the good news is, they're even more delicious the next day!
Turning Leftovers into a Feast
Leftover pot roast is an opportunity to get creative and explore new culinary possibilities. Use it for sandwiches, a hearty soup, or even throw it into a casserole. Here's a recipe I love: "Leftover Pot Roast Shepherd's Pie". Simply layer the leftover pot roast with a creamy mashed potato topping and bake it in the oven until bubbly. It's a comforting and flavourful dish that's perfect for a cosy night in. You can even transform those leftovers into a delicious pot roast hash! Chop up the leftover meat and vegetables, add some potatoes, and fry them up with some onions. It's a hearty and satisfying breakfast that's sure to please.
(Part 9) Mastering the Art of the perfect pot roast: Tips and Tricks
We've covered the fundamentals, but let's delve into some additional tips and tricks that will elevate your pot roast game.
Using a dutch oven
Instead of a roasting pan, you can use a Dutch oven. They distribute heat evenly and hold in moisture, making them ideal for slow cooking. Just make sure to sear the pot roast in the Dutch oven before adding the vegetables and liquid. It's a versatile tool that can handle both the initial searing and the slow cooking.
Using a slow cooker
For an even more hands-off approach, consider using a slow cooker. Brown the pot roast in a skillet, then transfer it to the slow cooker. Add the vegetables, liquid, and any seasonings, and cook on low for 6-8 hours or on high for 4-6 hours. The slow cooker takes the guesswork out of cooking, leaving you with a tender, flavorful pot roast. Just check the pot roast in the last hour or so to make sure it's not getting dry.
Adding a Touch of Wine
Want to add a touch of sophistication to your pot roast? Try a splash of red wine in your cooking liquid. It adds depth of flavour and creates a delicious sauce. A cup or two is enough to add flavour without making the dish too acidic. Use a wine that you enjoy drinking yourself. It's worth investing in a good bottle, especially if you're planning on using the sauce to serve over the pot roast.
Adding a Spoonful of Tomato Paste
For a richer sauce, add a spoonful of tomato paste to the roasting pan. It adds a touch of sweetness and depth of flavour, and it helps to create a beautiful, glossy sauce. Make sure to stir the tomato paste into the cooking liquid so it dissolves evenly.
Adding a Bouquet Garni
A bouquet garni is a bundle of herbs tied together with string or cheesecloth. It's a great way to add flavour without having to pick out individual herbs later. To make one, simply tie together a few sprigs of fresh thyme, rosemary, parsley, and bay leaf. Add the bouquet garni to the roasting pan with the other ingredients, and remove it before serving.
Using a Meat Thermometer
A meat thermometer is essential for ensuring your pot roast is cooked to perfection. It's a great way to avoid overcooking. Just insert the thermometer into the thickest part of the roast and make sure it reaches your desired temperature.
(Part 10) FAQs: Your Pot Roast Questions Answered
It's time to address those lingering pot roast questions you might have. I've got you covered!
- What if my pot roast is too tough?
Don't fret, there's a solution! If your pot roast is tough even after several hours of cooking, it likely needs more time. Simply add another hour or two to the cooking time, or even longer if necessary. You can also add more liquid to the roasting pan to help keep the meat moist. Keep an eye on it and check the internal temperature to ensure it's cooked through.
- Can I freeze leftover pot roast?
Absolutely! Leftover pot roast freezes beautifully. Transfer the leftovers to an airtight container and store it in the freezer for up to 3 months. When ready to use it, thaw it in the refrigerator overnight, then reheat it in the oven or on the stovetop. You can even use leftover pot roast to make a delicious pot roast soup!
- How can I make my pot roast sauce thicker?
If your pot roast sauce is too thin, you can thicken it by making a simple cornstarch slurry. Mix 2 tablespoons of cornstarch with 2 tablespoons of cold water, then whisk it into the pot roast sauce. Bring the sauce to a simmer and cook for a few minutes, or until it thickens. For a richer, more robust flavour, use a roux instead of cornstarch. A roux is made by cooking equal parts butter and flour together. Whisk the roux into the sauce and simmer for a few minutes until it thickens.
- What are some other creative ways to use leftover pot roast?
There are countless ways to use leftover pot roast! Here are a few ideas to spark your creativity:
- Make a pot roast hash
- Add it to a soup
- Turn it into a casserole
- Make pot roast tacos
- Use it to make a pot roast pizza
- Make pot roast sandwiches
- What wine is best for cooking pot roast?
When choosing a wine for your pot roast, select something with a full-bodied flavour that won't overpower the meat. A Cabernet Sauvignon or a Merlot are excellent options. A Zinfandel or a Shiraz can also work well. If you're not a fan of red wine, a dry white wine like a Chardonnay or a Sauvignon Blanc can be used. Just remember to use a wine you would enjoy drinking on its own, as it will add a noticeable flavour to your pot roast.
(Part 11) A Final Word: Embrace the Simplicity
Pot roast is a dish that everyone can enjoy and it's more approachable than you might think! It's all about the basics and a little bit of patience. Don't overthink it, just relax, enjoy the process, and you'll be rewarded with a truly delicious and comforting meal. There's no right or wrong way to make pot roast. Get creative, experiment with different flavours, and have fun with it! You'll be amazed by the delicious results. Just imagine those happy faces at the dinner table, ready to enjoy your masterpiece!
Everyone is watching

Perfect Rice Every Time: The Ultimate Guide to Cooking Rice
Cooking TipsAs a self-proclaimed foodie, I've always been a bit obsessed with rice. It's the foundation of countless cuisi...

Prime Rib Roast Cooking Time Chart: Per Pound Guide
Cooking TipsPrime rib roast. Just the name conjures images of lavish dinners, crackling fires, and hearty laughter. It’s ...

The Ultimate Guide to Cooking Asparagus: Tips, Techniques, and Recipes
Cooking TipsAsparagus. The mere mention of this spring delicacy conjures up images of vibrant green spears, crisp and burs...

Ultimate Guide to Cooking the Perfect Thanksgiving Turkey
Cooking TipsThanksgiving. Just the word conjures up images of overflowing tables laden with delicious food, the scent of r...

How Long to Bake Potatoes in the Oven (Perfect Every Time)
Cooking TipsBaked potatoes are a staple in my kitchen. They're incredibly versatile, delicious, and surprisingly easy to m...
