Alright, let's talk ribs! You know, the kind that practically melt in your mouth, so good they make you lick your fingers with pure joy. As a lifelong lover of good food, I’ve spent countless hours in the kitchen perfecting my oven-baked rib recipe. And now, I'm ready to share my secrets with you.
This isn't just about cooking ribs – it's a journey into the heart of culinary deliciousness, where we'll explore the secrets of tender, flavorful ribs that are bursting with BBQ goodness. We'll cover everything from picking the perfect cut and mastering the art of dry rubs to understanding the power of low and slow cooking, and how to create the ultimate glaze.
So, grab your apron, put on your favourite playlist, and get ready to embark on this rib-tastic adventure!
(Part 1) Choosing the Right Ribs: The Foundation of Your Masterpiece

You know what they say, a good foundation is essential for any successful project. And when it comes to oven-baked ribs, choosing the right cut is that foundation. This is your starting point, the key ingredient that sets the stage for culinary triumph.
The Battle of the Ribs: Spare vs. Baby Back
In the world of ribs, there are two main contenders: spare ribs and baby back ribs.
Spare ribs are the big players – they’re larger and more meaty, boasting a generous amount of fat that melts during cooking, infusing the meat with incredible flavour and moisture. They're like the hearty, full-bodied characters of the rib world.
baby back ribs, on the other hand, are the petite and delicate ones. They're shorter, leaner, and have a slightly more refined flavour. If you prefer a less fatty rib, baby backs are your go-to.
Personally, I'm a staunch fan of spare ribs. Their rich, meaty flavour and melt-in-your-mouth texture are unparalleled. Plus, they tend to be more budget-friendly than baby backs. But hey, taste is subjective – try both and discover your favourite!
Selecting the Perfect Rib Rack
Once you’ve picked your favourite cut, it’s time to choose the ribs themselves. Look for these key features:
Marbling is King: Pay attention to the marbling, those beautiful streaks of fat throughout the meat. It's the secret to succulent, juicy ribs. The fat renders down during cooking, adding both flavour and moisture.
Cartilage for Character: A good rib rack should have a nice layer of cartilage along the bone, which adds a bit of chewiness and flavour. It's that little bit of texture that makes the whole experience so satisfying.
Freshness is Key: Always look for ribs that are bright red in colour and have a firm texture. Steer clear of discoloured ribs or those with a slimy texture.
(Part 2) The Dry Rub: The Magic Dust That Elevates Your Ribs

Alright, you’ve got your ribs, now it’s time to unleash the magic dust – the dry rub! This is the secret ingredient that transforms ordinary ribs into flavour explosions.
Crafting a Dry Rub That Rocks
A good dry rub should be a balanced symphony of flavours. It's about finding the right mix of salty, sweet, smoky, and spicy. I've developed a simple dry rub recipe that I absolutely adore:
- 1 cup brown sugar – For a touch of sweetness that balances the other flavours.
- 1/2 cup paprika – Adds a vibrant colour and a mild, earthy flavour.
- 1/4 cup smoked paprika – Infuses those irresistible smoky notes that elevate the ribs to new heights.
- 1/4 cup garlic powder – Provides a pungent aroma and a delicious garlicky flavour.
- 1/4 cup onion powder – A subtle sweetness and a touch of umami that blends beautifully with the other flavours.
- 2 tablespoons kosher salt – The perfect balance of saltiness to enhance all the other flavours.
- 2 tablespoons black pepper – Adds a bit of heat and a touch of complexity.
- 1 tablespoon chili powder – A hint of spice to create a warm and satisfying finish.
Simply combine all the ingredients in a bowl, and you’ve got yourself a dry rub that will make your ribs sing.
Applying the Dry Rub with Love
Now, it's time to get your hands dirty! Take your chosen rib rack and generously rub it with your homemade dry rub. Don't be shy – make sure every inch of the ribs is coated, including the bone side.
Tip: Applying the dry rub a few hours in advance, or even overnight, is like giving the spices a head start. It allows them to penetrate the meat, creating even deeper, richer flavours. It's like letting your ribs marinate in a flavour bath!
(Part 3) Prepping Your Ribs for Oven Magic: The Crucial Steps

You’ve got your ribs all rubbed up and ready to go, but we’re not quite there yet. There are a few more steps we need to take before those ribs hit the oven.
Preheating the Oven: Setting the Stage
Firstly, preheat your oven to 300°F (150°C). We're going for a low and slow cooking process, the kind that turns tough meat into tender, fall-off-the-bone perfection. Think of it as creating a gentle, nurturing environment for your ribs to transform.
The Power of Wrapping: Locking in Flavor and Moisture
Now, here’s a bit of culinary magic that elevates your ribs to a whole new level. After rubbing them with the dry rub, wrap them tightly in aluminum foil. It's like creating a little steam bath for your ribs, trapping in moisture and creating the perfect environment for them to tenderize.
Securing the Foil: Making Sure No Flavor Escapes
Make sure the foil is tightly sealed all around the ribs, creating a barrier that prevents precious steam from escaping. You can even create a double layer of foil for extra security, ensuring that your ribs are perfectly insulated and protected during their cooking journey.
(Part 4) The Low and Slow Bake: Unveiling Rib-tastic Tenderness
Alright, you've got your ribs wrapped and ready to go. Now, it's time for the oven to work its magic, transforming your ribs into a culinary masterpiece.
Bake Time: Patience is Key
Place your foil-wrapped ribs in the preheated oven and bake for about 3-4 hours. The exact baking time will depend on the size of your ribs, but remember, we're aiming for tender, juicy ribs that practically melt in your mouth.
Checking for Tenderness: The Fork Test
You can check the tenderness of the ribs by gently probing them with a fork. If the meat easily separates from the bone, you know they're ready. It's like a little dance – if the meat gives way effortlessly, it's a sign of perfect tenderness.
(Part 5) The Finishing Touch: A Glaze of Glory
Your ribs are tender, juicy, and bursting with flavour. But there’s one final touch that will take them to a whole new level of deliciousness – the glaze!
Creating a Classic BBQ Glaze
For a classic BBQ glaze, mix together the following ingredients:
- 1/2 cup ketchup – Adds a tangy sweetness that complements the ribs.
- 1/4 cup brown sugar – For a hint of sweetness that balances the tang of the ketchup.
- 2 tablespoons apple cider vinegar – Provides a sharp, tangy flavour that cuts through the richness of the glaze.
- 1 tablespoon Worcestershire sauce – Adds umami and a hint of saltiness.
- 1 teaspoon mustard powder – Adds a touch of earthy, mustardy flavour.
Glazing Your Ribs: The Final Act
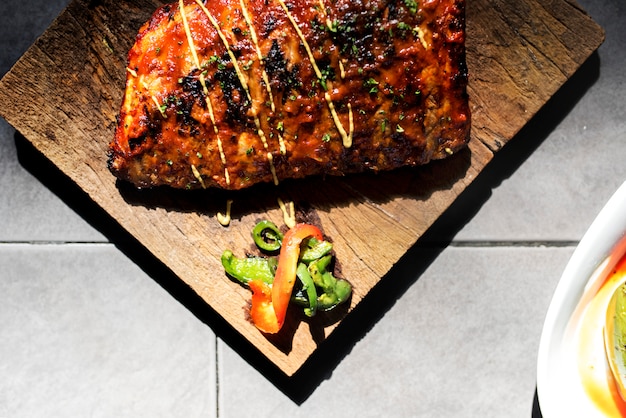
Unwrap your ribs, carefully brush them generously with the glaze, and return them to the oven for another 30-45 minutes. This final step creates a caramelized, slightly sticky glaze that adds an irresistible layer of flavour and visual appeal.
(Part 6) The Moment of Truth: Serving Your Rib Masterpiece
The aroma of your oven-baked ribs will fill your kitchen with a deliciousness that makes your stomach rumble with anticipation. It’s time to serve up your culinary triumph!
Cutting and Serving: A Symphony of Flavour
Carefully remove the ribs from the oven and let them rest for about 10 minutes before cutting and serving. This allows the juices to redistribute, resulting in even juicier ribs.
Garnishing and Accompaniments: A Feast for the Senses
Serve your ribs with your favourite sides. I love coleslaw, potato salad, corn on the cob, or mac and cheese. The possibilities are endless – let your creativity flow and create a symphony of flavour on your plate.
(Part 7) Elevating Your Rib Game: Beyond the Basics
Feeling adventurous? Here are a few extra tips to take your oven-baked ribs from good to absolutely spectacular:
Spicing Things Up: Adding Your Own Unique Twist
Explore New Flavour Profiles: Experiment with different dry rub combinations! Try adding chili flakes, cumin, or coriander for a spicy kick. Or go for a sweet and smoky flavour with brown sugar, molasses, and smoked paprika.
The Power of Heat: If you love a little heat, add some cayenne pepper, hot sauce, or even a touch of sriracha to your glaze. Be warned – a little bit goes a long way!
Adding a Touch of Smoke: The Ultimate Rib-tastic Upgrade
Smoke It Up: If you've got a smoker, you can elevate your ribs to another level of deliciousness by smoking them before baking. This adds an incredible smoky flavour that's hard to beat.
(Part 8) FAQs: Answers to Your Rib-tastic Questions
FAQs
| Question | Answer |
|---|---|
| Can I freeze ribs before cooking them? | Absolutely! Wrap them tightly in plastic wrap and aluminium foil and freeze them for up to 3 months. When you’re ready to cook them, thaw them in the refrigerator overnight. |
| What temperature should the ribs be cooked at? | For oven-baked ribs, the ideal temperature is 300°F (150°C). This low and slow cooking process allows the ribs to become incredibly tender and flavorful. |
| How do I know if my ribs are done? | You can check the tenderness of the ribs by gently probing them with a fork. If the meat easily separates from the bone, they’re ready. |
| How can I keep the ribs moist during cooking? | Wrapping the ribs in aluminium foil traps moisture and steam, helping to keep them juicy and tender. You can also add a little bit of liquid, such as apple cider or chicken broth, to the foil for extra moisture. |
| What should I serve with my ribs? | Serve your ribs with your favourite sides! Some popular options include coleslaw, potato salad, corn on the cob, mac and cheese, and baked beans. |
(Part 9) A Final Word: Embrace the Rib-tastic Journey
There you have it – my ultimate guide to tender, flavorful oven-baked ribs. I hope you've found it useful and that you’re now ready to embark on your own rib-tastic adventure.
Remember, the key to amazing ribs is all about patience, precision, and a bit of love. Don't be afraid to experiment with different rubs, glazes, and cooking techniques. Find what works best for you and enjoy the delicious journey!
And remember – when it comes to ribs, there are no rules! So go ahead, get creative, and have fun!
Everyone is watching

Perfect Rice Every Time: The Ultimate Guide to Cooking Rice
Cooking TipsAs a self-proclaimed foodie, I've always been a bit obsessed with rice. It's the foundation of countless cuisi...

Ultimate Guide to Cooking the Perfect Thanksgiving Turkey
Cooking TipsThanksgiving. Just the word conjures up images of overflowing tables laden with delicious food, the scent of r...

The Ultimate Guide to Cooking Asparagus: Tips, Techniques, and Recipes
Cooking TipsAsparagus. The mere mention of this spring delicacy conjures up images of vibrant green spears, crisp and burs...

Can You Cook Spaghetti with Gasoline? (The Shocking Truth)
Cooking TipsWe've all seen those crazy internet trends. You know, the ones that make you wonder, "Did someone actually try...

Chorizo and Eggs Recipe: The Ultimate Guide
Cooking TipsRight, let’s talk about chorizo and eggs. You know, that classic Spanish dish that's always a winner. It's th...
