Ah, the grilled cheese sandwich. A culinary cornerstone, a comforting hug in edible form. A simple dish, yet one that inspires passionate debate and, dare I say, a touch of artistry. I've spent years perfecting my own grilled cheese game, battling soggy disasters, escaping the clutches of burnt bread, and finally, achieving that elusive state of gooey, golden perfection. Join me on this journey, and together, we'll unlock the secrets of the ultimate stovetop grilled cheese.
(Part 1) The Bread: Your Foundation

Think of a grilled cheese like a painting. You wouldn't try to paint a masterpiece on a flimsy, torn piece of paper, would you? The bread is your canvas, the foundation upon which your cheesy masterpiece will be built. We need a bread that's sturdy enough to hold up against the onslaught of melted cheese, yet delicate enough to soak up the flavorful juices.
Choosing the Right Bread
Let's be clear: pre-sliced supermarket bread won't cut it. We're after bread with character, bread that sings with flavor.
- Sourdough: My personal champion. Its robust texture and tangy bite provide a delightful counterpoint to the richness of the cheese. It's got that satisfying chew that makes you feel like you're truly savoring the experience.
- Rye: If you're craving a bit more depth, rye is your ally. Its subtle sweetness and nutty undertones create a surprisingly complex flavor profile that'll have you questioning why you ever settled for plain white bread.
- White Bread: Let's not forget the classic! But even with white bread, we're not just grabbing the first thing we see. Choose a good quality, thick-sliced loaf that holds its own against the cheese. Avoid the super-fluffy stuff; we want a crisp exterior and a sturdy interior.
Toasting Your Bread: Building the Base
Before we even think about cheese, we need to prepare our bread for battle. The key is achieving that irresistible crispy crust – the antithesis of soggy, limp bread.
- Dry Pan Method: My go-to. Heat a dry pan over medium heat and place the bread slices directly on the hot surface. Toast for about 30 seconds per side until lightly golden. This creates a delicious barrier that prevents the bread from becoming soggy and contributes to the delightful crunch.
- Toaster Method: A quick and efficient choice. Toast your slices until they reach a light golden brown. Remember, a little browning goes a long way! We want that crispness without burning the bread.
And don't neglect those edges! Those crispy little morsels are a true delight, a little bonus reward for your cheese-filled journey.
(Part 2) The Cheese: The Heart and Soul

Now, let's talk about the heart and soul of any good grilled cheese: the cheese. This is where you get to unleash your creativity, personalize your sandwich, and ultimately, achieve that melty, stringy, gooey glory.
Choosing the Right Cheese: The Melting Point
It's all about the melting point, folks. We're looking for a cheese that transforms into a gooey, stretchy, stringy dream. Stay away from dry, crumbly cheeses; they'll only lead to disappointment.
- Cheddar: A classic for a reason. It melts beautifully, creating a rich, creamy texture with a hint of sharpness that cuts through the richness.
- Monterey Jack: A mild and buttery choice, ideal for those who prefer a smooth, mellow flavor.
- Provolone: This Italian cheese melts like a dream and has a slightly salty, nutty flavor that adds a touch of sophistication to your sandwich.
- Gouda: Feeling adventurous? Gouda is your ticket. This Dutch cheese offers a nutty, slightly sweet flavor and melts into a smooth, silky texture, adding another layer of complexity.
- Mozzarella: If you're all about that cheese pull, fresh mozzarella is your best friend. It melts into a beautiful, gooey, stringy mess that's guaranteed to impress.
The Art of Cheese Placement: Layering for Perfection
You might think, "How hard can it be to put cheese on bread?" But trust me, there's a right way and a wrong way. We're aiming for even melting, maximum flavor, and a satisfying cheese-to-bread ratio.
The "Overlapping" Technique
This is my go-to, especially when using multiple cheese types. I start by placing a slice of cheese on one slice of bread, followed by another slice of a different cheese, then top it off with a final slice of cheese on the other bread slice. This creates layers of different cheese flavors and textures, and helps the cheese melt more evenly. It's a symphony of cheesy goodness.
The "Single Layer" Technique
If you're sticking with one type of cheese, a single layer will do the trick. Place a slice on one slice of bread, then top it with the other slice of bread. You might need to adjust your cooking time as a single layer will melt faster.
The "Generous Hand" Technique
Sometimes, you just want a cheese overload. This is where you go all out, piling on the cheese as high as you can manage. I'm talking a cheese mountain, a cheesy avalanche! Just be warned: it can get a little messy, but it's a glorious mess.
(Part 3) The Butter: The Finishing Touch

Your bread is toasted, your cheese is chosen and strategically arranged. Now, it's time for the finishing touch, the element that truly elevates your grilled cheese to greatness: the butter.
Choosing the Right Butter: Melting Point Matters
Not all butter is created equal. We need something that melts evenly, creating that golden-brown, crispy crust that we crave.
- Unsalted Butter: My go-to. It allows you to control the saltiness of your grilled cheese, adding it to your liking.
- Salted Butter: If you prefer a little extra salt, go for salted butter. Just remember that it's inherently saltier, so you may need to adjust the amount of salt you add to your sandwich.
The Art of Butter Application: A Matter of Style
This is where things get a little messy, but it's all part of the fun.
- The "Generous Slathering" Technique: The classic approach. Take a pat of butter and generously slather it onto both sides of your bread. This ensures a nice, crispy crust and a beautiful, golden-brown exterior.
- The "Dabbing" Technique: If you're looking for a slightly less greasy finish, use a brush to lightly dab butter onto the bread. This will still create a crispy crust, but with a touch less oiliness.
- The "Olive Oil" Technique: Want to experiment? Swap butter for olive oil. It gives your grilled cheese a distinct flavor and adds a lovely sheen to the bread.
(Part 4) The Pan: Your Culinary Battlefield
You've got your bread, cheese, and butter. Now, you need your weapon: the pan. Choose wisely, as the right pan can elevate your grilled cheese to new heights.
Choosing the Right Pan: Heat and Control
You want a pan that distributes heat evenly and creates a crispy crust without burning.
- cast iron skillet: My personal favorite. It heats up evenly and retains heat well, creating a beautiful, crispy crust. Be sure to season it properly before use.
- non-stick pan: A good alternative if you're not a fan of cast iron. It's easy to clean and prevents sticking, but it might not get as crispy as a cast iron pan.
- Griddle: If you've got the space, a griddle is perfect for making multiple grilled cheese sandwiches at once. It heats up evenly and creates a beautiful, even browning.
Preparing Your Pan: Setting the Stage
Before you place your sandwich on the pan, you need to get it ready.
- Heat It Up: Heat your pan over medium heat. You want it hot enough to create a crispy crust, but not so hot that it burns the bread.
- Grease It Up: Once the pan is hot, add a little butter or oil to prevent your sandwich from sticking.
(Part 5) The Cooking Process: The Art of Patience
Now comes the moment of truth. This is where you need to be patient, observant, and a little obsessed (in a good way).
The First Side: The Foundation
Place your buttered bread, cheese-side down, onto the hot pan. Let it cook for about 2-3 minutes, or until the bottom is golden brown and crispy. Don't rush the process; let the bread get a nice, solid base.
The Flip: A Moment of Truth
When the first side is beautifully browned and the cheese is starting to melt, it’s time to flip. Use a spatula to carefully lift the sandwich and flip it over. Take a moment to admire your work: the golden crust, the cheese beginning to melt. You're almost there.
The Second Side: The Finishing Touch
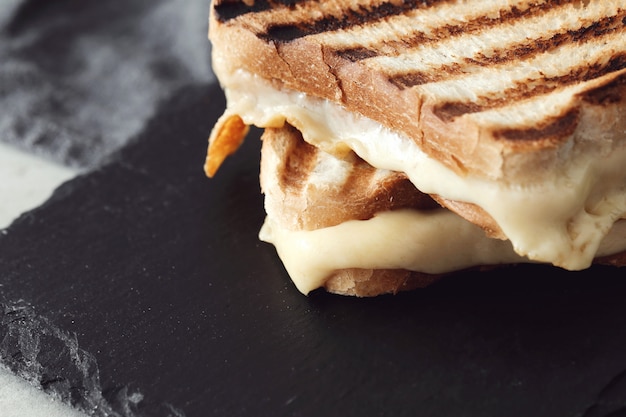
Cook the second side for another 2-3 minutes, or until the bottom is golden brown and crispy. You want the cheese to be melted and bubbly, and the bread to be perfectly toasted.
The Pressure Test: A Final Check
Now for the crucial step: the pressure test. Gently press down on the top of the sandwich with your spatula. If it feels firm and the cheese is nicely melted, you're ready to go.
(Part 6) The Cutting: A Moment of Triumph
The sandwich is cooked, the cheese is gooey, the crust is crispy. Time for the moment of truth: the cutting.
The "Diagonal Cut"
The classic, elegant approach. Cut the sandwich diagonally from corner to corner, creating two triangular pieces. Visually appealing and perfect for sharing.
The "Square Cut"
For a casual, no-frills approach, cut the sandwich into squares. Simple, efficient, and perfect for a quick lunch or snack.
The "Irregular Cut"
Feeling spontaneous? Don't be afraid to get creative! Use a cookie cutter to make fun shapes, or simply cut the sandwich into whatever shape strikes your fancy. It's your grilled cheese, after all.
(Part 7) The Serving: A Moment of Indulgence
You've worked hard, you've waited patiently. Now, it's time to savor the fruits of your labor.
The "Classic Plate"
A simple, clean white plate provides a perfect backdrop for your cheesy masterpiece. Let the colours and textures shine through.
The "Rustic Board"
For a more rustic, farmhouse feel, serve your grilled cheese on a wooden cutting board. This adds a touch of warmth and texture to your presentation.
The "Creative Garnish"
Want to take your grilled cheese to the next level? Add simple garnishes, such as a sprinkle of chopped parsley, a drizzle of honey, or a few slices of tomato.
(Part 8) The Extras: Taking it to the Next Level
Now that you've mastered the basics, it's time to get adventurous. Let's explore some extra techniques and ingredients that can elevate your grilled cheese to extraordinary heights.
The "Grilled Cheese Soup"
This is a fun and comforting twist on the classic. Make a simple tomato soup, then add your grilled cheese sandwich to the bowl. The warm soup melts the cheese, creating a delightful, cheesy broth.
The "Grilled Cheese Salad"
For a lighter option, try adding your grilled cheese to a salad. You can use a simple green salad or get creative with your toppings. Try grilled chicken, avocado, or a drizzle of balsamic vinaigrette.
The "Grilled Cheese Burger"
This is a crowd-pleaser. Use a large, thick slice of bread to create a "burger bun" for your grilled cheese. Add your favorite burger toppings: lettuce, tomato, onion, pickles. You can even add a slice of bacon or a fried egg for extra indulgence.
The "Grilled Cheese Wrap"
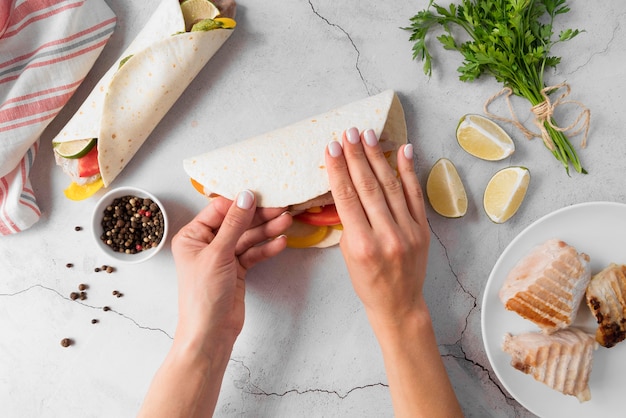
For a portable, on-the-go option, wrap your grilled cheese in a tortilla. Add your favorite fillings, like grilled vegetables, salsa, or guacamole. It's a delicious and convenient way to enjoy your cheesy creation.
(Part 9) The Troubleshooting Guide: Solving Common Grilled Cheese Problems
Even the most seasoned grilled cheese maker can run into problems. But fear not, here's a quick guide to solving common grilling dilemmas.
The "Soggy Bread" Problem
If your bread is soggy, it’s likely because you didn’t toast it properly or cooked the sandwich over too low a heat. Ensure you toast your bread thoroughly before adding the cheese, and cook the sandwich over medium heat.
The "Burnt Bread" Problem
Burnt bread is a sign that you've cooked it over too high a heat. Lower the heat and cook the sandwich more slowly.
The "Unevenly Melted Cheese" Problem
If your cheese is unevenly melted, it’s likely because you didn’t use the right type of cheese, or you didn’t cook the sandwich long enough. Choose a cheese that melts beautifully and cook the sandwich until the cheese is melted and bubbly.
The "Sticking Sandwich" Problem
If your sandwich is sticking to the pan, it’s likely because you didn’t grease the pan properly. Be sure to grease the pan with butter or oil before adding the sandwich.
FAQs
1. What is the best type of cheese to use for a grilled cheese?
The best cheese for a grilled cheese is a matter of personal preference, but I always recommend choosing a cheese that melts beautifully and has a good flavor. Some of my favorites include cheddar, Monterey Jack, provolone, and gouda. Experiment with different cheeses to find your favorites.
2. What is the best way to toast bread for a grilled cheese?
I prefer to toast my bread lightly in a dry pan before adding the cheese. This creates a nice, crispy crust and prevents the bread from getting soggy. You can also toast it in a toaster, but make sure not to overtoast it.
3. How do I know when my grilled cheese is cooked?
Your grilled cheese is cooked when the bottom is golden brown and crispy, the cheese is melted and bubbly, and the bread is nicely toasted. You can also gently press down on the top of the sandwich with your spatula to see if it feels firm and the cheese is nicely melted.
4. What are some creative ways to add flavor to my grilled cheese?
There are endless possibilities when it comes to adding flavor to your grilled cheese. You can add different types of cheese, use different types of bread, add toppings like sliced tomato, caramelized onions, or fresh herbs, or even try different cooking methods like grilling or pan-frying. Get creative and have fun with it!
5. What if my grilled cheese is too greasy?
If your grilled cheese is too greasy, you can try using less butter when cooking it. You can also use a non-stick pan, which will help to reduce the amount of grease.
There you have it, a comprehensive guide to achieving grilled cheese perfection. Remember, it's not about following a strict recipe, but rather about understanding the core principles and letting your creativity flow. So go forth, experiment, and enjoy the deliciousness!
Everyone is watching

Prime Rib Roast Cooking Time Chart: Per Pound Guide
Cooking TipsPrime rib roast. Just the name conjures images of lavish dinners, crackling fires, and hearty laughter. It’s ...

How Long to Bake Potatoes in the Oven (Perfect Every Time)
Cooking TipsBaked potatoes are a staple in my kitchen. They're incredibly versatile, delicious, and surprisingly easy to m...

Perfect Rice Every Time: The Ultimate Guide to Cooking Rice
Cooking TipsAs a self-proclaimed foodie, I've always been a bit obsessed with rice. It's the foundation of countless cuisi...

The Ultimate Guide to Cooking Asparagus: Tips, Techniques, and Recipes
Cooking TipsAsparagus. The mere mention of this spring delicacy conjures up images of vibrant green spears, crisp and burs...

Ultimate Guide to Cooking the Perfect Thanksgiving Turkey
Cooking TipsThanksgiving. Just the word conjures up images of overflowing tables laden with delicious food, the scent of r...
