Let's face it, there's nothing quite like a juicy, perfectly cooked strip steak. It's a classic for a reason! But let's be honest, getting that perfect sear and that tender, melt-in-your-mouth texture isn't always a walk in the park. I've been there, folks – those frustrating evenings where the steak ends up overcooked, dry, and frankly, a bit of a let-down. But fear not, my fellow steak lovers, because I'm here to share my hard-earned wisdom and guide you to steak-cooking nirvana.
(Part 1) Getting Ready: choosing the right cut

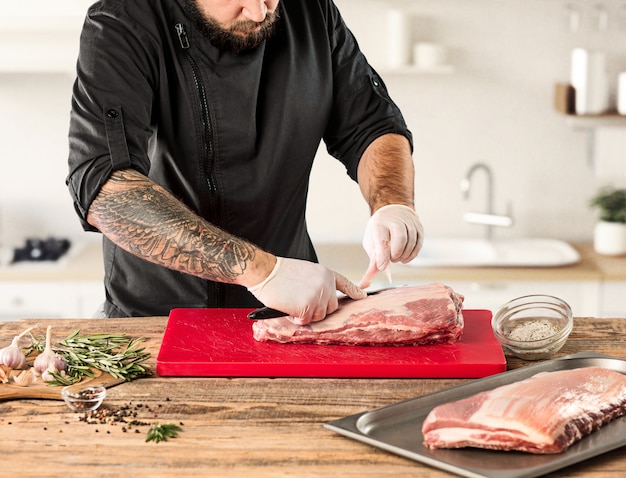
The journey to a truly magnificent steak starts long before you even turn on the oven. It all begins with selecting the right cut. Now, I'm a big fan of strip steak – it's got that beautiful marbling, which adds incredible flavor and keeps it moist, and it's just the right amount of tenderness. But hey, don't be afraid to experiment! If you fancy something a little leaner, go for a ribeye. Or maybe you're in the mood for something extra-thick – a porterhouse or a T-bone could be your perfect match.
1.1. The Importance of Thickness
Let's talk about thickness. If you're using the oven, you'll want a steak that's at least an inch thick. Why? Because a thicker steak retains heat better, making it easier to achieve that even cook and delicious crust without overdoing it on the outside. Think of it as a little bit of insurance against a dry, overcooked disaster.
1.2. Knowing Your Steak: The Grades
Now, you might see labels like "Select," "Choice," or "Prime" on your steak. These grades tell you about the marbling, which basically means the amount of fat within the meat. "Prime" is the top dog, with the most marbling, leading to a richer, juicier steak. "Choice" is a bit leaner but still very flavorful. "Select" is the leanest, so if you're watching your fat intake, that's your pick. But personally, I always go for "Choice" – it's a happy medium of flavor and tenderness, and it’s the grade you’re most likely to find in your supermarket.
Here's a little tip: When you're at the butcher counter, don't be afraid to ask questions! They're experts and can help you choose the perfect cut for your needs. You can even ask them to trim any excess fat for you. It's all about making your life easier!
(Part 2) Preparing for Perfection
Alright, you’ve chosen your steak, but we’re not ready to throw it in the oven just yet. We need to do a little prep work to make sure it’s absolutely ready to shine.
2.1. The Art of Seasoning: Don’t Be Shy
Now, I know some folks are hesitant about seasoning their steaks. They think it's all about letting the natural flavor shine through. But trust me, a little seasoning goes a long way. It enhances the steak's flavor, creating a symphony of taste buds. Here’s the thing – you want to salt your steak at least an hour before cooking, preferably even longer. This helps the salt to draw out moisture, then reabsorb it, making the steak even more flavorful and tender. As for pepper, I sprinkle that on right before I throw it in the oven. It adds a touch of zing and keeps the black peppercorns from burning.
But don't stop there! Experiment with different spices. A little garlic powder, paprika, or onion powder can add depth and complexity to your steak's flavor profile. Just remember, a little goes a long way. You don't want to overpower the natural taste of the steak.
2.2. Patting it Dry: A Crucial Step
Before you go tossing that steak in the oven, give it a good pat down with a paper towel. This is important! It gets rid of excess moisture on the surface, which can prevent a nice, crispy crust from forming. A dry surface is key for achieving that beautiful sear.
(Part 3) The Oven’s Turn: Setting the Stage

Let’s talk about your oven, the star of the show! We need to get it nice and hot to create the perfect sear.
3.1. The Importance of High Heat
You want your oven roaring hot for this. Aim for 500°F (260°C). Don’t worry, it’s just for a short time. This intense heat gives the steak that incredible crust and locks in those juices. Think of it like a quick burst of energy – in and out, and you're done!
3.2. Using a Baking Sheet
Now, you’ll want to use a baking sheet. Don’t be tempted to put your steak directly on the oven rack – it can lead to uneven cooking. The baking sheet provides a little buffer and helps distribute the heat more evenly.
Here's a tip: if you want to add a bit of smoky flavor, you can place a few wood chips on the baking sheet with your steak. Just make sure they're soaked in water first. The heat of the oven will cause the wood chips to release smoke, which will infuse your steak with a lovely smoky aroma.
(Part 4) The Big Moment: Cooking the Steak
Okay, we’ve done all the prep work. It’s time for the main event – cooking the steak! But remember, we're aiming for perfect doneness, not just a warm steak.
4.1. The Doneness Chart: Your Guide to Perfection
First things first, let’s talk about your preferred doneness. Everyone has their own idea of what’s perfect, so it’s crucial to know what you’re aiming for. Here’s a little chart to help:
| Doneness | internal temperature (°F) | Internal Temperature (°C) | Description |
|---|---|---|---|
| Rare | 125-130 | 52-54 | Cool red center, warm edges |
| Medium Rare | 130-135 | 54-57 | Warm red center, warm edges |
| Medium | 135-140 | 57-60 | Pink center, warm edges |
| Medium Well | 140-145 | 60-63 | Slightly pink center, warm edges |
| Well Done | 145 | 63 | No pink, fully cooked |
Remember, those temperatures are for when the steak comes out of the oven – it will continue to cook a bit once you take it out. So, don’t overcook it! It’s always better to err on the side of a little less cooked. You can always rest it a bit longer to reach your desired doneness.
4.2. Timing is Everything: The Baking Time
Now, let’s talk about timing. For a 1-inch thick steak, here’s a rough guide:
- Rare: 5-6 minutes
- Medium Rare: 7-8 minutes
- Medium: 9-10 minutes
- Medium Well: 11-12 minutes
- Well Done: 13 minutes
Remember, these are just estimates. Your oven, your steak, and your personal preference will all play a role. It’s always a good idea to use a meat thermometer to make sure you get it just right. And, you can adjust the time based on the thickness of your steak. Think about it – a thicker steak needs a bit longer to cook through.
4.3. The Flipping Ritual: One Time is Enough
Now, here’s a common question I get: How many times do you flip a steak in the oven? The answer is, once. Flipping it multiple times can disrupt the cooking process and prevent that beautiful crust from forming. So, just let it cook on one side until it’s almost done, then flip it over for a few more minutes to finish cooking. It’s all about patience and trusting the oven!
(Part 5) The Finishing Touch: Resting the Steak
You’ve cooked your steak, and it looks absolutely amazing – that beautiful crust, the rich color, it’s a masterpiece! But wait, there’s one last crucial step: resting. It’s a simple act, but it makes a huge difference in the final result. Here’s why.
5.1. Resting: A Culinary Secret
Think of it as giving your steak a chance to relax after its oven adventure. During cooking, the juices get pushed to the outside. When you cut into a steak that hasn't rested, those juices spill out, leaving you with a dry, disappointing steak. Resting allows those juices to redistribute throughout the steak, creating a more tender and juicy final product.
5.2. How Long to Rest
The rule of thumb is to rest a steak for about 5-10 minutes. For a thick steak, you might want to go for a little longer. Use a cutting board and cover it loosely with foil to keep it warm and prevent the juices from drying out. It’s a bit of a wait, but I promise, it’s worth it!
(Part 6) The Cutting Ceremony: A Final Act of Care
Alright, the steak is resting, and you can practically taste that juicy tenderness. Now comes the cutting ceremony – the final step before you indulge.
6.1. Cutting Against the Grain
This is important! Cutting against the grain, which means across the muscle fibers, makes your steak much easier to chew. Imagine it like cutting through a bunch of tiny threads – it’s smoother and more enjoyable. When you cut with the grain, you’re cutting through the fibers, which makes it tougher to chew.
6.2. The Perfect Slice: Thin and Even
Aim for slices about a half-inch thick – it’s the perfect size for enjoying that beautiful crust and the tender meat inside. And try to cut it in one go – a back-and-forth sawing motion can squish the juices out, which you definitely want to avoid! Remember, we’re aiming for juicy perfection, not a dry, tough experience.
(Part 7) The Grand Finale: Serving Time!
Your steak is perfectly cooked, rested, and beautifully sliced. Now, it’s time for the grand finale – serving it up! I like to keep it simple.
7.1. The Sides: Simple, but Delicious
I’m a big fan of classic sides for my steak. Think roasted vegetables like asparagus or broccoli, creamy mashed potatoes, or a simple salad with a vinaigrette dressing. You don’t want to overpower the steak, but you do want sides that complement the flavor and texture.
7.2. The Sauce: A Matter of Taste
Now, you can add a sauce if you like, but I think a perfectly cooked steak doesn’t need much extra. If you do choose a sauce, go for something light and flavorful, like a chimichurri or a simple garlic butter. The key is to enhance the steak, not hide it under a heavy sauce.
Here's a little secret: you can even make your own sauce from the drippings left in the pan after cooking your steak. Just deglaze the pan with a little wine or broth, then simmer it down to thicken it. You'll have a delicious, flavorful sauce that complements your steak perfectly.
(Part 8) Beyond the Basics: Elevating Your Steak Game
Okay, you’ve mastered the basics. Now, let’s talk about taking your steak game to the next level! There are a few tricks that can elevate your cooking and create a truly unforgettable experience.
8.1. Experiment with Herbs and Spices
Don’t be afraid to get creative with your seasoning. Try adding a touch of rosemary, thyme, or garlic to your rub. You can even get fancy and create your own spice blend. The possibilities are endless! Remember, the beauty of cooking is that it’s all about experimentation and finding what tastes best to you.
Here’s a little idea for a custom blend: mix together 1 tablespoon of smoked paprika, 1 tablespoon of garlic powder, 1 tablespoon of onion powder, 1 teaspoon of dried oregano, 1 teaspoon of black pepper, and 1/2 teaspoon of salt. Rub it all over your steak, and then let it sit for at least an hour before cooking. The flavors will really come through, and your steak will have a delicious smoky, savory taste.
8.2. The reverse sear Method
Here’s a little secret weapon: the reverse sear method. It’s a bit more time-consuming, but it delivers incredibly juicy and evenly cooked results. The idea is to cook the steak at a low temperature first, then finish it off at high heat for a crispy crust. You’ll need a thermometer for this method, but it’s a game changer for achieving that perfect level of doneness.
Here’s how to do it: Preheat your oven to 275°F (135°C). Place your steak on a baking sheet and cook for about 45 minutes to an hour, depending on the thickness of your steak. You want to cook it until the internal temperature reaches about 115°F (46°C) for medium rare. Then, crank up your oven to 500°F (260°C) and sear the steak for 2-3 minutes per side. This will give you a beautiful, crispy crust and a perfectly cooked steak.
8.3. Grilling: A Seasonal Delight
If you have a grill, don’t be afraid to put it to good use! Grilling gives the steak that lovely smoky flavor and beautiful char marks. Just make sure your grill is super hot and your steak is well-seasoned.
Here's a tip for grilling: Don't be afraid to move your steak around on the grill to get those beautiful grill marks. Just make sure you don't overcook it!
FAQs
Here are a few common questions about cooking steak in the oven:
1. What temperature should I cook a strip steak to?
The temperature depends on your preferred doneness. Check out the chart in Part 4 for a guide to internal temperatures. Remember, you can always adjust the cooking time to reach your desired doneness.
2. How long should I rest a steak after cooking?
A good rule of thumb is to rest a steak for 5-10 minutes, covered loosely with foil. This allows the juices to redistribute, resulting in a more tender and juicy steak.
3. What if my steak is too thin?
If you’re working with a thinner steak, you can try pan-searing it instead. Heat a pan over high heat, add a little oil, and sear the steak for a few minutes on each side. Then, you can transfer it to the oven to finish cooking.
4. How do I know if my steak is done?
The best way to tell if your steak is done is to use a meat thermometer. Insert it into the thickest part of the steak, making sure it’s not touching any bone. Check the chart in Part 4 for the desired temperature based on your preferred doneness.
5. What are some good sauces to serve with steak?
There are tons of sauces that pair well with steak. A simple garlic butter, a zesty chimichurri, or a classic béarnaise sauce are all excellent choices. You can also get creative with your own sauce recipes! And don’t forget about the classic steak sauce – it's a classic for a reason!
There you have it! My comprehensive guide to perfectly cooked strip steak in the oven. Remember, practice makes perfect. Don't be afraid to experiment, try different techniques, and adjust based on your preferences. And most importantly, have fun! There's nothing more satisfying than enjoying a juicy, flavorful steak that you’ve cooked to perfection yourself.
Everyone is watching

Prime Rib Roast Cooking Time Chart: Per Pound Guide
Cooking TipsPrime rib roast. Just the name conjures images of lavish dinners, crackling fires, and hearty laughter. It’s ...

How Long to Bake Potatoes in the Oven (Perfect Every Time)
Cooking TipsBaked potatoes are a staple in my kitchen. They're incredibly versatile, delicious, and surprisingly easy to m...

Perfect Rice Every Time: The Ultimate Guide to Cooking Rice
Cooking TipsAs a self-proclaimed foodie, I've always been a bit obsessed with rice. It's the foundation of countless cuisi...

The Ultimate Guide to Cooking Asparagus: Tips, Techniques, and Recipes
Cooking TipsAsparagus. The mere mention of this spring delicacy conjures up images of vibrant green spears, crisp and burs...

Ultimate Guide to Cooking the Perfect Thanksgiving Turkey
Cooking TipsThanksgiving. Just the word conjures up images of overflowing tables laden with delicious food, the scent of r...