Ah, steak. The king of the grill, the star of the dinner table, the culinary hero that sends taste buds into a frenzy. But let's be real, nailing that perfect sear, achieving that juicy, tender interior, and mastering the art of a well-rested steak isn't always a walk in the park. There have been times, I confess, where I've stood before a sizzling pan, sweating bullets and questioning my own cooking abilities. But through trial and error (and a fair bit of burnt meat, let's be honest), I've learned the secrets to conquering the stovetop steak. This guide is my way of sharing those hard-won lessons, guiding you from steak newbie to confident cook.
Part 1: Choosing Your Weapon: The Steak
The journey to a perfect steak starts with choosing the right cut. Think of it like this: you wouldn't use a butter knife to chop wood, right? So, let's pick the right tool for the job - a steak that's both delicious and ready for a sizzling showdown with your pan.
The Classic Contenders
- Sirloin: The go-to for a reason. This cut is known for its marbling - those lovely streaks of fat running through it - which means it's naturally juicy and flavorful. Plus, it holds up beautifully to high heat, making it ideal for pan-searing.
- Rib-Eye: Ah, the rib-eye. This is the king of buttery, indulgent flavor. It's a bit more decadent due to its higher fat content, but if you're looking for a luxurious experience, this is your champion.
- new york strip: My personal favorite! This steak offers a bolder flavor than your standard sirloin, with a perfect balance of fat and lean meat. It's the kind of steak that makes you go "Mmm, yes, this is good."
Hidden Gems: The Underrated Cuts
Don't dismiss these options, they can be absolute stars in the right hands.
- flank steak: Now, flank steak is a bit of a wild card. It's naturally tougher than the others, but with the right cooking method (think thinly sliced, quick-cooked), it can be incredibly delicious. It's the perfect choice for fajitas or stir-fries.
- skirt steak: Similar to flank steak, this cut is best enjoyed thinly sliced and cooked fast. It has a rich, smoky flavor that's absolutely addictive.
The Thickness Factor
Forget those thin, flimsy cuts. You want a steak that has some substance. Aim for at least an inch thick, and ideally closer to 1.5 inches. Any thinner, and you risk overcooking the outside before the inside even has a chance to warm up.
Part 2: The Prep Game: Setting the Stage

You've got your steak, now it's time to play it smart. These pre-game steps are essential for achieving a beautifully cooked steak that'll leave you wanting more.
Temperature Check: The Room Temp Advantage
Let's get this out of the way: a cold steak is not your friend. Why? Because a cold steak takes longer to cook evenly, which can lead to an uneven texture and a tough, dry result. So, take your steak out of the fridge at least 30 minutes before you're ready to cook. This allows it to gradually warm up to room temperature, ensuring a more even cook and a juicy, tender outcome.
Seasoning Secrets: The Art of Simplicity
Remember, we're not trying to mask the delicious natural flavor of the steak, we want to enhance it. A simple salt and pepper rub is often all you need, but feel free to experiment with a few carefully chosen spices.
- Salt: Kosher salt is the way to go. It's coarser than table salt and distributes more evenly, creating a beautiful, salty crust. Season generously, don't be shy!
- Pepper: Freshly ground black pepper is a must. Use a generous amount for a bolder flavor.
- Spice It Up (Optional): Want a touch of extra flavor? A sprinkle of garlic powder, onion powder, paprika, or even a pinch of chili flakes can add a kick.
And here's a crucial step: pat your steak dry with paper towels. You want to remove any excess moisture, which can create steam in the pan and prevent that coveted crispy crust.
Part 3: The Pan Choice: Finding Your Culinary Champion
Not all pans are created equal, especially when it comes to steak. Choosing the right pan can make or break your cooking experience. Let's find your perfect match.
Cast Iron: The King of the Kitchen
Cast iron is my go-to. It's a beast of a pan that retains heat like no other, giving you that intensely even sear that's the hallmark of a truly excellent steak. Plus, with proper care, it's practically indestructible, making it a loyal companion in your kitchen for years to come.
Stainless Steel: A Solid Choice
Stainless steel is a reliable workhorse. It distributes heat well and is generally easier to clean than cast iron. Just make sure to choose a pan with a thick base to ensure even heating.
Non-Stick: A Backup Option
non-stick pans are good for keeping things from sticking, but they don't hold heat as well as cast iron or stainless steel. If you're using non-stick, preheat it thoroughly before adding your steak.
The Oil Factor: A Vital Partner
No matter your pan choice, you'll need a good oil to help create that beautiful sear. Choose an oil with a high smoke point, meaning it can withstand high heat without burning.
- avocado oil: It's neutral in flavor and holds up well at high temperatures.
- Grapeseed Oil: Similar to avocado oil, it's perfect for searing.
- canola oil: Another popular choice with a high smoke point.
Avoid olive oil or butter for searing. They have low smoke points and will start to burn before your steak is ready.
Part 4: The Sizzle: mastering the sear
This is where the magic happens, the moment where you transform your steak from a simple slab of meat into a culinary masterpiece. It's all about high heat, patience, and letting the steak do its thing.
Heat It Up: The Importance of High Heat
Get that pan scorching hot. We're talking the kind of heat that makes you want to wear oven mitts just to stand near it. If your stove has multiple heat settings, use the highest one.
Adding the Oil: Letting it Get Hot
Once the pan is smoking hot, add a thin layer of your chosen oil. Let it heat up for a minute or two so it's ready to work its magic on your steak.
The First Impression: Creating the Crust
Carefully place your steak in the pan. Make sure to give it some space, don't overcrowd the pan. Let it sit undisturbed for 2-3 minutes. This is the crucial step for creating that beautiful, flavorful crust. Don't touch it, just let it sear in peace.
Flipping It Right: Timing is Key
You'll know it's time to flip when you can easily lift the steak and a nice crust has formed. The bottom should be a lovely, golden brown. Flip it over and repeat the process, searing the other side for another 2-3 minutes.
Resist the Flipping Frenzy: Patience is a Virtue
Don't get trigger-happy with the flipping. Every time you flip the steak, you interrupt the searing process and risk losing that perfectly formed crust. Be patient and let it cook undisturbed. We're aiming for a symphony of textures, not a chaotic flip-fest.
Part 5: Cooking Through: Knowing Your internal temperature
You've got that gorgeous crust, now it's time to cook the steak through to your desired doneness. This is where a meat thermometer becomes your best friend. Don't rely solely on visual cues, trust the science.
The Meat Thermometer: Your Culinary Compass
A meat thermometer is the only way to guarantee a perfectly cooked steak. There are various types available, but I prefer the instant-read ones. They're quick, easy to use, and give you a precise reading.
Internal Temperatures: A Guide to Doneness
Here's a handy table to guide you on the internal temperatures for different levels of doneness:
| Doneness | Internal Temperature (°F) |
|---|---|
| Rare | 125-130°F |
| Medium Rare | 130-135°F |
| Medium | 140-145°F |
| Medium Well | 150-155°F |
| Well Done | 160°F and above |
Remember, these are just guidelines. Don't be afraid to experiment and find what you like best.
The Resting Ritual: Letting the Steak Relax
Once your steak reaches the desired internal temperature, take it off the heat and let it rest for 5-10 minutes. This might sound like a waste of time, but it's essential for achieving a tender, juicy steak. While it rests, the juices redistribute, preventing them from running out when you slice it.
Part 6: The Finishing Touches: Adding Flavor and Texture
Okay, your steak is cooked, it's rested, and it's ready for its grand finale. These finishing touches will take it from good to truly exceptional.
Butter Magic: The Melting Delight
Nothing elevates a steak like a knob of butter melting over it. As your steak rests, add a tablespoon or two of butter to the pan. Let it melt and then spoon it generously over the steak. For an extra boost of flavor, add some herbs like rosemary, thyme, or sage to the butter while it melts.
Garlic Infusion: A Flavor Bombshell
Feeling adventurous? Add a few cloves of garlic to the pan with the butter. Let them sizzle until fragrant, then spoon that garlic-infused butter over your steak. It's a simple touch that makes a big difference.
The Sauce Factor: Elevating Your Steak
A simple sauce can elevate your steak to new heights. You can go classic with a red wine sauce, or get creative with a chimichurri, béarnaise, or even a simple herb vinaigrette. The options are endless, so experiment and find your perfect pairing.
Part 7: The Side Show: A Symphony of Flavors
You've got your star, the perfectly cooked steak, but let's not forget the supporting cast. A good side dish can create a balanced, satisfying meal.
Classic Choices: The Tried and True
- mashed potatoes: A timeless classic that complements the richness of the steak.
- Roasted Vegetables: Broccoli, asparagus, Brussels sprouts - the options are endless! They add freshness and a touch of sweetness.
- Green Salad: A simple green salad with a light vinaigrette helps cut through the richness of the steak.
Go Bold: Stepping Outside the Box
- Mac and Cheese: Creamy, comforting, and absolutely delicious with steak.
- grilled corn on the Cob: The sweetness of the corn and the smoky flavor of the grill make for a delightful pairing.
Remember, balance is key! Choose side dishes that complement your steak without overwhelming it.
Part 8: The Resting Ritual: Letting it Cool Down
You've poured your heart (and soul) into this steak, now it's time to enjoy the fruits of your labor. But hold your horses! Don't dive right in. Let that steak rest for a few minutes. This final step is crucial for ensuring a tender, juicy, and flavorful outcome.
The Resting Process: Patience Pays Off
Once your steak is off the heat, transfer it to a cutting board. Cover it loosely with foil and let it sit for 5-10 minutes. Don't be tempted to cut into it prematurely!
The Cutting Ceremony: Slicing It Right
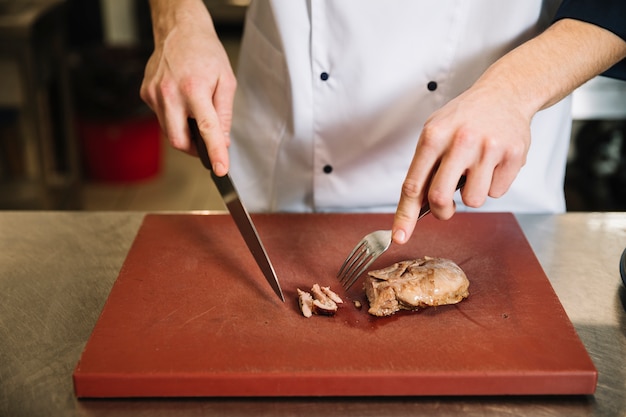
After resting, slice your steak against the grain. This means slicing perpendicular to the muscle fibers, making the meat tender and easier to chew.
Part 9: The Aftermath: Cleaning Up Like a Pro
Your steak masterpiece is on your plate, now it's time to clean up the battlefield. Don't let the mess intimidate you, a little post-dinner clean-up is part of the process.
The Cast Iron Conundrum: No Soap Required
If you used cast iron, let the pan cool slightly, then scrub it with hot water and a good quality chain mail scrubber. No soap needed! Cast iron is best cleaned with just water and a little elbow grease.
Other Pan Types: Soap It Up
For stainless steel or non-stick pans, use hot water and your favorite dish soap. Avoid harsh abrasives as they can damage the surface.
The Final Touch: Drying for Longevity
Once your pan is sparkling clean, dry it thoroughly. This helps prevent rusting and ensures it stays in tip-top shape for your next culinary adventure.
Part 10: FAQs: Your Steak-Related Questions Answered
1. How can I tell if my steak is cooked to my desired doneness?
The best way is to use a meat thermometer. Insert it into the thickest part of the steak and check the internal temperature. You can also use visual cues, but they're not always reliable. Rare will be a bright red, medium rare will have a touch of pink, medium will be mostly brown with a little pink, medium well will have very little pink, and well done will be completely brown.
2. What if I overcook my steak?
It happens to the best of us! If you've overcooked your steak, don't despair. Slice it thinly and serve it on a sandwich or use it in a salad. It's not ideal, but it's still edible.
3. How do I make a good steak sauce?
A good steak sauce is a matter of personal preference. You can make a simple sauce with butter, herbs, and garlic. Or, you can get more complex with a red wine reduction or a chimichurri. There are countless recipes online, so experiment and find your favourite.
4. What's the best way to store leftover steak?
Leftover steak should be stored in an airtight container in the refrigerator for up to 3-4 days. It can also be frozen for up to 2-3 months.
5. Can I cook steak in the oven?
Absolutely! oven-cooked steak is a great option if you're cooking for a large crowd. Preheat your oven to 400°F (200°C), season your steak, and place it on a baking sheet. Cook for 10-15 minutes for medium-rare, or until it reaches your desired temperature.
There you have it, my friends. The ultimate guide to conquering the stovetop steak. So, go forth, choose your cut, grab your pan, and get cooking! You've got this.
Everyone is watching

Prime Rib Roast Cooking Time Chart: Per Pound Guide
Cooking TipsPrime rib roast. Just the name conjures images of lavish dinners, crackling fires, and hearty laughter. It’s ...

How Long to Bake Potatoes in the Oven (Perfect Every Time)
Cooking TipsBaked potatoes are a staple in my kitchen. They're incredibly versatile, delicious, and surprisingly easy to m...

Perfect Rice Every Time: The Ultimate Guide to Cooking Rice
Cooking TipsAs a self-proclaimed foodie, I've always been a bit obsessed with rice. It's the foundation of countless cuisi...

The Ultimate Guide to Cooking Asparagus: Tips, Techniques, and Recipes
Cooking TipsAsparagus. The mere mention of this spring delicacy conjures up images of vibrant green spears, crisp and burs...

Ultimate Guide to Cooking the Perfect Thanksgiving Turkey
Cooking TipsThanksgiving. Just the word conjures up images of overflowing tables laden with delicious food, the scent of r...