Let's be honest, we've all been there. You're craving a simple, satisfying snack, and a hard-boiled egg seems like the perfect answer. But then, you end up with a rubbery yolk or a green ring around it, and your egg-cellent plans are ruined! I've been there too, countless times. But over the years, through trial and error (and a lot of peeling frustration!), I've finally cracked the code (pun intended!) to consistently perfect hard-boiled eggs. So, grab your favourite egg-cellent companion (a trusty saucepan, maybe?), because we're about to embark on a culinary adventure together.
(Part 1) The Foundation: choosing the right eggs
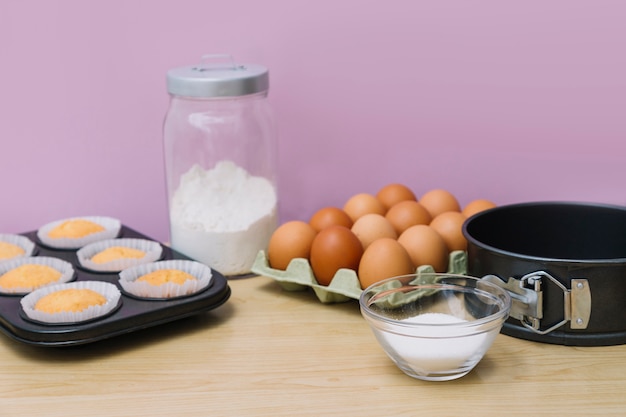
The journey to a perfect hard-boiled egg begins with choosing the right ingredients. Believe me, not all eggs are created equal, and the right choice can make a world of difference in the final product. It's like starting with a good foundation for a sturdy house - you can't build a masterpiece without quality building blocks.
The Egg-cellent Variety: Free-Range vs. Barn Eggs
You'll mainly find two types of eggs at the supermarket:
- free-range eggs: These eggs are laid by hens that have access to the outdoors and can roam freely. They're generally considered to have a richer flavour and a stronger yolk colour. They tend to be a bit more expensive, but personally, I think they're worth it for that extra taste and quality. You can often tell free-range eggs by their slightly brown shell color, a testament to the hens' natural diet.
- Barn Eggs: These hens are kept indoors, but they usually have more space than caged hens. They're a good option if you're looking for a balance between price and quality, as they offer a good middle ground between free-range and caged eggs.
I usually opt for free-range eggs because I love that extra flavour, but ultimately, it's your call. Experiment with different types to see what you prefer. You might even find a local farm that offers unique breeds or organic eggs for an even more special egg experience!
The Egg-ceptional Size Matters: Medium is My Favourite
The size of the egg also plays a role in how long it takes to cook. Larger eggs take longer to cook through, so keep that in mind when adjusting your cooking time. I find that medium-sized eggs are the perfect size for hard-boiling, as they're not too small or too big. Plus, they're usually the most readily available, so you can easily grab a carton without having to search for specific sizes.
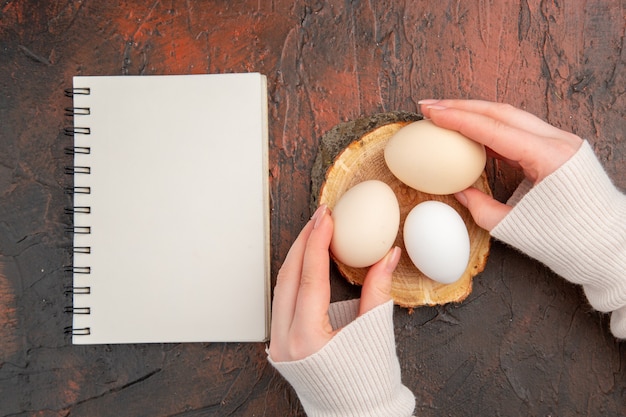
The Egg-sperts' Tip: The "Float Test" for Freshness
To make sure your eggs are fresh, give them a little "float test." Gently place an egg in a bowl of cold water. If it sinks to the bottom and lays flat, it's fresh. If it stands upright, it's a bit older but still good to eat. If it floats, it's best to toss it out, as it's likely gone bad. The air pocket inside the egg will expand as it ages, causing it to float.
(Part 2) The Preparation: Getting Your Eggs Ready
Now that you've chosen your eggs, it's time to get them ready for their transformation into hard-boiled perfection. This part is crucial, as it sets the stage for a smooth and successful cooking process. Think of it as prepping your canvas before starting a masterpiece - a little care in the beginning makes a big difference in the end result.
The Egg-quisite Cleaning: Leave the Bloom Alone!
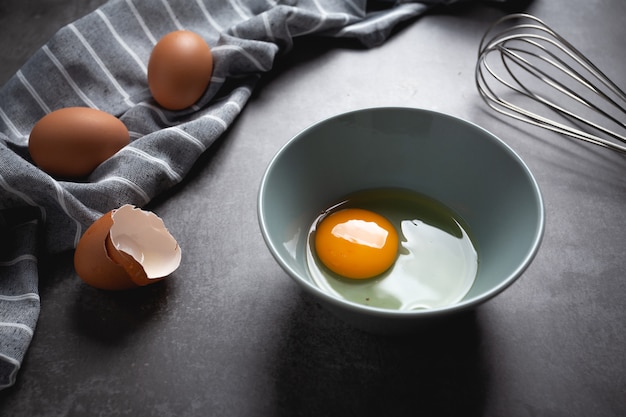
Some people swear by washing their eggs before boiling, but I'm a firm believer in leaving the protective coating on. That thin layer of bloom, called the cuticle, helps keep the egg fresh and prevents water from seeping in during cooking, which can result in those pesky green rings we talked about. The cuticle acts as a natural barrier, keeping the egg safe and fresh. If you're really concerned about any dirt, give them a gentle wipe with a damp cloth.
The Egg-cellent Soak: A Little Cold Water Magic
Next, I like to give my eggs a good soak in cold water for about 15 minutes before cooking. This helps ensure that the eggs cook evenly and prevents cracks. You'll thank me later when you're peeling those perfect, crack-free eggs! The cold water helps stabilize the temperature of the egg, making it less susceptible to cracking during the heat shock of boiling.
The Egg-xtra Tip: Adding Salt for Shell Strength
If you're worried about cracks, add a teaspoon of salt to the water. The salt helps to strengthen the egg's shell and make it less likely to crack during cooking. This is a great trick for those who have a tendency to crack their eggs while boiling. The salt acts as a binder, strengthening the shell structure.
(Part 3) The Cooking: Mastering the Art of Boiling
Now comes the exciting part – actually cooking the eggs! This is where the real magic happens, and with the right techniques, you'll be a hard-boiled egg pro in no time. Remember, it's all about gentle, consistent heat for the perfect egg.
The Egg-cellent Technique: The Gentle Simmer Method
The key to perfect hard-boiled eggs is to cook them gently and consistently. That's why I recommend using a large saucepan with enough space for the eggs to move freely. Fill the pan with cold water, making sure the eggs are completely submerged, and bring the water to a boil. Once the water boils, immediately remove the pan from the heat and cover it with a lid. This is called "simmering," and it's the best way to cook eggs without overcooking them. This gentle simmering allows for even heat distribution and prevents the eggs from getting too hot too quickly, which can lead to rubbery yolks.
The Egg-cellent Timing: Finding Your Perfect Yolk
The cooking time depends on how hard you want your yolks. I prefer mine firm, with a slight give, which takes about 10-12 minutes. Here's a handy chart to help you determine the perfect cooking time for your preferred yolk consistency:
| Yolk Consistency | Cooking Time |
|---|---|
| Soft-Boiled | 3-4 minutes |
| Medium-Boiled | 6-7 minutes |
| Hard-Boiled | 10-12 minutes |
| Very Hard-Boiled | 15-18 minutes |
Remember, these are just guidelines. The exact cooking time will depend on the size of your eggs and the heat of your stove. If you're unsure, start with the shorter end of the range and check the egg's consistency after the minimum time. You can do this by carefully cracking open an egg and examining the yolk. It's better to slightly undercook than overcook, as you can always cook it a little longer if needed.
The Egg-xtra Tip: Vinegar for Smooth Yolks
For perfectly smooth yolks, you can add a tablespoon of white vinegar to the boiling water. The acid in the vinegar helps to prevent the yolks from turning green, but it can also make the eggs a bit easier to peel. This is especially useful for older eggs, as the vinegar helps to loosen the shell. However, some people find that vinegar can affect the flavour of the egg, so it's up to you to decide if you want to use it.
(Part 4) The Cooling: Bringing the Heat Down
After the simmering is done, it's time to cool those eggs down. This step might seem insignificant, but it's actually crucial for creating a perfect hard-boiled egg. This step helps to stop the cooking process and makes the eggs easier to peel.
The Egg-cellent Method: A Cold water bath for Smooth Peeling
Immediately after removing the pan from the heat, drain the hot water and replace it with cold water. You can even add a few ice cubes for extra cooling power. Let the eggs sit in the cold water for about 10 minutes. This sudden temperature change helps to shock the egg and make the shell easier to peel. It also prevents the yolk from continuing to cook, resulting in a smoother texture.
The Egg-xtra Tip: Tapping for Easy Peeling
For super-easy peeling, gently tap each egg against a hard surface, like the counter. This creates small cracks in the shell that help release the air trapped inside and make peeling a breeze. Trust me, it's a game-changer! The air pocket inside the egg expands during cooking, so releasing it makes peeling much smoother.
(Part 5) The Peeling: Unveiling the Perfect Egg
The moment of truth! After all that hard work, it's time to unveil our masterpiece – a perfectly hard-boiled egg, ready to be enjoyed. This is where all your hard work comes together, and you can finally enjoy the fruits of your labor (or should I say, eggs?).
The Egg-ceptional Technique: Gently Roll and Crack
Start by gently rolling the egg between your hands to loosen the shell. Then, tap the wider end of the egg against a hard surface to create a small crack. Peel the shell away from the crack, starting from the top and working your way down. If the shell is still sticking, you can try gently running the egg under cool water to help loosen it.
The Egg-xtra Tips: Tools and Techniques for Smooth Peeling
- Use a spoon to help you peel: Gently insert the edge of a spoon under the shell and pry it off. This is especially helpful for stubborn shells.
- Peel under running water: If the egg is sticking to the shell, try peeling it under running water. The water helps loosen the shell and makes peeling easier. This is a classic technique, as the water creates a slight pressure that helps to separate the shell from the egg white.
- Don't be afraid to get your hands dirty! Sometimes the best way to peel an egg is simply to peel it with your fingers. This is especially true for older eggs, as the shell tends to be more brittle. Use a gentle touch and your fingers will guide you to a smooth peel.
With a little patience and practice, you'll be able to peel those eggs like a pro in no time. You'll be the envy of your family and friends, who will be amazed at your egg-cellent peeling skills!
(Part 6) The Storage: Keeping Your Eggs Fresh
You've successfully created a batch of perfectly hard-boiled eggs, but now what? Storing them correctly is important to keep them fresh and delicious. Proper storage is key to preserving the quality and flavour of your hard-boiled eggs, so they're ready to eat whenever you crave them.
The Egg-cellent Method: Refrigerator for Maximum Freshness
The best way to store hard-boiled eggs is in the refrigerator. Simply place them in an airtight container or wrap them individually in plastic wrap. They should stay fresh for up to a week in the fridge. This prevents them from drying out and absorbing flavours from other foods in the fridge.
The Egg-xtra Tip: Avoid Over-Soaking for Fresh Whites
To prevent the whites from becoming rubbery, don't leave hard-boiled eggs in the water for too long. Immediately transfer them to the fridge after cooling. The longer the eggs stay in the water, the more moisture they will absorb, which can make the whites rubbery.
(Part 7) The Creativity: Beyond the Basic
Okay, so you've mastered the art of the perfect hard-boiled egg. Now, it's time to have some fun! There are countless ways to enjoy this versatile ingredient, from simple snacks to gourmet dishes. Let your imagination run wild and experiment with different flavors and textures.
The Egg-cellent Snacks: Simple Yet Delicious
- deviled eggs: A classic for a reason! These little bites are always a crowd-pleaser, perfect for potlucks, parties, or a simple afternoon snack. The creamy, tangy filling is irresistible.
- egg salad Sandwiches: Perfect for a quick lunch or light dinner. The creamy egg salad is a comforting and satisfying classic.
- Egg and Pickle Salad: A refreshing and flavourful salad that's perfect for spring and summer. The combination of the creamy eggs and tangy pickles is a delightful combination.
The Egg-quisite Main Courses: From Simple to Elegant
- Egg fried rice: A quick and easy meal that's always a hit. The combination of fluffy rice, savory eggs, and your favorite vegetables is a comforting and satisfying meal.
- Egg Curry: A flavourful and aromatic dish that's perfect for a cold day. The creamy curry sauce with perfectly cooked eggs is a warm and comforting meal.
- Eggs Benedict: A classic brunch dish that's both delicious and impressive. The poached eggs on english muffins with hollandaise sauce is a decadent and satisfying brunch treat.
The Egg-ceptional Desserts: Sweet and Savory
Don't think hard-boiled eggs are just for savoury dishes! You can even use them in desserts:
- Meringue Pie: Hard-boiled egg whites are a key ingredient in this classic dessert. The meringue topping is light and airy, adding a delightful texture to the pie filling.
- Egg Custard: A simple and comforting dessert that's always a crowd-pleaser. The creamy custard with a hint of vanilla is a comforting and nostalgic dessert.
(Part 8) The FAQs: Your Hard-Boiled Egg Questions Answered
You've been through the entire guide, but maybe you still have some lingering questions. No worries, I've got you covered. Here are some of the most frequently asked questions about hard-boiled eggs, answered in my own words, of course!
1. Why do my hard-boiled eggs have a green ring around the yolk?
That green ring is caused by a chemical reaction that happens when the egg is overcooked. The iron in the yolk reacts with the sulfur in the white, creating ferrous sulfide, which gives the yolk that green tinge. To avoid this, make sure you don't overcook your eggs. Cook them according to the chart I provided, and you should be good to go! The key is to use gentle heat and prevent the egg from getting too hot too quickly.
2. Why are my hard-boiled eggs rubbery?
Rubbery yolks are usually a sign of overcooked eggs. Make sure you follow the recommended cooking times and cool the eggs down properly. Don't worry, with practice, you'll get the hang of it! Overcooking is the biggest culprit for rubbery yolks, so try to stick to the recommended cooking times and use gentle heat.
3. How can I tell if a hard-boiled egg is bad?
If the egg smells bad, looks slimy, or has any discolouration, it's best to throw it out. It's always better to be safe than sorry! Look for any signs of spoilage, such as a foul odor, a slimy texture, or a change in color. If you see any of these signs, it's best to discard the egg.
4. How long do hard-boiled eggs last in the fridge?
Hard-boiled eggs can last in the fridge for up to a week if stored properly. Just make sure they are stored in an airtight container or wrapped in plastic wrap. Proper storage is essential for maintaining freshness and preventing spoilage.
5. What's the best way to use leftover hard-boiled eggs?
There are tons of ways to use leftover hard-boiled eggs! You can chop them up and add them to salads, sandwiches, or pasta dishes. You can also use them to make deviled eggs, egg salad, or even egg fried rice. Get creative and experiment with different flavor combinations to find your favorite ways to use up leftover hard-boiled eggs.
And there you have it – the ultimate guide to perfect hard-boiled eggs every time. Now, go forth and conquer the world of egg-cellence! With a little practice and these simple tips, you'll be able to make perfect hard-boiled eggs every time. Enjoy!
Everyone is watching

Prime Rib Roast Cooking Time Chart: Per Pound Guide
Cooking TipsPrime rib roast. Just the name conjures images of lavish dinners, crackling fires, and hearty laughter. It’s ...

How Long to Bake Potatoes in the Oven (Perfect Every Time)
Cooking TipsBaked potatoes are a staple in my kitchen. They're incredibly versatile, delicious, and surprisingly easy to m...

Perfect Rice Every Time: The Ultimate Guide to Cooking Rice
Cooking TipsAs a self-proclaimed foodie, I've always been a bit obsessed with rice. It's the foundation of countless cuisi...

The Ultimate Guide to Cooking Asparagus: Tips, Techniques, and Recipes
Cooking TipsAsparagus. The mere mention of this spring delicacy conjures up images of vibrant green spears, crisp and burs...

Ultimate Guide to Cooking the Perfect Thanksgiving Turkey
Cooking TipsThanksgiving. Just the word conjures up images of overflowing tables laden with delicious food, the scent of r...