Let's be honest, the mere mention of "corned beef brisket" can be a bit daunting. It's often associated with long cooking times, a seemingly endless list of steps, and the potential for dryness. But trust me, this oven-roasted method transforms the humble brisket into a culinary masterpiece. We're talking about a dish that's not just satisfying but truly memorable. It's the kind of meal that makes you feel like you've achieved something special in the kitchen, and the kind of dish that brings people together. So, grab a mug of your favourite brew, put on some tunes, and let's embark on this delicious journey together.
(Part 1) Choosing the perfect brisket

The first step, and arguably the most important, is choosing the right brisket. It's like choosing the right tool for the job – you want one that's up to the task. Now, when it comes to brisket, there's more than meets the eye. You've got your flat cuts, your point cuts, and then there's the whole "packer" deal. Let's break it down:
Flat Cut: Lean and Clean
The flat cut is, as the name suggests, flatter and leaner than its point counterpart. It's a great choice for those who prefer a less fatty cut, and it's generally easier to slice neatly. However, it can be a bit on the dry side if you're not careful. So, if you go for a flat cut, be prepared to give it some extra TLC, perhaps with a good braising liquid or a bit of fat back.
Point Cut: The Juicy King
The point cut, on the other hand, is the more marbled option. It's got that beautiful fat cap that melts down during cooking, giving you all that juicy, succulent goodness. The downside? It can be a bit more challenging to slice, but hey, you can always just use a fork!
The "Packer": The Best of Both Worlds
Now, the "packer" is a bit of a mystery to some. It's essentially the whole brisket, the point and flat cut joined together. Think of it as the best of both worlds – tender, juicy, and brimming with flavour. It's also a bigger commitment, but I assure you, it's well worth it.
My Personal Preference
Personally, I tend to gravitate towards the "packer" more often than not. It's like getting two briskets for the price of one, and that fat cap from the point truly makes a difference. Plus, let's be real, it's just fun to say "packer brisket."
(Part 2) Prepping for the Roast: Brining and Rubbing

So, you've got your brisket. Now what? Time to get those pre-roasting rituals underway.
The Brine: A Flavorful Soak
Think of brining as a spa day for your brisket, a chance for it to soak up a ton of flavour and moisture. There are loads of recipes out there, but my go-to is a simple, straightforward brine that delivers big results.
Ingredients:
1 cup kosher salt
1 cup brown sugar
1 teaspoon black peppercorns
1 bay leaf
1 gallon water
Instructions:
1. Combine all the ingredients in a large bowl, then add the brisket, ensuring it's completely submerged.
2. Refrigerate for at least 4 hours, or up to 24 hours. This is where patience plays a key role. The longer your brisket chills in the brine, the more flavor it will absorb.
The Rub: A Personalized Touch
Next up, the rub. This is where you get to really personalize your brisket, letting your creative juices flow. Feel free to experiment! I prefer to keep things simple with a classic rub that packs a punch.
Ingredients:
2 tablespoons paprika
1 tablespoon garlic powder
1 tablespoon onion powder
1 tablespoon black pepper
1 tablespoon brown sugar
Instructions:
1. Mix all the ingredients together.
2. Rub it liberally all over your brisket, ensuring you get into all those nooks and crannies, as that's where the real flavour magic happens.
(Part 3) The Oven-Roast: Slow and Steady Wins the Race

Now it's time for the main event. Get ready to watch your brisket transform into a culinary masterpiece.
Preheating Your Oven: The Foundation for Success
Start by preheating your oven to 325 degrees Fahrenheit (160 degrees Celsius). You want a consistent, gentle heat for a long, slow roast. No need to rush things, remember – we're going for tender, juicy, and flavour-packed perfection.
Getting Started: Setting the Stage for a Great Roast
Place your brisket in a large roasting pan. Now, here's a little secret: I like to add a bit of water to the bottom of the pan. This helps to create steam, which keeps the brisket moist and prevents it from drying out.
The Long Wait: Patience is Your Friend
Now comes the part where patience truly shines. You're going to roast your brisket for 4 to 5 hours, or until it's fork-tender. Yes, you read that right: 4 to 5 hours. But trust me, it's worth the wait. During this time, check the brisket every hour or so, adding more water if needed to ensure it stays moist and doesn't dry out.
(Part 4) The Resting Period: Time for the Juices to Settle
Okay, so your brisket has spent hours in the oven, and it smells absolutely divine. But hold your horses! Before you slice into that beautiful meat, you need to give it a good rest. This is essential for allowing the juices to redistribute, ensuring your brisket remains incredibly tender.
Why Resting Matters: A Crucial Step for Tenderness
Think of it this way: when you cook meat, the juices get pushed towards the outside. By letting it rest, you allow those juices to settle back in, making your brisket incredibly moist and flavourful.
Resting Time: Patience Pays Off Again
Cover your brisket tightly with foil and let it rest for at least 30 minutes. While it's resting, you can start prepping your side dishes. You can't go wrong with mashed potatoes, baked beans, or even a simple green salad.
(Part 5) Slicing and Serving: The Moment of Truth
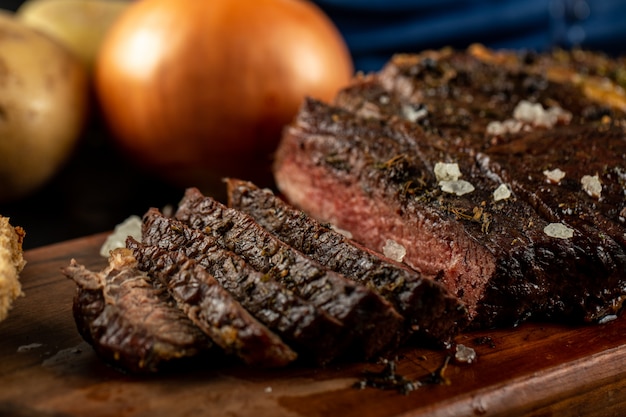
The moment of truth is here! Time to slice up that glorious brisket and get ready to feast.
Slicing Skills: The Art of the Perfect Cut
Use a sharp knife to slice your brisket against the grain. This will ensure that it's easy to chew and melts in your mouth. Now, if you're working with a "packer" brisket, you'll want to separate the flat and the point before slicing.
Serving it Up: A Feast for the Senses
Once your brisket is sliced, serve it however you like. I love to pile it high on a platter with a generous dollop of horseradish sauce, a sprinkle of fresh parsley, and a side of your favourite accompaniments.
(Part 6) Tips and Tricks: Making Your Brisket Extra Special
I've shared my favourite ways to cook a brisket, but let's delve into some extra tips and tricks to elevate your experience even further.
Temperature Check: Ensuring Perfect Doneness
When roasting your brisket, it's crucial to check the temperature regularly. You want the internal temperature to reach 190 degrees Fahrenheit (90 degrees Celsius) for the most tender and delicious result. You can use a meat thermometer to check the temperature without having to cut into the brisket.
Adding Flavor: Taking Your Brisket to the Next Level
If you're looking to add extra flavour, consider incorporating vegetables into your roasting pan. Onions, carrots, and celery are excellent choices, adding a beautiful depth of flavour to your dish. Plus, you'll have delicious roasted vegetables to serve alongside your brisket.
Leftover Magic: Transforming Leftovers into New Delights
Now, let's be real, a brisket is a lot of food. There's a good chance you'll have leftovers. But don't worry, you can easily transform them into delicious meals! Here are a few ideas:
Brisket Sandwiches: Slice the brisket thinly and pile it high on a toasted roll with your favourite toppings.
Brisket Hash: Dice the brisket and fry it with potatoes, onions, and peppers.
Brisket Soup: Make a hearty soup with your leftover brisket, vegetables, and broth.
(Part 7) FAQs: Answering Your Burning Questions
1. What if my brisket isn't tender enough?
If your brisket isn't tender enough, it probably wasn't cooked long enough. Don't worry, it happens. Simply put it back in the oven for another hour or two until it reaches that desired tenderness.
2. Can I cook the brisket in a slow cooker?
Absolutely! A slow cooker is a great option for cooking brisket. Just follow the same general instructions as for oven roasting, but adjust the cooking time. You'll likely need to cook it on low for 8 to 10 hours.
3. How can I tell if my brisket is done?
Check the internal temperature. It should reach 190 degrees Fahrenheit (90 degrees Celsius). You can also test for tenderness by poking the brisket with a fork. It should be easy to insert the fork, and the meat should pull apart easily.
4. How long does corned beef brisket last in the fridge?
Corned beef brisket will last in the fridge for up to 3 to 4 days. Be sure to store it in an airtight container.
5. What are some other ways to cook corned beef brisket?
You can also cook corned beef brisket in a pressure cooker, on the stovetop, or even on the grill. Just be sure to follow the instructions carefully and adjust the cooking time as needed.
(Part 8) My Final Thoughts: A culinary adventure Worth Taking
There you have it, your ultimate guide to oven-roasted corned beef brisket. It's a journey, but one that's well worth the effort. From choosing the right cut to the long, slow roast, each step is a chance to create something truly special. And when you finally get to savor that melt-in-your-mouth tenderness, you'll be glad you took the time to do it right. So, go forth and conquer the brisket. And remember, if you're ever feeling lost or overwhelmed, just remember: I've got your back. Now, go forth and make some culinary magic!
Everyone is watching

Prime Rib Roast Cooking Time Chart: Per Pound Guide
Cooking TipsPrime rib roast. Just the name conjures images of lavish dinners, crackling fires, and hearty laughter. It’s ...

How Long to Bake Potatoes in the Oven (Perfect Every Time)
Cooking TipsBaked potatoes are a staple in my kitchen. They're incredibly versatile, delicious, and surprisingly easy to m...

Perfect Rice Every Time: The Ultimate Guide to Cooking Rice
Cooking TipsAs a self-proclaimed foodie, I've always been a bit obsessed with rice. It's the foundation of countless cuisi...

The Ultimate Guide to Cooking Asparagus: Tips, Techniques, and Recipes
Cooking TipsAsparagus. The mere mention of this spring delicacy conjures up images of vibrant green spears, crisp and burs...

Ultimate Guide to Cooking the Perfect Thanksgiving Turkey
Cooking TipsThanksgiving. Just the word conjures up images of overflowing tables laden with delicious food, the scent of r...
