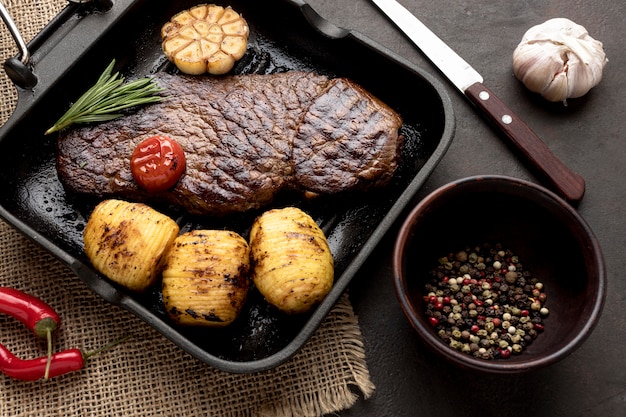
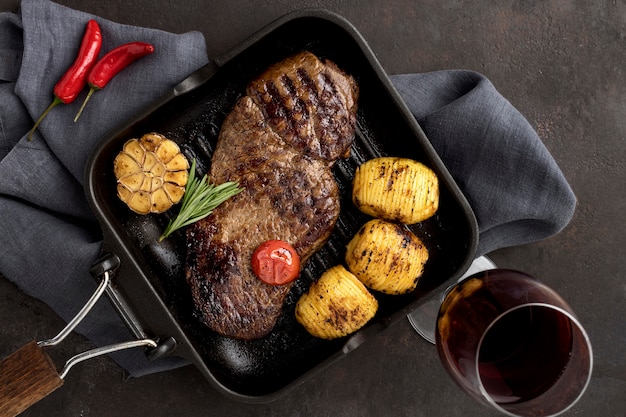
Let's face it, there's something undeniably impressive about a perfectly roasted beef tenderloin. It's a centerpiece that commands attention, a symbol of culinary prowess, and a guarantee of a delicious meal. But let's be real, getting that "perfect" result can feel like a daunting task. I've been there, countless times, staring at a dry, tough, or worse, undercooked piece of meat, wondering where I went wrong.
Over the years, through trial and error (and a lot of delicious, if not quite perfect, meals), I've finally cracked the code. This isn't just a recipe, it's a comprehensive guide, a step-by-step roadmap to oven-roasted beef tenderloin perfection. It's a journey we'll embark on together, from choosing the right cut to understanding the importance of resting, and even mastering the art of making a delicious pan sauce. By the time you're done, you'll be a bona fide beef tenderloin maestro!
(Part 1) Choosing the Right Beef Tenderloin: The Foundation of Success

It's All About the Cut: Tenderloin vs. Sirloin
First things first, let's get the terminology straight. We're talking about beef tenderloin, not sirloin. These are two different cuts with vastly different characteristics. The tenderloin, as the name suggests, is the most tender cut of beef. It's a long, narrow muscle that runs along the backbone of the cow, and it's known for its melt-in-your-mouth texture. You'll typically find it sold as a whole piece, which makes for a stunning presentation, or pre-cut into individual steaks. I prefer the whole piece for that "wow" factor and the satisfaction of carving a beautiful roast.
Getting the Right Size: Feeding a Crowd or a Couple?
The size of the tenderloin you choose depends entirely on your guest list. A 2-3 pound tenderloin is perfect for a dinner party with a handful of friends, while a 4-5 pound beast will feed a larger gathering. Remember, the tenderloin will lose some weight during the cooking process, so factor that in when you're making your selection.
Grading Matters: The Key to Taste and Tenderness
Beef is graded based on its quality, and the grade can significantly affect the taste and tenderness of your tenderloin. Look for a tenderloin graded "Choice" or "Prime" for the best results. Prime is the highest grade, offering the most marbling (intramuscular fat) and resulting in rich flavor and incredible tenderness. However, it's also the pricier option. Choice is a great alternative, offering excellent flavor and tenderness at a more affordable price.
(Part 2) Prepping Your Beef Tenderloin: Unlocking Flavor and Juiciness

Trim the Fat, But Don't Go Crazy: The Art of Balance
Once you've got your beautiful piece of beef tenderloin, it's time to trim it. But hold on! We're not aiming for a completely fat-free experience. A little bit of fat is crucial for adding flavor and keeping the meat juicy during cooking. However, you'll want to trim any excess fat, especially the thick, silvery membrane that runs along the top of the tenderloin. This membrane can be tough, so removing it ensures a more tender final product. A sharp knife or a good pair of kitchen shears will make this job a breeze.
Season It Up: A Flavorful Foundation
This is where you get to unleash your culinary creativity. There's no one-size-fits-all answer here. Experiment and find what you like best. My go-to seasoning is a simple mix of salt, black pepper, and garlic powder. It's classic, it's flavorful, and it never disappoints. But if you're feeling adventurous, try adding smoked paprika for a smoky depth, chili powder for a touch of heat, or even a bit of mustard powder for a tangy twist.
(Part 3) The Crucial First Step: Searing for a Crispy, Flavorful Crust

Why It's So Important: Beyond Just Appearance
Searing is the key to unlocking that beautiful, crispy crust that every good roast beef needs. It's more than just aesthetics, though. Searing is a high-heat process that locks in the moisture and flavor, creating a delicious barrier that prevents the tenderloin from drying out during cooking.
Get Your Pan Hot: The Key to a Successful Sear
You'll need a heavy-bottomed pan, like a cast iron skillet, for this crucial step. Get it screaming hot – we're talking high heat here. Use a good quality oil, like grapeseed or canola, that can handle high temperatures without smoking.
Searing Like a Pro: A Quick and Even Browning
Now, let's get those hands dirty! Carefully place the tenderloin in the hot pan and sear it for a couple of minutes on each side. We're aiming for a nice, even brown crust on all sides. Don't crowd the pan, or you'll lower the temperature and end up with steamed beef, not seared beef.
(Part 4) Roasting to Perfection: The Gentle Art of Cooking
Get the Oven Ready: The Right Temperature Matters
Set your oven to a moderate heat, around 375 degrees Fahrenheit. You want to cook the tenderloin slowly and evenly, not blast it with high heat.
The Roast: Ensuring Even Cooking
Place your seared tenderloin on a roasting rack in a baking dish. The rack allows for even airflow around the meat, ensuring that it cooks evenly on all sides. If you're a stickler for a perfectly golden brown crust, you can use a meat thermometer to check the internal temperature throughout the cooking process.
The Internal Temperature Matters: The Key to Juicy Perfection
This is crucial. You want to cook the tenderloin to an internal temperature of 135 degrees Fahrenheit for medium-rare. This is the sweet spot for maximum tenderness and flavor. Remember, the internal temperature will continue to rise slightly even after you remove the roast from the oven, so pull it out a few degrees below your target.
(Part 5) The Resting Ritual: A Crucial Step Often Overlooked
Why Resting is Crucial: A Chance for Juices to Redistribute
After all that hard work, you'd think it's time to dig in, right? Wrong! Resting the tenderloin for at least 15 minutes is essential. This allows the juices that were pushed to the surface during cooking to redistribute evenly throughout the meat. The result? A super tender, juicy, and flavorful cut of meat.
How to Rest It Properly: A Simple, Yet Essential Step
Cover the roast with foil and let it rest on a cutting board. While you wait, prepare your sides and sauce. Think of this as a final moment of anticipation, a chance for the flavors to meld and the meat to reach its peak of perfection.
(Part 6) Carving Time! A Moment to Show Off Your Skills
The Art of Carving: A Few Tips for Success
Now it's time to showcase those carving skills! Use a sharp carving knife and cut the tenderloin into 1-inch thick slices. If you're feeling fancy, you can arrange the slices in a fan shape on a platter for a stunning presentation.
Don't Forget the Drippings: A Flavor Booster
Those beautiful, rich juices that have collected in the roasting dish are pure gold! Don't waste them. Use a spoon to carefully scoop them out and make a delicious pan sauce.
(Part 7) The Pan Sauce Finale: Elevating Your Roast Beef to New Heights
Adding Depth to the Dish: A Simple Yet Effective Finishing Touch
A good pan sauce is the final touch that elevates your roast beef tenderloin to a whole new level. It adds a burst of flavor and richness, bringing the entire dish together.
The Simple Approach: Easy and Delicious
The easiest way to make a pan sauce is to deglaze the pan with a bit of wine or stock. Bring it to a simmer and whisk in some butter. Season to taste and serve over your slices of tenderloin.
Beyond the Basics: Experimenting with Flavors
For a more complex pan sauce, you can add ingredients like shallots, garlic, herbs, or Dijon mustard. The possibilities are endless, so get creative and experiment with different flavor combinations.
(Part 8) Serving Your Masterpiece: A Feast for the Senses
The Sides: Complementary Flavors and Textures
Roast beef is a versatile dish that pairs well with a variety of sides. Think roasted vegetables like asparagus, Brussels sprouts, or carrots. mashed potatoes provide a creamy counterpoint to the rich meat, while a simple green salad adds a touch of freshness.
The Presentation: Making Your Roast Beef Shine
When it comes to serving your roast beef tenderloin, you want to present it with style. Place the sliced meat on a platter, surround it with your chosen sides, and garnish with fresh herbs like rosemary or thyme for a touch of elegance.
(Part 9) FAQs: Addressing Common Questions and Concerns
1. Can I use a cheaper cut of beef?
While a tenderloin is the best choice for a melt-in-your-mouth roast, you can use other cuts if you're on a budget. A top sirloin or a chuck roast will still turn out tender and delicious if cooked correctly. Just remember that these cuts may require a longer cooking time.
2. What if my tenderloin is overcooked?
Unfortunately, overcooked beef tenderloin can be tough and dry. The best way to prevent this is to use a meat thermometer and cook it to the desired internal temperature. If you do overcook it, try slicing it thinly and using it in a stir-fry or other dish where the texture isn't as critical.
3. How long can I keep leftover roast beef?
Leftover roast beef can be stored in the refrigerator for up to 4 days. It can also be frozen for up to 3 months.
4. Can I roast a tenderloin in a slow cooker?
While you can technically roast a tenderloin in a slow cooker, it's not the best method for getting a crispy crust or a perfect sear.
5. What's the best way to reheat leftover roast beef?
Reheat leftover roast beef in the oven or microwave. Make sure to keep the heat low to prevent it from drying out.
(Part 10) Final Thoughts: A Journey of Culinary Confidence
So there you have it, my ultimate guide to oven-roasted beef tenderloin perfection. It's a journey that requires a bit of effort, a touch of patience, and a whole lot of passion. But the results are worth it. With a little practice, you'll be impressing your guests with the most delicious roast beef tenderloin they've ever tasted. Remember, it's not just about the recipe, it's about the confidence and joy you bring to the table. Now go forth and conquer!
Everyone is watching

Perfect Rice Every Time: The Ultimate Guide to Cooking Rice
Cooking TipsAs a self-proclaimed foodie, I've always been a bit obsessed with rice. It's the foundation of countless cuisi...

Ultimate Guide to Cooking the Perfect Thanksgiving Turkey
Cooking TipsThanksgiving. Just the word conjures up images of overflowing tables laden with delicious food, the scent of r...

The Ultimate Guide to Cooking Asparagus: Tips, Techniques, and Recipes
Cooking TipsAsparagus. The mere mention of this spring delicacy conjures up images of vibrant green spears, crisp and burs...

Can You Cook Spaghetti with Gasoline? (The Shocking Truth)
Cooking TipsWe've all seen those crazy internet trends. You know, the ones that make you wonder, "Did someone actually try...

Chorizo and Eggs Recipe: The Ultimate Guide
Cooking TipsRight, let’s talk about chorizo and eggs. You know, that classic Spanish dish that's always a winner. It's th...
