Let’s be honest, there’s nothing quite like sinking your teeth into a perfectly cooked steak. Juicy, flavorful, and cooked just the way you like it – that’s the dream, right? For years, I’ve been on a mission to conquer the art of oven-baked steak, experimenting with different techniques, cuts, and seasonings. It’s been a delightful journey, filled with both delicious successes and a few, well, let’s call them “learning experiences.”
This guide is my ode to steak perfection, a culmination of everything I’ve learned and a roadmap for you to achieve the same level of succulent satisfaction in your own kitchen.
(Part 1) choosing the right cut
You know the saying, “You can’t make a silk purse out of a sow’s ear?” Well, the same applies to steak. Choosing the right cut is the foundation of a truly delicious experience. It’s like selecting the right canvas for a masterpiece – the right cut will set the stage for a symphony of flavors.
The Classic Cuts:
Rib-eye: Oh, the rib-eye! This is the crowd-pleaser, the rockstar of the steak world. Its rich marbling, like little jewels scattered throughout the meat, creates an incredibly juicy and flavorful experience. The fat melts in your mouth, adding a depth of richness you just can’t resist.
new york strip: If you prefer a leaner option, the New York Strip is your hero. It boasts a nice, even texture and a more pronounced, almost savory flavor. Think of it as the sophisticated steak, perfect for those who want a bit more bite and a touch of elegance.
filet mignon: This is the ultimate in tenderness, a true delicacy. The filet mignon is known for its delicate flavor and melt-in-your-mouth texture, making it a perfect choice for special occasions. It's like the gentle giant of the steak world, luxurious and utterly satisfying.
Beyond the Classics:
Sirloin: Don’t underestimate the sirloin! It’s a budget-friendly option, perfect for weeknight dinners, but don't let that fool you. It can still deliver a satisfying, hearty flavor, especially when cooked right.
flank steak: This is for the adventurous cook. Flank steak is a tougher cut, but with the right treatment, it can be transformed into a culinary masterpiece. It’s perfect for marinating, grilling, or slicing thinly for stir-fries.
Matching the Cut to Your Preferences:
For the ultimate tenderness and juicy indulgence: Rib-eye or filet mignon.
For a leaner option with a satisfying bite: New York strip or sirloin.
For a culinary challenge and a unique flavor experience: Flank steak.
My Personal Pick:
I’m a rib-eye enthusiast. The rich, buttery flavor and melt-in-your-mouth texture just win me over every time. But remember, everyone has their own taste, so don’t be afraid to experiment and discover your own favorites!
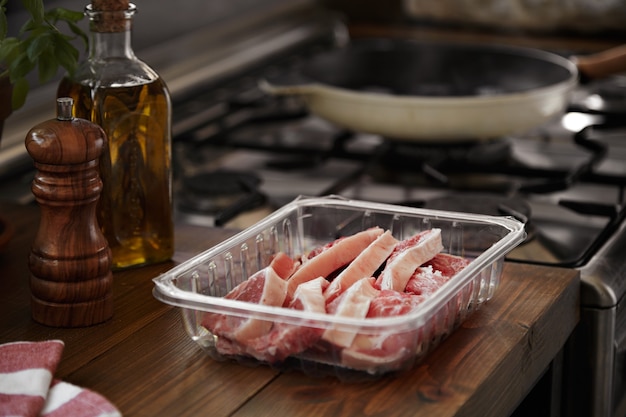
(Part 2) Preparing the Steak
Now that you've chosen your steak, it’s time to prepare it for its culinary debut. This step is crucial, like prepping an artist's canvas – getting it ready to accept the brushstrokes of flavor.
Let it Rest
Just like a painting needs time to dry, your steak needs time to relax before going into the oven. Take it out of the fridge and let it rest at room temperature for about 30 minutes. This allows the steak to cook more evenly, preventing cold spots and ensuring a perfectly cooked center.
Pat it Dry
Patting the steak dry with paper towels is a simple but important step. It helps the steak brown beautifully and prevents steam from forming, which can hinder the development of a crispy crust.
Seasoning: A Symphony of Flavor
This is where you get to express your creativity! Seasoning is your palette to paint a symphony of flavor on your steak.
Simple and Classic: Salt and pepper – it's a classic for a reason. The simplicity allows the natural flavor of the steak to shine through.
Italian Inspiration: Salt, pepper, garlic powder, onion powder, oregano, and a touch of red pepper flakes. This combination adds a fragrant, savory depth with a hint of warmth.
Bold and Spicy: Salt, pepper, paprika, cumin, chili powder, and a sprinkle of cayenne pepper. This blend delivers a bold, fiery punch that will tantalize your taste buds.
Don’t Overdo It:
Remember, the goal is to enhance the natural flavor of the steak, not overwhelm it. Too much seasoning can mask the inherent deliciousness.
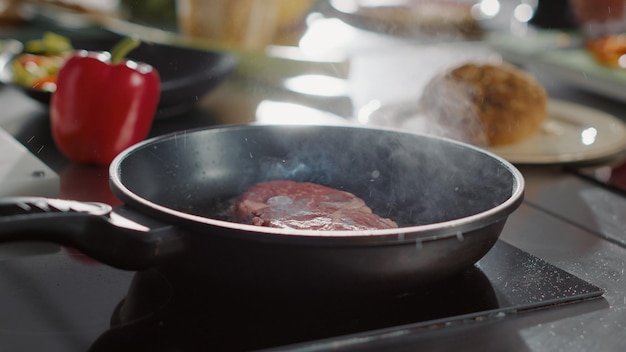
(Part 3) Searing the Steak
Ah, the sear! This is where the real magic happens. A good sear is like a coat of armor, locking in the juices and creating a beautiful, crispy crust that adds another layer of flavor.
The Tools of the Trade:
You'll need a heavy-bottomed skillet or cast-iron pan. These sturdy pans hold heat well, crucial for achieving that perfect, sizzling sear.
The Heat is On:
Heat your pan over medium-high heat. You want the pan to be smoking hot before you add the steak. Think of it as getting a hot iron ready for pressing – it needs the right temperature for the job.
Adding the Steak:
Carefully place the steak in the hot pan, ensuring there’s enough space for it to cook without overcrowding. Let it sear for about 2-3 minutes per side without moving it too much. This allows the steak to develop a beautiful, even crust.
Signs of a perfect sear:
A perfectly seared steak will have a beautiful, dark brown crust on all sides. It should also be firm to the touch.
(Part 4) Baking the Steak
Now that your steak has its beautiful, protective crust, it’s time to finish cooking it in the oven. Baking allows the steak to cook through evenly, preventing the center from becoming dry and ensuring a juicy, tender result.
Preheat Your Oven:
Set your oven to 400°F (200°C) and let it heat up while you're finishing your searing.
Transfer to the Oven:
Carefully transfer the seared steak to a baking sheet. If you want to add some extra richness, you can add a few tablespoons of butter to the baking sheet and baste the steak with it while it cooks.
cooking time:
The baking time will vary depending on the thickness of your steak and your desired level of doneness. Here’s a general guideline:
Rare: 3-4 minutes per side
Medium-rare: 4-5 minutes per side
Medium: 5-6 minutes per side
Medium-well: 6-7 minutes per side
Well-done: 8-9 minutes per side
Don't Forget the Thermometer:
For the most accurate results, use a meat thermometer to ensure your steak is cooked to your liking. Here are the recommended internal temperatures:
Rare: 125°F (52°C)
Medium-rare: 130°F (54°C)
Medium: 140°F (60°C)
Medium-well: 150°F (65°C)
Well-done: 160°F (71°C)
(Part 5) The Importance of Resting
You’ve come so far, but don’t rush to cut into your steak just yet. Resting is a crucial step that ensures juicy, tender results.
Why Rest?
When you cook steak, the juices become trapped inside the meat. Resting allows the juices to redistribute evenly, preventing them from running out when you cut into the steak.
How Long to Rest:
Let your steak rest for 5-10 minutes before slicing and serving. It may seem like a long wait, but trust me, it’s worth it.
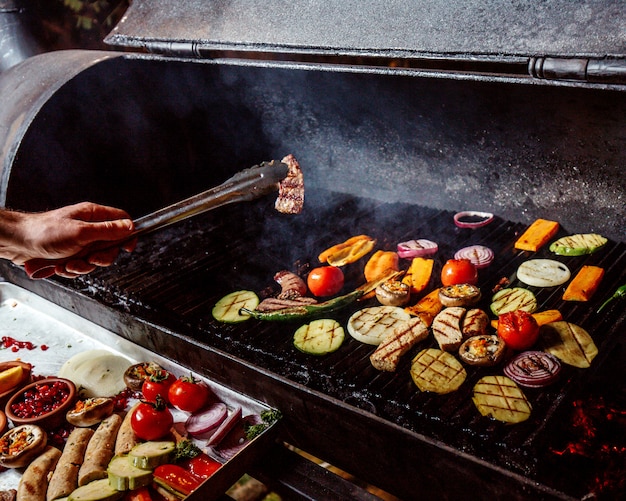
(Part 6) Serving the Steak
The moment has arrived – you’re ready to enjoy the fruits of your labor! Here are some ideas to elevate your steak experience:
Classic: Serve your steak with mashed potatoes, roasted vegetables, and a side of gravy.
Gourmet: Elevate your steak with a creamy mushroom sauce or a tangy chimichurri sauce.
Creative: Get adventurous and try a steak salad with grilled peppers and onions or a steak sandwich with caramelized onions and horseradish sauce.
(Part 7) Avoiding Common Mistakes
Even the most experienced cooks can make mistakes. Here are some common pitfalls to avoid when oven-baking steak:
Overcrowding the Pan:
If you crowd the pan with too much steak, it won't sear properly, and the temperature will drop too much. Make sure there's enough space between the steaks for even browning.
Not Letting the Steak Rest:
Don't skip the resting step! It’s crucial for achieving a juicy and tender result.
Overcooking the Steak:
Overcooked steak is dry and tough. Use a meat thermometer to ensure you cook your steak to your desired level of doneness.
Using the Wrong Equipment:
A good quality skillet or cast-iron pan is essential for achieving a perfect sear.
Not Seasoning Properly:
Don't be afraid to experiment with different seasonings, but remember, less is more.
Not Paying Attention:
cooking steak requires some attention. Keep an eye on your steak and make sure it doesn’t burn!
(Part 8) FAQs
1. Can I use any type of oven for this recipe?
Yes, you can use a conventional oven, a fan oven, or even a gas oven. Just make sure you adjust the cooking time accordingly.
2. What happens if I don't sear the steak before baking it?
Skipping the searing step will result in a less flavorful steak without the crispy crust. It's what locks in the juices and adds that delicious depth of flavor.
3. What should I do if my steak is too thick for the skillet?
If your steak is too thick, you can use a large roasting pan. Just make sure to heat the pan well before adding the steak.
4. Can I marinade the steak before cooking it?
Yes, marinating can add even more flavor to your steak. Experiment with different marinades, but be sure to pat the steak dry before searing.
5. How do I know when the steak is done?
The best way to tell when the steak is done is to use a meat thermometer. You can also check the steak by pressing on it. A rare steak will be soft, a medium-rare steak will be springy, and a well-done steak will be firm.
(Part 9) A Final Bite:
There you have it, my friends – the complete guide to oven-baked steak perfection. From selecting the right cut to mastering the art of seasoning and resting, you now have the tools to create a steak that will impress even the most discerning palate. Remember, practice makes perfect, so don't be afraid to experiment, discover your own preferences, and most importantly, enjoy the process! Happy cooking!
Everyone is watching

Prime Rib Roast Cooking Time Chart: Per Pound Guide
Cooking TipsPrime rib roast. Just the name conjures images of lavish dinners, crackling fires, and hearty laughter. It’s ...

How Long to Bake Potatoes in the Oven (Perfect Every Time)
Cooking TipsBaked potatoes are a staple in my kitchen. They're incredibly versatile, delicious, and surprisingly easy to m...

Perfect Rice Every Time: The Ultimate Guide to Cooking Rice
Cooking TipsAs a self-proclaimed foodie, I've always been a bit obsessed with rice. It's the foundation of countless cuisi...

The Ultimate Guide to Cooking Asparagus: Tips, Techniques, and Recipes
Cooking TipsAsparagus. The mere mention of this spring delicacy conjures up images of vibrant green spears, crisp and burs...

Ultimate Guide to Cooking the Perfect Thanksgiving Turkey
Cooking TipsThanksgiving. Just the word conjures up images of overflowing tables laden with delicious food, the scent of r...