(Part 1) Choosing the Right Cut of Ribs
What are Spare Ribs?
Let's start with the basics. Spare ribs, also known as "St. Louis-style" ribs, are the most popular choice for home cooks. They come from the belly of the pig and are typically cut into slabs about 2-3 inches thick. These ribs have a good amount of fat marbling, which is crucial for their rich flavor and tenderness. Think of it as the secret ingredient to melt-in-your-mouth magic.
Why Spare Ribs?
Now, you might be thinking, "What about baby back ribs?" Those are popular too, but they tend to be a bit more expensive and can be a bit drier. Don't get me wrong, baby back ribs can be delicious, but for the average home cook, spare ribs are the way to go. They're more forgiving, and with a little bit of know-how, you can get a fantastic result.
What to Look for
When choosing your ribs, look for slabs that are well-marbled. The fat will render down during cooking, adding moisture and flavor. Imagine it like a built-in self-basting system. Also, avoid ribs that are too thin or too thick. You want a slab that's about 2-3 inches thick so that it cooks evenly.
Don't be afraid to ask your butcher for advice. They can point you towards the best cuts and help you choose the right size for your needs. They're the experts, after all.
(Part 2) Preparing the Ribs
The Trimming Process
Alright, you've got your ribs, now it's time to get them ready for cooking. First, you'll need to trim the membrane. This is a thin, tough membrane on the back side of the ribs that can make them tough if you leave it on. It's like a little protective layer that's got to go.
There are two ways to remove the membrane. You can use a sharp knife, carefully lifting it up and cutting it off. Or, you can use a paper towel to help you grip it and pull it off in one go. It's a bit like a tug of war, but the paper towel gives you a good grip.
Cleaning Up
Now, give your ribs a good wash with cold water to remove any leftover bits and pieces. Then, pat them dry with paper towels. You want them to be as dry as possible before you start seasoning them. Think of it as a fresh start for your ribs.
(Part 3) The Dry Rub - The Foundation of Flavor
What is a Dry Rub?
A dry rub is a mixture of spices and herbs that you rub into the meat before cooking. It's essential for adding flavor to ribs and creating a delicious crust. You can buy pre-made dry rubs, but I prefer to make my own. It allows me to customize the flavor to my liking and it's surprisingly easy to do. It's like creating your own flavor symphony.
My Favourite Dry Rub
Now, this is where things get personal. Here's my go-to dry rub recipe, and it's a real winner:
- 2 tablespoons paprika
- 1 tablespoon brown sugar
- 1 tablespoon garlic powder
- 1 tablespoon onion powder
- 1 teaspoon salt
- 1 teaspoon black pepper
- 1 teaspoon chili powder
- 1/2 teaspoon cayenne pepper (optional, for extra heat)
Just mix all the ingredients together in a bowl, then generously rub it into your ribs. Make sure to cover all the surfaces and get it right into the cracks between the bones. Think of it like giving your ribs a good massage with flavor.
Let's Talk about Salt
I know a lot of people are hesitant to use salt in dry rubs, but don't worry about it. Salt is an essential ingredient in flavor development. It helps break down the protein in the meat and draw out moisture, resulting in a more tender and flavorful rib. It's like a little flavor magic trick.
You can use kosher salt or table salt, but I prefer kosher salt because the crystals are larger and don't dissolve as quickly. It gives you a nice, even distribution of saltiness.
(Part 4) The Oven-Baking Process
The Power of Low and Slow
When it comes to ribs, low and slow is the key. It's the only way to break down the tough connective tissue and achieve that melt-in-your-mouth tenderness. It's like giving your ribs a long, relaxing spa treatment, making them incredibly tender.
My Oven-Baking Method
Preheat your oven to 300°F (150°C). Now, here's a little trick I've learned: put a baking sheet on the bottom rack of your oven. This will catch any drips and help keep your oven clean. It's like a little insurance policy for a clean oven.
Place your ribs on a roasting rack set over a baking sheet. This is crucial for even cooking and allowing air circulation around the ribs. This creates a lovely little convection effect that ensures your ribs cook evenly.
If you don't have a roasting rack, you can simply place the ribs on a baking sheet, but be sure to flip them halfway through cooking to ensure even cooking. It's like a little game of rib-flipping to ensure perfect results.
Time for Patience
The key here is patience. You're going to cook your ribs for 3-4 hours, or even longer depending on the size of your ribs. And it's really crucial to check them regularly. It's like a marathon, not a sprint, and you want to keep a close eye on your ribs.
The internal temperature Test
The best way to tell if your ribs are done is to check the internal temperature. The ribs should be cooked to an internal temperature of at least 190°F (88°C) for optimal tenderness. This is your ultimate gauge for rib perfection.
If you don't have a meat thermometer, you can use the "bone-wiggle" test. If the ribs are cooked properly, the meat should pull back from the bone and the bone should wiggle easily. It's like a little rib dance to tell you they're ready.
(Part 5) Rest Time is Key
Why Rest?
Once your ribs are cooked, it's crucial to let them rest. This allows the juices to redistribute throughout the meat, resulting in even more tender and juicy ribs. Think of it as a little post-cooking recovery session, where the juices settle in and make them even more flavorful.
How to Rest Ribs
Simply take your ribs out of the oven and wrap them tightly in foil. Leave them to rest for at least 30 minutes. It's like a little warm hug for your ribs, helping them relax and release their delicious juices.
(Part 6) The Saucing Showdown
Ready for the Sauce
Okay, so your ribs are perfectly cooked and rested. Now, it's time to add that final touch of flavor with a delicious sauce. It's like putting the finishing touches on a masterpiece.
My Sauce Choices
Now, I'm a big fan of a good bbq sauce. My go-to choices are:
- Sweet and Smoky BBQ Sauce: This sauce is a classic and always hits the spot. It's got a perfect balance of sweetness and smokiness, with a touch of tanginess. It's like a little taste of the American South.
- Spicy BBQ Sauce: For those who like a bit of heat, a spicy BBQ sauce is the way to go. It's got a nice kick to it, but it's not too overwhelming. It's like a gentle nudge of spice, not a full-blown fire.
- Honey BBQ Sauce: This sauce is sweet and sticky, with a hint of honey. It's perfect for those who want a more subtle flavor. It's like a gentle drizzle of sweetness and a touch of honey magic.
How to Apply the Sauce
Now, there are two ways to apply the sauce. You can brush it on the ribs while they're still in the oven, or you can brush it on after they've been rested. I prefer to brush it on after they've rested, as this helps to keep the sauce from burning. It's like letting the sauce create a beautiful glaze without burning the ribs.
You can brush the sauce on generously, or you can just lightly drizzle it over the top. It's up to you! It's all about personal preference and how much sauce you like to enjoy.
(Part 7) Oven-Baked Ribs: Taking it to the Next Level
The Finishing Touches
Alright, so your ribs are cooked, rested, and sauced. But you want to take them to the next level, right? Here are a few tips for making your ribs even more delicious: They're like secret weapons for rib perfection.
The Broiler Boost
For a crispy crust, you can broil your ribs for a few minutes after they've been sauced. This will give them a beautiful caramelized finish. Just be careful not to burn them! It's like a little dose of heat to create a delicious crust.
The Smoking Factor
If you want to add a smoky flavour, you can smoke your ribs before you bake them. You can use a smoker, or you can simply put some wood chips in a foil pouch and place them on the bottom rack of your oven. It's like adding a touch of wood-fired magic to your ribs.
The Recipe Experimentation
The world is your oyster when it comes to ribs. Experiment with different dry rubs, sauces, and cooking methods. There's no right or wrong way to cook ribs. It's all about finding what you like best. It's like a culinary adventure with endless possibilities.
(Part 8) Serving Your Ribs with Pride
Time for the Grand Finale
Now, your ribs are finally ready to be served. You've put in the time and effort, and now it's time to reap the rewards! It's like the culmination of a culinary symphony.
The side dish Symphony
There are endless possibilities for side dishes to accompany your ribs. Some classic choices include:
- Coleslaw: Creamy and refreshing, coleslaw is the perfect foil to the richness of ribs. It's like a cool and refreshing counterpoint to the rich flavor of the ribs.
- Mac and Cheese: A comfort food classic, mac and cheese goes perfectly with ribs. It's like a comforting embrace, pairing perfectly with the smoky goodness.
- Baked Beans: Sweet and tangy, baked beans are a traditional side dish for ribs. It's like a little taste of the American South, adding a sweet and tangy element.
- Cornbread: A little bit sweet and a little bit crumbly, cornbread is a great complement to ribs. It's like a little touch of sweetness and texture, pairing perfectly with the richness of the ribs.
The Presentation Matters
Now, don't forget about the presentation. After all, you've put so much effort into cooking these ribs, so you want them to look as good as they taste. It's like a final act of culinary artistry.
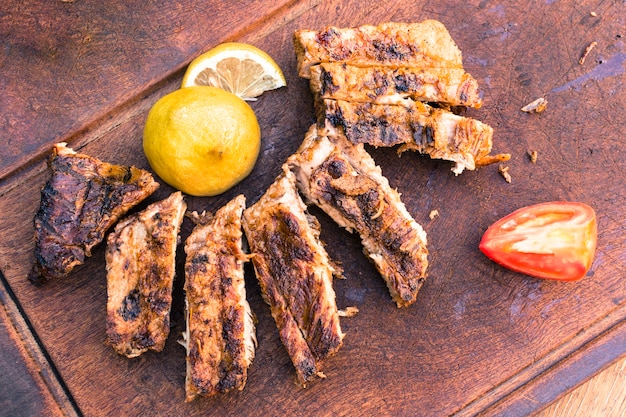
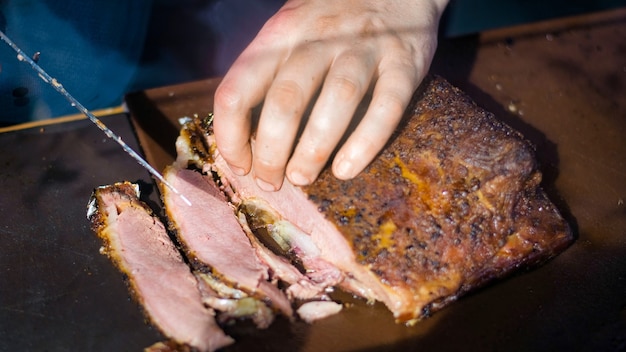
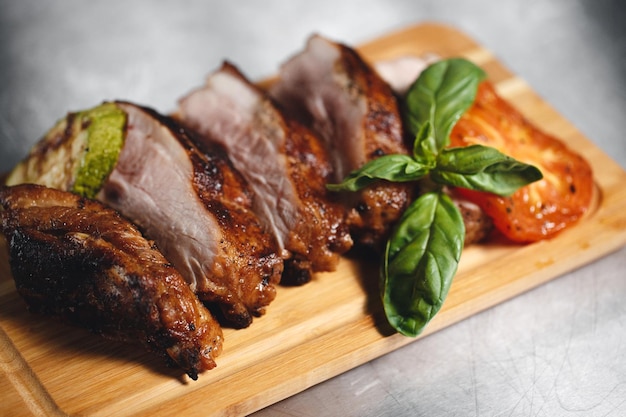
Cut the ribs into individual pieces and arrange them on a platter. Garnish with fresh herbs, like parsley or chives, and a squeeze of lemon juice for a bit of brightness. It's like adding a little touch of elegance and freshness to your masterpiece.
(Part 9) Leftovers - A Rib-tastic Treat
Leftover Love
Let's be real, leftover ribs are the best. They're even better the next day when the flavors have had time to meld together. It's like a little culinary magic trick where the flavors get even better over time.
Rib-tastic Leftover Ideas
Here are a few ideas for using up your leftover ribs:
- Rib Sandwiches: Pile those ribs on a toasted bun with your favorite toppings, like cheese, coleslaw, and BBQ sauce. It's like a rib-tastic sandwich that's guaranteed to satisfy.
- Rib Salad: Dice up the leftover ribs and toss them into a salad with your favorite vegetables and dressing. It's like a little twist on a classic salad, adding a touch of smoky flavor.
- Rib Pizza: Spread some BBQ sauce on a pizza crust, top it with leftover ribs, cheese, and your favorite vegetables. It's like a rib-tastic pizza that's guaranteed to be a hit.
- Rib Soup: Break up the leftover ribs and add them to a hearty soup. It's like a cozy and comforting rib soup, perfect for a cold day.
(Part 10) FAQs
1. What temperature should I cook the ribs at?
Cook ribs at a low and slow temperature of 300°F (150°C). This helps to break down the tough connective tissue and create tender, juicy ribs. It's like a gentle, slow-cooked magic that transforms the ribs.
2. How long do I cook the ribs?
cooking time will vary depending on the size of your ribs, but you can expect to cook them for 3-4 hours, or even longer. It's like a culinary marathon, and you need to be patient and let the ribs cook slowly.
3. How do I know if the ribs are done?
The best way to tell if your ribs are done is to check the internal temperature. They should be cooked to an internal temperature of at least 190°F (88°C). You can also use the "bone-wiggle" test. If the ribs are cooked properly, the meat should pull back from the bone and the bone should wiggle easily. It's like a little rib dance to tell you they're ready.
4. Can I use a different type of rib?
Yes, you can use other types of ribs, like baby back ribs. However, spare ribs are the most popular choice for home cooks because they are more forgiving and less expensive. It's like a little cheat code for rib success.
5. Can I make ribs without a smoker?
Yes, absolutely! You can achieve delicious oven-baked ribs without a smoker. Just follow the instructions in this guide and you'll be rewarded with tender, juicy, and flavorful ribs. It's like proving that you don't need a smoker to create rib perfection.
I hope this guide has given you the confidence to try your hand at oven-baked ribs. Remember, it's all about low and slow, patience, and a little bit of experimentation. And most importantly, have fun! It's a culinary adventure that will reward you with delicious ribs and a sense of accomplishment.Everyone is watching

Prime Rib Roast Cooking Time Chart: Per Pound Guide
Cooking TipsPrime rib roast. Just the name conjures images of lavish dinners, crackling fires, and hearty laughter. It’s ...

How Long to Bake Potatoes in the Oven (Perfect Every Time)
Cooking TipsBaked potatoes are a staple in my kitchen. They're incredibly versatile, delicious, and surprisingly easy to m...

Perfect Rice Every Time: The Ultimate Guide to Cooking Rice
Cooking TipsAs a self-proclaimed foodie, I've always been a bit obsessed with rice. It's the foundation of countless cuisi...

The Ultimate Guide to Cooking Asparagus: Tips, Techniques, and Recipes
Cooking TipsAsparagus. The mere mention of this spring delicacy conjures up images of vibrant green spears, crisp and burs...

Ultimate Guide to Cooking the Perfect Thanksgiving Turkey
Cooking TipsThanksgiving. Just the word conjures up images of overflowing tables laden with delicious food, the scent of r...