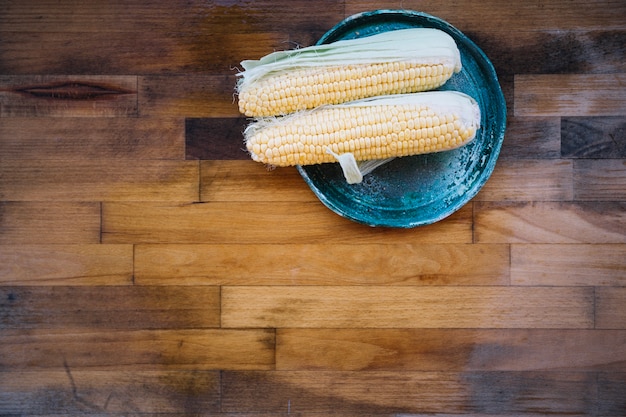
Alright, let’s be honest. Nothing quite hits the spot like a juicy, sweet corn on the cob, especially when it’s cooked to absolute perfection. And while the grill might be the first thing that pops into your head, let me tell you, oven-baking is where it's at. No standing by the flames, no worrying about burnt husks, just pure, delicious corn magic.
Now, you might be thinking, “Oven-baked corn? I've tried it before, and it wasn't that great.” Well, my friend, you haven't tasted it done right. I'm about to spill the beans, share my secrets, and reveal the tried-and-true methods for crafting the most mouth-watering, tender, and flavourful oven-baked corn on the cob you've ever encountered.
Ready to embark on this culinary adventure? Let’s get started!
(Part 1) Choosing the perfect corn: The Foundation of Flavor

The first step is crucial, folks. Picking the right corn is like laying the foundation of a beautiful house – if it's not sturdy, the whole thing can crumble. You can't expect a magnificent corn on the cob if you start with subpar produce.
Shopping for Corn: Tips from a Seasoned Cook
Freshness is Everything: Look for corn that’s been picked recently. The husks should be a vibrant, emerald green and feel moist to the touch. Avoid those dry, brown husks - they're a sign of age.
The Husk Test: Give the corn a gentle squeeze. The kernels should feel plump and firm, like little jewels. If you feel any emptiness or softness, move on to another ear.
Silk Check: The silk at the top of the corn should be fresh, a rich brown, and not dry or brittle. It's a sign of the corn's maturity.
Ask the Experts: If you’re at a local farmer’s market, don’t hesitate to ask the vendors for their recommendations. They know their produce and can point you to the sweetest, most flavorful corn around.
(Part 2) Prepping the Corn: A Simple Ritual of Flavor

Alright, you've got your perfect corn. Now, let's get it ready for the oven, unleashing its full flavour potential.
Washing and Shucking: Unveiling the Corn's Treasure
1. A Cleansing Ritual: Rinse the corn under cool water to remove any dirt or debris. Think of it as a mini spa treatment for your corn.
2. Shucking Time: Peel back the husks and remove the silk. You can leave a few layers of husks on, but make sure every trace of silk is gone. It's like a good cleaning – it's all about the details.
Adding Flavor: A Symphony of Spices
Now, here's where we make our oven-baked corn truly sing.
Butter: The Foundation of Flavor: I'm a big believer in butter, and it's essential for oven-baked corn. Generously rub the corn with melted butter. It's like giving your corn a luxurious massage.
The Spice Rack: Let's get creative! Here are some of my favourite flavour combos:
Salt and Pepper: A timeless duo, adding a touch of earthy depth.
Garlic Powder: A pinch of garlic adds a wonderful aroma and savory complexity.
Paprika: A subtle sweetness and vibrant colour come together in paprika.
Chili Powder: For a kick of heat and a smoky flavour.
Herbs: Fresh or dried herbs like parsley, thyme, oregano, or basil add a lovely aroma and freshness.
(Part 3) Baking the Corn: The Transformation Begins

You’ve prepped your corn, and now it’s time for the grand finale: the oven. This is where we’ll witness the transformation from raw kernels to sweet, tender perfection.
Preheating and Temperature: Setting the Stage
Preheat Power: Always preheat your oven to 400 degrees Fahrenheit (200 degrees Celsius). It's like warming up your kitchen stage for a culinary performance.
Baking Time and Tips: A Choreographed Dance
The Baking Time: Bake the corn for about 20-25 minutes, or until the kernels are tender and slightly browned, like a beautiful golden hue.
Keep an Eye Out: Check the corn after 15 minutes. If the husks start to brown too quickly, cover the corn with foil to prevent burning.
Flipping for Evenness: For even cooking, flip the corn over halfway through baking. It’s like giving the corn a little dance lesson to ensure all sides get their turn in the spotlight.
Variations for Extra Flavor: The Encores
If you want to take your oven-baked corn to the next level, try these variations:
Foil-Wrapped Delight: Wrap the corn in foil after buttering and seasoning for a more steamed, moist result, like a cozy blanket for your corn.
Cheese, Please!: After baking, sprinkle on your favorite cheese - cheddar, Monterey Jack, or Parmesan.
Spice Up Your Life: Experiment with different spice combinations. For example, cumin and coriander powder add a lovely earthy flavour.
(Part 4) Serving and Enjoying: The Culinary Grand Finale
Your corn is baked to perfection, and now it's time to showcase this masterpiece.
Serving Suggestions: A Culinary Stage
Simple Elegance: Slice the corn off the cob and serve it as a side dish, like a classic supporting role.
Skewer Magic: Thread the corn onto skewers for a more elegant presentation, transforming it into a star.
Dip Delight: Serve with your favorite dip, like ranch dressing, sour cream, or even salsa, adding a layer of flavour.
Salad Sensation: Add corn to your favorite salad for a sweet and crunchy addition, turning it into a culinary ensemble.
Enjoying the Flavors: A Celebration of Taste
Don't Forget to Taste! Always taste your corn to make sure it's cooked to your liking. You might need to adjust the baking time or seasoning based on your preference.
Get Messy!: Embrace the joy of biting into a fresh, juicy corn on the cob. It's a culinary experience, not a formal dining event.
(Part 5) Mastering the Art of Oven-Baked Corn: Advanced Techniques
Alright, you’ve mastered the basics. Now, let's take your oven-baked corn skills to the next level.
Grilling Before Baking: A Smoky Embrace
Charred Flavor: For an extra layer of flavor, grill the corn for a few minutes before baking. This will add a smoky, charred flavor that's simply irresistible, like a kiss from the grill.
Time and Technique: Grill the corn over medium heat for about 5 minutes, turning occasionally, until the husks start to char slightly. Then, follow the instructions for oven-baking.
Adding a Sweet Touch: A Symphony of Sweetness
Honey Glaze: For a truly decadent twist, try brushing the corn with a honey glaze before baking. The sweetness of the honey pairs perfectly with the corn's natural sweetness, like a harmonious duet.
Maple Syrup: Another option for a sweet glaze is maple syrup. It's a classic combination for a reason.
Citrus Zest: Add a pinch of orange or lemon zest to the butter for a refreshing citrus flavour, adding a bright, zingy note.
(Part 6) Storage and Leftovers: Preserving the Magic
Okay, you've baked a bunch of corn. Now, what about those leftovers?
Storing Leftovers: Preserving Flavor for Later
Keep it Fresh: To keep your leftover corn fresh, store it in an airtight container in the refrigerator.
Avoid Sogginess: Wrap the corn in paper towels to absorb any excess moisture.
Enjoy within a Few Days: Leftover corn is best enjoyed within a few days.
Reheating Options: Reviving the Flavor
Oven Reheating: Reheat the corn in a preheated oven at 350 degrees fahrenheit (175 degrees Celsius) for about 10 minutes.
Microwave Magic: Reheat the corn in the microwave on high power for 1-2 minutes, or until heated through.
Grill Revival: For a more intense flavor, grill the leftover corn for a few minutes, like a quick trip back to the grill for a flavour boost.
(Part 7) A Corn Lover's Guide: Useful Tips and Tricks
Here are some helpful tips and tricks to make your oven-baked corn journey even smoother.
Tips for Preventing Soggy Corn: A Recipe for Success
Don't Overbake: Overbaked corn can become dry and tough, like an overcooked piece of theatre.
Keep it Dry: Make sure to pat the corn dry before baking to prevent steam buildup inside the husks, like a little moisture control for your corn.
Baking Sheet with Rack: This will allow air to circulate around the corn and prevent it from steaming, like a little ventilation for your culinary masterpiece.
Saving Time and Effort: Efficiency in the Kitchen
Prep Ahead: You can prep the corn ahead of time by shucking and seasoning it. Store it in an airtight container in the refrigerator until you're ready to bake, like a little batch cooking magic.
Family Affair: Get the kids involved in shucking, buttering, and seasoning the corn. It's a fun, interactive culinary experience.
Double Up: Make a double batch of corn and freeze the extra for later, like a little food storage magic.
(Part 8) Corn on the Cob: A Culinary Delight
We've covered everything from choosing the perfect corn to serving it up in style. But let’s take a moment to appreciate the beauty and deliciousness of corn on the cob itself.
A Global Staple: The Versatility of Corn
Versatile Ingredient: Corn on the cob is a staple ingredient in kitchens around the world. It's a versatile ingredient that can be enjoyed in countless ways, like a blank canvas for culinary creativity.
From Mexico to America: Corn is a key ingredient in dishes like Mexican street corn (elote), American barbecue, and Asian stir-fries, showcasing its global appeal.
Sweet and Savoury: Corn on the cob is both sweet and savory, making it a perfect complement to both sweet and savory dishes, like a culinary chameleon.
A Taste of Summer: A Seasonal Treasure
Summertime Delight: For many people, corn on the cob is synonymous with summer. It's a perfect food for picnics, barbecues, and outdoor gatherings, like a quintessential summer treat.
A Flavorful Treat: The sweet, juicy kernels are a real treat, and they’re a great source of vitamins, minerals, and fiber, making it a healthy and delicious choice.
(Part 9) FAQs: Your Oven-Baked Corn Questions Answered
Let’s clear up any lingering questions you might have about baking the perfect corn on the cob.
1. Can I bake corn on the cob in the husk?
Yes, you can absolutely bake corn on the cob in the husk. Just make sure to remove the silk and wash the husks before baking. Baking in the husk helps to steam the corn, resulting in a more tender and flavorful result, like a little natural steamer.
2. How do I know if the corn is done?
The kernels should be tender and slightly browned. You can test the corn by pressing a kernel with your fingernail. If it yields easily, it’s done, like a little culinary test.
3. How long can I store leftover corn on the cob?
Leftover corn on the cob can be stored in the refrigerator for up to 3-4 days. Wrap the corn in paper towels to absorb any excess moisture and place it in an airtight container, ensuring a long and delicious life for your corn.
4. What are some other ways to cook corn on the cob?
Besides baking, you can also cook corn on the cob by grilling, boiling, or steaming. Each method results in a slightly different flavor and texture, allowing you to experiment and find your favorite approach.
5. What are some creative ways to serve corn on the cob?
Get creative with your serving! Try slicing the corn off the cob and using it in salads, salsas, or soups. You can also grill the corn and serve it with a spicy mayo dip, unleashing your culinary creativity.
Conclusion: The Ultimate Oven-Baked Corn Experience
There you have it, folks! The ultimate guide to oven-baked corn on the cob. From choosing the freshest corn to adding creative flavour combinations, I’ve shared all my tips and tricks to help you make the most delicious oven-baked corn you’ve ever tasted.
So, next time you’re craving a sweet and savory treat, don’t hesitate to fire up the oven and whip up a batch of oven-baked corn on the cob. It’s a simple and satisfying dish that’s sure to please everyone at the table. Happy baking!
Everyone is watching

Prime Rib Roast Cooking Time Chart: Per Pound Guide
Cooking TipsPrime rib roast. Just the name conjures images of lavish dinners, crackling fires, and hearty laughter. It’s ...

How Long to Bake Potatoes in the Oven (Perfect Every Time)
Cooking TipsBaked potatoes are a staple in my kitchen. They're incredibly versatile, delicious, and surprisingly easy to m...

Perfect Rice Every Time: The Ultimate Guide to Cooking Rice
Cooking TipsAs a self-proclaimed foodie, I've always been a bit obsessed with rice. It's the foundation of countless cuisi...

The Ultimate Guide to Cooking Asparagus: Tips, Techniques, and Recipes
Cooking TipsAsparagus. The mere mention of this spring delicacy conjures up images of vibrant green spears, crisp and burs...

Ultimate Guide to Cooking the Perfect Thanksgiving Turkey
Cooking TipsThanksgiving. Just the word conjures up images of overflowing tables laden with delicious food, the scent of r...
