(Part 1) The Sweet Potato Saga: Choosing the Perfect Spuds

1.1 The Power of the Sweet Potato
Let's start with the foundation of our masterpiece: the sweet potato. It's not just any potato – it's the heart and soul of our pie. And the key to a truly phenomenal pie? Choosing the right sweet potatoes.You've got your orange ones, your white ones, even purple ones. But for this pie, we're going for the classic orange ones. They're the most flavorful, the most versatile, and they'll give you that lovely rich color we all crave in a sweet potato pie.1.2 Spotting the Winners
Now, don't just grab any sweet potato. Take a look at them. You're looking for ones that are: Firm and smooth: Avoid any that are soft or bruised. A little bit of firmness indicates they're fresh and full of flavor. Heavy for their size: This is a good indicator of their density and moisture content, meaning they'll have a great flavor and texture. No wrinkles or cracks: These are signs of an older potato, and we want the freshest ones possible.1.3 Storage Secrets
Once you've got your sweet potatoes home, store them in a cool, dark place. Don't put them in the fridge – it can make them dry out. If you're not using them right away, keep them in a paper bag for a few days. This will help them stay fresh and flavorful.(Part 2) The perfect pie crust: A Foundation for Success

2.1 The Importance of a Great Crust
Now, let's talk about the base of our masterpiece: the pie crust. It's not just a vessel for the filling. A good crust adds a lovely buttery flavor and a satisfying crunch that compliments the sweet potato filling. It's the perfect foundation for our pie, and it should be treated with respect!2.2 Homemade or Store-Bought?
Honestly, it's up to you. I'm a big fan of making my own crust, I love the control it gives me over the flavor and texture. But if you're short on time, store-bought crusts are perfectly acceptable. Just make sure you pick a good quality one, with a nice flaky texture.2.3 My Go-To Crust Recipe
2 cups all-purpose flour 1 teaspoon salt 1 cup cold unsalted butter, cut into small pieces ?? cup ice water1. Combine the dry ingredients: In a large bowl, whisk together the flour and salt. This ensures the salt is evenly distributed throughout the dough. 2. Cut in the butter: Using a pastry cutter or your fingers, work the cold butter into the flour mixture until it resembles coarse crumbs. This creates layers in the dough, which will give the crust its flaky texture. 3. Gradually add the water: Slowly drizzle in the ice water, mixing until the dough just comes together. Be careful not to overmix. Overmixing develops gluten, which can make the crust tough.4. Chill and roll: Shape the dough into a disc, wrap it in plastic wrap, and chill for at least 30 minutes. Chilling the dough helps to firm up the butter and prevent the crust from shrinking during baking. Once chilled, roll out the dough on a lightly floured surface to about ??-inch thickness. 5. Transfer to the pie plate: Transfer the dough to a pie plate and trim the edges. You can use a fork to crimp the edges or get fancy with a decorative edge. 6. Prick the bottom: Prick the bottom of the crust with a fork to prevent air bubbles from forming during baking. 7. Blind bake: Blind bake the crust for 15 minutes at 350°F (175°C). This will ensure the crust is cooked through before you add the filling.
2.4 Crust Tips
Keep it cold: Use cold butter and ice water to ensure the crust stays flaky. Don't overwork the dough: Overworking it will make the crust tough. Blind bake it: blind baking the crust ensures it's cooked through before you add the filling.(Part 3) Sweet Potato Symphony: Mastering the Filling

3.1 The Base of the Filling
We've got our crust, now it's time for the heart of the pie: the filling. The key is to use high-quality ingredients and to balance the sweetness with a hint of spice. This is where you create the delicious flavor profile that will make your pie unforgettable.3.2 A Classic Sweet Potato Pie Filling
4 large sweet potatoes, peeled and cubed ?? cup unsalted butter ?? cup packed light brown sugar ?? cup granulated sugar 2 large eggs 1 cup whole milk 1 tablespoon all-purpose flour 1 teaspoon ground cinnamon ?? teaspoon ground nutmeg ?? teaspoon ground cloves ?? teaspoon salt1. Cook the sweet potatoes: Boil the cubed sweet potatoes until tender, about 15-20 minutes. Don't overcook them, as they can become mushy. Drain and mash thoroughly.2. Cream the butter and sugars: In a large bowl, cream together the butter and sugars until light and fluffy. This will incorporate air into the mixture, making it light and airy.3. Add the eggs: Beat in the eggs one at a time, making sure each egg is fully incorporated before adding the next. 4. Mix in the wet ingredients: Stir in the milk, flour, spices, and salt. This creates a smooth and creamy base for the filling. 5. Combine with sweet potatoes: Gradually add the mashed sweet potatoes, stirring until well combined.
3.3 Secrets to a Superior Filling
Don't overcook the sweet potatoes: Overcooked sweet potatoes can become mushy and affect the texture of the filling. Use real butter: It adds flavor and richness that you can't get with margarine. Add a touch of vanilla extract: This elevates the flavor to another level. Just a teaspoon or two can make a big difference. Use spices sparingly: Don't overdo it on the spices, you want a subtle flavor, not an overpowering one. A little goes a long way when it comes to cinnamon, nutmeg, and cloves.(Part 4) Building the Pie: The Art of Assembly
4.1 The Grand Assembly
You've got your crust, you've got your filling, now it's time to bring them together. This part is about creating the beautiful pie you'll be proud to present.4.2 The Pie Filling
Pour the filling into the pre-baked pie crust, smoothing the top. Don't overfill it – leave about an inch of space at the top. This will allow room for the filling to rise during baking and prevent it from spilling over the edges.4.3 The Pie Crust
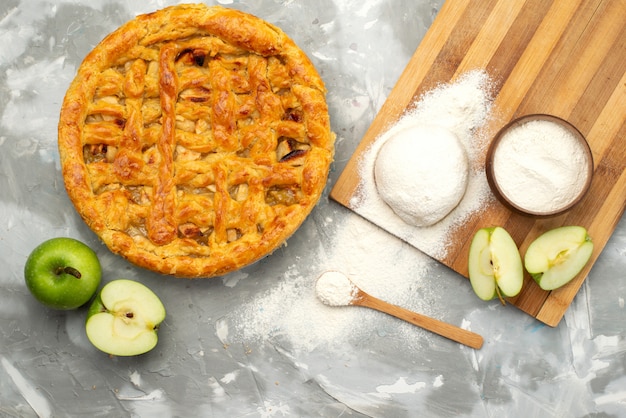
Now, here's where it gets interesting. You can leave the edges of the crust plain, or you can get creative. Here's my favorite approach: lattice crust: Cut the dough into strips and weave them over the filling. This creates a classic and beautiful design. Crossed Crust: Cut the dough into squares and arrange them in a criss-cross pattern. This adds a rustic and charming touch.4.4 A Touch of Elegance
Optional: Brush the crust with a little milk or egg wash to create a golden brown colour. Sprinkle with some sugar: This gives the crust a lovely crunch.(Part 5) Baking Time: Patience is Key
5.1 The Oven's Role
Now comes the moment of truth: baking. It's a time for patience and a little bit of watchful waiting.5.2 Baking Instructions
1. Preheat the oven: Preheat the oven to 350°F (175°C). This ensures the pie bakes evenly.2. Bake the pie: Bake the pie for 45-55 minutes, or until the filling is set and the crust is golden brown. Use a toothpick to test the center of the filling – if it comes out clean, it's ready. 3. Cool completely: Let the pie cool completely before slicing and serving. This allows the filling to set properly and prevents it from being too runny.5.3 Don't Overbake it!
It's tempting to keep checking on the pie, but try to resist the urge. Overbaking will dry out the filling and make the crust tough. A good sign the pie is done is when the centre jiggles slightly when you shake the pie plate.(Part 6) The Finishing Touch: Making it Special
6.1 The Grand Finale
The pie is baked, it's cooled, now it's time to make it truly spectacular.6.2 Whipped Cream Dreams
A dollop of whipped cream on top? Absolutely! It adds a touch of sweetness and a fluffy texture that contrasts beautifully with the rich filling.6.3 A Hint of Spice
A sprinkle of cinnamon or nutmeg on top can elevate the flavor. It adds an extra touch of warmth and spice that enhances the overall experience.6.4 A Decorative Delight
Want to get fancy? Use a pastry cutter to cut out shapes from the dough before baking. You can use cookie cutters to create fun and festive designs.(Part 7) Sweet Potato Pie Variations: Experiment and Explore
7.1 Beyond the Classic
Think the classic sweet potato pie is the only way to go? Think again! There are so many variations out there, you're only limited by your imagination.7.2 Sweet Potato Pecan Pie
Add chopped pecans to the filling for a nutty twist. The pecans add a nice crunch and a rich, nutty flavor that compliments the sweet potato beautifully.7.3 Sweet Potato Chocolate Pie
Add a few tablespoons of melted chocolate to the filling for a decadent twist. This adds a luxurious depth of flavor and a touch of indulgence.7.4 Sweet Potato Chai Pie
Add a teaspoon of chai spices to the filling for a warming and aromatic flavor. The chai spices, with their blend of cinnamon, cardamom, ginger, and cloves, create a unique and complex flavor profile that is both comforting and exotic.7.5 Sweet Potato Maple Pie
Swap the sugar for maple syrup for a more natural sweetness. Maple syrup adds a rich and slightly smoky flavor that works beautifully with the sweet potato.(Part 8) Serving and Storing Your Masterpiece
8.1 Time to Indulge
Your pie is finally ready! Now, it's time to enjoy it.8.2 Serving Suggestions
Warm or cold? It's up to you! I prefer mine warm, but it's delicious cold, too. The warmth brings out the flavors of the spices, while the coldness provides a refreshing contrast. A touch of cream: Whipped cream, ice cream, even a dollop of yogurt can be a delightful accompaniment. The cream adds a touch of sweetness and a refreshing element. A dash of spice: A sprinkle of cinnamon or nutmeg can enhance the flavour. This adds an extra layer of warmth and complexity.8.3 Storage Tips
Refrigerate: Store any leftover pie in the refrigerator for up to 3 days. Make sure it's tightly covered to prevent it from drying out. Freezing: You can freeze the pie for up to 2 months. Thaw it in the refrigerator overnight before serving.FAQs
1. Can I use canned sweet potatoes instead of fresh?
Yes, absolutely! Just make sure you drain them well before using them in the recipe. Canned sweet potatoes are a great shortcut, but they can be a bit denser than fresh ones, so you may need to add a little extra liquid to the filling.
2. Can I use a different type of milk?
You can use any type of milk you like. Whole milk gives the filling a richer texture, but you can use skim milk, almond milk, or even coconut milk if you prefer. Just be aware that using a non-dairy milk can slightly alter the flavor and texture of the filling.
3. What if the filling is too runny?
If the filling is too runny, you can add a tablespoon or two of cornstarch to thicken it. Just whisk the cornstarch into a little cold milk before adding it to the filling.
4. Can I add other spices to the filling?
Absolutely! Get creative with your spices. Some popular additions include ginger, cardamom, and allspice. Just be sure to add them sparingly, and taste as you go to make sure the flavors are balanced.
5. Can I make the pie ahead of time?
You can assemble the pie and refrigerate it for up to 24 hours before baking. Just be sure to bake it from a cold state. This will ensure the filling is cooked through and the crust doesn't become soggy.
Everyone is watching

Prime Rib Roast Cooking Time Chart: Per Pound Guide
Cooking TipsPrime rib roast. Just the name conjures images of lavish dinners, crackling fires, and hearty laughter. It’s ...

How Long to Bake Potatoes in the Oven (Perfect Every Time)
Cooking TipsBaked potatoes are a staple in my kitchen. They're incredibly versatile, delicious, and surprisingly easy to m...

Perfect Rice Every Time: The Ultimate Guide to Cooking Rice
Cooking TipsAs a self-proclaimed foodie, I've always been a bit obsessed with rice. It's the foundation of countless cuisi...

The Ultimate Guide to Cooking Asparagus: Tips, Techniques, and Recipes
Cooking TipsAsparagus. The mere mention of this spring delicacy conjures up images of vibrant green spears, crisp and burs...

Ultimate Guide to Cooking the Perfect Thanksgiving Turkey
Cooking TipsThanksgiving. Just the word conjures up images of overflowing tables laden with delicious food, the scent of r...
