As a seasoned home cook and self-proclaimed broth enthusiast, I've learned a thing or two about crafting the perfect pot of chicken broth. It's not just about boiling chicken bones and vegetables - it's about transforming them into a flavourful, nourishing elixir that's as comforting as a warm hug. This guide is my attempt to share the secrets I've picked up over the years, from choosing the right ingredients to perfecting the simmering process. So grab your apron, gather your ingredients, and let's dive into the world of homemade chicken broth.
(Part 1) Understanding the Basics of Broth
Why homemade broth is a Game Changer
Forget those watery, bland broths from the supermarket. Homemade chicken broth is a whole different story. It's a symphony of flavour, bursting with the natural essence of chicken, vegetables, and herbs. The taste is so much deeper, richer, and more complex than anything you can buy off the shelf. But it's more than just taste. Homemade broth is packed with nutrients, making it a fantastic base for soups, stews, sauces, and even risottos. You're essentially creating a liquid gold that elevates every dish it touches.
The Essential Ingredients: Building a Flavourful Foundation
The key to a fantastic broth lies in the quality of your ingredients. Let's break down the essentials:
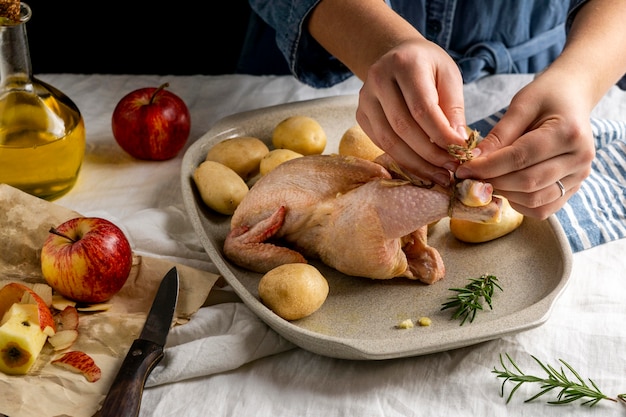
- Chicken Bones: Think chicken carcasses, wings, and necks. These are packed with flavour and collagen, which adds richness and body to your broth. I always save my chicken bones from roasts and other meals for just this purpose. If you're not a chicken bone hoarder like me, you can easily buy them from your butcher. The type of chicken you use can also affect the flavour of your broth. For example, using bones from a roasted chicken will result in a richer, more intense broth than using bones from a raw chicken.
- Vegetables: A medley of vegetables will contribute depth and complexity to your broth. My go-to vegetables include carrots, onions, celery, garlic, and a bay leaf. Don't hesitate to experiment with other vegetables like parsnips, leeks, or even a few sprigs of fresh thyme. Some people also add a pinch of black peppercorns, which adds a subtle warmth to the broth.
- Water: Use cold, filtered water for the best results. The cold water helps to draw out the flavours more effectively. You could also use mineral water, which can add a slight mineral flavour to the broth.
- Salt and Pepper: A touch of salt and pepper during the simmering process will season your broth and enhance the flavours. Adding salt at the end is important as well, to adjust the flavour to your taste.
(Part 2) Mastering the Art of Broth Making
Setting the Stage: Preparing Your Ingredients
Before you embark on your broth-making adventure, make sure you're set up for success. Here's my pre-broth checklist:
- Clean Your Bones: Rinse the chicken bones under cold water, removing any excess fat or debris. I like to give them a quick soak in a bowl of cold water for about 15 minutes to help remove any lingering impurities. If you're using roasted chicken bones, you can also use a small brush to scrub off any stuck-on bits.
- Rough Chop Your Vegetables: There's no need for precision chopping here. Simply chop your vegetables into large chunks to release their flavours more effectively during the simmering process. You can even leave the skin on your carrots and onions, as this will add extra flavour to your broth.
- Choose Your Pot: A large stock pot is essential for making a generous batch of broth. Make sure it's big enough to accommodate all your ingredients and allow for ample room for simmering. If you're using a smaller pot, you can always reduce the amount of broth you make, but be sure to leave enough room for the broth to bubble and simmer without overflowing.
The Simmering Process: Patience is Key
Now comes the fun part! Get ready to embrace the slow and steady approach to making delicious broth.
- Layer Your Ingredients: Start by placing your chicken bones in the bottom of your pot. Then add your chopped vegetables. You can add any herbs you like, such as bay leaves, thyme, or parsley, at this stage. Adding herbs towards the end of the simmering process, like in the last hour, can result in a more delicate flavour.
- Cover with Cold Water: Pour cold, filtered water over your ingredients, making sure they're completely submerged. Leave about an inch or two of space at the top of the pot. This is important, as the broth will expand as it boils.
- Bring to a Gentle Simmer: Bring the pot to a simmer over medium heat, making sure to skim off any foam that rises to the surface. This is the protein from the bones, which can make your broth cloudy. Once the broth is simmering, reduce the heat to low. The key here is to maintain a gentle simmer, not a rolling boil. A rolling boil can make your broth cloudy and reduce the flavour.
- Simmer Slowly and Steadily: Here's where patience comes into play. Let your broth simmer gently for at least 4 hours, and up to 8 hours for maximum flavour. The longer you simmer, the richer and more intense your broth will become. I love to let mine simmer for 6 hours, just as the sun begins to set. It's during this long, slow simmer that the magic happens, as the collagen from the bones breaks down and the flavours meld together.
(Part 3) The Finishing Touches: Bringing Your Broth to Perfection

The Strain and Cool Down
After all that simmering, it's time to reveal the delicious broth hidden within. Here's how to strain and cool it down:
- Strain the Broth: Line a large sieve with cheesecloth or a fine-mesh strainer. Carefully pour the broth through the strainer, discarding the solids. I like to press gently on the solids with a wooden spoon to extract as much liquid as possible. If you're concerned about any tiny bits of bones getting into your broth, you can double-strain it by using a second, finer-mesh strainer.
- Cool Down: Transfer your broth into a large bowl or container and place it in the refrigerator to cool. This helps to solidify any remaining fat, which you can easily skim off later. Cooling the broth quickly will also help to prevent bacteria from growing.
The Fat Removal: A Clear Broth is a Happy Broth
Once your broth has cooled, you'll notice a layer of fat on the surface. This is perfectly normal and can be easily removed. Here's my favourite method:
- Skim the Fat: Using a spoon, carefully skim off the layer of fat from the surface of your broth. I like to use a slotted spoon to avoid any debris from the bottom. If you prefer, you can also use a ladle to carefully scoop off the fat. Be careful not to remove too much broth with the fat.
- Store in the Fridge: Transfer your broth into airtight containers and store in the refrigerator for up to 5 days. Make sure to label your containers with the date so you know how long it's been stored.
(Part 4) Creative Uses for Homemade Chicken Broth
The Soup Starter Kit
Homemade chicken broth is the foundation for countless delicious soups. It's the secret ingredient that brings depth and richness to every bowl. Think creamy chicken noodle, hearty vegetable, or even a light and refreshing summer gazpacho. The possibilities are endless!
When using broth in soups, you can adjust the amount to your liking. For a more intense flavour, use a larger proportion of broth. For a lighter soup, use a smaller proportion of broth and add more water.
The Sauce Superpower
Don't underestimate the power of chicken broth in sauces. It adds a subtle depth of flavour and moisture to everything from creamy Alfredo to light and tangy lemon-herb sauces.
For creamy sauces, you can use chicken broth to help thin out the sauce and add a layer of flavour. For lighter sauces, you can use chicken broth to deglaze the pan after cooking your meat or vegetables, creating a delicious base for your sauce.
The Risotto Booster
For a truly luxurious risotto, use homemade chicken broth instead of water. The rich flavour of the broth will infuse your risotto with an extra layer of complexity and flavour.
When making risotto, you should add the broth gradually, a ladleful at a time, allowing the rice to absorb the broth before adding more. This ensures that the risotto cooks evenly and has a creamy texture.
(Part 5) Variations on the Classic Broth Recipe
Spice It Up!
For a touch of spice, add a few cloves of ginger, a couple of star anise pods, or a pinch of cayenne pepper to your broth. You can add these spices at the beginning of the simmering process, or towards the end for a more subtle flavour.
If you're using ginger, you can either slice it thinly or grate it. If you're using star anise, you can break it in half to release more flavour. Cayenne pepper should be used sparingly, as it can be quite spicy.
Aromatic Delights
Experiment with fresh herbs like thyme, parsley, rosemary, or sage. Simply add a few sprigs to your broth during the simmering process. You can also use dried herbs, but use a smaller amount than you would fresh herbs.
If you're using dried herbs, you can tie them together in a cheesecloth bag to make them easier to remove from the broth at the end. This is particularly useful for herbs like rosemary, which can be difficult to remove individually.
A Hint of Citrus
For a brighter, more refreshing broth, add a few slices of lemon or lime to your pot. This will add a touch of acidity that complements the richness of the chicken and vegetables. You can also use a few drops of lemon or lime juice for a subtler citrus flavour.
Adding citrus towards the end of the simmering process is recommended, as it can become bitter if cooked for too long.
(Part 6) Making Broth in Your slow cooker
For a hands-off approach to broth making, try using your slow cooker. It's the perfect way to let your broth simmer for hours while you go about your day. The slow cooker is ideal for extracting maximum flavour from your bones and vegetables, resulting in a truly delicious broth.
- Layer Your Ingredients: Combine your chicken bones, chopped vegetables, herbs, and seasonings in your slow cooker. You can add the ingredients in any order, but it's a good idea to place the bones on the bottom and then add the vegetables and herbs on top.
- Cover with Water: Add enough cold water to cover your ingredients by about an inch. Ensure that the water level is at least halfway up the sides of the slow cooker, to prevent the broth from evaporating too quickly.
- Slow Cook: Cook on low for 8-10 hours, or on high for 4-6 hours. The longer you cook your broth, the richer and more flavourful it will become. Adjust the cooking time based on the size of your slow cooker and the desired intensity of your broth.
- Strain and Cool: After cooking, strain the broth and cool it as described above. Be careful when transferring the hot broth from the slow cooker, as it can be very hot. Use a ladle or a large measuring cup to carefully pour the broth into a strainer.
(Part 7) The Art of Storing and Freezing Homemade Broth
Storage in the Fridge
Store your cooled broth in airtight containers in the refrigerator for up to 5 days.
Make sure to use airtight containers to prevent the broth from absorbing any flavours from other foods in the refrigerator. You can also store the broth in glass jars, but make sure to leave some headspace at the top to allow for expansion.
Freezing for Future Flavour
For longer storage, freeze your broth in freezer-safe containers or ice cube trays. Frozen broth can last for up to 3 months. To thaw, simply transfer your frozen broth to the refrigerator overnight or defrost in a bowl of cold water.
freezing broth in ice cube trays is a great way to have small portions on hand for quick meals. You can also freeze broth in larger containers, but make sure to leave some headspace at the top to allow for expansion. To thaw frozen broth in a bowl of cold water, make sure the container is fully submerged.
(Part 8) FAQs: Answering Your Broth Questions
Q: Can I use bone-in chicken instead of just bones?
Absolutely! Using bone-in chicken will add even more flavour and richness to your broth. However, you'll want to remove the chicken after about an hour of simmering to avoid it becoming dry and tough. The chicken can then be used in other dishes, such as sandwiches, salads, or pasta.
Q: How do I know if my broth is done?
A good broth should be rich, flavorful, and slightly gelatinous. You should also see a light layer of fat on the surface. If your broth is still thin and watery after 4 hours, you can continue to simmer for a couple more hours. The broth should also have a pleasant aroma, with hints of chicken, vegetables, and herbs.
Q: What can I do with the chicken bones after I've made broth?
Once you've strained your broth, you can discard the bones or use them for another batch of broth. You can also make a delicious chicken stock by simmering the bones with water, vegetables, and herbs for a shorter period of time. Chicken stock is typically made with just chicken bones and water, and is less gelatinous than broth.
Q: Can I make broth with other types of meat?
You can! Beef, pork, and even fish bones can be used to make delicious broths. The simmering times and ingredients may vary depending on the type of meat. For example, beef broth typically requires a longer simmering time than chicken broth. Fish broth is often made with fish bones, heads, and tails, and can be used in soups and sauces.
Q: Is homemade broth healthier than store-bought broth?
Homemade broth is typically healthier than store-bought broth, as it's made with fresh, whole ingredients. It's also free from preservatives and added sodium. Store-bought broths often contain added flavourings, MSG, and other additives, which can be unhealthy in large quantities.
Now that you've got all the secrets to making delicious homemade chicken broth, it's time to roll up your sleeves and get cooking! Remember, the most important ingredient is patience. Enjoy the process and the rich, flavorful rewards of your homemade broth. Happy simmering!
Everyone is watching

Prime Rib Roast Cooking Time Chart: Per Pound Guide
Cooking TipsPrime rib roast. Just the name conjures images of lavish dinners, crackling fires, and hearty laughter. It’s ...

How Long to Bake Potatoes in the Oven (Perfect Every Time)
Cooking TipsBaked potatoes are a staple in my kitchen. They're incredibly versatile, delicious, and surprisingly easy to m...

Perfect Rice Every Time: The Ultimate Guide to Cooking Rice
Cooking TipsAs a self-proclaimed foodie, I've always been a bit obsessed with rice. It's the foundation of countless cuisi...

The Ultimate Guide to Cooking Asparagus: Tips, Techniques, and Recipes
Cooking TipsAsparagus. The mere mention of this spring delicacy conjures up images of vibrant green spears, crisp and burs...

Ultimate Guide to Cooking the Perfect Thanksgiving Turkey
Cooking TipsThanksgiving. Just the word conjures up images of overflowing tables laden with delicious food, the scent of r...