Let's talk about ghee, shall we? You know, that golden elixir, that nutty-flavored clarified butter that's been a culinary hero in Indian kitchens for ages. It's not just a fancy trend, it's the real deal, a treasure that deserves a place in your pantry. And the best part? You can make it yourself at home! Seriously, it's easier than you think, and the results are absolutely worth the effort.
I remember the first time I made ghee. I was living in India, and my neighbor, Mrs. Singh, a true culinary wizard, invited me over for a cup of chai. While she stirred her fragrant brew, she showed me how to make this magical butter. It was a revelation! It was like magic, this simple transformation from ordinary butter into this incredible, flavorful ghee. I went home that day, eager to give it a try myself. And let me tell you, that first batch of homemade ghee was a triumph. I was so proud of myself! Ever since, it's become a regular fixture in my kitchen.
Now, I'm going to share everything I've learned about making ghee, from the basics to the tricks of the trade. Get ready to join me on this journey into the world of ghee. I guarantee you'll be whipping up batches of this deliciousness in no time!
Part 1: Unveiling the Magic of Ghee

So, what exactly is ghee? Well, it's essentially clarified butter, meaning it's butter that's been heated to remove all the milk solids and moisture. This process not only intensifies its flavor but also gives it a longer shelf life. Ghee is incredibly versatile. It's amazing for frying, sautéing, roasting, and even baking. It's a true star in Indian cooking, often used in curries, dals, and chutneys. And here's the best part – it's healthier than regular butter.
The Health Benefits of Ghee: A Golden Elixir
- It's a powerhouse of beneficial fats: Ghee is rich in butyric acid, a short-chain fatty acid that's linked to gut health and a reduction in inflammation.
- It's a natural anti-inflammatory: Thanks to the presence of conjugated linoleic acid (CLA), ghee may have anti-inflammatory properties.
- It's packed with vitamin K2: This essential vitamin plays a crucial role in maintaining strong bones and helps your body absorb calcium.
- It's naturally lactose-free: Ghee is naturally free of lactose, making it a great option for people with lactose intolerance.
Part 2: Choosing the Right Butter: The Foundation of Flavor

The key to making truly delicious ghee lies in choosing the right butter. You've got to be selective, and trust me, it really makes a difference. Look for unsalted, organic butter, preferably grass-fed. The higher the quality of the butter, the richer and more flavorful your ghee will be. And remember, unsalted butter gives you complete control over the saltiness of your ghee. You can always add salt later to taste.
Avoid butter with added flavors, colorings, or preservatives – these can affect the natural flavor of your ghee. Stick to good old-fashioned, simple butter. I've found that using a combination of European and American butter creates a particularly rich and creamy ghee, so that's what I usually go for. But feel free to experiment and find what you like best!
Part 3: The Ghee-Making Journey: A Step-by-Step Guide

Now, let's get down to the business of making ghee. Don't worry, it's a breeze, but you'll need a few essential tools before you start. You'll need:
- A heavy-bottomed pot or saucepan: This will help prevent burning as the butter simmers.
- A heatproof spatula or spoon: For stirring and skimming off the solids.
- A fine-mesh sieve: To strain the ghee.
- Sterilized glass jars or containers: For storing your homemade ghee.
- A thermometer (optional): To monitor the temperature of the ghee.
Now, let's dive into the heart of the process – making ghee itself. Here's what you need to do:
Step 1: Melting the Butter: The First Transformation
Place the butter in your pot or saucepan over medium heat. Let it melt slowly, stirring occasionally to prevent scorching. You want the butter to melt completely, but not boil. This is the first step in transforming butter into ghee – the beginning of the magic! Be patient, it's worth it.
Step 2: Skimming the Foam: Removing Impurities
As the butter melts, you'll notice a layer of foamy milk solids forming on the surface. These solids need to be skimmed off to prevent them from burning and affecting the flavor of your ghee. Gently skim the foam off the surface of the melted butter with your spatula or spoon. Dispose of the foam. This step is all about getting rid of impurities – we're after pure, golden ghee.
Step 3: Simmering and Clarifying: A Slow and Steady Transformation
Once the foam has subsided, turn the heat down to low and let the butter simmer gently. You'll notice the butter beginning to separate – the milky solids will settle at the bottom, and the ghee will rise to the top. This is the clarifying process, where the butter is transformed into ghee. It's important to keep an eye on the ghee during this stage – you don't want it to burn. If you're using a thermometer, aim for a temperature of around 200°F (93°C). You can use a candy thermometer or a regular kitchen thermometer.
The ghee will slowly turn a beautiful golden-brown colour. This is where patience comes in. It can take anywhere from 20 to 45 minutes for the ghee to fully clarify. During this time, you can skim off any remaining foam or solids that rise to the surface. The ghee will be ready when it becomes clear, fragrant, and almost nutty in colour.
Step 4: Straining the Ghee: The Final Touches
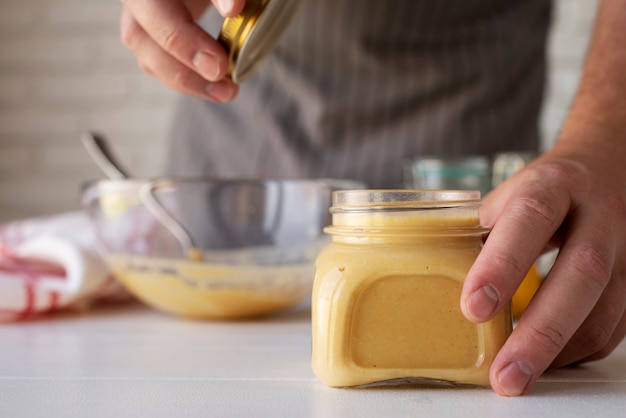
Once the ghee is clarified, it's time to separate it from the milky solids. Carefully pour the ghee through a fine-mesh sieve lined with cheesecloth or muslin cloth into a clean, sterilized glass jar or container. Leave the solids in the sieve. This step is about getting that pure, golden liquid. Once the ghee has been strained, it's ready to be used or stored.
Let the ghee cool down to room temperature before storing it. The ghee will solidify as it cools down. Once cool, you can store it in an airtight container in a cool, dark place for up to 6 months.
Part 4: The Versatility of Ghee: A Culinary Treasure
Now, you've got a beautiful jar of golden ghee – what can you do with it? The possibilities are endless! Ghee is so versatile, it can be used in so many different ways. Let me share some of my favorite ways to use this delicious culinary treasure:
Cooking: Elevating Every Dish
- Frying and Sautéing: Ghee's high smoke point makes it ideal for frying and sautéing. It gives food a lovely, rich flavor and a beautiful golden colour.
- Roasting: Ghee adds a depth of flavor to roasted vegetables, meats, and poultry. I love using it to roast chicken – it really takes the taste to another level.
- Baking: You can use ghee in baking, too. It imparts a rich, buttery flavor to pastries, cakes, and cookies.
- Indian Cuisine: Ghee is a cornerstone of Indian cooking. It's used in countless dishes, from curries to dals to chutneys.
Other Uses: Beyond the Kitchen
- As a Spread: Ghee can be used as a spread on toast, crackers, or even as a topping for pancakes. It's so delicious!
- For Hair and Skin: Ghee has been used for centuries in traditional Indian medicine for its healing properties. It can be applied to the hair and skin to moisturize and nourish.
Part 5: Avoiding Common Mistakes: A Few Tips for Success
Like any culinary skill, making ghee comes with a few potential pitfalls. It's important to be aware of these so you can avoid them. Here are some common mistakes to watch out for:
- Overheating the ghee: If the ghee is overheated, it can burn and develop a bitter taste. Keep a close eye on the temperature and make sure it doesn't exceed 200°F (93°C).
- Not skimming the solids: The milky solids can burn and affect the flavor of the ghee. Make sure you skim off the foam and any remaining solids as they rise to the surface.
- Using the wrong container: Don't store ghee in a container that isn't heat-resistant or airtight. This can lead to contamination or spoilage.
- Storing ghee incorrectly: Ghee should be stored in a cool, dark place. Exposure to light or heat can affect its flavor and quality.
Part 6: Flavor Variations: Get Creative with Ghee
The basic ghee recipe I've shared is a classic, but you can experiment with different flavors and additions to create your own unique ghee. Here are a few ideas to get you started:
- Infused Ghee: Infuse ghee with herbs, spices, or citrus zest for a fragrant and flavorful twist. I love infusing ghee with garlic, ginger, or chilli flakes. It's amazing in curries.
- Salted Ghee: Add a pinch of salt to your ghee for a salty and savory flavor. You can adjust the amount of salt to your liking.
- Spiced Ghee: Add a blend of spices like cumin, coriander, turmeric, or cardamom to your ghee for a warm and aromatic flavor.
Part 7: Exploring the World of Ghee: A culinary adventure
As I mentioned earlier, ghee is a cornerstone of Indian cuisine. It's used in countless dishes, from curries and dals to chutneys and desserts. It adds a rich, nutty flavor that's both delicious and distinctive. You can find ghee at Indian grocery stores or online, but nothing beats making it at home. It's a simple and rewarding process, and you'll be amazed by the difference homemade ghee makes.
Beyond Indian cuisine, ghee is gaining popularity in other culinary traditions, including European and American. It's a versatile ingredient that can be used in a variety of dishes. Its high smoke point and rich flavor make it a favourite among chefs and home cooks alike. It's also a popular ingredient in Paleo and keto diets, as it's a good source of healthy fats and is naturally lactose-free.
Part 8: Ghee FAQs: Your Questions Answered
I know you might have a few questions about making ghee at home. Here are answers to some common ones:
| Question | Answer |
|---|---|
| How long does ghee last? | Homemade ghee can last up to 6 months if stored properly. Keep it in an airtight container in a cool, dark place. |
| Can I use salted butter? | You can, but I recommend using unsalted butter so you can control the saltiness of your ghee. |
| What happens if the ghee burns? | If the ghee burns, it will have a bitter taste and may not be suitable for use. Discard it and start again. |
| What should I do with the milk solids? | You can discard the milk solids, but they can also be used as a fertilizer in your garden. |
| Can I make ghee in the microwave? | It’s not recommended to make ghee in the microwave. The microwave doesn't provide consistent heat, and it can be difficult to control the temperature. |
I hope this guide has been helpful and inspired you to make your own ghee at home. It's a truly rewarding experience, and the results are well worth the effort. So grab some good-quality butter, a saucepan, and get cooking!
Happy ghee-making!
Everyone is watching

Prime Rib Roast Cooking Time Chart: Per Pound Guide
Cooking TipsPrime rib roast. Just the name conjures images of lavish dinners, crackling fires, and hearty laughter. It’s ...

How Long to Bake Potatoes in the Oven (Perfect Every Time)
Cooking TipsBaked potatoes are a staple in my kitchen. They're incredibly versatile, delicious, and surprisingly easy to m...

Perfect Rice Every Time: The Ultimate Guide to Cooking Rice
Cooking TipsAs a self-proclaimed foodie, I've always been a bit obsessed with rice. It's the foundation of countless cuisi...

The Ultimate Guide to Cooking Asparagus: Tips, Techniques, and Recipes
Cooking TipsAsparagus. The mere mention of this spring delicacy conjures up images of vibrant green spears, crisp and burs...

Ultimate Guide to Cooking the Perfect Thanksgiving Turkey
Cooking TipsThanksgiving. Just the word conjures up images of overflowing tables laden with delicious food, the scent of r...
