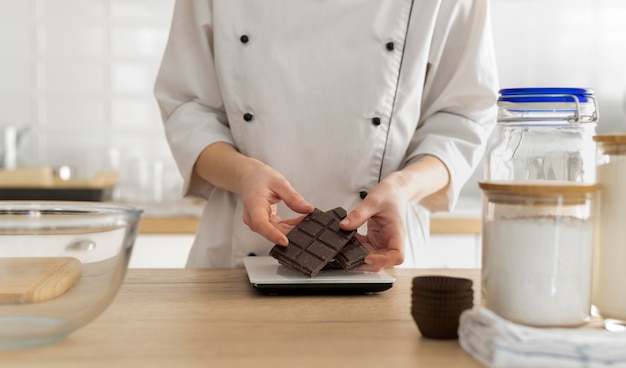
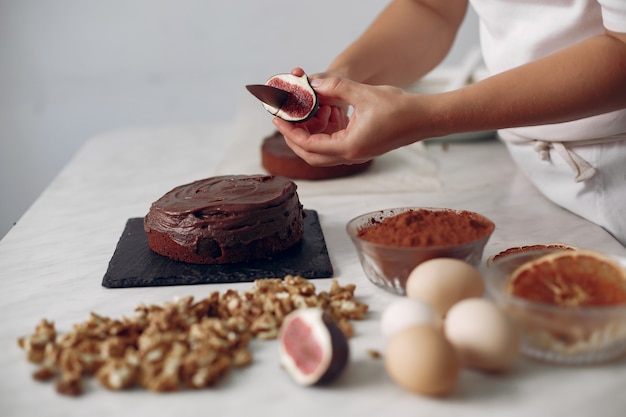
I’ll admit it, I’ve always had a soft spot for fudge. There’s something so utterly satisfying about that smooth, creamy texture, the rich chocolatey flavour, and that delightful, melt-in-your-mouth sensation. It’s a dessert that’s both nostalgic and utterly decadent. And over the years, I’ve learned a thing or two about making it. So, I’m here to share my secrets – the tips, tricks, and techniques I’ve picked up along the way – to help you create fudge that’s truly out of this world.
(Part 1) Let’s Talk Basics

Making delicious fudge is surprisingly simple, and it’s all about getting the fundamentals right.
1. The Essential Ingredients: A Foundation for Success
Think of this as the blueprint for your fudge, the building blocks that create the magic.
Sugar: The foundation of every good fudge is sugar. It provides sweetness and helps create that smooth, creamy texture. Now, I’ve tried them all, but for classic fudge, you can’t beat granulated sugar. It’s reliable, readily available, and delivers that perfectly balanced sweetness.
Butter: This is where we start to elevate the experience. Unsalted butter is the key to richness and that silky smooth texture. It’s a game-changer for the overall flavour profile.
Milk: This ingredient adds moisture and helps create a luscious, velvety texture. I tend to stick with whole milk, but you can play around with evaporated milk for a richer flavour or even almond milk for a dairy-free option.
Chocolate: The heart and soul of your fudge! This is where you can really unleash your creativity. We’ll delve deeper into the different types in a bit, but know this – your choice of chocolate will define the overall flavour of your fudge.
Extras: Now, this is where you add that extra touch of personality to your fudge. Think flavourings like vanilla extract, coffee, peppermint extract, or even a pinch of salt for a touch of intrigue. These additions add depth and complexity to the flavour profile.
2. The Process: Unveiling the Magic
Now that you have your ingredients, it’s time to get into the action.
Melting: The process starts with melting the sugar, butter, and milk in a saucepan over medium heat. It’s all about gentle, consistent stirring, and a little patience. This is where a candy thermometer is your best friend. It helps you monitor the temperature and prevent the sugar from burning, which is crucial for a smooth texture.
Boiling: This is a critical step where you bring the mixture to a rolling boil. You’ll need that candy thermometer again to ensure you reach the correct temperature for the desired consistency.
Chocolate Time: Once your mixture reaches the proper temperature, remove it from the heat and gently stir in your chocolate. It’s a moment of pure indulgence as the chocolate melts into the warm mixture, creating that signature chocolatey base.
Whipping: Now, it’s time to get a little vigorous! You’ll need to whip the mixture until it begins to thicken. This is where your electric mixer comes in handy, and it’s a good idea to have some elbow grease ready.
Pouring and Setting: You’re nearing the finish line! Pour your luxurious fudge into a greased pan and let it cool down completely. This is a crucial step as it allows the fudge to set properly and develop that firm yet chewy texture we all love. Finally, slice it into squares, and you’re ready to enjoy!
(Part 2) Choosing the Right Chocolate: The Soul of Your Fudge

We’ve established the basics, now let’s talk about the most important element – the chocolate. It’s the heart and soul of your fudge, the ingredient that dictates the flavour profile. I’ve experimented with countless types of chocolate, and each one offers a unique experience.
1. Milk Chocolate: The Comforting Classic
This is the chocolate that brings back childhood memories. Milk chocolate offers a comforting, mellow sweetness and a creamy richness that’s always a crowd-pleaser. It’s the go-to choice for those who prefer a gentle, balanced flavour.
2. Dark Chocolate: For the Bold and Adventurous
For those who crave a more intense experience, dark chocolate is the way to go. It’s rich, complex, and often features a hint of bitterness that balances out the sweetness. This is the choice for chocolate connoisseurs who appreciate a depth of flavour.
3. White Chocolate: The Creamy and Unique
White chocolate is a bit of a wildcard. It’s creamy and sweet but lacks cocoa solids, getting its colour from cocoa butter. This results in a smoother, lighter texture than its darker counterparts. It’s a great option for a unique and elegant flavour.
4. Combining Chocolates: A Symphony of Flavours
Remember, you’re not limited to just one type of chocolate! Experimenting with blending different varieties is a fun way to create unique flavour profiles. Imagine a swirl of milk chocolate and dark chocolate, a delightful contrast of textures and tastes.
(Part 3) Creating a Symphony of Flavours: Unleashing Your Creativity

Now that we’ve got the foundation in place, let’s explore the exciting world of flavour combinations.
1. A Touch of Vanilla: The Classic Companion
Vanilla extract is a staple for a reason. It adds a subtle, comforting note that complements any chocolate, enhancing its richness without overpowering it.
2. Coffee Lovers Rejoice: A Touch of Coffee
For those who enjoy a hint of coffee in their sweet treats, a dash of instant coffee powder or espresso powder is a fantastic addition. It adds a subtle bitterness that balances the sweetness, enhancing the chocolate’s richness.
3. Peppermint Delight: A Festive Treat
Peppermint extract is a perfect choice for a festive fudge. It creates a cool, refreshing flavour that contrasts beautifully with the rich chocolate, making it ideal for the holiday season.
4. The Zing of Orange: A Citrusy Twist
For a bright and tangy twist, try adding orange extract or a little zest from an orange peel. It brings a citrusy note that balances out the sweetness and adds a vibrant, refreshing element.
5. A Hint of Salt: Enhancing the Sweetness
Don’t be afraid to add a pinch of salt! It may sound unusual, but a tiny bit of salt can actually enhance the flavours of your fudge, creating a subtle balance between sweet and savoury.
(Part 4) Mastering the Consistency: Achieving That Perfect Texture
We all want that perfect fudge texture – smooth, slightly chewy, and just-melt-in-your-mouth delicious.
1. The Candy Thermometer: Your Guide to Perfection
I swear by the candy thermometer! It’s like a magic wand that helps you achieve that ideal consistency. You need to reach the "soft ball" stage, which is about 235°F (113°C). This ensures that your fudge won’t be too runny or too hard.
2. Patience is Key: Allowing the Fudge to Set
It’s tempting to rush the process, but patience is key. Let your fudge cool down completely before slicing it. This allows it to set properly and achieve that firm yet slightly chewy texture that’s so satisfying.
3. The “Cold Water Test”: A Simple Alternative
If you don’t have a candy thermometer, there’s a handy alternative: the “cold water test”. Drop a tiny bit of fudge into a bowl of cold water. If it forms a soft ball that holds its shape, it’s ready!
(Part 5) Fudge Fun: Creative Ideas to Elevate Your Fudge Game
So you’ve mastered the basics, and now you’re ready to get creative! Let’s explore some fun ideas to take your fudge to the next level.
1. Swirls of Flavour: Visual and Flavor Contrast
This is a fun way to create a beautiful visual appeal and a delightful flavour contrast. Simply pour one flavour of fudge into your pan, then swirl in a different flavour using a knife or toothpick.
2. Layered Delights: A Dramatic and Delicious Presentation
For a more dramatic effect, try creating layers of different fudge flavours. Think about a layer of classic chocolate fudge topped with a layer of coffee fudge or a layer of white chocolate fudge topped with a layer of peppermint fudge.
3. Nutty Goodness: Adding a Touch of Crunch
Add a touch of crunch to your fudge by mixing in chopped nuts like pecans, walnuts, or almonds. It creates a wonderful texture contrast and adds a nutty flavour that complements the chocolate.
4. Chocolate Chips: Double the Chocolatey Goodness
Who doesn’t love chocolate chips? Add some to your fudge for extra chocolatey goodness and a fun, speckled appearance.
5. Candy-Coated Crunch: A Festive and Fun Twist
Get creative with candy coatings! Think about chopped pretzels for a salty-sweet combination, sprinkles for a festive touch, or even crumbled Oreo cookies for a delightful twist.
(Part 6) Serving Your Fudge Masterpiece: Presentation is Key
Okay, your fudge is ready. Now, let’s think about presenting it like the culinary artist you are.
1. First Impressions Matter: A Beautiful Presentation
It’s all about that first impression. Cut your fudge into neat squares, and arrange them beautifully on a plate. I like to use a festive serving tray or a small decorative dish to elevate the presentation.
2. Storage is Key: Preserving the Freshness and Texture
Store your fudge in an airtight container in the refrigerator for up to a week. I always keep mine in the freezer to maintain that fresh, chewy texture.
3. A Touch of Flair: Adding That Extra Sparkle
Elevate your presentation with a sprig of fresh mint, a dusting of powdered sugar, or a few colourful sprinkles.
(Part 7) Beyond the Basics: Troubleshooting Your Fudge Creations
Let’s be real, sometimes things don’t go exactly as planned. But don’t worry! I’ve encountered these hiccups myself, and I’ve got your back.
1. Fudge is Too Soft: Adjusting the Consistency
If your fudge is too soft, it means it didn’t reach the proper "soft ball" stage. You can try adding a bit of powdered sugar to thicken it up.
2. Fudge is Too Hard: Bringing it Back to Life
On the other hand, if your fudge is too hard, it means you overcooked it. Don’t fret! You can try adding a bit of milk and reheating it gently to soften it.
3. Fudge Has a Grainy Texture: Preventing Grainy Fudge
If you notice a grainy texture, it might be due to not stirring the sugar mixture constantly during the boiling process. You can try melting it again and stirring it more consistently.
(Part 8) Enjoying Your Fudge Creations: A Celebration of Deliciousness
You’ve done it! You’ve created your own delicious fudge. Now it’s time to sit back, relax, and enjoy your masterpiece.
1. Sweet Treats for Everyone: Sharing the Fudge Love
Fudge is a great treat for everyone. It’s perfect for sharing with friends and family, and it’s always a hit at gatherings.
2. Gifting Delight: A Homemade Gift That’s Sure to Please
Want to give a thoughtful homemade gift? Fudge is always a winner! Package it up in a cute container or bag with a festive ribbon.
3. Fudge-Inspired Indulgences: Expanding Your Fudge Horizons
Go beyond the classic square! You can use your fudge to create other delicious treats. Think about adding it to your favourite desserts like ice cream, brownies, or even cakes!
FAQs: Answers to Your Fudge-Making Questions
1. Can I use different types of milk?
Absolutely! You can use evaporated milk for a richer flavour, almond milk for a dairy-free option, or even coconut milk for a tropical twist.
2. How long can I store fudge?
Stored in an airtight container in the refrigerator, fudge can last up to a week. For longer storage, you can freeze it for up to 2 months.
3. Can I use chocolate chips instead of chocolate bars?
You can definitely use chocolate chips! However, make sure you use high-quality chocolate chips for the best flavour.
4. What if my fudge doesn’t set properly?
If your fudge doesn’t set properly, it might be due to not reaching the proper temperature during the cooking process. You can try reheating it gently and adding a bit of powdered sugar to help it thicken.
5. What are some tips for making the perfect fudge?
Use a candy thermometer to ensure you reach the correct temperature for the "soft ball" stage.
Stir the mixture constantly during the boiling process to avoid burning.
Don't rush the cooling process, as this allows the fudge to set properly.
Experiment with different flavours and textures to create your own unique fudge recipes!
And there you have it! Now, you have all the tools and knowledge to embark on your own fudge-making journey. So, gather your ingredients, put on your apron, and have fun creating delicious, melt-in-your-mouth fudge. Who knows, you might just become a fudge master!
Everyone is watching

Perfect Rice Every Time: The Ultimate Guide to Cooking Rice
Cooking TipsAs a self-proclaimed foodie, I've always been a bit obsessed with rice. It's the foundation of countless cuisi...

Prime Rib Roast Cooking Time Chart: Per Pound Guide
Cooking TipsPrime rib roast. Just the name conjures images of lavish dinners, crackling fires, and hearty laughter. It’s ...

The Ultimate Guide to Cooking Asparagus: Tips, Techniques, and Recipes
Cooking TipsAsparagus. The mere mention of this spring delicacy conjures up images of vibrant green spears, crisp and burs...

Ultimate Guide to Cooking the Perfect Thanksgiving Turkey
Cooking TipsThanksgiving. Just the word conjures up images of overflowing tables laden with delicious food, the scent of r...

How Long to Bake Potatoes in the Oven (Perfect Every Time)
Cooking TipsBaked potatoes are a staple in my kitchen. They're incredibly versatile, delicious, and surprisingly easy to m...
