(Part 1) The Foundation: Choosing Your Chocolate

The Chocolate Hierarchy: From Bitter to Sweet
Let's talk about chocolate types. Now, you might be tempted to reach for that bag of milk chocolate chips, but hold on! For a frosting that sings with flavour, you'll want to use bittersweet or semisweet chocolate. They offer a richer, more complex chocolate flavour, without being overly sweet. My personal preference is a dark chocolate with at least 60% cacao, because that intense cocoa flavour is just divine! Now, if you prefer a sweeter frosting, milk chocolate is a viable option, but it won't be as intense or nuanced.
Chocolate Ratios: Balancing Taste and Texture
The amount of chocolate you use will determine how rich and intense your frosting will be. As a rule of thumb, I generally use about 1 cup of chopped chocolate for every 1 cup of frosting. But don't be afraid to add more chocolate! It's always better to err on the side of too much chocolate, trust me, you won't regret it.
Chocolate Chips vs. Chocolate Bars: A Matter of Preference
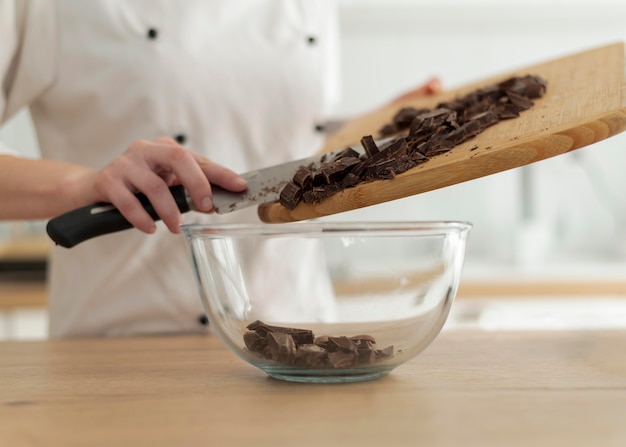
When it comes to chocolate, there's a whole debate about chocolate chips vs. chocolate bars. Both work well in frosting, but there are nuances. Chocolate chips are easier to melt because they're already small, but I prefer the richer flavour of a high-quality chocolate bar that I chop myself. There's something so satisfying about breaking open a bar of chocolate and chopping it into little pieces, it feels like a ritual.
(Part 2) Mastering the Melt: Bringing Your Chocolate to Life

The Double Boiler: Tried and True
For generations, bakers have relied on the double boiler technique for melting chocolate. It's tried and true, foolproof, and produces beautifully smooth chocolate. It's a little like a spa treatment for your chocolate! You'll need a heatproof bowl and a saucepan filled with simmering water. Place the bowl over the saucepan, ensuring the bottom of the bowl doesn't touch the water. Now, add your chopped chocolate to the bowl and gently stir until it melts. The warmth from the steam will melt the chocolate evenly, leaving you with a gloriously smooth texture.
The Microwave: A Speedy Shortcut
If you're pressed for time, the microwave is a good option for melting chocolate. It's quick and easy, but you have to be careful not to overheat the chocolate. Place your chopped chocolate in a microwave-safe bowl and heat in 30-second intervals, stirring in between. Watch closely! Overheating can cause the chocolate to seize up, becoming grainy and unusable.
Melting Chocolate Tips: Avoiding the Seize-Up
- Use low heat or a low power setting in the microwave.
- Stir frequently to ensure even melting and prevent scorching.
- Avoid adding water to your chocolate. It will make it seize up, and we don't want that.
- If your chocolate does seize up, try salvaging it by adding a tablespoon of unsalted butter and stirring until smooth. It's a bit of a gamble, but sometimes it works!
(Part 3) The Creamy Core: Building Your Frosting Base

The Butter: Foundation of Creaminess
The first key ingredient in our frosting base is butter. It's the secret to creating that velvety, rich texture that we all crave. Unsalted butter is my go-to because it gives me complete control over the sweetness of the frosting. Let your butter soften at room temperature before you start. This makes it easier to cream together with the sugar.
The Sugar: Balancing Sweetness and Texture
Now, let's talk sugar. The type of sugar you choose will influence both the texture and sweetness of your frosting. For a classic, smooth frosting, powdered sugar is the absolute best. I prefer confectioners' sugar, as it dissolves easily and creates that lovely velvety texture. You can use granulated sugar, but be prepared for a slightly grainy texture. It's a matter of personal preference, really.
The Art of Creaming: A Fluffy Base
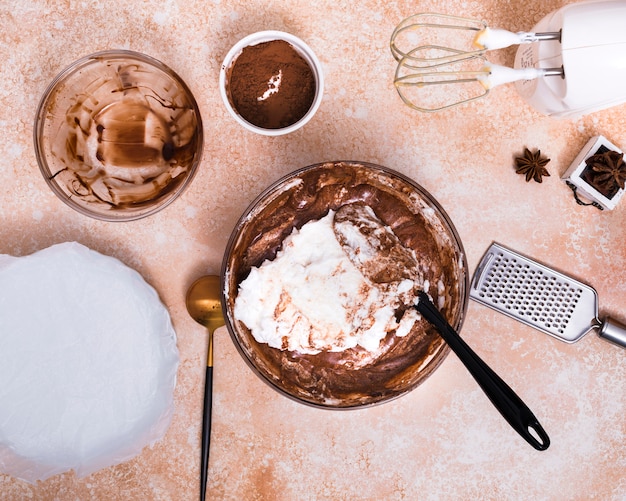
Creaming the butter and sugar together is a vital step in creating a light, fluffy frosting. This is where your electric mixer comes in handy. Use medium speed and cream the butter and sugar together until they're light and airy. This incorporates air into the frosting, making it lighter and less dense, which is what gives it that airy, pillowy texture.
(Part 4) Blending the Flavors: Introducing the Chocolate
It's finally time to introduce our star ingredient! This is the moment we've been waiting for. Get ready for a symphony of chocolatey goodness.The Gradual Incorporation: A Smooth Transition
Don't just dump the melted chocolate into the butter and sugar mixture! It's crucial to gradually add the melted chocolate, beating on low speed until it's fully incorporated. This gentle process prevents the chocolate from seizing up and ensures a smooth, silky frosting. It's all about taking your time and letting the flavours blend together harmoniously.
A Touch of Vanilla: Enhancing the Flavour
A splash of pure vanilla extract is a must-have addition to your chocolate frosting. It adds a warm, comforting aroma and a subtle sweetness that complements the chocolate perfectly. It's a small detail, but it makes a big difference in the overall flavour profile.
Optional Extras: Personalizing Your Creation
While the basic recipe is delicious on its own, there's always room for customization! Feel free to add your own personal touch to your frosting with these tasty extras:
- A pinch of salt to enhance the chocolate flavour and create a more complex taste. This is a trick that professional bakers use all the time.
- A tablespoon of cocoa powder for a more intense chocolate flavour. It adds a deeper, richer chocolate note to the frosting.
- A tablespoon of espresso powder for a bold, coffee-chocolate flavour. It's a delicious way to add a caffeine kick to your dessert.
- A handful of chopped nuts for a delightful crunch. Pecans, walnuts, or almonds all work well with chocolate.
- A teaspoon of peppermint extract for a refreshing and festive twist. It's a great flavour combination for the holidays or for adding a touch of minty freshness to your dessert.
(Part 5) Achieving the Perfect Consistency: Frosting Finesse
The consistency of your frosting is crucial to its success. If it's too thin, it'll slide off your cake. Too thick, and it'll be difficult to spread. It's all about finding that sweet spot.Adjusting the Consistency: A Balancing Act
If your frosting is too thin, add more powdered sugar, one tablespoon at a time, until you reach the desired consistency. If it's too thick, you can thin it out with a bit of milk or heavy cream. It's a balancing act, but with a little practice, you'll get the hang of it.
The Spoon Test: A Simple Check
To check if your frosting is ready, scoop a spoonful onto a plate and let it sit for a minute. It should hold its shape but still be soft and spreadable. If it's too runny, it'll spread out quickly. If it's too thick, it'll hold its shape like a mound. You're looking for that perfect balance between firm and spreadable.
(Part 6) The Art of Spreading: A Smooth Finish
You've created the most delicious chocolate frosting imaginable. Now, it's time to showcase your culinary skills by spreading it flawlessly. It's an art form, my friends, but with a little practice, you'll be spreading like a pro in no time.The Right Tools: Essential Equipment
An offset spatula is your best friend when spreading frosting. It allows you to smoothly and evenly spread the frosting without damaging the cake. The angled blade makes it easy to get into the corners and create a clean, professional finish. You can also use a piping bag fitted with a large round tip for a more decorative finish.
The Gentle Touch: Spreading with Confidence
Start by spreading a thin layer of frosting over the entire cake. This is called the crumb coat, and it helps to seal in any crumbs and create a smooth base for the final layer of frosting. Then, add a second layer and smooth it out using a gentle back-and-forth motion. Don't press too hard, as this can damage the cake. It's all about smooth, even strokes, and a light hand.
(Part 7) Storage and Shelf Life: Keeping Your Frosting Fresh
No one wants their delicious chocolate frosting to go to waste, so here's how to store it properly to keep it fresh and flavorful for days to come.Refrigeration: Preserving Freshness
Store your frosting in an airtight container in the refrigerator for up to 5 days. The fridge is the ideal environment to keep it moist and prevent it from drying out. Just remember to bring the frosting to room temperature before using it.
Freezing Frosting: A Time-Saving Trick
If you're planning to make frosting ahead of time, you can freeze it for up to 3 months. Transfer the frosting to an airtight container and freeze until solid. When you're ready to use it, thaw the frosting overnight in the refrigerator. It's a great time-saving tip for busy bakers.
(Part 8) Variations on the Theme: Exploring New Flavors
Once you've mastered the art of making classic chocolate frosting, it's time to unleash your inner creativity and explore different flavour variations. Here are a few ideas to get your taste buds tingling:
Chocolate Raspberry Frosting: A Fruity Twist
Add a tablespoon of raspberry jam to the frosting for a sweet and tart flavour combination. The tangy raspberry flavour balances the sweetness of the chocolate perfectly.
Chocolate Peppermint Frosting: A Festive Delight
For a refreshing and festive twist, add a teaspoon of peppermint extract to the frosting. This is a classic holiday flavour combination that always brings a smile to your face.
Chocolate Peanut Butter Frosting: A Classic Combo
For a decadent and satisfying treat, add a tablespoon of peanut butter to the frosting. It's a classic combination that always pleases a crowd. The creamy peanut butter complements the richness of the chocolate perfectly.
(Part 9) FAQs: Your Chocolate Frosting Questions Answered
What if my frosting is too runny?
If your frosting is too runny, you can thicken it by adding more powdered sugar, one tablespoon at a time, until you reach the desired consistency. Remember, it's a balancing act, so add the sugar gradually and check the consistency after each addition.
Can I use a different type of sugar?
While powdered sugar is the best option for a smooth and creamy frosting, you can use granulated sugar if you prefer. However, be prepared for a slightly grainy texture. If you decide to use granulated sugar, make sure to beat it for a longer time to ensure it's fully incorporated.
How long does chocolate frosting last?
Properly stored chocolate frosting can last up to 5 days in the refrigerator. You can also freeze it for up to 3 months. Just make sure to store it in an airtight container to prevent it from absorbing any unwanted flavours.
What should I do if my chocolate seizes up?
If your chocolate seizes up while melting, try adding a tablespoon of unsalted butter and stirring until smooth. It's a bit of a gamble, but sometimes it works. If it doesn't, you might have to start over with a fresh batch of chocolate.
Can I make chocolate frosting ahead of time?
Yes, you can make chocolate frosting ahead of time. Store it in an airtight container in the refrigerator for up to 5 days or freeze it for up to 3 months. It's a great time-saving tip, especially if you're planning a big event.
(Part 10) A Final Word: Embracing Your Inner Chocolatier
Making delicious chocolate frosting is a truly rewarding experience. It's a journey of experimentation and creativity, where you can unleash your inner chocolatier and craft a sweet masterpiece that will impress your taste buds and delight your loved ones.
Remember, practice makes perfect. Don't be afraid to experiment with different flavours and techniques. With a little patience and a whole lot of chocolate love, you'll be creating frosting that's worthy of a standing ovation. And who knows, maybe you'll even discover your own signature frosting recipe that will be the envy of all your friends and family. Happy frosting!
Everyone is watching

Perfect Rice Every Time: The Ultimate Guide to Cooking Rice
Cooking TipsAs a self-proclaimed foodie, I've always been a bit obsessed with rice. It's the foundation of countless cuisi...

The Ultimate Guide to Cooking Asparagus: Tips, Techniques, and Recipes
Cooking TipsAsparagus. The mere mention of this spring delicacy conjures up images of vibrant green spears, crisp and burs...

Ultimate Guide to Cooking the Perfect Thanksgiving Turkey
Cooking TipsThanksgiving. Just the word conjures up images of overflowing tables laden with delicious food, the scent of r...

Can You Cook Spaghetti with Gasoline? (The Shocking Truth)
Cooking TipsWe've all seen those crazy internet trends. You know, the ones that make you wonder, "Did someone actually try...

Chorizo and Eggs Recipe: The Ultimate Guide
Cooking TipsRight, let’s talk about chorizo and eggs. You know, that classic Spanish dish that's always a winner. It's th...
