Let's be honest, there's nothing worse than a dry, disappointing turkey. It's the bane of holiday feasts and the source of many a disappointed sigh. But fear not, my fellow food enthusiasts! I'm here to share the secrets I've learned over the years, the tips and tricks that have transformed my turkey from a dry, uninspiring bird into the star of the show.
This isn't just a recipe, folks. It's a journey. It's a quest for the perfect Thanksgiving centrepiece, the ultimate Christmas feast hero, or just a darn good Sunday roast. And I'm going to take you with me, step-by-step, to ensure your turkey is always the juiciest, moistest, most flavourful bird on the block.
(Part 1) Choosing the Right Turkey

The Turkey Selection: Finding Your Perfect Bird
The first step in this turkey journey is choosing the right bird. Don't just grab the first one you see! Take your time, and look for these key characteristics:
- Size: Think about your guest list. You want enough turkey for everyone, but you also don't want to be stuck with leftovers for a week. A good rule of thumb is about 1 pound of turkey per person. For example, if you're feeding 10 people, a 10-pound turkey should be perfect.
- Appearance: The skin should be smooth and plump, without any discolouration or blemishes. This indicates that the bird has been handled properly and is fresh.
- Weight: Pick a turkey that feels heavy for its size. This means it's well-hydrated and juicy. You want a turkey that feels dense, not flimsy.
- Freshness: If you're buying a frozen turkey, make sure it's frozen solid. Avoid any packages that are leaking or have frost buildup. This means the turkey might have been thawed and refrozen, which can affect its quality.
Fresh or Frozen: The Great Debate
Now, the age-old question: Fresh or frozen? It comes down to personal preference and what's available. I'll be honest, I usually opt for frozen turkeys. They're often more readily available and can be stored for longer. Plus, thawing a frozen turkey properly gives you a chance to brine it, which is a game-changer in the moisture department.
Brining: The Moisture Miracle
Speaking of brining, this is where the magic truly begins. Brining is like giving your turkey a spa day before its big moment. It involves soaking the turkey in a salt and water solution, which infuses it with moisture and flavour. I've been a dedicated brining believer for years, and I swear by it. It truly makes a difference in the juiciness and tenderness of the final product.
Brining Basics: Unveiling the Secrets
Here's the lowdown on brining:
- What You Need: A large container (a stockpot or cooler works great), cold water, salt, and optionally, other seasonings like sugar, herbs, or spices. You can get creative with your brining solution, adding aromatics like garlic, onions, or citrus zest for extra flavour.
- The Recipe: The basic brine is 1 cup of salt per gallon of water. For a more flavorful brine, add 1/2 cup of sugar and your favorite herbs and spices. I like to add a bay leaf, some peppercorns, and a sprig of thyme for a classic flavour profile.
- Time: You'll want to brine your turkey for at least 6 hours, but overnight is best. Don't worry about over-brining. A good soak will only make your turkey more flavorful.
- Thawing and Brining: If you're using a frozen turkey, make sure to thaw it completely in the refrigerator before brining. This is essential for food safety.
(Part 2) Getting Ready for the Roast

Prepping the Turkey: Setting the Stage for a Delicious Roast
Once your turkey is thawed and brined (if you're doing the brine thing), it's time to prep it for the big roast. This step is all about maximizing flavour and ensuring a perfectly cooked bird.
- Pat It Dry: Remove the turkey from the brine and pat it dry with paper towels. This will help the skin crisp up nicely during roasting. You don't want a soggy skin, you want a golden-brown, crispy delight.
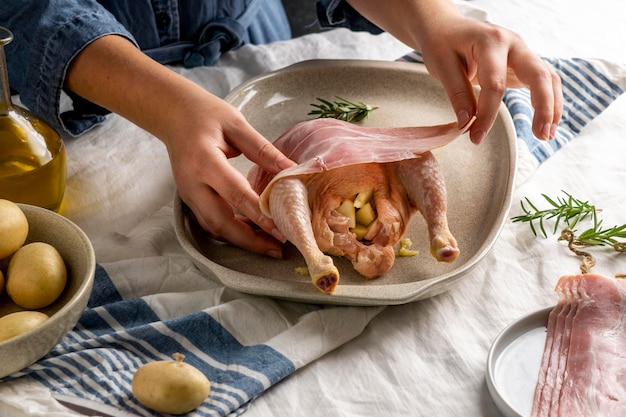
- Stuff or Not? This is a personal choice. I'm a fan of stuffing the cavity with herbs and aromatics, like onions, celery, and garlic. It adds a wonderful depth of flavour to the turkey. If you're stuffing the turkey, make sure to do it right before roasting so the stuffing doesn't get too soggy.
- Seasoning: Don't skimp on seasoning! Rub the entire turkey with butter or olive oil and season liberally with salt, pepper, and any other herbs or spices you love. Remember, you can never have too much flavour. I like to use a blend of dried herbs like rosemary, thyme, and sage, but you can use whatever you fancy.
Roasting Essentials: The Tools of the Trade
You've got your prepped turkey, now it's time to gather your roasting gear. You'll need:
- A Large roasting pan: This is where the turkey will live during its roasting adventure. Choose a pan that's large enough to fit the turkey comfortably without overcrowding. You want the turkey to have some space to breathe, allowing the heat to circulate evenly.
- A Roasting Rack: This is essential for even cooking. The rack lifts the turkey off the bottom of the pan, allowing heat to circulate all around it. This prevents the bottom from burning and ensures the entire bird cooks evenly.
- A meat thermometer: Don't rely on guesswork! A meat thermometer is your best friend when it comes to ensuring your turkey is perfectly cooked. You don't want to undercook or overcook your turkey, and a meat thermometer guarantees that it's cooked to the right temperature.
The Roasting Process: Unveiling the Secrets to a perfect roast
Now, onto the roasting! This is the moment we've been waiting for. But before we dive in, remember, every oven is different. You may need to adjust cooking times based on your own oven.
- Preheat Your Oven: Preheat your oven to 325°F (165°C). This is the ideal temperature for a juicy, evenly cooked turkey.
- Roast Time: Roast the turkey for about 15 minutes per pound, or until the internal temperature reaches 165°F (74°C) in the thickest part of the thigh. This ensures the turkey is cooked through and safe to eat.
- Basting: For extra moisture and flavour, baste the turkey every 30-45 minutes with pan juices. You can also add water or broth to the roasting pan to prevent it from drying out. Basting helps to keep the turkey moist and adds a beautiful glaze to the skin.
(Part 3) The Resting Ritual: Letting the Turkey Relax

Why Resting Matters: The Importance of Patience
We're almost there! But before you slice into your masterpiece, let the turkey rest for at least 15 minutes. This might seem like an unnecessary step, but it's crucial for locking in the juices and ensuring a tender, flavorful turkey.
How to Rest Your Turkey: The Art of Patience
- Cover and Let It Cool: Transfer the turkey to a cutting board and cover it loosely with foil. Let it rest for at least 15 minutes, or up to 30 minutes for a larger bird. This allows the juices to redistribute throughout the meat, resulting in a much more moist and flavorful turkey.
(Part 4) The Big Reveal: Carving Your Turkey Masterpiece
Carving the Turkey: A Culinary Art Form
Now comes the moment of truth. carving a turkey can be a bit daunting, but with a few simple steps, you'll be a pro in no time.
- Gather Your Tools: You'll need a sharp carving knife and a carving fork. A sharp knife is essential for clean cuts, and a carving fork helps to hold the turkey steady.
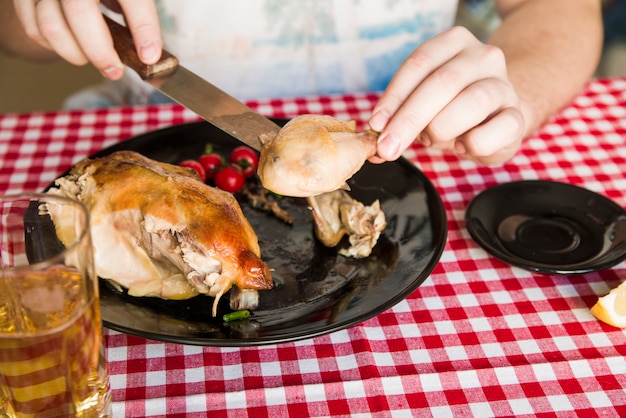
- Start with the Legs: Begin by carving the legs and thighs. Use your carving fork to hold the leg steady and slice through the joint. Then, separate the thigh from the drumstick.
- Breast Time: Next, carve the breast. Use your carving knife to slice across the breastbone, separating the breast meat into thin slices. You can carve the breast whole or in individual slices, depending on your preference.
- Wings: Finally, remove the wings. You can slice them or serve them whole, depending on your preference. The wings can be a bit tricky to carve, so you can always just serve them whole, which is perfectly acceptable.
The Ultimate Turkey Presentation: A Feast for the Eyes
Now that you've carved your masterpiece, it's time to show it off! Here's how to create a visually stunning centerpiece that's sure to impress:
- Plating with Finesse: Arrange the carved turkey on a platter, keeping the skin side up to maintain its crispy texture.
- Gravy Goodness: Don't forget the gravy! Serve it in a separate gravy boat or pour it over the turkey. Gravy adds a delicious richness and moisture to the turkey and makes it even more satisfying.
- side dishes Shine: Complement your turkey with a variety of side dishes, like mashed potatoes, stuffing, cranberry sauce, and roasted vegetables. These side dishes add a variety of flavours and textures to your meal, making it a truly memorable experience.
(Part 5) The Taste Test: The Moment of Truth
The Verdict: A Celebration of Deliciousness
Take a bite. How does it taste? Juicy, right? Tender? Flavourful? It should be. If you followed this guide, you've achieved turkey nirvana.
(Part 6) Leftover Love: Transforming Turkey Scraps into Culinary Delights
Turning Leftovers into Treasures: A culinary adventure
Don't let those leftover turkey scraps go to waste! There's a world of culinary possibilities waiting to be explored.
turkey sandwiches: A Classic for a Reason
The classic leftover turkey dish. Use leftover turkey meat to make mouthwatering sandwiches, piled high with your favourite toppings like lettuce, tomato, onion, and mayonnaise.
turkey soup: A Hearty and Comforting Option
This is my go-to for using up leftover turkey. Simmer the leftover turkey bones with vegetables, herbs, and spices to create a rich and flavorful broth. Shred the leftover turkey meat and add it to the soup for a hearty and comforting meal. You can add different vegetables like carrots, celery, onions, and potatoes, and flavour the soup with your favourite herbs and spices, like thyme, rosemary, and bay leaf.
turkey salad: A Versatile Delight
Mix chopped leftover turkey with mayonnaise, celery, onion, and your favourite herbs and spices to make a delicious and versatile turkey salad. Serve it on sandwiches, crackers, or lettuce wraps. You can add a little bit of chopped cranberries or walnuts to the turkey salad for added flavour and texture.
(Part 7) Tips and Tricks for Turkey Success: Avoiding Common Pitfalls
The Don'ts of Turkey: Avoiding Common Mistakes
- Don't Overcook: Overcooking is the enemy of juicy turkey. Make sure you use a meat thermometer to ensure your turkey reaches the proper internal temperature. Overcooked turkey can become dry and tough, so keep a close eye on it.
- Don't Stuff the Turkey Too Early: Stuffing the turkey too early can cause the stuffing to become soggy. Stuff the turkey right before roasting for the best results. This ensures the stuffing cooks evenly and doesn't become a soggy mess.
- Don't Let the Turkey Dry Out: Baste your turkey regularly during roasting to keep it moist. This helps to keep the turkey juicy and flavorful.
The Dos of Turkey: Key Strategies for Success
- Do Brine: Brining is a game-changer for turkey moisture. It's a simple yet effective technique that transforms the turkey's texture.
- Do Rest: Allow your turkey to rest after roasting to redistribute the juices and ensure a tender, flavorful turkey. This is crucial for achieving a moist and delicious turkey.
- Do Experiment with Seasonings: Don't be afraid to get creative with your seasonings. Experiment with different herbs and spices to find your perfect turkey flavour profile.
(Part 8) FAQs: Answering Your Turkey Questions
1. What's the Best Way to Thaw a Frozen Turkey?
The safest and most effective way to thaw a frozen turkey is in the refrigerator. Allow about 24 hours of thawing time for every 5 pounds of turkey. This ensures that the turkey thaws evenly and safely.
2. Can I Brine a Turkey in the Oven?
No, you should never brine a turkey in the oven. Brining should be done in a large container, such as a stockpot or cooler, filled with cold water and salt. This allows the turkey to be fully submerged in the brine and prevents any potential safety hazards.
3. How Do I Know When the Turkey is Done?
Use a meat thermometer to check the internal temperature of the turkey in the thickest part of the thigh. The turkey is done when the internal temperature reaches 165°F (74°C). This ensures that the turkey is cooked through and safe to eat.
4. What If the Turkey is Overcooked?
If the turkey is slightly overcooked, it might be a bit dry. However, it can still be salvaged! Carve the turkey and serve it with gravy or a sauce to add moisture and flavour. These sauces will help to rehydrate the turkey and enhance its flavour.
5. How Long Can I Keep Leftover Turkey?
Leftover turkey can be stored in the refrigerator for 3-4 days. Make sure to store it in an airtight container. This will help to keep the turkey fresh and prevent it from drying out.
(Part 9) The Final Word: Your Journey to Turkey Triumph
So there you have it, the ultimate guide to juicy, moist turkey every time. It's not rocket science, but it does take a bit of planning and attention to detail. But trust me, the results are worth it. With a little bit of effort, you can turn a humble turkey into a culinary masterpiece that will have everyone begging for seconds. Happy roasting!
Everyone is watching

Prime Rib Roast Cooking Time Chart: Per Pound Guide
Cooking TipsPrime rib roast. Just the name conjures images of lavish dinners, crackling fires, and hearty laughter. It’s ...

How Long to Bake Potatoes in the Oven (Perfect Every Time)
Cooking TipsBaked potatoes are a staple in my kitchen. They're incredibly versatile, delicious, and surprisingly easy to m...

Perfect Rice Every Time: The Ultimate Guide to Cooking Rice
Cooking TipsAs a self-proclaimed foodie, I've always been a bit obsessed with rice. It's the foundation of countless cuisi...

The Ultimate Guide to Cooking Asparagus: Tips, Techniques, and Recipes
Cooking TipsAsparagus. The mere mention of this spring delicacy conjures up images of vibrant green spears, crisp and burs...

Ultimate Guide to Cooking the Perfect Thanksgiving Turkey
Cooking TipsThanksgiving. Just the word conjures up images of overflowing tables laden with delicious food, the scent of r...
