Fried chicken – just the mere mention of those words sends shivers down my spine, a symphony of pure, unadulterated joy playing in my head. We're talking about the kind that makes your mouth water just thinking about it, the kind that sends you into a frenzy of pure, unadulterated joy. The kind of fried chicken that's so good, it's practically a religion.
Now, I've been on this fried chicken journey for years. I've tried countless recipes, experimented with different techniques, and learned from the best. And trust me, I've learned a thing or two.
This isn't just any old guide, my friend. This is the ultimate guide to crispy, delicious fried chicken, the kind that will have your friends and family begging for more. I'm going to break it down for you, step-by-step, and by the end of this guide, you'll be a fried chicken pro, turning out crispy, juicy, flavour-packed masterpieces that will leave everyone speechless.
So grab a cuppa, get comfy, and let’s get this chicken fried.
(Part 1) The Chicken – The Foundation of Your Fried Chicken Empire

You can’t have great fried chicken without great chicken, can you? It's the foundation, the bedrock, the star of the show. So let’s get this right from the start.
Choosing the Right Chicken: A Matter of Preference
Now, you can get fancy with free-range, organic chicken, or stick to the good old-fashioned supermarket stuff. It's really up to you and your budget. But here’s the thing: you want to go for chicken pieces that are roughly the same size. This is key for even cooking. You wouldn’t want some pieces overcooked and dry while others are still raw, would you?
The Chicken Parts: A Brief Guide
Here's a rundown of the common chicken parts used for frying:
Drumsticks: These are the most popular choice for fried chicken due to their juicy and flavorful meat.
Thighs: Another great option for their juicy and flavorful meat.
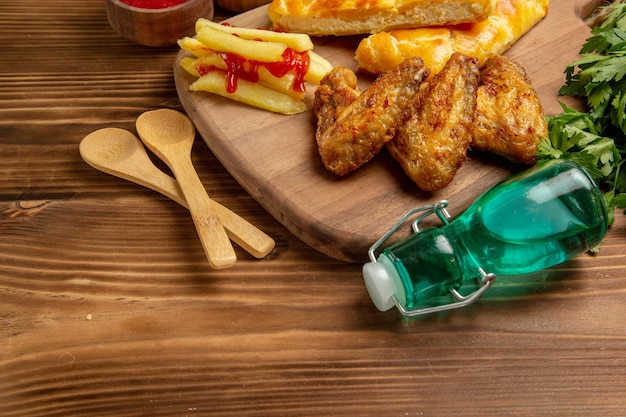
Wings: These can be divided into the drumette (the part closest to the thigh) and the wingette (the tip of the wing). They are great for snacking and have a good mix of skin and meat.
Breasts: These are leaner and can dry out more easily, so it's important to cook them carefully.
Preparing the Chicken: The First Step to Crispy Perfection
Once you've got your chicken, it's time for a little preparation. Pat those pieces dry with paper towels - no one wants soggy fried chicken! Then, season them with your favourite spices. I’m a big fan of a simple salt and pepper mix, but you can get creative with paprika, garlic powder, onion powder, or even a little cayenne pepper for a kick.
(Part 2) The Batter – The Secret to a Crunchy Outer Shell

Right, let’s talk about the batter, the secret weapon to that perfect crispy exterior. There are loads of different batter recipes out there, but I'm a firm believer in the classic buttermilk and flour combination. It's simple, it's effective, and it produces a gloriously crispy, golden-brown crust.
The Buttermilk Soak: The Magic Touch
This is where the magic happens. The buttermilk does two things: it tenderises the chicken, making it juicy and flavorful, and it helps the batter adhere to the chicken, ensuring a crispy crust. Just submerge those chicken pieces in buttermilk for at least 30 minutes, preferably for an hour or two.
The Flour Mixture: A World of Flavor
While the chicken is soaking, it’s time to create your batter. This is where you can get creative. You can simply use plain flour, or add some spices like paprika, cayenne pepper, or even garlic powder for extra flavour. Don’t forget to add a pinch of salt and pepper. Now, it’s important to avoid over-mixing. We want a light, airy batter, not a dense, clumpy mess.
The Dredging Process: Coating the Chicken with Flavor
Now, this is where things get exciting. Take those chicken pieces out of the buttermilk, give them a good shake to remove excess liquid, and then dredge them in your flour mixture. Make sure they’re fully coated, and then set them aside on a wire rack. Repeat this process for all the chicken pieces.
(Part 3) The Oil – The Lifeblood of Your Fried Chicken

We’ve got the chicken, we’ve got the batter, now it’s time to talk about the oil. It’s the lifeblood of your fried chicken, the medium that transforms it from raw to golden perfection. So choose wisely, my friend.
Choosing the Right Oil: A Matter of smoke points
You want an oil with a high smoke point. This means it can withstand high temperatures without burning. vegetable oil, peanut oil, and canola oil are all good choices. Avoid olive oil, as it has a low smoke point and can easily burn, giving your chicken an unpleasant taste.
Heating the Oil: Getting it Sizzling Hot
Now, get that oil sizzling. You need the oil to be hot enough to cook the chicken quickly, creating that crispy, golden-brown crust. The ideal temperature is about 350 degrees fahrenheit (175 degrees Celsius). You can use a thermometer to check the temperature, but if you don’t have one, you can test it by dropping a small piece of bread into the oil. If it sizzles and browns quickly, you’re good to go.
The Frying Process: A Balancing Act of Time and Temperature
This is the moment of truth. Carefully lower those battered chicken pieces into the hot oil. Don’t overcrowd the pan – give those pieces space to cook evenly. Now, resist the urge to peek! Let those chicken pieces cook undisturbed for about 6 to 8 minutes on each side. You know they're ready when they're golden brown and cooked through.
(Part 4) The Resting – Letting the Chicken Settle In
We’re almost there, my friend! Those chicken pieces are cooked, now it’s time to let them rest. This might seem like an unnecessary step, but it’s crucial. It gives the chicken a chance to cool down and absorb all that delicious flavour. Place those golden beauties on a wire rack lined with paper towels to drain off excess oil.
(Part 5) The Serving – A Fried Chicken Feast
The moment you've been waiting for has arrived – it's time to serve your masterpiece!
The Accompaniments: A Symphony of Flavor
Now, no fried chicken is complete without some amazing accompaniments. I’m talking mashed potatoes, creamy coleslaw, tangy pickles, and a side of gravy. Don't forget the hot sauce!
The Presentation: A Culinary Masterpiece
Presentation is everything, right? Arrange those crispy chicken pieces on a platter, surrounding them with your favourite sides. You can even garnish with fresh herbs or a sprinkle of paprika for a touch of colour.
(Part 6) Experimenting with Flavors – Beyond the Basics
Now that you've mastered the basics, it's time to get creative and experiment with different flavours. There are no limits to what you can do with fried chicken.
Spiced Chicken: A Burst of Heat and Flavor
Add some heat with cayenne pepper, paprika, and smoked paprika. Or maybe some garlic powder, onion powder, and a touch of cumin for a flavour explosion.
Sweet and Spicy Chicken: A Deliciously Unexpected Combination
For a unique twist, try adding a pinch of brown sugar to your batter. This adds a sweet and salty flavour that pairs perfectly with a touch of spice.
Herbed Chicken: A Fresh and Aromatic Touch
Add a fresh, herbal touch to your chicken by incorporating herbs like rosemary, thyme, or oregano into your batter.
(Part 7) Troubleshooting – Handling Those Fried Chicken Hiccups
Fried chicken can be a bit of a fickle mistress, but don’t worry, I’ve got you covered. Here are some tips to help you overcome those little hiccups along the way.
Overcooked Chicken: The Dryness Dilemma
It’s a classic fried chicken problem: overcooked chicken. If your chicken is dry, it probably means it was cooked for too long. Next time, try reducing the frying time a little.
undercooked chicken: A Safety First Approach
Just like overcooked chicken, undercooked chicken can be a real bummer. If your chicken is still pink inside, it needs to go back in the oil. Make sure the oil is hot enough, and don’t be afraid to cook it a little longer.
Soggy Chicken: The Quest for Crispiness
No one wants soggy fried chicken. If your chicken isn't crispy enough, it might be because the oil wasn't hot enough, or because it was overcrowded in the pan. Make sure the oil is piping hot, and give those chicken pieces plenty of room to breathe.
(Part 8) The Equipment – Your Fried Chicken Arsenal
If you want to turn out the best fried chicken, you need the right tools.
dutch oven: The Ultimate Fried Chicken Pot
A Dutch oven is the perfect pot for frying chicken. It's large enough to hold a good amount of oil, and it has a heavy base that distributes heat evenly.
Deep Frying Thermometer: Ensuring the Perfect Temperature
A deep frying thermometer is essential for ensuring that your oil is at the right temperature. It takes the guesswork out of frying, allowing you to achieve consistently crispy results.
Wire Rack: Draining and Cooling Perfection
A wire rack is essential for draining excess oil from your chicken after frying. It also allows the chicken to cool evenly, preventing it from becoming soggy.
(Part 9) FAQs – Clearing Up Those Burning Questions
Got any questions about fried chicken? Don’t worry, I’ve got you covered. Here are the most common FAQs, answered in all their glory.
Can I fry frozen chicken?
Technically, you can fry frozen chicken, but it's not recommended. Frozen chicken will take longer to cook, and it won't be as crispy as fresh chicken.
How long can I keep fried chicken in the fridge?
Fried chicken can be stored in the fridge for up to 3 days. Just make sure it's properly sealed in an airtight container.
How can I reheat fried chicken?
The best way to reheat fried chicken is in the oven. Preheat your oven to 350 degrees Fahrenheit (175 degrees Celsius), and bake the chicken for about 10 to 15 minutes, or until it's heated through.
What’s the best way to clean up after frying chicken?
The best way to clean up after frying chicken is to let the oil cool completely, and then carefully pour it into a container for disposal. Don’t pour it down the drain.
Why does my fried chicken always turn out greasy?
If your fried chicken is greasy, it could be because the oil wasn't hot enough, or because the chicken was overcrowded in the pan. Make sure the oil is piping hot, and give those chicken pieces plenty of room to breathe.
(Part 10) Conclusion – The Fried Chicken Journey Continues
There you have it, my friends – the ultimate guide to crispy, delicious fried chicken. Remember, the key to great fried chicken is to have fun, experiment, and don’t be afraid to make mistakes. It’s all part of the journey, and with practice, you’ll be whipping up mouthwatering fried chicken in no time.
So, what are you waiting for? Get those aprons on, gather your ingredients, and let’s get frying! I know I’m already craving some myself!
Everyone is watching

Prime Rib Roast Cooking Time Chart: Per Pound Guide
Cooking TipsPrime rib roast. Just the name conjures images of lavish dinners, crackling fires, and hearty laughter. It’s ...

How Long to Bake Potatoes in the Oven (Perfect Every Time)
Cooking TipsBaked potatoes are a staple in my kitchen. They're incredibly versatile, delicious, and surprisingly easy to m...

Perfect Rice Every Time: The Ultimate Guide to Cooking Rice
Cooking TipsAs a self-proclaimed foodie, I've always been a bit obsessed with rice. It's the foundation of countless cuisi...

The Ultimate Guide to Cooking Asparagus: Tips, Techniques, and Recipes
Cooking TipsAsparagus. The mere mention of this spring delicacy conjures up images of vibrant green spears, crisp and burs...

Ultimate Guide to Cooking the Perfect Thanksgiving Turkey
Cooking TipsThanksgiving. Just the word conjures up images of overflowing tables laden with delicious food, the scent of r...
