You know that feeling, right? The anticipation building as you picture that perfectly seared ny strip steak, the juicy pink center, and the irresistible aroma filling your kitchen. It's a symphony of flavors, textures, and aromas that'll have you craving more. But achieving that perfect sear, that juicy pink centre, and that delightful crust takes more than just throwing a steak on the grill. It's about understanding the nuances of the cut, the art of cooking, and the finesse of finishing touches. So, grab a beer, settle in, and let me share my secrets to cooking the ultimate NY strip steak, a journey I've been on for years. Trust me, you'll be a steak master in no time.
(Part 1) choosing the right cut: The Foundation of a Great Steak

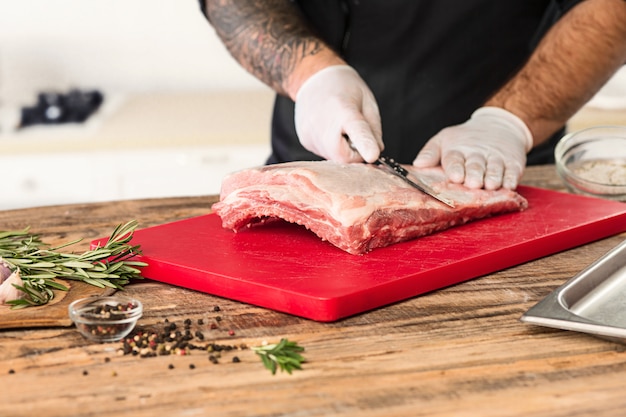
Let's start at the beginning, the foundation of any great steak: choosing the right cut. We're talking about a NY strip, a cut known for its marbling, thickness, and the promise of a juicy, flavourful experience. There's nothing quite like it. But let's be specific, shall we? There are a few key things to look for when picking out your NY strip.
Looking for the Right Cut: Knowing Your Steak
- Thickness: Aim for a steak that's at least 1.5 inches thick. This ensures even cooking and that luscious, juicy centre we all crave. Thin steaks cook too quickly and can easily become dry.
- Marbling: That's the white streaks of fat running through the meat, and the more, the merrier. Marbling is the key to flavour, adding richness and tenderness to your steak. It's like the secret ingredient that takes your steak to the next level.
- Colour: You want a vibrant, bright red colour. If it's looking a bit brown or dull, it's probably not the freshest. You're looking for that fresh-from-the-butcher brilliance.
- Smell: A good steak should smell fresh, clean, and inviting. There should be no hint of sourness or mustiness. If you smell anything off, it's better to steer clear.
When it comes to buying your steak, I'm a firm believer in supporting local butchers. They're usually brimming with knowledge and passion, offering tips and tricks to help you choose the perfect cut. Plus, they often trim the meat for you, saving you time and effort. Of course, if you're heading to the supermarket, keep those pointers in mind and don't be afraid to ask for help.
(Part 2) Preparing Your Steak: Setting the Stage for Success
Right, you've got your beautiful piece of meat, now let's get it ready for its starring role. There's a little pre-show prep that'll make all the difference in the final act.
Letting it Rest: Patience is a Virtue
First things first, let your steak come to room temperature. This might seem like a small detail, but it's crucial. A cold steak takes longer to cook evenly and can result in a tough, chewy texture. Give it at least 30 minutes to relax and reach room temperature before you begin cooking. Think of it as a warm-up for the star of the show.
Pat it Dry: A Dry Surface for the Perfect Sear
Once your steak has had a chance to relax, give it a good pat with some kitchen paper to remove any excess moisture. This might seem counterintuitive, but a wet surface can lead to steaming instead of searing, preventing that beautiful, crispy crust we're aiming for. A dry surface helps the steak develop a gorgeous sear and adds to the overall flavour.
Seasoning It Right: The Art of Enhancement
Now for the fun part: seasoning. This is where you get to unleash your culinary creativity. My go-to is a simple mix of salt and pepper, a classic combination that never fails. But feel free to experiment! Some folks love garlic powder, onion powder, paprika, or even a pinch of chili flakes for a bit of heat. The key is to season generously and evenly, coating the entire surface. Do this right before cooking, so the salt doesn't draw out moisture. You want to enhance the flavour, not overwhelm it.
(Part 3) Cooking Your Steak: The Griddle vs. the Pan
Time for the main event, the moment of truth: cooking your steak. You've got two main options here, both with their own charm and advantages: the griddle and the pan.
Grilling: The Classic Choice
Grilling is the traditional way to cook a steak, and for good reason. It imparts that iconic char, those beautiful grill marks, and a smoky aroma that's simply irresistible. You want your griddle nice and hot, medium-high heat is the way to go. If you can't hold your hand over it for more than a second, you're good to go. Place your steak on the preheated griddle and let it cook for about 2-3 minutes per side, flipping only once. Resist the urge to keep flipping, as it can lead to a dry steak. You want to give that crust a chance to develop, creating a symphony of textures.
Pan-frying: A Versatile Option
If you don't have a griddle, don't fret! A good cast iron pan can do the trick. Again, heat is your friend. Add a little oil to the pan, just enough to coat the bottom, and let it heat up. Once it's sizzling, carefully place your steak in the pan. Listen for that satisfying sizzle, that's the sound of deliciousness! Cook for about 3-4 minutes per side, giving it a chance to develop a beautiful crust. For the final minute of cooking, you can add a tablespoon of butter, which will melt and create a rich, buttery sauce that infuses your steak with even more flavour.
(Part 4) The Art of Doneness: Finding Your Steak Sweet Spot
Now we get to the exciting part: determining the level of doneness. This is where personal preference takes center stage. It's about finding that sweet spot where your steak is cooked to perfection, just the way you like it.
Understanding the Levels of Doneness: A Guide for Every Palate
| Doneness | internal temperature (°F) | Description |
|---|---|---|
| Rare | 125-130 | Cool red centre, warm edges. The steak is very soft and tender. |
| Medium-Rare | 130-135 | Warm red centre, pink edges. A classic level of doneness, offering a balance of tenderness and flavour. |
| Medium | 135-140 | Pink centre, mostly cooked edges. A slightly firmer texture with a more pronounced cooked flavour. |
| Medium-Well | 140-145 | Slightly pink centre, mostly cooked edges. A slightly firmer texture with a more pronounced cooked flavour. |
| Well Done | 145-150 | Completely cooked, brown throughout. The steak is firm and dry with a strong, cooked flavour. |
Personally, I'm a medium-rare kind of guy. There's something magical about that juicy, pink centre, a taste of pure indulgence. But hey, it's your steak, so cook it to your liking!
Using a Thermometer: Ensuring Accuracy
To ensure your steak is cooked to perfection, it's a good idea to use a meat thermometer. Insert it into the thickest part of the steak, making sure it doesn't touch bone, and check the internal temperature. This gives you a precise reading, eliminating any guesswork.
The Thumb Test: A Tried-and-True (But Less Accurate) Method
For those who prefer to go by feel, there's a tried-and-true method called the thumb test. Press your thumb against your palm, then press your finger against the steak. The feel should be similar to the level of doneness you're looking for. For example, if you want medium-rare, press your index finger against your thumb. But be warned, this takes some practice and isn't as accurate as using a thermometer. It's a good option for those who prefer to cook by feel but should be used with caution.
(Part 5) Resting Your Steak: Unlocking Juiciness
Okay, your steak is cooked, the aroma is intoxicating, and you're ready to dig in. But hold on! Before you slice and serve, give it a rest. I know, it seems counterintuitive, but trust me, it's crucial. Resting is the key to unlocking the juicy, tender steak of your dreams.
Why Resting is Important: The Science Behind Juiciness
During cooking, the juices in your steak get pushed to the surface. By letting it rest, those juices have a chance to redistribute throughout the meat, ensuring it stays juicy and tender. Resting also allows the internal temperature to even out, resulting in a more evenly cooked and delicious steak.
How Long Should You Rest It: Patience Pays Off
As a rule of thumb, rest your steak for at least 5-10 minutes before slicing and serving. Cover it loosely with foil to keep it warm and allow the juices to settle back in. This is also a great time to prepare your sides, making the most of your time. The result? A juicy, flavour-packed steak that will leave you speechless.
(Part 6) Slicing and Serving: The Grand Finale
Your steak has rested, the juices have settled, and your anticipation is at a fever pitch. It's time for the grand finale: slicing and serving.
Slicing: Unlocking Tenderness
Use a sharp knife to slice your steak against the grain. This means slicing perpendicular to the direction the muscle fibres run. It'll make your steak easier to chew and create a more tender texture.
Serving: A Symphony of Flavours
Now's your chance to showcase your culinary skills. There are endless possibilities when it comes to serving a NY strip steak. You can go classic with mashed potatoes and asparagus, or get creative with roasted vegetables and a vibrant chimichurri sauce.
(Part 7) Sides to Elevate Your Steak: Complementary Flavors
You've got the star of the show, now let's add some supporting actors to enhance the flavour and texture. The perfect sides can take your steak experience from good to unforgettable.
Classic Sides: Tried-and-True Pairings
- Mashed Potatoes: A classic comfort food that goes perfectly with a juicy steak.
- Asparagus: A healthy and refreshing side that adds a touch of green to the plate.
- Roasted Vegetables: A colourful and flavourful side that can be easily customized with your favourite vegetables.
- Mac and Cheese: A cheesy and indulgent side that will take your steak to the next level.
More Adventurous Options: Beyond the Classics
- Risotto: A creamy and comforting rice dish that's perfect for pairing with a steak.
- potato gratin: A cheesy and decadent potato dish that's sure to impress.
- grilled corn on the Cob: A sweet and smoky side that complements the richness of the steak.
Don't be afraid to experiment and find what you like best. The beauty of sides is that they can be as unique as you are.
(Part 8) Sauces: The Finishing Touch
We've got the steak, we've got the sides, and now it's time for the grand finale: a sauce. The right sauce can elevate your steak from good to great. It's the cherry on top, the final flourish that adds a burst of flavour and complexity.
Classic Sauce Options: Tried-and-True Pairings
- Béarnaise: A rich and creamy sauce made with egg yolks, butter, and tarragon. It adds a luxurious touch to your steak, with a delicate herbal flavour.
- Peppercorn: A robust sauce made with cracked peppercorns, butter, and cream. It's a perfect match for steak lovers who enjoy a bit of heat and spice.
- Red Wine Reduction: A simple and elegant sauce made with red wine, shallots, and herbs. It's a classic pairing for steak, adding depth and complexity to the flavour profile.
More Creative Sauce Ideas: Beyond the Classics
- Chimichurri: A vibrant and flavourful Argentinian sauce made with parsley, oregano, garlic, and olive oil. It's a fresh and herbaceous sauce that adds a burst of flavour to your steak.
- Garlic Butter: A simple and classic sauce that's perfect for adding a garlicky kick to your steak.
- Blue Cheese Sauce: A rich and creamy sauce that's perfect for steak lovers who appreciate a bit of blue cheese flavour. It adds a tangy and complex twist to your steak.
Remember, a little sauce goes a long way. You want to enhance the flavour of your steak, not drown it.
(Part 9) The Perfect Pairing: Drinks and Wine
No steak experience is complete without the perfect beverage pairing. So, what's going to complement your masterpiece?
Drinks: Elevating the Experience
- Beer: A classic pairing for steak. Go for a lighter beer, such as a pale ale or a lager, to avoid overpowering the flavour of the meat.
- Red Wine: A rich and full-bodied red wine, such as a Cabernet Sauvignon or a Merlot, is a perfect match for a NY strip steak.
- Cocktail: For something a little more sophisticated, try a classic Manhattan or an Old Fashioned.
Remember, the best drink pairing is the one you enjoy most. Don't be afraid to experiment and find what you like best.
FAQs
What temperature should I grill my steak at?
For a delicious sear and even cooking, aim for medium-high heat on your grill. You want to be able to hold your hand over the grill for only a second or two.
How do I know if my steak is cooked to my liking?
The best way is to use a meat thermometer. Insert it into the thickest part of the steak, ensuring it doesn't touch bone, and check the internal temperature. If you prefer to go by feel, try the thumb test, but remember, it takes practice.
What's the best way to rest a steak?
Cover your steak loosely with aluminium foil to allow the juices to redistribute throughout the meat. Let it rest for at least 5-10 minutes before slicing and serving.
What's the secret to a crispy crust on a steak?
A hot pan or grill is key to achieving that beautiful sear. Make sure your pan or grill is super hot before adding your steak. Also, be sure to pat your steak dry before cooking to prevent steam from forming.
What are some tips for cooking a steak indoors?
Use a cast iron pan or a heavy-bottomed skillet. Heat your pan over high heat until it's smoking hot. Add a tablespoon of oil to the pan and let it heat up before adding the steak. Cook for 3-4 minutes per side, or until your desired level of doneness is achieved.
Everyone is watching

Prime Rib Roast Cooking Time Chart: Per Pound Guide
Cooking TipsPrime rib roast. Just the name conjures images of lavish dinners, crackling fires, and hearty laughter. It’s ...

How Long to Bake Potatoes in the Oven (Perfect Every Time)
Cooking TipsBaked potatoes are a staple in my kitchen. They're incredibly versatile, delicious, and surprisingly easy to m...

Perfect Rice Every Time: The Ultimate Guide to Cooking Rice
Cooking TipsAs a self-proclaimed foodie, I've always been a bit obsessed with rice. It's the foundation of countless cuisi...

The Ultimate Guide to Cooking Asparagus: Tips, Techniques, and Recipes
Cooking TipsAsparagus. The mere mention of this spring delicacy conjures up images of vibrant green spears, crisp and burs...

Ultimate Guide to Cooking the Perfect Thanksgiving Turkey
Cooking TipsThanksgiving. Just the word conjures up images of overflowing tables laden with delicious food, the scent of r...