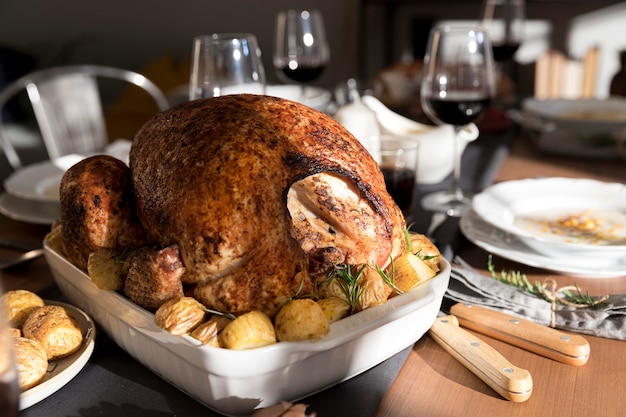
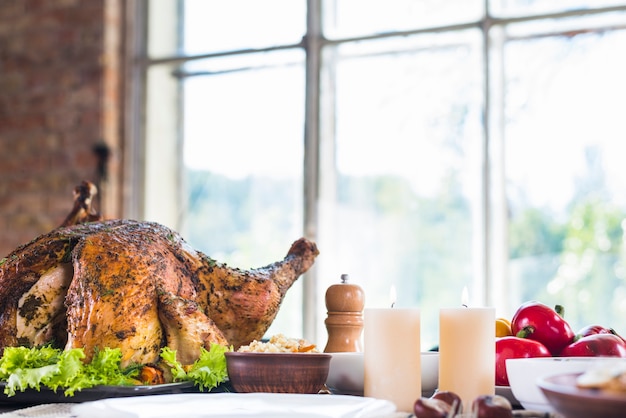
It’s that time of year again – the leaves are turning, the air is crisp, and the aroma of pumpkin spice is filling the air. Thanksgiving is just around the corner, and for many of us, that means one thing: a delicious, juicy turkey.
Now, I'll be honest, cooking a turkey can be a bit daunting, especially if you're a novice in the kitchen. I've certainly had my fair share of Thanksgiving disasters, from dry, overcooked birds to stuffing that was more like a brick than a side dish. But over the years, I've learned a thing or two about cooking a perfect turkey.
This guide is a culmination of my hard-earned wisdom, a treasure trove of tips and tricks to help you create a Thanksgiving masterpiece. It's a journey we'll take together, step by step, from choosing the perfect bird to carving it like a seasoned pro. So grab a comfy chair, a cup of tea, and let's dive in!
(Part 1) Choosing the Right Turkey

1. Fresh vs. Frozen: A Tale of Two Turkeys
The first decision you’ll need to make is whether to go fresh or frozen. Fresh turkeys, for me, have a more vibrant flavor and a lovely, even texture. But let's be real, sometimes fresh turkeys aren’t available, especially if you're planning ahead. If you're buying your turkey a couple of weeks in advance, frozen is the way to go. Just remember to thaw it properly in the fridge, giving it plenty of time to defrost.
2. Size Matters: Feeding the Flock
Consider your guest list when deciding on the size of your turkey. A good rule of thumb is to allow about 1 pound of turkey per person, but for those hearty eaters who can polish off a whole leg in one go, you might want to bump that up to 1.5 pounds per person.
3. The Turkey Checkup: A Visual and Olfactory Inspection
Once you've got your turkey home, give it a thorough once-over. Look for a plump, well-shaped bird with a nice, even skin tone. Give it a good sniff – it should smell fresh, not funky. If you notice any discolouration or an unpleasant odor, take it back to the shop and grab a new one. No one wants to deal with a smelly bird on Thanksgiving!
(Part 2) Prepping Your Turkey for the Big Day

1. Brining: The Great Debate
Ah, the age-old question: to brine or not to brine? Brining, which involves soaking the turkey in a salt-water solution, can create a juicier, more flavorful bird. But it's not mandatory. I've tried both methods, and honestly, haven't noticed a world of difference.
2. Stuffing: The Separate Approach
Traditionalists may balk at the idea, but I'm a firm believer in stuffing the turkey separately. It's a safer bet for food safety, and you'll have more control over the cooking process. Not to mention, it can prevent your stuffing from becoming soggy.
3. The Pat-Down: A Dry Bird is a Happy Bird
Whether you’ve brined or not, give your turkey a good pat dry with paper towels. This helps the skin to crisp up nicely during roasting, giving you a beautiful, golden-brown finish.
(Part 3) The Big Roast: Bringing the Bird to Life

1. Choosing Your Weapon: The roasting pan
Now it's time to pick your weapon – the roasting pan. I'm a big fan of cast iron, as it distributes heat evenly, resulting in a crispy skin. But if you're new to roasting, a regular roasting pan will work just fine.
2. The Perfect Temperature: Setting the Stage
Preheat your oven to 325 degrees Fahrenheit (165 degrees Celsius). This is the sweet spot for a beautifully cooked turkey. It allows for even cooking and a tender, juicy result.
3. Time for Butter: The Flavor Boost
Get your hands dirty! Soften some butter, add a pinch of salt, and mix in your favorite herbs and spices. I prefer a blend of sage, rosemary, and thyme, but feel free to experiment with your favorite combinations. Rub this mixture all over the turkey, ensuring a gorgeous, golden-brown skin.
4. The Right Placement: Giving the Bird Some Space
Place your turkey in the roasting pan, breast-side up. Make sure there's a bit of space around it for air to circulate. This helps to cook the turkey evenly and prevents it from steaming. If you're stuffing separately, place it in a baking dish next to the turkey.
5. The Roast Begins: The Countdown is On
Slide your turkey into the preheated oven. Now, be patient! The cooking time will vary depending on the size of your turkey. A general rule of thumb is to allow 15 minutes per pound for an unstuffed turkey, and 20 minutes per pound for a stuffed turkey. However, the most important thing is to use a meat thermometer to ensure the turkey is cooked through.
(Part 4) Cooking Time and Temperature: The Science of Turkey
1. The Magic Number: The Perfect internal temperature
For a turkey that's juicy and delicious, you want the internal temperature to reach 165 degrees Fahrenheit (74 degrees Celsius). This ensures that the bird is cooked through and safe to eat.
2. Temperature Check: The Meat Thermometer
Insert the meat thermometer into the thickest part of the thigh, making sure not to touch any bones. The thermometer should be inserted deep enough to ensure an accurate reading. If the temperature hasn’t reached 165 degrees, keep roasting.
3. Resting Is Key: The Final Touch
Once the turkey is cooked through, remove it from the oven and let it rest for at least 30 minutes before carving. This gives the juices a chance to redistribute, resulting in a moist, flavorful bird.
(Part 5) Carving Like a Pro: A Masterclass in Turkey Dissection
1. The Tools of the Trade: Sharpen Your Skills
You’ll need a good carving knife and a carving fork. Make sure your knife is sharp! A dull knife will make carving a turkey a frustrating and potentially dangerous experience.
2. The Art of the Carve: A Step-by-Step Guide
Start by removing the legs and thighs. To do this, gently pull the leg away from the turkey, using your carving fork to help you. Once the leg is loose, use your knife to cut through the joint where the leg connects to the turkey. Repeat this process with the other leg.
Next, carve the breast into thin slices, going against the grain. This will help to prevent the meat from shredding and make it easier to eat.
3. Presentation Matters: Putting the Finishing Touches
Arrange your carved turkey on a platter, and serve it with your favorite sides. You can also create a beautiful presentation by using a carving board and a decorative platter.
(Part 6) Leftover Magic: Turning Leftovers into Culinary Delights
1. The Best of Times: thanksgiving leftovers
Leftovers are where the real magic happens! You’ve got turkey sandwiches, turkey pot pie, turkey soup, turkey salad – the possibilities are endless!
2. Storage Time: Keep It Fresh
Store your leftover turkey in the refrigerator for up to four days, or freeze it for longer storage. Make sure to wrap the turkey tightly in plastic wrap or aluminum foil to prevent freezer burn.
(Part 7) Troubleshooting: Dealing with Turkey Emergencies
1. Dry Turkey: Reviving a Dry Bird
If your turkey ends up a bit dry, don’t despair! You can add a little gravy or stock to the carving platter to help moisten it up. You can also try adding some butter or cream to your gravy to make it richer and more flavorful.
2. Burnt Skin: Preventing a Crispy Disaster
If the skin starts to brown too quickly, cover the turkey loosely with foil for the remaining cooking time. This will help to prevent the skin from burning.
3. Undercooked Turkey: Ensuring Food Safety
If your turkey is still undercooked, pop it back in the oven and cook it for another 15-20 minutes. Just keep checking the temperature with your meat thermometer. Never eat a turkey that's undercooked – it could make you sick.
(Part 8) Serving Up a Feast: Creating a Thanksgiving Extravaganza
1. The Sidekick: Sides That Steal the Show
No turkey is complete without a fantastic side dish. From mashed potatoes to stuffing to cranberry sauce, the options are endless.
2. The Drinks: Raising a Glass
Don’t forget the drinks! Sparkling cider, wine, beer – there’s something for everyone. You can also offer a variety of non-alcoholic beverages, such as sparkling water or juice.
3. The Ambience: Setting the Mood
Set the mood with some festive decorations, candles, and maybe even some background music. Create a warm and welcoming atmosphere for your guests to enjoy.
(Part 9) thanksgiving tips: Making Your Thanksgiving a Breeze
1. Don’t Sweat the Small Stuff: Relax and Enjoy
Thanksgiving is about spending time with loved ones, not about perfection. If something doesn’t go exactly to plan, don’t worry about it. Focus on enjoying the company of your family and friends.
2. Delegate: Sharing the Burden
Enlist the help of your guests! Ask them to bring a side dish, a dessert, or even just some drinks. This will help to lighten your workload and create a more collaborative experience.
3. Enjoy the Moment: Savor the Memories
Take a deep breath, relax, and enjoy the company of your loved ones. Thanksgiving is a time for gratitude, love, and good food. Make the most of it!
FAQs
1. What if my turkey is too small?
Don’t worry, you can always supplement with a roast chicken or even a ham. You can also serve additional side dishes to make up for the smaller size of the turkey.
2. What’s the best way to keep my turkey moist?
Basting with pan drippings during cooking can help to keep your turkey juicy. You can also use a turkey baster to inject moisture into the bird.
3. How long should I let my turkey rest?
At least 30 minutes, but 45-60 minutes is even better. Allowing the turkey to rest allows the juices to redistribute, ensuring a moist and flavorful bird.
4. Can I cook my turkey in a slow cooker?
You can! Just make sure to use a slow cooker that’s big enough for your turkey. You will also need to adjust the cooking time and temperature to ensure the turkey is cooked through.
5. What should I do with my leftover turkey?
There are so many delicious possibilities! Try a turkey sandwich, a turkey pot pie, a turkey salad, or a turkey chili. You can also use leftover turkey to make a delicious turkey soup.
There you have it, folks, the ultimate guide to cooking a perfect Thanksgiving turkey! I've shared all my secrets, from choosing the right bird to carving it like a pro. Now it’s your turn to impress your loved ones with a delicious, show-stopping turkey. Happy Thanksgiving!
Everyone is watching

Prime Rib Roast Cooking Time Chart: Per Pound Guide
Cooking TipsPrime rib roast. Just the name conjures images of lavish dinners, crackling fires, and hearty laughter. It’s ...

How Long to Bake Potatoes in the Oven (Perfect Every Time)
Cooking TipsBaked potatoes are a staple in my kitchen. They're incredibly versatile, delicious, and surprisingly easy to m...

Perfect Rice Every Time: The Ultimate Guide to Cooking Rice
Cooking TipsAs a self-proclaimed foodie, I've always been a bit obsessed with rice. It's the foundation of countless cuisi...

The Ultimate Guide to Cooking Asparagus: Tips, Techniques, and Recipes
Cooking TipsAsparagus. The mere mention of this spring delicacy conjures up images of vibrant green spears, crisp and burs...

Ultimate Guide to Cooking the Perfect Thanksgiving Turkey
Cooking TipsThanksgiving. Just the word conjures up images of overflowing tables laden with delicious food, the scent of r...
