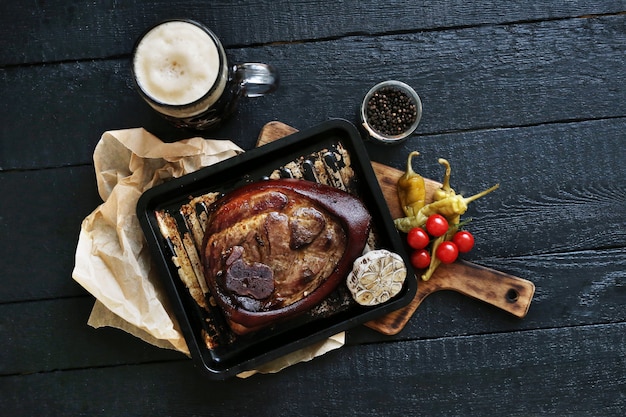
The aroma of a perfectly roasted rib of beef, filling your home with the promise of a delicious meal, is a truly satisfying experience. As a seasoned home cook, I've had my fair share of triumphs and a few mishaps in the pursuit of the perfect roast. But with practice and a little know-how, you can transform this majestic cut of meat into a culinary masterpiece.
This ultimate guide is a culmination of my experiences, tips, and tricks, designed to equip you with everything you need to cook a rib roast that will leave everyone wanting more. Whether you're a seasoned pro or just starting out, I promise you'll find something useful here. So, grab your apron, a nice sharp knife, and let's embark on this culinary adventure together.
Part 1: Choosing the Right Roast
The first step in creating a magnificent rib roast is selecting the right piece of meat. It's like choosing the perfect canvas for a painting – you want something that's both beautiful and full of potential.
1.1. Understanding the Cut
Rib roasts are typically cut from the primal rib section, the part of the cow that runs along the spine. This section offers a range of cuts, each with its own unique characteristics. Let's break them down:
- standing rib roast: This is the traditional, show-stopping roast. It includes the rib bones, creating a beautiful presentation and adding extra flavour. The standing rib roast is usually cut from the 7th to the 12th rib, offering a nice balance of lean meat and marbling. The bones also help to retain moisture during cooking.
- Rib Roast (Boneless): This roast is boneless, making it easier to carve and serve. It's usually cut from the 5th to the 12th rib and is known for its tender and succulent texture. This is a great option for those who prefer a more streamlined carving experience.
- prime rib Roast: This is the top-tier choice, coming from the highest grade of beef. Prime rib is known for its rich marbling, contributing to its intense flavour and exceptional tenderness. It's typically a standing rib roast, but boneless versions are also available.
Personally, I have a special fondness for the standing rib roast. The bones add a rustic charm, and the meat is incredibly juicy and flavourful. The bones also help to distribute heat evenly during cooking, resulting in a more tender roast. But ultimately, the choice is yours. Pick the cut that best suits your needs, your cooking style, and your budget.
1.2. Choosing the Right Size
Once you've decided on the type of roast, it's time to consider the size. Rib roasts come in various sizes, and choosing the right one depends on how many people you're serving. A general rule of thumb is to plan for about 1 pound of roast per person. However, if you have hearty appetites or want leftovers, it's wise to choose a larger roast. Don't be afraid to ask your butcher for advice on sizing – they are the experts!
1.3. Looking for the Right Marbling
The key to a moist, flavourful rib roast lies in the marbling. Marbling refers to the streaks of fat that run through the muscle tissue. The more marbling a roast has, the juicier and more flavorful it will be. When selecting your roast, look for a good amount of marbling, with streaks of fat running through the lean meat. Avoid roasts that are overly lean, as they can be dry and tough.
There's a fine line between a roast with too much fat and one with just the right amount. Too much fat can be difficult to render and can make the roast greasy. Look for a roast with good marbling but not excessive fat. Your butcher can help you choose a roast with the right balance of fat and lean meat.
Part 2: Preparing the Roast
Now that you've got your beautiful roast, it's time to prepare it for its starring role. This might seem like a simple step, but it's crucial for achieving a delicious and tender outcome.
2.1. Patting it Dry
The first step is to pat the roast dry with paper towels. This removes any excess moisture that could prevent browning and create a less crispy crust. A dry surface will help the seasoning adhere better and create a beautiful, golden-brown crust during cooking.
2.2. Seasoning with Salt and Pepper
Next, season your roast generously with salt and freshly ground black pepper. Don't be shy with the seasoning! The salt will help to draw out moisture and season the meat more deeply. I prefer to use kosher salt because it doesn't clump up like table salt, allowing for a more even distribution. Remember, the salt and pepper should form a thin, even layer over the entire surface of the roast.
2.3. A Touch of Herbs and Spices (Optional)
For a more complex flavour profile, you can add a touch of your favourite herbs and spices. Rosemary, thyme, garlic powder, and onion powder are all excellent choices, adding depth and complexity to the flavour of the roast. However, don't go overboard. A little goes a long way. Just sprinkle a teaspoon or two of your chosen herbs and spices over the roast, ensuring even distribution for consistent flavour.
I often like to create a simple blend of rosemary, garlic powder, and onion powder and rub it into the roast. It gives it a fantastic depth of flavour, perfect for a celebratory dinner. Remember, the key is to enhance the natural flavour of the beef, not to overwhelm it.
2.4. Roasting with a Rub (Optional)
For a truly special flavour, you can create a dry rub. This involves combining a mixture of herbs, spices, and sometimes even sugars, and rubbing it onto the roast. There are countless dry rub recipes available online, and you can easily adapt them to your preferences. For a classic dry rub, try mixing together smoked paprika, brown sugar, garlic powder, onion powder, and black pepper. Rub the mixture onto the roast and let it sit for at least 30 minutes, or even overnight, for maximum flavour penetration.
The longer the roast sits with the rub, the more intense the flavour will be. This allows the flavours to penetrate the meat and create a more complex flavour profile. The dry rub will also help to create a beautiful, crispy crust during cooking.
2.5. The Importance of Resting
After you've prepped your roast, let it rest at room temperature for at least 30 minutes. This will help the meat to come to room temperature, ensuring even cooking. If you're short on time, you can skip this step, but allowing the roast to rest will give you the best results.
It might seem counterintuitive to leave meat at room temperature, but trust me on this one. It allows the meat to relax and cook more evenly. It also helps to ensure a juicier and more tender roast. It's worth the extra time for a better outcome.
Part 3: Roasting the Beef
Now comes the exciting part – actually roasting the beef! This is where the real magic happens, where that beautiful piece of meat transforms into a culinary masterpiece.
3.1. Preheat the Oven
Preheat your oven to 450°F (230°C). This high heat is crucial for achieving a crispy crust on the outside while keeping the inside tender and juicy. Make sure your oven is preheated before you put the roast in. Otherwise, it won't cook evenly and you'll end up with a disappointing result.
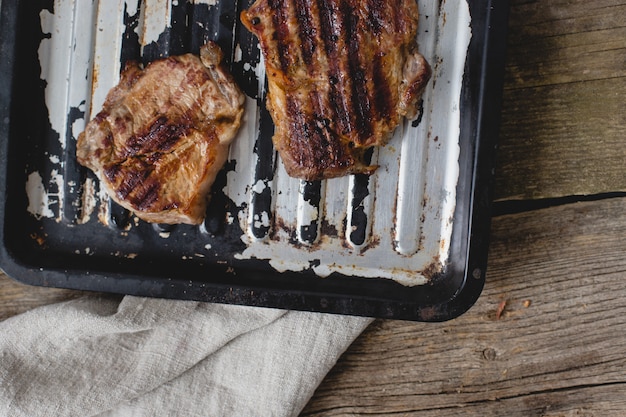
3.2. Roasting the Roast
Place the seasoned roast on a roasting rack set in a roasting pan. A roasting rack allows air to circulate around the roast, promoting even cooking and preventing it from steaming in its own juices. If you don’t have a roasting rack, you can simply place the roast directly in the roasting pan. Just make sure it’s not overcrowded, so air can circulate around it.
Slide the roasting pan into the preheated oven and roast for 15 minutes. This initial high-heat sear will create a beautiful, crispy crust on the roast. After 15 minutes, reduce the oven temperature to 325°F (160°C) and continue roasting. The temperature should be reduced to ensure that the meat cooks evenly and the inside is tender.
3.3. Checking for Doneness
The cooking time for a rib roast depends on its size and how well you want it done. Here's a general guide for cooking time:
A standing rib roast can take between 1.5 to 2.5 hours to cook, depending on its size and desired level of doneness.
A boneless rib roast will take a bit less time, usually between 1 to 1.5 hours.
The most accurate way to check for doneness is to use a meat thermometer. Insert the thermometer into the thickest part of the roast, making sure it doesn't touch bone. Here’s a table showing the internal temperatures for different levels of doneness:
| Level of Doneness | Internal Temperature (°F) |
|---|---|
| Rare | 125-130 |
| Medium Rare | 130-135 |
| Medium | 140-145 |
| Medium Well | 150-155 |
| Well Done | 160-165 |
Remember, the internal temperature of the roast will continue to rise slightly after it's removed from the oven, so it's best to take it out 5-10 degrees below your desired doneness.
3.4. Resting the Roast
Once the roast has reached your desired internal temperature, remove it from the oven and let it rest for at least 15-20 minutes before carving. This resting period allows the juices to redistribute throughout the roast, resulting in a more tender and flavorful cut.
While the roast rests, you can make a pan sauce with the drippings. Simply pour off any excess fat from the roasting pan, leaving behind the flavorful brown bits. Add a little broth or wine and whisk to deglaze the pan, scraping up the browned bits. Simmer the sauce for a few minutes until it thickens.
You can also use the pan drippings to make a gravy. Simply whisk in some flour and cook until the gravy thickens.
Part 4: Carving the Roast
The moment of truth – carving the roast! Now that it's rested, it's time to reveal the beautiful, juicy, and flavourful result of your hard work.
4.1. Preparing the Cutting Board
Place your roast on a clean cutting board. Make sure the board is large enough to accommodate the roast and that it's positioned securely to prevent slipping. This is a crucial step in ensuring a safe and successful carving process. A sturdy cutting board will help to prevent accidents and make the carving process smoother.
4.2. Using a Sharp Knife
Grab a sharp carving knife. A sharp knife is essential for clean, precise cuts and prevents the roast from tearing. Avoid using dull knives, as they can make the cutting process difficult and result in messy slices. A sharp knife will make all the difference in achieving perfectly sliced meat.
If you’re carving a standing rib roast, first slice off the thin layer of fat that runs along the top of the roast. This will help you to see the grain of the meat, which will guide you in carving. This step helps to ensure that the meat is carved evenly and makes the meat easier to slice.
4.3. Cutting Against the Grain
Now, the key to a tender roast is to cut against the grain. This means cutting across the direction that the muscle fibres run. If you cut with the grain, the muscle fibres will separate and you’ll end up with tough, chewy meat. Cutting against the grain is a simple technique, but it makes a big difference in the texture of the meat.
To cut against the grain, simply look closely at the roast. You'll notice that the muscle fibres run in a specific direction. Cut perpendicular to those fibres. You'll know you're cutting against the grain when the meat slices smoothly and easily.
4.4. Slicing Thinly
To ensure that each slice is tender and juicy, slice the roast thinly. Start by making a series of thin cuts across the width of the roast, working your way from one end to the other.
It’s okay if the slices aren’t perfectly uniform. The goal is to create thin, manageable pieces that will melt in your mouth. Thin slices allow the flavours to be fully appreciated and make the meat more tender and easier to eat.
4.5. Serving and Enjoying
You’ve done it! You’ve cooked a magnificent rib roast. Now it's time to serve and enjoy.
Arrange the sliced roast on a platter. If you're serving a standing rib roast, you can leave the bones in for a rustic presentation. Pour some of the pan sauce over the meat for extra flavor.
Serve your roast with your favorite sides, such as mashed potatoes, roasted vegetables, or a green salad. And don't forget the pan sauce! It's the perfect complement to the rich, flavorful roast.
As you savor each delicious bite, take a moment to appreciate your accomplishment. You've just cooked a masterpiece, a true culinary triumph.
Part 5: Making the Most of Leftovers
The joy of a rib roast doesn't end with the initial meal. Leftovers provide delicious possibilities for days to come.
5.1. Sandwiches
One of the most satisfying ways to use rib roast leftovers is in sandwiches. The combination of juicy meat and crispy bread is a classic for a reason. To create a delicious rib roast sandwich, simply pile sliced roast onto your favorite bread, add some cheese, your favorite condiments, and enjoy.
5.2. Salads
Add some zest to your salads with leftover rib roast. Slice the meat into thin strips and toss it with your favorite greens, vegetables, and dressing. The combination of textures and flavors is sure to delight your taste buds.
5.3. Soup
Transform your leftovers into a hearty and comforting soup. Shred the leftover roast and add it to your favorite soup recipe. It will add a rich, savory flavor and make the soup extra satisfying.
5.4. Stir-Fry
For a quick and flavorful meal, use leftover rib roast in a stir-fry. Slice the meat into bite-sized pieces and toss it with your favorite vegetables and sauce. Stir-fries are a great way to use up leftovers and create a satisfying meal in minutes.
5.5. Pasta
Add a touch of luxury to your pasta dishes with leftover rib roast. Shred the meat and toss it with pasta, sauce, and your favorite toppings. It's a simple way to elevate a classic pasta dish.
Part 6: Mastering the Techniques
Cooking a perfect rib roast is all about mastering a few key techniques. Here's a breakdown of the essential skills you need to nail your next roast.
6.1. Understanding Temperature
As we discussed earlier, temperature is crucial for cooking a rib roast. Don’t rely solely on visual cues, use a meat thermometer to ensure you achieve your desired level of doneness.
A meat thermometer is an essential tool for ensuring a perfectly cooked roast. It eliminates any guesswork and allows you to achieve the desired level of doneness with precision.
6.2. Resting the Roast
The importance of resting can't be overstated. Allowing the roast to rest after cooking is essential for juicy, tender meat. It allows the juices to redistribute throughout the roast.
Resting the roast is a crucial step that often gets overlooked. It allows the muscle fibres to relax, resulting in more tender meat. It also ensures that the juices are evenly distributed throughout the roast, creating a more flavorful and juicy cut.
6.3. Carving Techniques
Carving against the grain is essential for tender and flavorful slices. Take the time to understand how to properly carve your roast.
Carving techniques are an essential skill to master for a beautiful and satisfying presentation. Cutting against the grain ensures that the slices are tender and easy to chew. With a little practice, you'll be able to carve a rib roast like a pro.
Part 7: Troubleshooting Common Problems
Even the most experienced cooks can run into a few common problems when cooking a rib roast. But don't worry, these tips can help you avoid common pitfalls and ensure a delicious outcome:
7.1. Dry Roast
One of the most common problems is a dry roast. This can happen if the roast is overcooked or if it doesn't have enough marbling. To avoid this, make sure you use a meat thermometer to check the internal temperature and take the roast out of the oven 5-10 degrees below your desired doneness.
Also, choose a roast with good marbling, as this will help to keep it moist. If you're using a leaner roast, consider adding a little butter or oil to the pan before cooking to help prevent it from drying out.
Overcooking is a common culprit for a dry roast. Using a meat thermometer helps to ensure that the roast is cooked to the perfect level of doneness.
7.2. Unevenly Cooked Roast
An unevenly cooked roast is another common problem. This can happen if the oven temperature isn't consistent or if the roast isn't positioned correctly in the oven. To avoid this, make sure you preheat the oven to the correct temperature and use a roasting rack to allow air to circulate around the roast.
A consistent oven temperature is essential for even cooking. Using a roasting rack ensures that air circulates around the roast, promoting even cooking and preventing the bottom from steaming in its own juices.
7.3. Overcooked Roast
Overcooked roast can be tough and dry. This can be avoided by using a meat thermometer to check the internal temperature and taking the roast out of the oven when it reaches your desired doneness.
Remember, the internal temperature of the roast will continue to rise slightly after it's removed from the oven, so it's best to take it out 5-10 degrees below your desired doneness.
Overcooking is a common mistake that can ruin a perfectly good roast. Using a meat thermometer and taking the roast out of the oven a few degrees before reaching the desired temperature will ensure that the meat is cooked to perfection.
Part 8: FAQs
Have you got a burning question about cooking a rib roast? Here are some common FAQs and their detailed answers:
8.1. Can I cook a rib roast in a slow cooker?
While it’s technically possible, I wouldn’t recommend cooking a rib roast in a slow cooker. Slow cookers are designed for moist, slow cooking, which can result in a roast that's too tender and falls apart. A traditional oven is the best method for cooking a rib roast to achieve that perfect balance of tenderness and flavour.
For a roast that is cooked to perfection, a traditional oven is the best choice. The oven provides the right combination of heat and air circulation to create a roast that is both tender and flavorful.
8.2. Can I freeze a rib roast?
Yes, you can freeze a rib roast. To freeze, wrap the roast tightly in plastic wrap and then aluminum foil. It can be frozen for up to 3 months. To thaw, place the roast in the refrigerator for 2-3 days. Allow the roast to come to room temperature before cooking.
Freezing a rib roast is a great way to save time and ensure that you have a delicious roast on hand whenever you need it. Freezing is a simple process that can help to extend the shelf life of your roast.
8.3. How long should I cook a rib roast per pound?
There’s no one-size-fits-all answer to this question. The cooking time will depend on the size of the roast, the desired level of doneness, and the temperature of your oven. It's best to use a meat thermometer to ensure that the roast reaches the desired internal temperature.
A meat thermometer is the best tool for determining cooking time. It allows you to accurately measure the internal temperature of the roast, ensuring that it is cooked to the perfect level of doneness.
8.4. Can I make a rib roast ahead of time?
Yes, you can make a rib roast ahead of time. To do so, cook the roast according to the instructions above, but allow it to cool completely before storing in the refrigerator for up to 3 days. To reheat, place the roast in a preheated oven at 325°F (160°C) for 15-20 minutes, or until it's heated through.
Cooking a rib roast ahead of time can be a great way to save time and ensure that you have a delicious meal ready to go. It allows you to plan ahead and enjoy the benefits of a homemade roast without the last-minute stress.
8.5. What are some good side dishes for rib roast?
The possibilities for side dishes are endless! Some classic pairings include mashed potatoes, roasted vegetables, Yorkshire pudding, and a green salad. Feel free to get creative and experiment with different flavors.
The right side dish can elevate your rib roast meal to new heights. Classic pairings offer a comforting and satisfying experience, while creative combinations can add a touch of excitement and surprise.
I hope this comprehensive guide has given you the confidence and knowledge to cook a perfect rib roast. From choosing the right cut to mastering carving techniques, you now have everything you need to create a culinary masterpiece. So, gather your ingredients, put on your apron, and get ready to impress your family and friends with the ultimate rib roast experience!
Everyone is watching

Perfect Rice Every Time: The Ultimate Guide to Cooking Rice
Cooking TipsAs a self-proclaimed foodie, I've always been a bit obsessed with rice. It's the foundation of countless cuisi...

Ultimate Guide to Cooking the Perfect Thanksgiving Turkey
Cooking TipsThanksgiving. Just the word conjures up images of overflowing tables laden with delicious food, the scent of r...

The Ultimate Guide to Cooking Asparagus: Tips, Techniques, and Recipes
Cooking TipsAsparagus. The mere mention of this spring delicacy conjures up images of vibrant green spears, crisp and burs...

Can You Cook Spaghetti with Gasoline? (The Shocking Truth)
Cooking TipsWe've all seen those crazy internet trends. You know, the ones that make you wonder, "Did someone actually try...

Chorizo and Eggs Recipe: The Ultimate Guide
Cooking TipsRight, let’s talk about chorizo and eggs. You know, that classic Spanish dish that's always a winner. It's th...