(Part 1) Choosing Your Weapon: The New York Strip

The first step to a perfect steak is choosing the right cut. Now, I'm a big fan of the New York strip, and for good reason. It's got a fantastic flavour, with a nice marbling of fat that adds richness. Think of it as the steak that has it all - the tenderness, the juiciness, the flavour. It’s a real crowd-pleaser.
The Cut: Unveiling the Short Loin
The New York strip, also known as a strip steak or Kansas City strip, comes from the short loin of the cow. This prime area is known for its tenderness and flavour. The cut itself is long, rectangular, and features a beautiful, thick edge. You'll find it comes in different sizes, but a good starting point is around 1 inch thick. Now, that might sound thin, but trust me, it's enough to get a great sear and a lovely pink interior.
The Marbling: Fat is Your Friend
When you're choosing a New York strip, there are a few things to keep an eye out for. First, you want to check the marbling. This is the distribution of fat within the lean meat. Look for a steak with even, fine marbling. This fat will render during cooking, adding richness and flavour to the steak. The marbling also contributes to the steak's tenderness.
The Colour: Freshness Matters
Secondly, look for a bright red colour. This indicates a fresh cut of meat. Avoid steaks that are brown or have a dull appearance. Those are signs that the meat might be older and less flavorful.
The Smell: Trust Your Senses
Finally, give the steak a sniff. It should smell fresh, not sour. If it smells off, move on to the next one. You don't want to take any chances when it comes to food safety.
(Part 2) Prepping Your Weapon: Getting Ready to Grill

Alright, you've got your New York strip, now it's time to get it prepped for grilling. It's a little like prepping for a big night out - you want to look your best. Here's what we'll do.
Pat it Down: Removing Excess Moisture
First things first, pat the steak dry with paper towels. This helps remove any excess moisture, which can hinder that beautiful sear we're aiming for. We want a crisp, golden-brown crust, not a soggy mess.
Seasoning: The Art of Flavour
Now for the fun part - seasoning! I like to keep things simple with salt and pepper, but feel free to experiment with different herbs and spices. You can use a pre-made steak seasoning blend, or create your own. Some favourites are garlic powder, onion powder, paprika, and even a touch of cayenne pepper for a bit of heat. A sprinkle of smoked paprika gives a smoky depth, while fresh herbs like rosemary or thyme add a fragrant note. But don't overdo it. Just a light dusting will do. You want to taste the steak, not the seasoning.
Let it Rest: Reaching Room Temperature
After you've seasoned your steak, it's crucial to let it rest at room temperature for about 30 minutes. This allows the steak to come to room temperature, which helps it cook more evenly and prevents it from getting cold shock when you put it on the grill. A cold steak will take longer to cook, and it might end up tough and unevenly cooked.
(Part 3) The Grill Master: Setting Up Your Domain

Okay, the grill is where the magic happens. Now, there are all sorts of grills out there, from gas to charcoal to even those fancy pellet grills. But regardless of your choice, the key is to get it hot and ready.
Hot and Ready: Creating a Sear-Worthy Environment
You want your grill to be piping hot. If you're using a gas grill, preheat it to high heat. For charcoal, use enough briquettes to create a good bed of coals. We're aiming for a temperature of about 500°F (260°C). You want that intense heat to sear the steak and create that beautiful crust. A hot grill ensures a quick, even sear, which seals in the juices and creates a crispy, flavorful exterior.
Cleaning Up: Ensuring a Clean Slate
Before you get started, it's a good idea to give your grill a quick clean. You don't want any leftover bits of food from your last barbecue to interfere with the flavour of your steak. I usually use a wire brush to scrub the grates. A clean grill also prevents sticking and ensures that your steak gets a nice, even sear.
The Right Tools: Equipping Your Grill Station
To make your life easier, have all your tools ready. You'll need tongs, a meat thermometer, and maybe even a grilling spatula. You might want a timer handy as well, but I usually just go by feel. A good pair of tongs is essential for flipping the steak without piercing it. A meat thermometer is a must-have to ensure the steak is cooked to your preferred doneness. And a spatula comes in handy for lifting and maneuvering the steak on the grill.
(Part 4) The Art of the Sear: Mastering the Crust
This is the crucial moment - the sear. This is where we create that irresistible golden-brown crust, which adds texture and flavour to the steak. Remember that hot grill we talked about? Now's the time to put it to use.
High Heat, Direct Grill: Searing Perfection
Place your steak directly over the hottest part of the grill. This direct, high heat will create a beautiful sear on both sides. Don't move the steak around too much. Let it cook undisturbed for about 3-4 minutes per side, or until a nice, crispy crust forms. The intense heat helps to create a maillard reaction, a chemical process that develops flavour and creates the characteristic brown crust.
The Flip: A Gentle Touch
Once the first side is beautifully seared, use your tongs to flip the steak over. You want to make sure you're not poking holes in the steak, so use those tongs with a gentle touch. Repeat the process on the other side, aiming for that same beautiful crust. Flip the steak only once to avoid losing valuable juices.
(Part 5) The Internal Battle: Achieving the Perfect Doneness
Alright, the sear is done, now it's time to cook the steak to your preferred level of doneness. This is where you get to choose your destiny - rare, medium-rare, medium, medium-well, or well-done.
The Magic Number: Temperature as Your Guide
To ensure your steak is cooked to perfection, I always use a meat thermometer. Here's a handy guide to the internal temperatures for different levels of doneness:
| Doneness | Internal Temperature (°F) | Internal Temperature (°C) |
|---|---|---|
| Rare | 125-130 | 52-54 |
| Medium-Rare | 130-135 | 54-57 |
| Medium | 140-145 | 60-63 |
| Medium-Well | 150-155 | 65-68 |
| Well-Done | 160 and above | 71 and above |
Remember, these are just guidelines. The best way to determine your ideal doneness is to try a small piece of the steak with your finger.
cooking time: A General Guideline
The cooking time will depend on the thickness of the steak, the heat of your grill, and your preferred level of doneness. But here's a general guide:
- Rare: 2-3 minutes per side
- Medium-Rare: 3-4 minutes per side
- Medium: 4-5 minutes per side
- Medium-Well: 5-6 minutes per side
- Well-Done: 6-7 minutes per side
It's important to note that these times are approximate and you should always check the internal temperature of the steak to ensure it's cooked to your liking.
Don't Forget the Sides: Complementing Your Masterpiece
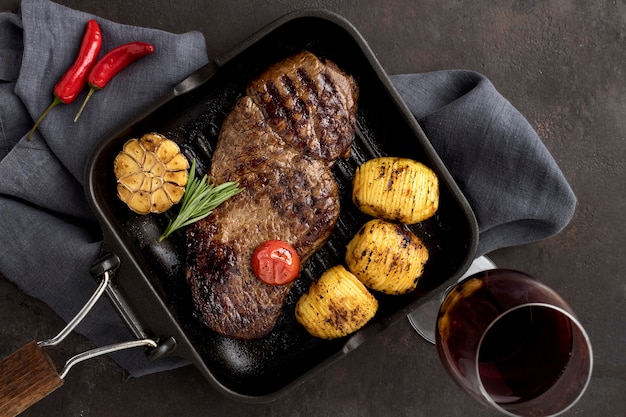
While your steak is cooking, don't forget about the sides! Think about what you're going to serve with your steak. Maybe some roasted vegetables, a creamy potato gratin, or a classic salad. The possibilities are endless! The right side dishes can elevate the entire meal, providing contrasting textures and flavours to complement the steak.
(Part 6) The Resting Stage: Let Your Steak Relax
Alright, your steak is cooked to perfection. But hold your horses! Don't jump straight into slicing it. Instead, let it rest for 5-10 minutes. This gives the juices a chance to redistribute throughout the steak, resulting in a much more tender and flavorful piece of meat.
The Importance of Resting: Reabsorbing Juices
Resting the steak is like giving it a chance to catch its breath after a hard workout. When the steak is hot off the grill, the juices are concentrated towards the surface. By resting it, those juices have time to redistribute, making the entire steak moist and flavorful. Resting helps prevent the juices from running out when you slice the steak.
Covering the Steak: Keeping it Warm
You can rest your steak on a cutting board, covered with a piece of foil. This will help keep it warm while it rests. Or, if you prefer, you can just leave it uncovered on the cutting board. It's really up to you. Covering the steak with foil helps retain heat and prevents it from drying out.
(Part 7) The Final Cut: Presenting Your Masterpiece
After the resting period, it's finally time to slice your steak and present it to the world! I like to slice the steak against the grain, which means cutting it perpendicular to the muscle fibers. This helps make the steak more tender. Slicing against the grain also creates more surface area for the sauce to cling to.
Slicing It Right: Unveiling the Tenderness
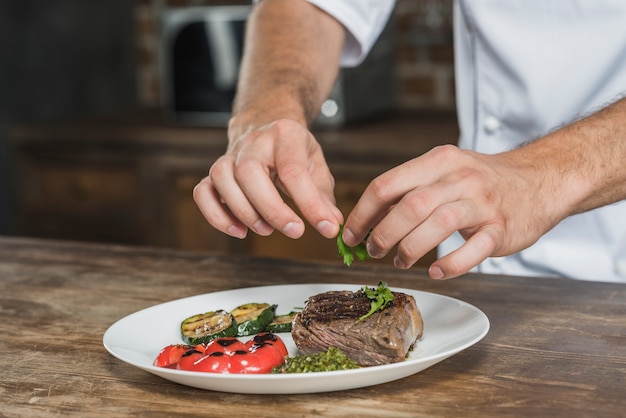
Use a sharp knife, and slice the steak into about 1/2-inch thick slices. If you're serving it with sides, arrange the steak and sides on a plate, and get ready for the big reveal!
(Part 8) The Final Touch: Elevating Your Steak Game
Now, you've got a perfectly cooked New York strip, ready to devour. But why stop there? There are a few things you can do to take your steak game to the next level.
Sauce It Up: Adding Flavorful Depth
A good steak sauce can really elevate the flavour of your steak. There are all sorts of options out there, from classic A1 sauce to more gourmet options like chimichurri or béarnaise sauce. You can even make your own! I personally like a simple garlic butter sauce, which I make by melting some butter in a pan, adding a clove of garlic, and a sprinkle of parsley. A simple sauce can sometimes be the best way to enhance the natural flavor of a good steak.
Side Dishes: Complementing the Flavors
As mentioned before, don't forget the side dishes. They are the perfect complement to your steak. Think about what you're craving, and go for it. A classic salad with a vinaigrette dressing, some roasted vegetables, or even a simple side of mashed potatoes can really round out your meal. Side dishes add variety and balance to your steak meal, and they can be just as important as the steak itself.
Wine Pairing: Elevating the Experience
For the ultimate steak experience, don't forget about the wine pairing. A bold red wine like Cabernet Sauvignon, Merlot, or Syrah complements the richness of the steak. If you're feeling adventurous, try a Pinot Noir, which offers a lighter, more fruit-forward option. The right wine pairing can enhance the flavours of the steak and create a truly memorable dining experience.
(Part 9) FAQs: Answering Your Burning Steak Questions
Alright, you've got your perfect steak. Now, let's answer a few questions that you might have.
1. Can I cook a New York strip in a pan instead of on the grill?
Absolutely! A cast iron skillet is a fantastic option for cooking a steak. Just heat it up over medium-high heat, and add a little oil. You can sear the steak in the pan, just like you would on the grill, and then finish cooking it in the oven for a more even doneness. A cast iron skillet can create a beautiful sear and retains heat well, making it an excellent alternative to grilling.
2. How do I know if my steak is done?
The best way to know if your steak is done is to use a meat thermometer. Insert it into the thickest part of the steak, making sure it's not touching the bone. The internal temperature should match the doneness level you're aiming for. A meat thermometer is an invaluable tool for achieving consistent and accurate doneness.
3. How long can I rest my steak?
You can rest your steak for 5-10 minutes. Anything more than that, and it will start to cool down. You want to rest it long enough to allow the juices to redistribute, but not so long that it becomes cold. Resting is crucial for achieving a tender and juicy steak, so don't skip this step.
4. How do I store leftover steak?
If you have leftover steak, store it in an airtight container in the refrigerator for up to 3-4 days. You can also freeze it for up to 3 months. When reheating, I recommend grilling it or pan-frying it again to get that delicious sear. Proper storage helps maintain the quality of the steak and prevents freezer burn.
5. What are some other steak cuts that I can try?
There are so many other delicious steak cuts out there! Some popular choices include ribeye, filet mignon, and sirloin. Each cut has its own unique flavor and texture, so I encourage you to experiment and find your favorites. Each steak cut offers a different flavour and texture, so exploring different options can be a fun culinary adventure.
There you have it! Your ultimate guide to cooking a perfect New York strip steak. Remember, the key to a good steak is to choose the right cut, preheat your grill, cook it to your preferred doneness, and let it rest before slicing. Now go forth and grill!
Everyone is watching

Prime Rib Roast Cooking Time Chart: Per Pound Guide
Cooking TipsPrime rib roast. Just the name conjures images of lavish dinners, crackling fires, and hearty laughter. It’s ...

How Long to Bake Potatoes in the Oven (Perfect Every Time)
Cooking TipsBaked potatoes are a staple in my kitchen. They're incredibly versatile, delicious, and surprisingly easy to m...

Perfect Rice Every Time: The Ultimate Guide to Cooking Rice
Cooking TipsAs a self-proclaimed foodie, I've always been a bit obsessed with rice. It's the foundation of countless cuisi...

The Ultimate Guide to Cooking Asparagus: Tips, Techniques, and Recipes
Cooking TipsAsparagus. The mere mention of this spring delicacy conjures up images of vibrant green spears, crisp and burs...

Ultimate Guide to Cooking the Perfect Thanksgiving Turkey
Cooking TipsThanksgiving. Just the word conjures up images of overflowing tables laden with delicious food, the scent of r...
