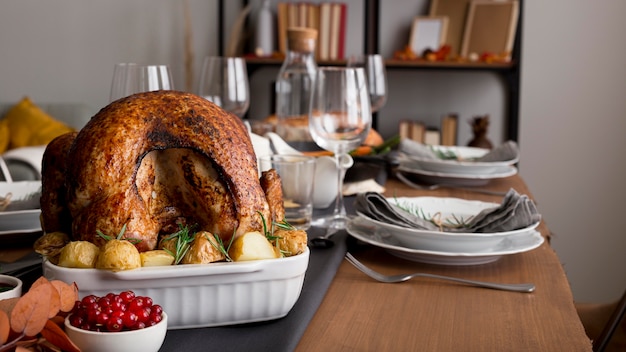
Thanksgiving is just around the corner, and for many of us, that means one thing: a magnificent roast turkey, bursting with flavour and surrounded by all the trimmings. Now, I won't lie, cooking a turkey can feel a bit daunting, especially for first-timers. But fear not! I'm here to share my tried and tested methods, tips, and tricks to ensure your Thanksgiving bird is a triumph, making you the culinary hero of the day.
Part 1: Choosing the Perfect Bird
The Great Turkey Hunt
The first step in your thanksgiving turkey journey is choosing the right bird. This is no ordinary supermarket run; it's a quest for the perfect feathered friend, a culinary hero destined for greatness.
My advice? Head to your local butcher. They're experts in all things turkey and can offer invaluable guidance on choosing the right size and weight for your crowd. Plus, you're likely to find a wider variety of turkeys than in your average supermarket, from free-range to heritage breeds. If you're feeling adventurous, you might even find a beautiful bronze turkey, known for its rich, deep flavour.
Weight and Size
Now, let's talk about that weight. A good rule of thumb is to allow about 1 pound of turkey per person. But let's be honest, you want leftovers, right? So, bump that up to 1.5 pounds per person. And don't forget the stuffing! A good stuffing recipe can truly make or break a turkey, so factor in a bit extra bird for that delicious side dish.
Fresh or Frozen?
Ah, the eternal debate: fresh or frozen? It really comes down to personal preference, but I tend to lean towards frozen. The reason? frozen turkeys are often already brined, which helps to keep the meat moist and flavourful. If you're going for fresh, make sure to buy it a day or two before you plan to cook it.
Part 2: Preparing the Turkey
The Thawing Process
If you've opted for a frozen turkey, the thawing process is crucial. Resist the temptation to leave it on the kitchen counter for days—that's a recipe for disaster. The safest and most effective way to thaw a turkey is in the refrigerator. Allow about 24 hours for every 5 pounds of turkey. So, a 15-pound turkey will need about 3 days to thaw completely.
The Brine Bath
Now, let's talk about the magic of brining. Brining is essentially soaking the turkey in a salt water solution, which helps to draw moisture into the meat, resulting in a juicier, more flavorful bird. While you can find countless fancy brine recipes online, trust me, a simple salt and water solution works wonders.
Here's my basic brine recipe:
- Dissolve 1 cup of salt in 1 gallon of cold water.
- Add 1/2 cup of brown sugar for extra sweetness and depth of flavour.
- Submerge the turkey in the brine for 12-24 hours. The longer it soaks, the more flavour it will absorb.
Pro Tip: Don't forget to weigh the turkey down with a plate or a heavy pot to ensure it's fully submerged in the brine. This keeps the entire bird evenly brined.
Pat It Dry
Once the turkey has been brined, it's time to pat it dry with paper towels. This is crucial for achieving that crispy skin, which is essential for a truly delicious turkey.
Part 3: The Stuffing Saga
The Stuffing Dilemma
Now, we come to a point that can spark debate amongst Thanksgiving enthusiasts: cooking the stuffing inside the turkey or separately.
I'm a firm believer in cooking the stuffing separately. Cooking stuffing inside the turkey can be a bit risky, as it might not cook all the way through. Plus, it can create a barrier between the stuffing and the heat, making it harder for the turkey to cook evenly.
My Go-to Stuffing Recipe
But hey, if you're a stuffing-in-the-bird kinda person, I won't judge. Just make sure you cook the stuffing separately for at least 15 minutes at 350 degrees fahrenheit to ensure it's safe to eat.
Here's my tried-and-true stuffing recipe, which I always cook separately:
- Start with a good quality bread, like sourdough or ciabatta. The crusty texture adds a lovely bite to the stuffing.
- Cube the bread and toast it in the oven for about 10 minutes, until it's golden brown and slightly crispy. This enhances the flavour and gives the stuffing a delicious texture.
- While the bread is toasting, sauté some onions, celery, and carrots in a large skillet. I like to add a bit of butter or olive oil to the pan for extra flavour.
- Add herbs and spices to your liking. I love a mix of sage, thyme, rosemary, and parsley. Feel free to experiment with your own favourite combinations.
- Combine the toasted bread, vegetables, herbs, and broth in a large bowl. I use chicken or turkey broth, but vegetable broth works well too.
- Mix well and season generously with salt and pepper. Taste and adjust seasonings as needed.
- Transfer the stuffing to a baking dish and bake for 30-40 minutes, until golden brown and cooked through. Make sure the stuffing is heated all the way through to ensure it's safe to eat.
Pro Tip: I like to add a handful of dried cranberries or chopped apples to my stuffing for a touch of sweetness and a bit of textural contrast.
Part 4: Roasting the Turkey
The Big Day
Right, the big day is here! You've chosen the perfect bird, brined it to perfection, and prepped your delicious stuffing. Now it's time to roast that turkey!
The Prep Work
Before you get started, preheat your oven to 325 degrees Fahrenheit. This gives your oven ample time to reach the right temperature, which is essential for consistent cooking.
The Stuffing Decision
Now, here's a little secret: even if you're cooking your stuffing separately, you can still stuff the turkey cavity. It's a bit of a visual trick, but it helps to keep the turkey moist and flavorful. Just make sure to remove the stuffing before serving, as it won't have been cooked in the oven.
Tuck and Tie
Once the turkey is stuffed, it's time to tuck the wings behind the bird and tie the legs together with kitchen twine. This helps to keep the bird compact and ensure it cooks evenly.
Time for Butter
Now, for the real fun: the butter basting! I like to use a mixture of softened butter, herbs, and spices. Try using a combination of fresh herbs like rosemary, thyme, or sage, or experiment with dried herbs. Gently rub the mixture all over the skin of the turkey. This will not only give the turkey a beautiful golden-brown color but also add a burst of flavour.
Part 5: Cooking the Turkey
The Timing Game
Now, let's talk turkey cooking times. A general rule of thumb is to allow about 15 minutes per pound of turkey. So, a 15-pound turkey will take about 3 hours and 45 minutes to cook.
Important Note: Always check the turkey for doneness with a meat thermometer. The turkey is done when the internal temperature reaches 165 degrees Fahrenheit. This ensures that the turkey is cooked through and safe to eat.
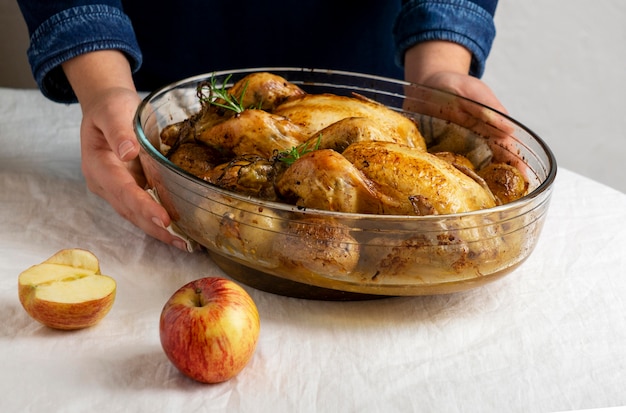
The Roasting Process
Place the turkey in a roasting pan and add about 1 cup of water to the bottom of the pan. This will help to create steam and keep the turkey moist. You can also add vegetables like onions, carrots, and celery to the bottom of the pan, which will flavour the drippings and add another layer of deliciousness to your gravy.
The Basting Ritual
Now, here's where things get interesting. I like to baste the turkey every 30 minutes with the butter mixture. This helps to keep the skin crispy and moist, and it adds a beautiful golden-brown color.
The Resting Period
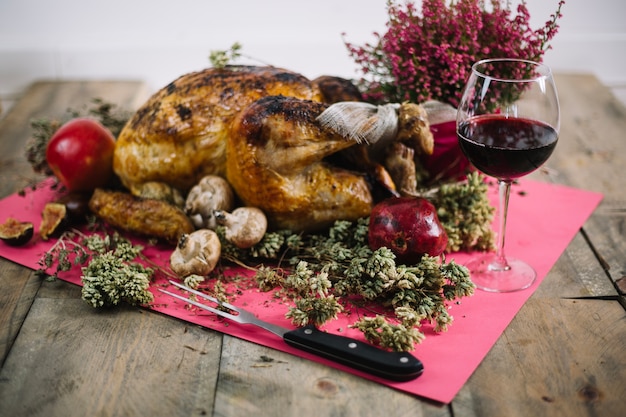
Once the turkey is cooked through, it's important to let it rest for at least 30 minutes before carving. This allows the juices to redistribute throughout the meat, resulting in a more flavorful and tender bird. Covering the turkey loosely with foil during this resting period helps to keep it warm and prevent it from drying out.
Part 6: Carving the Turkey
The Art of Carving
This is the moment we've all been waiting for! It's time to carve that turkey!
Tip: Use a sharp carving knife and a cutting board large enough to accommodate the bird. A good carving knife will make the process much easier and ensure clean cuts.
The Carving Process
1. First, remove the legs from the turkey by cutting through the joint at the thigh.
2. Then, carve the legs into drumsticks and thighs.
3. Next, remove the breast meat by making a shallow cut down the center of the breastbone.
4. Slice the breast meat into thin slices, cutting across the grain. This helps to ensure tender, juicy slices.
5. Finally, remove the wings by cutting through the joint at the shoulder.
Part 7: The Leftover Feast
The Delicious Aftermath
Now, we come to the glorious aftermath of a Thanksgiving turkey: the leftovers!
The Leftover Possibilities
There are endless possibilities for using leftover turkey.
- Make turkey sandwiches with cranberry sauce and stuffing. Add a touch of mayonnaise or mustard for a bit of tang.
- Add leftover turkey to soup or stew. It adds a great depth of flavour to any soup or stew.
- Create a turkey salad. Combine chopped turkey with mayonnaise, celery, onion, and your favourite spices. Serve on bread, crackers, or lettuce leaves.
- Fry up leftover turkey with some vegetables for a quick and easy meal. This is a great way to use leftover turkey for a tasty and satisfying lunch or dinner.
Storage Tips
Store leftover turkey in an airtight container in the refrigerator for up to 4 days. You can also freeze leftover turkey for up to 3 months. Thaw frozen turkey in the refrigerator before using.
Part 8: FAQs
What if my turkey isn't cooked all the way through?
If the internal temperature of the turkey doesn't reach 165 degrees Fahrenheit after the estimated cooking time, simply continue to cook it for another 15-20 minutes. Check the temperature again, and if it's still not cooked through, continue cooking for another 15 minutes. Make sure to check the temperature in the thickest part of the thigh, as this is usually the last part to cook through.
What if my turkey is dry?
If your turkey turns out to be a bit dry, you can remedy the situation by adding some gravy or sauce. You can also add some of the turkey drippings to the leftover turkey to help keep it moist.
What if my stuffing is too dry?
If your stuffing is too dry, add a little bit of broth or water until it reaches the desired consistency. You can also add some butter or oil to help moisten the stuffing.
What if my turkey skin isn't crispy?
If your turkey skin isn't crispy, you can try broiling it for a few minutes at the end of the cooking time. Just be careful not to burn the skin. Broiling can be a great way to achieve a crispy skin, but keep a close eye on it to prevent it from burning.
How do I make my turkey extra flavorful?
For an extra burst of flavor, try rubbing the turkey with a spice rub or marinade. You can also stuff the turkey cavity with herbs and aromatics, like onions, garlic, and lemon.
Part 9: Final Thoughts
Right, there you have it! My ultimate guide to cooking a turkey with stuffing. It might seem like a lot of steps, but I promise you, it's worth it! With a little practice and a whole lot of love, you can create a truly unforgettable thanksgiving feast. So, get out there, find your perfect turkey, and let's make some Thanksgiving magic!
Everyone is watching

Prime Rib Roast Cooking Time Chart: Per Pound Guide
Cooking TipsPrime rib roast. Just the name conjures images of lavish dinners, crackling fires, and hearty laughter. It’s ...

How Long to Bake Potatoes in the Oven (Perfect Every Time)
Cooking TipsBaked potatoes are a staple in my kitchen. They're incredibly versatile, delicious, and surprisingly easy to m...

Perfect Rice Every Time: The Ultimate Guide to Cooking Rice
Cooking TipsAs a self-proclaimed foodie, I've always been a bit obsessed with rice. It's the foundation of countless cuisi...

The Ultimate Guide to Cooking Asparagus: Tips, Techniques, and Recipes
Cooking TipsAsparagus. The mere mention of this spring delicacy conjures up images of vibrant green spears, crisp and burs...

Ultimate Guide to Cooking the Perfect Thanksgiving Turkey
Cooking TipsThanksgiving. Just the word conjures up images of overflowing tables laden with delicious food, the scent of r...