Oh, pumpkin pie. The very words conjure up images of warm, spiced goodness and the cozy embrace of autumn. But you know what? A truly great pumpkin pie doesn’t just happen. It takes a bit of knowledge, a touch of finesse, and a dash of pumpkin pie pumpkin magic.
For years, I’ve been obsessed with perfecting my pumpkin pie recipe, experimenting with different pumpkins, spices, and baking techniques. It’s become a personal quest, and I’m here to share everything I’ve learned with you.
This guide is your one-stop shop for everything pumpkin pie pumpkin – from choosing the perfect gourd to the final sprinkle of cinnamon. We'll cover everything from picking the right pumpkin at the market to the secrets of roasting, pureeing, and baking. So, grab a comfy chair, a cup of tea, and let's get started on this delicious journey together.
(Part 1) The Great Pumpkin Hunt
Think of this as a treasure hunt for your pie’s star ingredient. Now, you might be tempted to grab a pumpkin from the supermarket, but hear me out. There’s a world of difference between a supermarket pumpkin and one that’s been lovingly grown at a farm or a local market. The atmosphere, the smells, the vast array of pumpkins – it’s a sensory experience that’s part of the fun!
Choosing the Right Pumpkin
It’s not just any pumpkin that will do for a pie. You need a pumpkin specifically bred for pie-making, a pumpkin with a sweet, rich flavour that’ll melt in your mouth. These pumpkins are usually smaller, with a deep orange colour and a smooth, firm skin. Those giant jack-o'-lantern pumpkins? Forget them. They’re often watery and bland, not what you want for your pie.
Here's what to look for in a pumpkin pie pumpkin:
- Size: Aim for a pumpkin between 5 and 8 inches in diameter. This size usually strikes the perfect balance between sweetness and the amount of flesh to seeds.
- Colour: Look for a deep, rich orange. It's a sign of ripeness and that delicious flavour we’re after.
- Firmness: Your pumpkin should feel solid and firm to the touch, with no soft spots or bruises. A bruise can indicate that the pumpkin is starting to rot.
- Stem: The stem should be dry and attached firmly. If the stem is loose or withered, it could be a sign that the pumpkin isn’t as fresh as you’d like.
If you’re ever unsure, ask the farmer or vendor for help. They'll be happy to point you towards the perfect pumpkin for your pie.
(Part 2) Prepping the Pumpkin
Okay, you've got your pumpkin. Now it’s time to get it ready for baking. Don’t be intimidated by this part! It’s really quite straightforward, and I’ll walk you through it step-by-step.
1. Cleaning Your Pumpkin
First, give your pumpkin a good scrub with a brush and some water. We want to get rid of any dirt or debris that might be hanging around. This little step helps to prevent any unexpected surprises when you’re cutting it open.
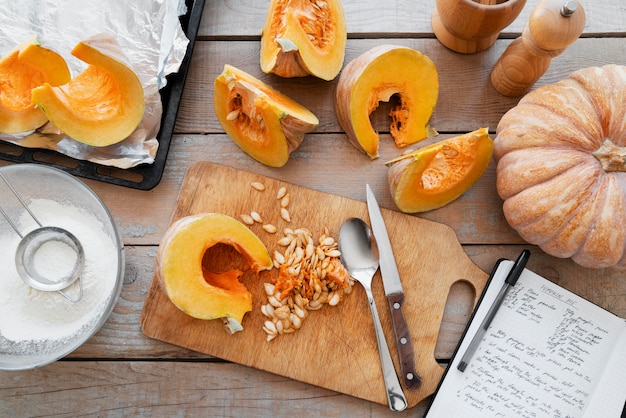
2. Cutting Your Pumpkin
Now, the big moment – cutting open the pumpkin. Remember, safety first! No rush here, just a steady hand and a sharp knife.
Here's a foolproof method for cutting a pumpkin:
- Slice the top: Cut a circle around the stem, about 2 inches thick. This will give you a nice lid for scooping out the insides.
- Scoop out the seeds: Use a spoon to scoop out the seeds and stringy pulp. You can save those seeds for roasting – they make a delicious snack!
- Cut into chunks: Cut the pumpkin into smaller chunks, about 1-2 inches thick. This makes it easier to roast evenly.
(Part 3) Roasting the Pumpkin
Roasting is where the magic really happens. The heat transforms the pumpkin's flavour, bringing out that sweet, fragrant essence. There are different ways to roast a pumpkin, but this simple method is my favourite.
1. Preheat the oven:
Start by preheating your oven to 350°F (175°C). This will ensure your pumpkin cooks evenly and turns out perfectly tender.
2. Place pumpkin on a baking sheet:
Place your pumpkin chunks on a baking sheet lined with parchment paper. This prevents sticking and makes cleanup a breeze.
3. Drizzle with olive oil:
Drizzle the pumpkin chunks with a little bit of olive oil. This helps them to brown nicely and keeps them from drying out.
4. Season with salt and pepper:
Sprinkle the pumpkin chunks with salt and pepper to taste. You can also add a pinch of other spices, like cinnamon, ginger, nutmeg, or cloves, for an extra flavour boost. But don’t go overboard with the spices at this stage - we’ll be adding more to the pie filling later.
5. Roast for 30-40 minutes:
Bake the pumpkin for 30-40 minutes, or until it’s tender and slightly browned. The exact time will depend on the size of your pumpkin chunks and your oven. You can test for doneness by piercing the pumpkin with a fork. If it slides in easily, it’s ready.
While your pumpkin is roasting, take a moment to breathe in that wonderful aroma. It’s a sure sign that you’re on your way to pie perfection.
(Part 4) From Pumpkin to Pie
The roasted pumpkin is ready, and now it’s time to transform it into your delicious pie filling. This is where your culinary skills and patience come into play. We want this filling to be as smooth and silky as can be.
1. Pureeing the Pumpkin:
First, puree your roasted pumpkin. You can use a blender, food processor, or even a potato masher. Blend it until you have a smooth, creamy consistency. For a super smooth texture, you can pass it through a fine-mesh sieve.
2. Adding the Wet Ingredients:
Now we’ll add the wet ingredients to the pureed pumpkin. This is what gives the filling its richness and luxurious texture. You can use evaporated milk, heavy cream, or a combination of both. I usually find that a mix of both works best, but feel free to experiment and see what you prefer.
3. Sweetening the Pie Filling:
Time to add some sweetness! For a classic pumpkin pie, granulated sugar is the go-to. You can also add a little bit of brown sugar for a deeper, more complex flavour. Just remember to adjust the amount to your taste.
4. Spices:
Here’s where you can really get creative. Stick with the classic combination of cinnamon, ginger, nutmeg, and cloves, or explore some new flavour profiles. I like to add a pinch of allspice or cardamom for a slightly spicy kick. Have fun with it!
5. The Salt Touch:
Don’t forget to add a pinch of salt. It may seem odd, but salt actually enhances the sweetness of the filling and brings all the other flavours into perfect harmony.
Take a moment to taste your pie filling. Adjust the sugar and spices as needed. You’re the maestro of this pumpkin pie symphony!
(Part 5) Assembling the Pie
The filling is ready, and now we're going to assemble our masterpiece. You can use either a pre-made pie crust or make your own. Both have their merits, but if you’re feeling ambitious, making your own crust is a rewarding experience. Regardless of which you choose, make sure your crust is nice and cold. This will help prevent it from getting soggy during baking.
1. Pre-baking the Crust:
It’s a good idea to pre-bake the pie crust for about 10-15 minutes before adding the filling. This helps to prevent the crust from getting soggy and also adds a nice, crispy texture to the bottom.
2. Pouring in the Filling:
Once the crust is pre-baked, it’s time to add the filling. Pour it into the crust, making sure to spread it evenly. You might have a little leftover filling - this is a great excuse to make a small pumpkin pie custard for yourself!
3. Baking the Pie:
The final step is baking the pie. The time will vary depending on your oven and the size of the pie, but it will generally take about 45-50 minutes. You can check for doneness by inserting a toothpick or cake tester into the centre of the pie. If it comes out clean, it’s ready.
As your pie bakes, the house will fill with the most incredible aroma – a symphony of cinnamon, nutmeg, and pumpkin. It’s a sensory experience that’s part of the joy of baking.
(Part 6) Letting it Cool
After your pie comes out of the oven, let it cool down completely before serving. This is crucial. It allows the flavours to develop and the filling to set properly. I recommend letting it cool on a wire rack for at least 2 hours. If you can resist, letting it cool for even longer is even better.
(Part 7) The Finishing Touches
Your masterpiece is almost ready! Before you serve it up, add some finishing touches to make it truly irresistible. A dollop of whipped cream, a sprinkle of cinnamon, a scattering of pecans – these little details elevate your pie to the next level.
And don’t forget, if you're feeling adventurous, try adding some other toppings. Chopped apples, cranberries, or even a drizzle of caramel sauce – it's up to you!
(Part 8) Serving and Storing
Now that you’ve got your stunning pumpkin pie, it’s time to enjoy it! Here's how to serve and store your creation:
1. Serving:
The best way to serve pumpkin pie is at room temperature. Allow it to sit for about 15 minutes before slicing. This gives the filling a chance to soften and the flavours to really come through.
2. Storing:
Leftover pumpkin pie can be stored in the refrigerator for up to 3 days. You can also freeze it for up to 2 months. Just make sure to wrap it tightly in plastic wrap and then aluminum foil to prevent freezer burn.
FAQs
Here are some frequently asked questions about pumpkin pie pumpkins:
1. What other types of pumpkins are good for baking?
Besides pumpkin pie pumpkins, you can also use sugar pumpkins, which are similar in size and flavour. You can also use butternut squash, although it will have a slightly different flavour profile.
2. Can I use canned pumpkin for my pie?
Yes, you can definitely use canned pumpkin for your pie. It's a convenient option, but I find that homemade pumpkin puree tends to have a richer and more complex flavour.
3. How can I tell if my pumpkin is ripe?
A ripe pumpkin will have a deep orange colour, a firm texture, and a dry stem. It should also have a slightly hollow sound when you tap it.
4. What are some other ways to use roasted pumpkin?
Roasted pumpkin is incredibly versatile. You can use it in soups, stews, salads, and even smoothies. It’s a great source of vitamins and minerals, so you’re getting a healthy dose of goodness along with that delicious flavour.
5. What's the best way to get the most flavour out of my pumpkin pie?
To get the most flavour out of your pumpkin pie, make sure to use a high-quality pumpkin pie pumpkin. Roast it thoroughly, don't be afraid to experiment with spices, and let the pie cool down completely before serving.
(Part 9) Beyond Pumpkin Pie
You've mastered the art of pumpkin pie, but that's just the tip of the pumpkin iceberg! You can go beyond the classic pie and explore a whole world of pumpkin-inspired treats. Think pumpkin bread, pumpkin muffins, pumpkin cheesecake, pumpkin cookies, and even pumpkin lattes. The possibilities are endless!
(Part 10) Final Thoughts
This journey through the world of pumpkin pie pumpkins has been a joy. We've learned the secrets of choosing, prepping, roasting, and baking the perfect pumpkin pie. But beyond the pie itself, it’s the whole experience that makes it so special. The autumn atmosphere, the warmth of the oven, and the joy of sharing your creations with those you love – it’s what makes baking so rewarding.
I hope this guide has given you the confidence and know-how to make your own pumpkin pie masterpiece. So go out there, embrace the season, and create something truly delicious. And remember, don’t be afraid to experiment and have fun! Maybe you'll even discover your own unique twist on this classic autumn treat.
Everyone is watching

Perfect Rice Every Time: The Ultimate Guide to Cooking Rice
Cooking TipsAs a self-proclaimed foodie, I've always been a bit obsessed with rice. It's the foundation of countless cuisi...

The Ultimate Guide to Cooking Asparagus: Tips, Techniques, and Recipes
Cooking TipsAsparagus. The mere mention of this spring delicacy conjures up images of vibrant green spears, crisp and burs...

Ultimate Guide to Cooking the Perfect Thanksgiving Turkey
Cooking TipsThanksgiving. Just the word conjures up images of overflowing tables laden with delicious food, the scent of r...

Prime Rib Roast Cooking Time Chart: Per Pound Guide
Cooking TipsPrime rib roast. Just the name conjures images of lavish dinners, crackling fires, and hearty laughter. It’s ...

Can You Cook Spaghetti with Gasoline? (The Shocking Truth)
Cooking TipsWe've all seen those crazy internet trends. You know, the ones that make you wonder, "Did someone actually try...