Let's talk corned beef, a dish that holds a special place in my heart. It's not just a slab of salty meat, it's a nostalgic journey back to family gatherings, hearty meals, and a comforting dose of tradition. I'm here to guide you through the process, sharing my personal experiences, tips, and tricks to help you cook up a batch that'll have everyone singing your praises.
(Part 1) Choosing the perfect brisket

Understanding the Cuts
First things first, you need the right cut of beef, and that means a brisket. Now, brisket isn't just one thing – you've got the point cut and the flat cut. The point cut is the fattier option, packed with a luscious layer that melts during cooking, yielding a wonderfully juicy and tender piece of meat. Think of it as the decadent, melt-in-your-mouth choice. The flat cut, on the other hand, is leaner, making it perfect for slicing and creating those classic corned beef sandwiches. It's the more versatile option, ideal for a variety of dishes. You can choose either, or even a combination of both, depending on your preferences and the recipe you're making.
Inspecting the Goods
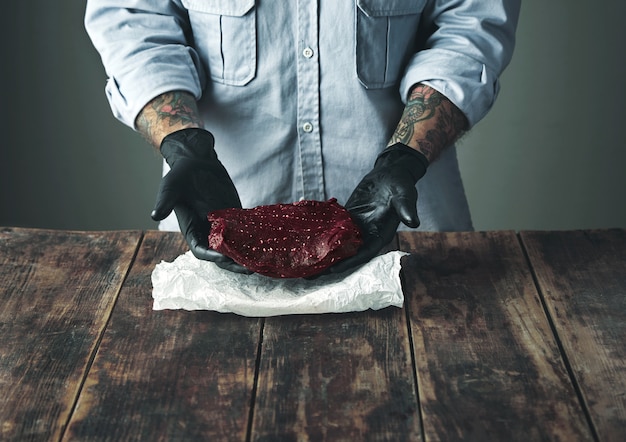
When you're at the butcher's, take a good, long look at your brisket. You're aiming for a good, even layer of fat across the top. This fat is key to achieving a moist and flavorful corned beef. The meat should be firm and have a good, bright red colour. And, of course, it should smell fresh and enticing. If you're buying a pre-packed brisket, pay attention to the colour and texture of the meat. You want to see a good marbling of fat throughout.
Pre-Packed or Butcher's Choice?
Now, you've got a choice to make: pre-packed corned beef or the butcher's fresh cut. The pre-packed stuff is incredibly convenient, often ready to go straight from the fridge to the pot. However, they often come with added flavorings that might not be to your liking. The butcher, on the other hand, offers a level of customization. You can specify how salty you want your corned beef, and even request additional spices if you're feeling adventurous. I personally prefer the butcher's choice because it gives me more control over the final flavor profile.
(Part 2) The Magic of Curing

Understanding the Cure
Let's dive into the heart of what makes corned beef, well, corned beef - the cure. It's a magical blend of salt, sugar, and spices that transforms a simple brisket into a flavourful masterpiece. The salt draws out moisture, adding that distinctive salty flavour and giving the beef its characteristic texture. The sugar adds a touch of sweetness, balancing the saltiness and rounding out the flavour profile. Finally, the spices contribute a wonderful depth of flavour, adding complexity and intrigue to the finished product.
Pre-Cured or Do It Yourself?
You can buy pre-cured corned beef, which is already brined and ready to go. This is a great option for those who are short on time or don't fancy the hassle of curing it themselves. However, if you want to control the flavour and saltiness to your liking, then curing it yourself is the way to go. It's a rewarding process that allows you to personalize your corned beef and achieve a truly unique flavour.
Homemade Cure Recipe
For a homemade cure, you'll need a blend of salt, sugar, black peppercorns, coriander seeds, bay leaves, juniper berries, and garlic cloves. The exact proportions are up to you, a matter of personal preference and experimentation. I tend to go for a good balance of salt and sugar, with a generous sprinkle of spices. The key is to create a mix that will impart a deep, rich flavour without being overly salty.
Curing Process
Once you've got your cure mix, it's time to rub it all over the brisket, making sure you get it into every nook and cranny. Next, wrap the brisket tightly in cling film and place it in the fridge for 5-7 days. Flip the brisket halfway through the process to ensure even curing. Patience is key here, as the cure works its magic over time, transforming the brisket into a flavorful treasure.
(Part 3) Cooking Your Corned Beef to Perfection

Preparation is Key
So, you've got your perfectly cured brisket, and now it's time to get cooking. First things first, give it a good rinse to wash off any excess cure. Then, pat it dry with paper towels to ensure a crisp, delicious crust during cooking.
The Classic Boiling Method
The most traditional way to cook corned beef is by boiling it in a large pot. Fill the pot with enough water to cover the brisket, adding some chopped onions, carrots, and celery for extra flavour. Bring the whole lot to a boil, then reduce the heat to a gentle simmer, cover the pot, and cook for 2-3 hours per pound. This method allows the beef to cook slowly and evenly, resulting in a tender, succulent piece of meat.
The slow cooker's Gentle Touch
If you're looking for a hands-off approach, the slow cooker is your trusty companion. Place your brisket in the slow cooker, add the same vegetables as before, and pour in enough water to cover the beef. Cook on low for 8-10 hours, or on high for 4-6 hours. The slow cooker does all the work for you, allowing the beef to cook slowly and release all its natural flavour.
Oven Cooking for a Richer Flavour
For a more intense flavour, you can cook your corned beef in the oven. Preheat your oven to 325 degrees Fahrenheit (160 degrees Celsius). Place your brisket in a roasting pan, add the vegetables, and pour in some water or broth. Cover the pan with foil and bake for 3-4 hours per pound, or until the beef is tender. The oven method allows the beef to develop a beautiful crust and a rich, concentrated flavour.
Checking for Doneness
Once your corned beef is cooked, it should be fork-tender. If you can easily pierce it with a fork, it's ready to be enjoyed. You can also check the internal temperature; it should reach 160 degrees Fahrenheit (71 degrees Celsius).
(Part 4) The Art of Slicing and Serving
Resting for a Better Experience
Before you start slicing, let your corned beef rest for at least 30 minutes. This allows the juices to redistribute throughout the meat, resulting in a more tender and flavorful cut. It's a simple step that makes a big difference in the final result.
Slicing Tips for Success
When slicing, go against the grain. This helps to ensure that the beef is tender and easy to chew. Use a sharp knife to slice the beef into thin, even pieces. A sharp knife makes a difference – it cuts cleanly through the meat, preventing tearing and ensuring beautiful, uniform slices.
Serving Options for Every Taste
Now, the fun part – how you serve it! The classic combo is corned beef and cabbage, boiled together for a hearty and satisfying meal. It's a timeless combination that never fails to please. You can also serve it on rye bread with mustard, or use it in sandwiches, salads, and even soups. Get creative and experiment with different flavours. Corned beef is a versatile ingredient that can be incorporated into a wide range of dishes.
(Part 5) Leftover Love: Storing and Reheating
Storing Your Beef for Later
Any leftover corned beef can be stored in the refrigerator for up to 4 days. Wrap it tightly in cling film to prevent drying and store it in the coldest part of the fridge. This helps to preserve the freshness and flavour of the corned beef.
Reheating for a Delicious Second Helping
When you're ready to enjoy your leftovers, you can reheat them in the oven, microwave, or slow cooker. If you're reheating in the oven, wrap the beef in foil and bake it at 325 degrees Fahrenheit (160 degrees Celsius) for 15-20 minutes. For a quick reheat, the microwave is a convenient option. Reheat on low power for 1-2 minutes, checking the temperature to ensure it's piping hot. And, for a slow and gentle reheating, pop it in the slow cooker on low for a couple of hours.
Turning Leftovers into Hash
A fantastic way to use up leftover corned beef is to make hash. Dice up the beef, sauté it with onions and potatoes, and season it with salt and pepper. You can serve it with a fried egg on top for a hearty and satisfying brunch. It's a simple dish that packs a flavour punch.
(Part 6) Exploring Flavor Twists and Variations
Spiced Up with a Kick
Want to add a little extra kick to your corned beef? Try adding some chili flakes or hot peppers to your cure mix. For a more subtle heat, use smoked paprika or cayenne pepper. These spices add a touch of warmth and complexity to the flavour profile, creating a truly unique experience.
Citrus Burst for a Refreshing Twist
For a refreshing twist, try adding some citrus zest to your cure mix. Lemon, orange, or lime zest all work well, adding a bright and tangy flavour to the beef. It's a beautiful way to balance the saltiness of the corned beef and add a touch of citrusy brightness.
Herby Goodness for an Aromatic Delight
If you're a fan of herbs, try adding some fresh herbs to your cure mix. Thyme, rosemary, or sage all complement the flavour of corned beef, adding an aromatic depth to the finished dish. These herbs infuse the beef with their unique fragrance, creating a truly aromatic experience.
Sweet and Spicy for a Unique Combination
For a unique and interesting flavour profile, try adding a touch of brown sugar or maple syrup to your cure mix. This will add a hint of sweetness that complements the saltiness of the beef and balances out the spices for a truly complex flavour profile.
(Part 7) Corned Beef cooking tips: Mastering the Art
Temperature Control for Tender Results
Make sure your water is simmering gently during the cooking process. Don't let it boil too hard, as this will dry out the beef. The gentle simmer allows the beef to cook slowly and evenly, resulting in a tender, juicy product.
Skimming the Fat for a Cleaner Flavour
As the beef cooks, you'll see a layer of fat rise to the surface. Skim this off regularly to prevent the beef from becoming greasy. Skimming the fat helps to maintain a clean flavour and a less oily finished product.
Adding Liquid to Keep it Moist
If you find that the water level is getting low, add a little more hot water to the pot. This will help to keep the beef moist and tender. Adding water ensures that the beef cooks in a moist environment, preventing it from drying out.
Don't Overcook: A Matter of Timing
Once the beef is tender, take it out of the pot. Overcooking will make it tough and dry. It's important to remove the beef from the heat as soon as it reaches the desired level of tenderness to prevent overcooking.
Resting is Key: Allowing the Flavors to Blend
After you've cooked your corned beef, let it rest for at least 30 minutes before slicing. This will allow the juices to redistribute, resulting in a more tender and flavorful cut. Resting is a crucial step in the process, allowing the juices to settle and create a truly succulent piece of meat.
(Part 8) Unveiling the History of Corned Beef
Irish Roots: A culinary legacy
The history of corned beef stretches back centuries, with its origins firmly rooted in Ireland. The Irish were renowned for their cattle farming, and the preservation of meat was essential in a climate that could not always sustain fresh food supplies. The art of preserving meat was passed down through generations, becoming an integral part of Irish culinary tradition.
Salt as a Preservative: A Time-Honored Technique
In the 18th and 19th centuries, salt was used as a primary preservative for meat. The process of corning, which involved soaking the beef in a brine of salt and spices, was a common practice in Ireland. This process extended the shelf life of meat, allowing it to be stored for longer periods.
American Influence: A Culinary Fusion
Corned beef made its way to America in the 19th century, largely thanks to Irish immigrants who brought their culinary traditions with them. It quickly gained popularity and became a staple dish in many American households. Corned beef became a symbol of the immigrant experience, a taste of home in a new land.
The Deli Counter: A New Era of Enjoyment
In the 20th century, corned beef became a popular deli item, often served as a sandwich with mustard and rye bread. It's a dish that has become synonymous with New York City and the Jewish culinary tradition. The deli sandwich has become a classic, a symbol of comfort food and a delicious reminder of the rich history of corned beef.
(Part 9) FAQs: Answering Your Burning Questions
How long does corned beef last in the fridge?
You can store leftover corned beef in the fridge for up to 4 days. Wrap it tightly in cling film and store it in the coldest part of the fridge.
How do you reheat corned beef?
You can reheat corned beef in the oven, microwave, or slow cooker. If you're reheating in the oven, wrap the beef in foil and bake it at 325 degrees Fahrenheit (160 degrees Celsius) for 15-20 minutes. If you're using the microwave, reheat on low power for 1-2 minutes, checking the temperature to ensure it's piping hot. And, for a slow and gentle reheating, pop it in the slow cooker on low for a couple of hours.
What goes well with corned beef?
Corned beef pairs well with a variety of sides, including cabbage, potatoes, carrots, parsnips, and Brussels sprouts. It also goes well with rye bread, mustard, and pickles.
Can you freeze corned beef?
Yes, you can freeze corned beef, but it's best to freeze it raw and uncooked. Wrap it tightly in cling film and then place it in a freezer bag. frozen corned beef can be stored for up to 3 months.
What are the different cuts of corned beef?
The most common cut of corned beef is brisket. Brisket comes in two main cuts: point and flat. The point cut has more fat, which melts during cooking, resulting in a juicier, more tender piece of meat. The flat cut is leaner, making it better for slicing and using in sandwiches.
There you have it, the ultimate guide to cooking perfect corned beef. It's a simple yet satisfying dish that's sure to please everyone at the table. So, next time you're looking for a hearty meal, give corned beef a try. You won't regret it!
Everyone is watching

Prime Rib Roast Cooking Time Chart: Per Pound Guide
Cooking TipsPrime rib roast. Just the name conjures images of lavish dinners, crackling fires, and hearty laughter. It’s ...

How Long to Bake Potatoes in the Oven (Perfect Every Time)
Cooking TipsBaked potatoes are a staple in my kitchen. They're incredibly versatile, delicious, and surprisingly easy to m...

Perfect Rice Every Time: The Ultimate Guide to Cooking Rice
Cooking TipsAs a self-proclaimed foodie, I've always been a bit obsessed with rice. It's the foundation of countless cuisi...

The Ultimate Guide to Cooking Asparagus: Tips, Techniques, and Recipes
Cooking TipsAsparagus. The mere mention of this spring delicacy conjures up images of vibrant green spears, crisp and burs...

Ultimate Guide to Cooking the Perfect Thanksgiving Turkey
Cooking TipsThanksgiving. Just the word conjures up images of overflowing tables laden with delicious food, the scent of r...
