Let's face it, chickpeas are having a moment. They're no longer just a humble legume hiding in the back of the pantry. They're taking center stage, starring in everything from creamy hummus to hearty curries, and even showing up in unexpected treats like chickpea brownies! But before you can unleash your inner chickpea chef, you need to know how to cook them right. Because let's be honest, no one wants mushy or undercooked chickpeas. So grab a cuppa, get comfy, and let's embark on a journey to chickpea perfection, together.
(Part 1) Chickpea Selection: Choosing Your Culinary Companion
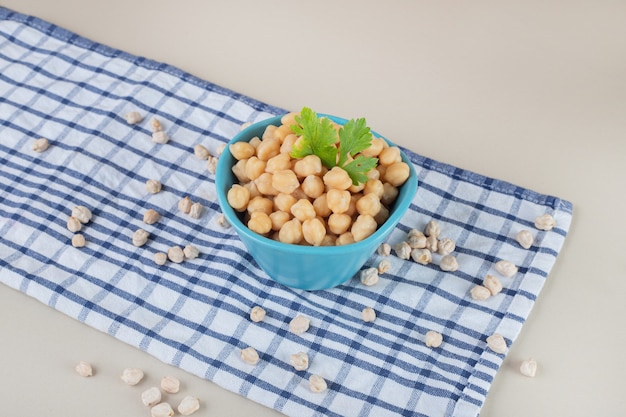
The first step to a delicious chickpea adventure is choosing the right chickpeas. It’s like picking the perfect ingredient for your favorite dish - it sets the tone for everything that follows. Now, I'm not saying you need to go on a gourmet quest, but it's worth taking a moment to find chickpeas that are plump, firm, and free from any cracks or discoloration. They should look healthy and vibrant.
Dry Chickpeas: The Control Freaks' Choice
My personal preference? dried chickpeas. I love the control they give me over the cooking process. I can adjust the texture and flavor to my liking, which is a big deal for a perfectionist like me. But, let's be real, dried chickpeas do require a bit of extra time and effort, involving soaking and cooking. It's a bit like taking a slow and steady approach to baking - you're invested in the process and the outcome.
canned chickpeas: The Convenience Kings
If you're looking for a quick and easy solution, canned chickpeas are your best friend. They're pre-cooked and ready to use in a flash. Just make sure to give them a good rinse to get rid of that canned water and brine. You'll be surprised at how versatile they are, especially for quick salads and dips. They’re like a culinary shortcut, letting you get straight to the delicious part.
The Great Chickpea Debate: Dried vs. Canned
So, which one should you choose? It really depends on your needs and preferences.
| Feature | Dried Chickpeas | Canned Chickpeas |
|---|---|---|
| Time Commitment | Higher - Requires soaking and cooking | Lower - Ready to use |
| Texture | More control over texture during cooking | Pre-cooked, usually softer |
| Flavor | More intense flavor, less salty | More subtle flavor, can be salty |
| Cost | Usually cheaper per serving | More expensive per serving |
If you have time and want to experiment with different flavors and textures, go for dried chickpeas. If you need a quick and easy solution, canned chickpeas are the way to go. Whichever you choose, you're on your way to chickpea greatness.
(Part 2) Soaking Dried Chickpeas: A Symphony of Hydration
You’ve got your dried chickpeas. Now comes the crucial soaking step. Don't think of it as a chore; think of it as a gentle introduction to the cooking process. It's like letting the chickpeas take a luxurious bath, preparing them for their starring role in your culinary masterpiece. Soaking softens the chickpeas, making them easier to cook and resulting in a tender, flavorful final product. Plus, it shortens the cooking time – a win-win for any busy cook.
The Classic Cold Soak: A Patient and Rewarding Approach
The classic cold soak is my personal go-to. It's simple, reliable, and doesn't require constant supervision. Just cover the chickpeas with cold water, ensuring the water level is at least 2 inches above them. Pop them in the fridge for at least 8 hours, or even overnight. The longer they soak, the softer they become. It's a bit like letting the flavors mingle and deepen over time, like a good wine.
The Quick Soak: When Time Is of the Essence
For those moments when you just can't wait, the quick soak comes in handy. It's like a culinary shortcut, getting you to the delicious finish line a little faster. Cover the chickpeas with boiling water and let them sit for an hour. Then, drain and rinse. While it's not as gentle as the cold soak, it does the trick. Just be aware that the quick soak can sometimes result in a slightly tougher texture.
Post-Soak Ritual: A Fresh Start
Whether you've gone for a slow, cold soak or a quick dip in boiling water, after soaking, make sure to drain and rinse your chickpeas under cold water. This washes away any excess starch, leading to a fluffier texture and a more pleasing flavor.
(Part 3) cooking chickpeas: Mastering the Art of Tenderness
Right, your chickpeas are prepped and ready to cook. The cooking process is where you transform those humble beans into culinary stars. I'm a big fan of the stovetop method - it's simple, reliable, and allows me to keep a close eye on the cooking process. But if you're looking for a more hands-off approach, a pressure cooker is your go-to.
Stovetop Cooking: A Slow and Steady Approach
1. Bring the Water to a Boil: Fill a large pot with water and bring it to a rolling boil. Add the drained chickpeas and ensure they're covered by at least 2 inches of water. Let the water come back to a boil.
2. Simmer to Perfection: Reduce the heat to a gentle simmer, cover the pot, and let those chickpeas simmer for 45 minutes to an hour, or until they're tender. We're aiming for soft, but not mushy, chickpeas. It’s a delicate balance, like finding the sweet spot in a good cup of coffee.
3. The Test of Time: After 45 minutes, take a few chickpeas out of the pot and mash them between your fingers. They should be soft and easily mashed, but still hold their shape. If not, continue simmering for another 10-15 minutes, checking the texture every few minutes.
Pressure Cooker Cooking: A Speedy Solution
1. Pressure Cooker Prep: Place the drained chickpeas in your pressure cooker along with enough water to cover them by about an inch. Add a pinch of salt.
2. Under Pressure: Seal the pressure cooker and cook on high pressure for 20-30 minutes, depending on the size and age of the chickpeas. A little less time is needed for newer chickpeas.
3. The Release: Once the cooking time is up, allow the pressure to release naturally for about 10 minutes. Then, carefully release the remaining pressure.
4. Cooling Down: Drain the chickpeas and rinse them under cold water to stop the cooking process. This helps prevent them from becoming mushy.
(Part 4) The Chickpea Gauntlet: Achieving Perfect Texture
You've cooked your chickpeas. But how do you know if they're truly cooked to perfection? It's all about achieving that sweet spot between tender and firm, a delicate balance between yielding and retaining their shape. You don't want them to be mushy, but you also don't want them to be crunchy. It's like finding the perfect bite of a perfectly ripe peach - a symphony of textures.
Signs of a Chickpea Triumph:
- Texture Tango: The chickpeas should be soft and tender, but still hold their shape. They should easily mash between your fingers, giving you a satisfyingly creamy texture.
- Flavor Symphony: They should have a mild, nutty flavor, without any bitterness. A hint of bitterness might mean the chickpeas weren't soaked properly. Think of it as the delicate balance of a well-made tea - subtle, nuanced, and perfectly balanced.
Tips for Avoiding the Mushy Menace:
- Don't Overdo It: Keep a close eye on the cooking time and test them frequently for doneness. Overcooked chickpeas will become mushy, so be vigilant and stop the cooking process just when they reach that perfect tenderness.
- Hold the Salt: Adding salt at the beginning of the cooking process can make the chickpeas tougher and harder to cook. Wait until the end to season them, letting the flavors develop naturally. Think of it as adding salt to a finished dish, enhancing the existing flavors, not overpowering them.
(Part 5) Beyond Basic Boiling: Flavor Adventures for the Chickpea Connoisseur
Basic boiling is a great starting point, but it's just the beginning of your chickpea journey. There's a whole world of flavor waiting to be explored, and it's time to let your culinary creativity run wild.
Flavoring Techniques: A Symphony of spices and herbs
- A Touch of Herb and Spice: Add a bay leaf, thyme, cumin, coriander, or even a pinch of chili flakes to the cooking water. It's like adding a splash of personality to your dish, creating a complex and fragrant aroma.
- Vegetable Companions: Toss in some carrots, onions, or celery while cooking for added sweetness and depth of flavor. Think of it as creating a culinary harmony, where each ingredient enhances the others.
- Citrus Zest: A bit of lemon or orange zest adds a bright, refreshing note to your chickpeas. It's like a burst of sunshine, adding a lively zing to your dishes.
- Garlic's Embrace: Add a couple of cloves of garlic to the pot for a rich, savory flavor. Garlic is a culinary chameleon, adding a warm and inviting aroma to any dish.
- Smoky Charm: For a smoky kick, add a sprinkle of smoked paprika to the chickpeas while they're cooking. It adds a hint of mystery and depth to your dishes, like a whispered secret.
(Part 6) Storing Cooked Chickpeas: Preserving Your Culinary Treasures
You've cooked your perfect chickpeas. Now comes the question: how to store them so you can enjoy them later? The good news is that storing cooked chickpeas is easy, whether you're planning to use them within a few days or want to freeze them for later.
Refrigerator Storage: Fresh and Ready to Go
1. Cooling Down: After cooking, allow the chickpeas to cool down completely in a bowl of cold water. This stops the cooking process and prevents them from becoming mushy.
2. Airtight Storage: Once cooled, drain the chickpeas and transfer them to an airtight container. Store them in the refrigerator for up to 5 days. Keep them cool and fresh, just like a well-kept bouquet of flowers.
Freezing for Future Flavors:
1. Cool and Dry: After cooking, allow the chickpeas to cool down completely. Drain them well and pat them dry. It’s like prepping them for a long sleep, ensuring they’re ready for their big culinary awakening later.
2. Freeze in Portions: Spread the chickpeas out on a baking sheet lined with parchment paper and freeze for about an hour, or until solid. This prevents them from sticking together in the freezer. Once frozen, transfer the chickpeas to an airtight freezer-safe bag or container. Store them in the freezer for up to 3 months.
(Part 7) Chickpea Transformations: A World of Culinary Possibilities
Now for the fun part! You've got your perfectly cooked chickpeas, ready to star in a multitude of dishes. From classic favorites to unexpected delights, there's a chickpea recipe out there waiting for you to discover.
Classic Chickpea Delights:
- Hummus: The undisputed king of chickpea dishes! Simply blend cooked chickpeas with tahini, lemon juice, garlic, and olive oil. It's a creamy, flavorful dip that's perfect for everything from crudités to sandwiches.
- Falafel: These crispy chickpea fritters are a staple in Middle Eastern cuisine. You can find pre-made falafel at most supermarkets, or get adventurous and make your own using a simple recipe.
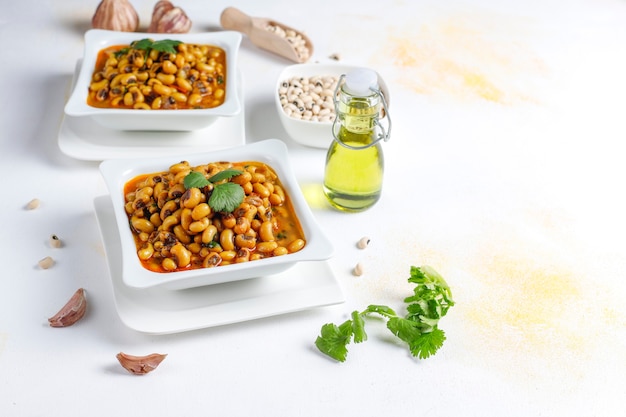
- chickpea curry: Spice up your life with a delicious and hearty chickpea curry. There are countless variations online, from mild to spicy, so you can find one that suits your taste buds.
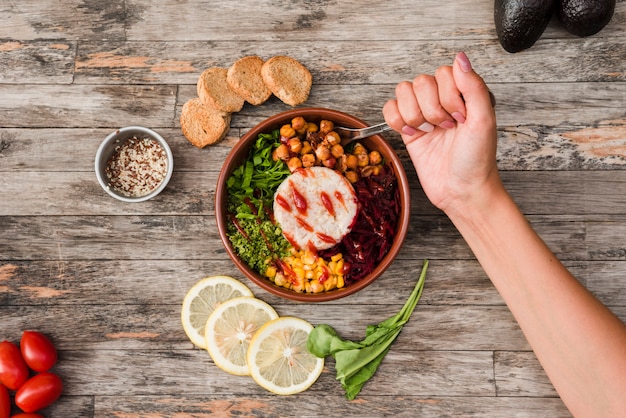
- chickpea salad: This simple and versatile salad is perfect as a sandwich filling, a side dish, or a light lunch. Mix cooked chickpeas with chopped vegetables, herbs, and your favorite dressing. Get creative with the ingredients!
Beyond the Ordinary:
- Chickpea Pasta: A healthy and delicious alternative to traditional pasta, chickpea pasta is made from chickpea flour and is gluten-free. It's a great option for those who are looking for a lighter and more flavorful pasta experience.
- Chickpea Flour Pancakes: A protein-packed breakfast option! Mix chickpea flour with water, milk, and your favorite spices to create a batter and cook on a griddle. It's like a hearty and flavorful version of classic pancakes.
- Chickpea Brownies: Yes, you read that right! Chickpea flour can be used to make decadent and surprisingly delicious brownies. Don't be afraid to experiment with this unexpected but delightful twist on a classic treat.
(Part 8) FAQs: Your Chickpea Queries Answered
Now, let's tackle those burning questions you might have about chickpeas.
1. My Chickpeas Are Hard: What Went Wrong?
If your chickpeas are still hard after cooking, they might not have been soaked properly. Try soaking them for longer next time. You can also add a pinch of baking soda to the cooking water, which helps soften the chickpeas. If they're still hard after cooking, don't despair! Try mashing them into a dip or a salad.
2. Can I Use Canned Chickpeas for All Recipes?
Absolutely! Canned chickpeas are a fantastic option for recipes that don't require specific textures, like hummus or chickpea salads. Just remember to rinse them thoroughly before using them.
3. What Are the Health Benefits of Chickpeas?
Chickpeas are a nutritional powerhouse! They're packed with protein, fiber, and essential nutrients, making them a healthy addition to any diet. They're a great source of iron, folate, and magnesium. Plus, they're low in fat and calories, making them a guilt-free indulgence.
4. How Long Can I Store Cooked Chickpeas in the Freezer?
You can store cooked chickpeas in the freezer for up to 3 months. Just make sure to freeze them in portions to prevent them from sticking together.
5. Are There Any Other Ways to cook chickpeas?
Absolutely! You can roast chickpeas for a crispy, flavorful snack or add them to soups, stews, and salads. Get creative and experiment with different cooking methods!
There you have it! From choosing the right chickpeas to mastering the art of cooking them perfectly, you now have all the tools you need to conquer the chickpea world. So go forth and create delicious, chickpea-filled culinary adventures. Happy cooking!
Everyone is watching

Prime Rib Roast Cooking Time Chart: Per Pound Guide
Cooking TipsPrime rib roast. Just the name conjures images of lavish dinners, crackling fires, and hearty laughter. It’s ...

How Long to Bake Potatoes in the Oven (Perfect Every Time)
Cooking TipsBaked potatoes are a staple in my kitchen. They're incredibly versatile, delicious, and surprisingly easy to m...

Perfect Rice Every Time: The Ultimate Guide to Cooking Rice
Cooking TipsAs a self-proclaimed foodie, I've always been a bit obsessed with rice. It's the foundation of countless cuisi...

The Ultimate Guide to Cooking Asparagus: Tips, Techniques, and Recipes
Cooking TipsAsparagus. The mere mention of this spring delicacy conjures up images of vibrant green spears, crisp and burs...

Ultimate Guide to Cooking the Perfect Thanksgiving Turkey
Cooking TipsThanksgiving. Just the word conjures up images of overflowing tables laden with delicious food, the scent of r...