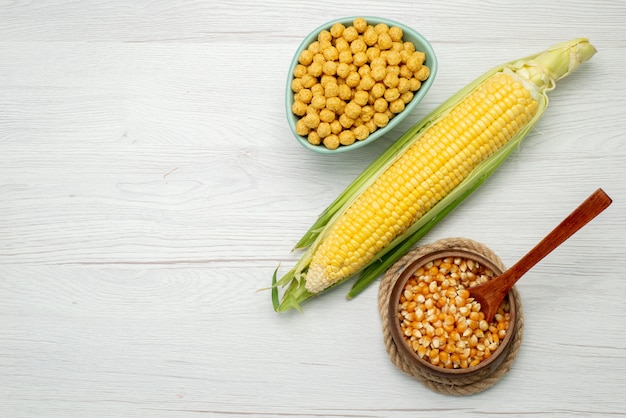
As a seasoned cook, I've always held a special fondness for corn. It's a pantry staple that transforms effortlessly from a simple side dish to the star of a meal. From smoky grilled corn to creamy creamed corn, its versatility is truly remarkable. This guide, born from years of experimentation, whispers of my grandmother's wisdom, and countless recipes tried and tested, is your go-to resource for mastering the art of cooking corn, from selecting the perfect cob to crafting flavourful dishes. So, grab a fresh ear of corn and let's embark on a culinary journey together.
(Part 1) Choosing the Right Corn: A Foundation for Flavor
The first step to achieving delicious corn creations lies in picking the freshest, most flavorful cobs. It's a sensory experience, a dance between sight, touch, and even a whisper of intuition.
Picking the Perfect Cob: The Art of Selection
- Husk Appearance: Think of the husk as a protective cloak. It should be a vibrant green, tightly hugging the cob, signaling freshness and a sweet, juicy interior. Steer clear of husks that are dry, brown, or show signs of damage, as these indicate the corn may be past its prime.
- Silks: The silks, those delicate threads peeking from the end of the cob, should be moist and a pale yellow. If they're dry or brown, it's a sign the corn is losing its moisture and flavor.
- Weight: A good cob will feel substantial for its size. This is a good indicator of plump, juicy kernels waiting to be released.
- Freshness: Whenever possible, opt for corn that was picked recently. Ask your local farmer's market vendor or grocery store staff about the harvest date. The fresher, the sweeter!
Different Types of Corn: A Spectrum of Flavor
Corn comes in various varieties, each offering a unique flavor profile and texture. Choosing the right type can elevate your dish to new heights.
- sweet corn: The classic choice! This type is readily available and perfect for grilling, boiling, and roasting. It boasts a naturally sweet flavor and tender kernels that burst with juicy goodness.
- field corn: While often used for animal feed, field corn holds its own in the kitchen. It brings a slightly starchy, nutty flavor to dishes like polenta or cornbread.
- Popcorn: The champion of cinematic snacks! This corn is specially bred for its ability to pop, thanks to its hard, starchy kernels that expand magically when heated.
(Part 2) grilling corn: Embracing Summer's Flavors
The aroma of grilled corn is synonymous with summer evenings, conjuring images of backyard barbecues and smoky, sweet flavors. There's a certain magic to grilling corn, transforming it into a delightful treat.
Grilling Essentials: Tools for Success
- Medium-High Heat: Aim for a temperature of around 400°F (200°C). This ensures a beautiful char without burning the corn.
- Clean Grill: A clean grill is essential for optimal results. Give your grill grates a good scrub and lightly oil them to prevent sticking.
- Husks On or Off?: This is a matter of personal preference. I find grilling corn with the husks on adds a delightful smoky flavor and keeps the kernels moist. However, if you're using a gas grill or prefer a more even char, removing the husks is perfectly acceptable. Just be sure to soak the corn in cold water for 30 minutes to prevent drying out.
The Grilling Process: A Step-by-Step Guide
- Prep the Corn: If grilling with the husks on, remove the silks. If grilling with the husks off, soak the corn in cold water for 30 minutes to prevent drying out.
- Grill for 15-20 Minutes: Place the corn on the preheated grill, rotating it every few minutes to ensure even cooking and those beautiful char marks.
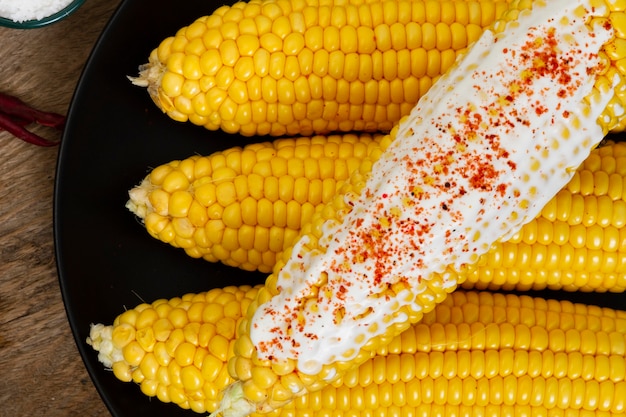
- Seasoning: Once cooked, remove the husks (if you grilled them on) and let the magic of flavor begin. A simple blend of salt, pepper, and butter is a classic choice, but feel free to get creative with herbs, spices, and even a sprinkle of cheese. My personal favorite is a combination of fresh cilantro, lime juice, and a pinch of chili powder.
(Part 3) boiling corn: A Classic Approach for Simplicity
Boiling corn is a straightforward method that delivers a tender, sweet corn. It's perfect for a quick side dish or for adding a touch of sweetness to salads and other recipes.
The Boiling Process: Simplicity at its Best
- Bring Water to a Boil: Fill a large pot with enough water to comfortably submerge the corn cobs. Bring the water to a rolling boil over high heat.
- Add the Corn: Gently lower the corn cobs into the boiling water.
- Cook for 5-7 Minutes: Once the water returns to a boil, reduce the heat to medium and simmer for 5-7 minutes. The corn should be tender but still slightly firm. Overcooking will lead to a mushy texture.
- Drain and Serve: Drain the corn and serve it immediately, adorned with your favorite toppings. A drizzle of melted butter, a sprinkle of salt and pepper, or a squeeze of lemon juice are always welcome additions.
Boiling Tips: Enhancing Flavor and Texture
- Add Salt: A pinch of salt in the boiling water enhances the corn's natural sweetness.
- Don't Overcook: Overcooked corn will become mushy. Cook it just until tender, and it will retain its pleasing firmness.
- Chill Before Serving: For a refreshing side dish, cool the boiled corn in ice water after cooking. It's a delightful contrast to a warm summer meal.
(Part 4) roasting corn: A Delicious Alternative for Oven Lovers
For those who prefer oven cooking, roasting corn delivers a rich, caramelized flavor that elevates the simple corn to a new level. It's a great option for those without a grill, offering a similar depth of flavor.
Roasting Essentials: Setting the Stage for Flavor
- Preheat Oven: Preheat your oven to 400°F (200°C). This ensures the corn cooks evenly and develops a beautiful golden hue.
- Baking Sheet: Line a baking sheet with parchment paper. This prevents sticking and makes clean up a breeze.
- Seasonings: Let your imagination run wild with seasonings. My favorite combination for roasted corn is paprika, cumin, and a touch of chili powder. This trio adds a touch of warmth and smokiness that complements the corn's natural sweetness.
The Roasting Process: Unlocking the Flavor
- Prep the Corn: Remove the husks and silks from the corn. If desired, soak the corn in cold water for 30 minutes to prevent drying out. This is particularly helpful for older corn.
- Season and Roast: Place the corn on the prepared baking sheet, drizzle with olive oil, and generously sprinkle with your chosen spices. Roast for 20-25 minutes, turning halfway through, until the corn is tender and slightly charred.
- Serve Warm: Remove the corn from the oven and serve warm. The warmth brings out the full range of flavors, making it a delightful treat.
(Part 5) microwave corn: A Quick and Convenient Option
For those rushed evenings when time is of the essence, the microwave offers a surprisingly good way to cook corn. While it may not achieve the same char as grilling or the depth of flavor as roasting, it's a quick and convenient solution that delivers tender, flavorful corn.
Microwave Essentials: Simple Tools for Quick Cooking
- Microwave-Safe Dish: Choose a microwave-safe dish large enough to comfortably hold the corn cobs. A glass or ceramic dish works well.
- Water: Add a few tablespoons of water to the dish. This helps prevent the corn from drying out during cooking.
The Microwave Process: Time-Saving Efficiency
- Prep the Corn: Remove the husks and silks from the corn.
- Microwave for 3-5 Minutes: Place the corn in the microwave-safe dish with a few tablespoons of water. Microwave on high for 3-5 minutes, or until the corn is tender. The cooking time may vary depending on the power of your microwave.
- Season and Serve: Remove the corn from the microwave and season with your preferred toppings. Enjoy!
(Part 6) Beyond the Cob: Cooking Corn Kernels
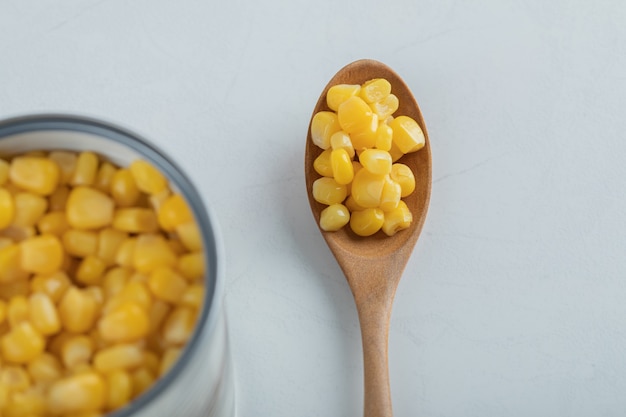
Corn kernels, those tiny jewels of flavor, are incredibly versatile. They can be used in a myriad of dishes, adding a burst of sweetness and texture. Let's explore some of my favorite ways to cook corn kernels.
1. Sautéed Corn Kernels: A Simple Yet Delightful Side
- Ingredients: fresh corn kernels, butter, salt, pepper, garlic (optional), and your favorite herbs.
- Method: Melt butter in a skillet over medium heat. Add the corn kernels, garlic (if using), and herbs. Sauté for 5-7 minutes, stirring occasionally, until the corn is tender and lightly browned. Season with salt and pepper to taste.
2. Creamed Corn: A Creamy and Comforting Classic
- Ingredients: Fresh corn kernels, milk, butter, flour, salt, pepper, and optional ingredients like cheese, bacon, or jalapenos.
- Method: In a saucepan, melt butter over medium heat. Whisk in flour and cook for 1 minute, creating a roux. Gradually whisk in milk until smooth, ensuring no lumps remain. Add the corn kernels, salt, pepper, and any desired additions. Bring to a simmer and cook for 5-10 minutes, stirring occasionally, until the corn is tender and the sauce has thickened.
3. Cornbread: A Southern Staple With Sweet and Savory Notes
- Ingredients: Cornmeal, flour, sugar, eggs, buttermilk, baking soda, salt, and butter.
- Method: Preheat oven to 400°F (200°C). Grease a baking pan. In a large bowl, whisk together the dry ingredients: cornmeal, flour, sugar, baking soda, and salt. In a separate bowl, whisk together the wet ingredients: eggs, buttermilk, and melted butter. Gradually add the wet ingredients to the dry ingredients, mixing until just combined. Pour the batter into the prepared pan and bake for 25-30 minutes, or until a toothpick inserted into the center comes out clean.
(Part 7) corn salad: A Refreshing and Versatile Side Dish
Corn salad is a quintessential summer side dish that's light, refreshing, and bursting with flavor. It's the perfect accompaniment to grilled meats, fish, or even as a stand-alone dish.
Ingredients:
- 2 ears of corn, grilled or boiled
- 1/2 cup chopped red onion
- 1/4 cup chopped fresh cilantro
- 1/4 cup crumbled feta cheese
- 2 tablespoons olive oil
- 1 tablespoon lime juice
- Salt and pepper to taste
Instructions:
- Cut the kernels off the corn cobs using a sharp knife.
- In a large bowl, combine the corn kernels, red onion, cilantro, and feta cheese.
- In a small bowl, whisk together the olive oil and lime juice. This forms a simple yet flavorful dressing.
- Pour the dressing over the corn salad and toss to combine.
- Season with salt and pepper to taste. Adjust the seasoning to your preference.
- Serve immediately for a fresh, vibrant salad or chill for later.
Variations: A World of Flavor Possibilities
- Vegetable Symphony: Add other vegetables like bell peppers, tomatoes, or black beans for a more substantial salad.
- Cheese Variations: Substitute feta cheese with another type of cheese, such as cheddar or mozzarella. Experiment with different flavors to find your perfect match.
- Herby Delight: Explore different herbs like basil, parsley, or chives. Each brings its own unique aromatic notes to the salad.
(Part 8) Corn Chowder: A Hearty and Comforting Soup
Corn chowder is a classic, comforting soup that warms the soul. Its creamy texture and blend of flavors evoke memories of cozy evenings and hearty meals.
Ingredients:
- 1 tablespoon olive oil
- 1 medium onion, chopped
- 2 cloves garlic, minced
- 4 cups chicken broth
- 1 cup peeled and diced potatoes
- 1 cup frozen corn kernels
- 1/2 cup heavy cream
- Salt and pepper to taste
Instructions:
- In a large pot or dutch oven, heat olive oil over medium heat.
- Add onion and cook until softened, about 5 minutes.
- Stir in garlic and cook for 1 minute. The aroma of garlic will infuse the soup with a savory depth.
- Pour in chicken broth and bring to a boil.
- Add potatoes and corn kernels. Reduce heat to low, cover, and simmer for 15-20 minutes, or until potatoes are tender.
- Stir in heavy cream and season with salt and pepper to taste. Adjust the seasoning to your liking.
- Serve hot with a dollop of sour cream or a sprinkle of fresh chives. This adds a touch of tanginess and visual appeal.
(Part 9) Corn Fritters: A Delicious and Crispy Treat
Corn fritters are a delightful appetizer or snack, offering a crispy exterior and a tender, flavorful interior. They're perfect for parties, potlucks, or a simple weeknight treat.
Ingredients:
- 1 cup corn kernels
- 1/2 cup all-purpose flour
- 1/4 cup grated cheddar cheese
- 1 egg, beaten
- 1/4 cup milk
- 1 teaspoon baking powder
- 1/2 teaspoon salt
- 1/4 teaspoon black pepper
- vegetable oil for frying
Instructions:
- In a large bowl, combine the corn kernels, flour, cheese, egg, milk, baking powder, salt, and pepper. Mix until just combined, avoiding overmixing.
- Heat a few inches of vegetable oil in a large skillet over medium heat. The oil should be hot enough to sizzle when a drop of batter is added.
- Drop spoonfuls of the batter into the hot oil. Allow a few fritters to cook at a time, ensuring they have ample space in the pan.
- Cook for 2-3 minutes per side, or until golden brown and crispy.
- Remove the fritters from the oil and drain on paper towels. This removes excess oil and prevents them from becoming soggy.
- Serve warm with your favorite dipping sauce. A simple sour cream and chives dipping sauce or a spicy jalapeno ranch are always welcome companions.
FAQs
1. How do I store fresh corn?
Fresh corn should be stored in the refrigerator. You can leave the husks on, which helps retain moisture, or you can remove the husks and wrap the corn in plastic wrap. Corn will stay fresh for up to 3 days in the refrigerator.
2. Can I freeze corn?
Yes, you can freeze corn! To freeze corn, remove the husks and silks, then blanch the corn by boiling it for 3-5 minutes. This process helps preserve the corn's flavor and texture. Cool the corn in ice water, then drain and freeze in airtight containers or freezer bags. Frozen corn can be stored for up to 6 months.
3. What are the best ways to season corn?
The best way to season corn depends on your personal preference, but here are some popular options to get you started:
- Simple: Salt, pepper, and butter. A timeless combination that enhances the corn's natural sweetness.
- Herby: Fresh herbs like parsley, cilantro, chives, or dill. These add a burst of freshness and aroma.
- Spicy: Chili powder, cayenne pepper, or paprika. These add a touch of heat and complexity.
- Cheesy: Shredded cheese like cheddar, mozzarella, or Parmesan. This adds a creamy, savory element.
- Savory: Garlic powder, onion powder, or smoked paprika. These provide a deeper, more complex flavor profile.
4. What other dishes can I make with corn?
Corn is a culinary chameleon, making appearances in countless dishes:
- Soup: Corn chowder, corn and tomato soup, creamy corn bisque
- Salads: Grilled corn salad, corn and black bean salad, summer corn salad with avocado and feta
- Sides: Creamed corn, succotash, cornbread muffins
- Main courses: Cornbread, corn fritters, corn pancakes, corn enchiladas
- Desserts: Corn pudding, corn ice cream, corn cake
5. How can I tell if corn is overcooked?
Overcooked corn will become mushy and lose its flavor. The kernels will be soft and easily fall off the cob. If you notice these signs, your corn is likely overcooked.
Everyone is watching

Prime Rib Roast Cooking Time Chart: Per Pound Guide
Cooking TipsPrime rib roast. Just the name conjures images of lavish dinners, crackling fires, and hearty laughter. It’s ...

How Long to Bake Potatoes in the Oven (Perfect Every Time)
Cooking TipsBaked potatoes are a staple in my kitchen. They're incredibly versatile, delicious, and surprisingly easy to m...

Perfect Rice Every Time: The Ultimate Guide to Cooking Rice
Cooking TipsAs a self-proclaimed foodie, I've always been a bit obsessed with rice. It's the foundation of countless cuisi...

The Ultimate Guide to Cooking Asparagus: Tips, Techniques, and Recipes
Cooking TipsAsparagus. The mere mention of this spring delicacy conjures up images of vibrant green spears, crisp and burs...

Ultimate Guide to Cooking the Perfect Thanksgiving Turkey
Cooking TipsThanksgiving. Just the word conjures up images of overflowing tables laden with delicious food, the scent of r...