As a seasoned cook with a passion for all things delicious, I've spent countless hours perfecting the art of baking chicken. It's a dish that often feels deceptively simple but can easily turn out dry, bland, or just plain disappointing. But fear not, fellow foodies! Through countless trials, a few burnt offerings (we all have them!), and a whole lot of learning, I've cracked the code to consistently baking chicken that's juicy, flavorful, and so good, it'll have everyone begging for seconds.
So, grab your apron, gather your ingredients, and get ready to embark on this culinary adventure with me. We'll delve into the secrets of choosing the perfect chicken, mastering the art of preparation, and exploring a world of baking techniques and flavour combinations. By the end of this journey, you'll be a chicken-baking pro, turning out mouthwatering meals that will impress even the most discerning palate.
(Part 1) Setting the Stage: Choosing the Right Chicken
Just like a good foundation is essential for any sturdy building, selecting the right chicken is crucial for a delicious, flavorful dish. Think of it as your starting point – a great chicken will be your secret weapon for an unforgettable meal.
The Chicken Conundrum: Whole vs. Pieces
First, we have to tackle the classic chicken dilemma: go for a whole bird, or stick to individual pieces? This choice depends on your culinary goals and personal preferences. whole chickens, while needing a bit more prep, generally cook more evenly, resulting in a beautifully browned and crispy skin, especially if you're aiming for a traditional roasted chicken. However, chicken pieces, like breasts, legs, or thighs, offer more flexibility. They can be cooked individually, making them perfect for smaller meals or experimenting with different marinades and seasonings.
Beyond the Breed: Unveiling the Flavor
Now, let's talk breeds. While most supermarkets offer the standard "broiler" chicken, those who seek a more nuanced flavor might venture to specialty butchers or farmers markets. They often carry breeds like cornish hens or free-range chickens. I personally find free-range chickens to have a richer, more complex flavor, but ultimately, your choice depends on your taste and budget. It's all about discovering what speaks to your palate!
A Chicken's Age: It Matters More Than You Think
You might not know this, but just like wine, chicken develops a more intense flavor with age. A young chicken, usually around 6-8 weeks old, is tender and delicate, ideal for roasting. But older chickens, over 10 weeks, gain a more pronounced flavor and a slightly tougher texture, making them perfect for stewing or braising. If you're aiming for a succulent roast, a chicken between 10-12 weeks old is a good starting point. They offer a balance of tenderness and robust flavor.
(Part 2) Prep Time: Laying the Foundation for Success
Now that you have your perfect chicken, it's time to get prepped. This step might seem straightforward, but it's where the real magic happens, ensuring your chicken cooks evenly and develops those beautiful, golden-brown bits.
Patting Down: The Secret to Crispy Skin
First things first, pat your chicken dry. You might be thinking, "why bother?" Well, excess moisture leads to steaming instead of browning, resulting in a dull, lacklustre skin. I've learned this the hard way, so trust me, take a few minutes to thoroughly pat your chicken dry with paper towels before seasoning. It's a simple step, but it makes a huge difference!
Seasoning Savvy: Unleashing Flavor
Now comes the fun part – seasoning! This is your chance to get creative and personalize your chicken with your signature touch. However, remember, sometimes less is more. Start with a basic salt and pepper rub, then build from there. I'm a big fan of herbs like rosemary, thyme, and sage, or a touch of garlic powder for added depth. For a little heat, try a sprinkle of paprika or cayenne pepper. Just remember, go easy on the seasoning. Overdoing it can easily overwhelm the chicken's natural flavour.
Beyond the Basics: Exploring Flavorful Possibilities
Once you have your basic seasonings down, you can explore a world of flavour combinations. For a touch of luxury, try a citrus rub with lemon zest and orange juice. Or, for a more robust flavour profile, experiment with a blend of smoked paprika, cumin, and chili powder. You can even create your own custom spice blends, unleashing your inner chef!
(Part 3) The Baking Process: Mastering the Technique
Alright, we're ready for the main event: baking! This is where the magic truly happens, transforming your seasoned chicken into a culinary masterpiece. But before we dive in, remember, every chicken is different, so adjusting the baking time and temperature is essential for the perfect result.
Preheating Perfection: Setting the Stage for Even Cooking
Always preheat your oven to the appropriate temperature before placing your chicken inside. I usually start with 400°F (200°C) for a standard whole chicken or chicken pieces. This ensures even cooking and helps create that beautiful, golden-brown crust. It's like giving your chicken a warm welcome to the oven, setting the stage for a successful cook.
Baking Bliss: Reaching the Perfect Doneness
The baking time will vary depending on the size and cut of your chicken. For a whole chicken, it can take anywhere from 1 to 1 1/2 hours. Chicken pieces will cook faster, usually around 30-45 minutes. It's crucial to use a meat thermometer to ensure the chicken is cooked through. The chicken is ready when the internal temperature reaches 165°F (74°C).
Resting is Key: Letting the Juices Redistribute
Once your chicken is cooked to perfection, don't be tempted to carve it immediately! Let it rest for 10-15 minutes before slicing. This allows the juices to redistribute throughout the meat, guaranteeing a tender and juicy final product. This simple step is crucial for achieving that perfectly moist and flavorful chicken, so don't skip it!
(Part 4) Baking Variations: Exploring New Horizons
Now that you've mastered the basics, it's time to explore the world of flavour possibilities. Baking chicken opens up a realm of creativity, allowing you to create a symphony of flavors and textures. Let's delve into some exciting ways to elevate your chicken game.
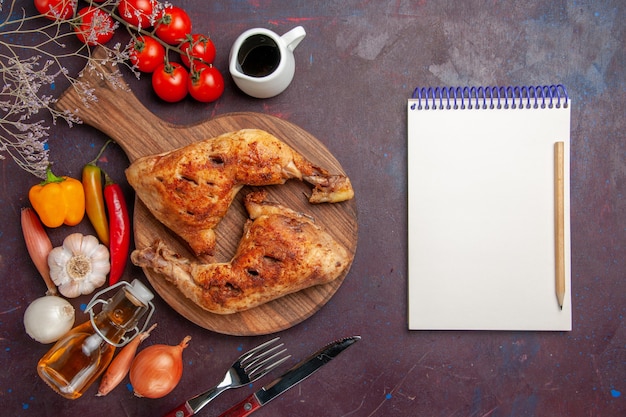
Baking with a Twist: Adding Flavor with Vegetables
One of my favourite ways to enhance the flavour and texture of baked chicken is by incorporating vegetables. Imagine tender roasted potatoes, sweet carrots, and aromatic onions, or a vibrant medley of colourful bell peppers, all mingling with the chicken as they bake. Not only do the vegetables contribute a delightful range of textures and flavors, but they also create a delicious sauce as they cook, transforming your chicken into a one-pan masterpiece.
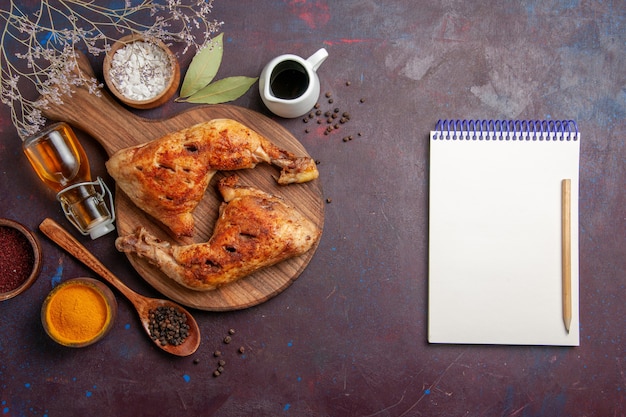
The Power of Herbs: A Symphony of Aromas
Herbs can elevate your baked chicken from ordinary to extraordinary. Experiment with different combinations like thyme, rosemary, and sage for a classic flavour profile. Or, try a Mediterranean twist with oregano, basil, and parsley. You can even add a touch of zest with lemon and orange peel, adding a bright and refreshing note. Let your creativity run wild and explore the world of herbs, unlocking a multitude of aromatic possibilities.
Exploring Beyond: The World of Marinades
Marinades are a game-changer when it comes to flavour. They infuse the chicken with a depth of flavour that's hard to resist. A simple marinade of soy sauce, garlic, and ginger can add a savory and complex depth of flavour. For a more tangy kick, try a marinade of lemon juice, olive oil, and herbs. The possibilities are endless! Remember to marinate your chicken for at least 30 minutes, or even overnight, to allow the flavours to really penetrate the meat. The longer the marinade, the more intense and delicious your chicken will be.
(Part 5) The Art of Roasting: Mastering the Crispy Skin Technique
For the ultimate baked chicken experience, you must master the art of achieving crispy skin. It's all about achieving that perfect balance of a crispy, golden-brown exterior and a juicy, tender interior. It's a culinary feat worth striving for!
The Secret Weapon: High Heat
The first step to achieving crispy skin is to crank up the heat! I usually start by preheating my oven to 425°F (220°C) for about 15 minutes, then lower it to 400°F (200°C) for the rest of the cooking time. This initial high temperature helps to crisp up the skin quickly, locking in those delicious flavours.
The Power of Moisture: Preventing Dryness
Here's a little trick I've learned over the years: adding a bit of moisture to the baking pan helps prevent the chicken from drying out. I usually add a cup of water or chicken broth to the bottom of the pan before placing the chicken on a rack. The steam created by the simmering liquid helps to keep the chicken moist and tender while the skin crisps up beautifully.
The Final Touch: Basting for Extra Crisp
For that extra layer of crispness, try basting your chicken during the cooking process. You can use melted butter, olive oil, or a simple mixture of herbs and spices. I find that basting every 15-20 minutes helps to achieve that perfect golden-brown crust, adding a layer of richness and flavour to your chicken.
(Part 6) Beyond the Basics: Advanced Baking Techniques
Now that you've mastered the fundamentals, let's explore some advanced baking techniques that will take your chicken game to the next level. These techniques add a touch of culinary artistry to your chicken, unlocking even more flavour and texture possibilities.
Spatchcocking: Unlocking Flavor and Speed
Spatchcocking is a simple technique that involves removing the backbone from a whole chicken and flattening it. This allows the chicken to cook more evenly and quickly, as well as increasing the surface area, leading to a crispier skin. It's a bit more involved than traditional baking, but the results are worth the effort. Plus, it's a great way to impress your guests with your culinary skills.
The reverse sear: Mastering Tenderness and Crispness
The reverse sear is a technique that involves cooking the chicken at a low temperature for a longer period, followed by a quick sear at a high temperature. This method helps ensure a juicy and tender interior while still achieving that crispy skin. It's a bit more time-consuming, but it's a great option for those who want the best of both worlds: a tender, flavorful interior and a perfectly crisp skin.
Sous Vide: Precise Cooking for Ultimate Tenderness
Sous vide is a method of cooking food in a water bath at a precise temperature. It's a fantastic way to achieve perfectly cooked chicken that's incredibly tender and juicy. After sous vide cooking, you can sear the chicken to create a crispy skin. It's a bit more involved, but the results are truly impressive, resulting in a remarkably tender and flavorful chicken that will melt in your mouth.
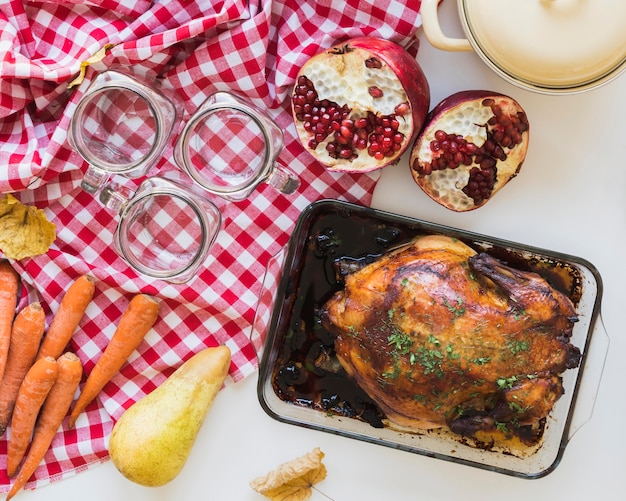
(Part 7) The Art of Serving: Putting the Finishing Touches
Your delicious baked chicken is ready to be served! But it's not just about the taste, it's about creating a beautiful and inviting presentation that enhances the dining experience. A few simple touches can elevate your chicken from a good meal to a culinary masterpiece.
Presentation Perfection: Choosing the Right Plate
Start by selecting the right plate. A simple white plate will showcase the colours and textures of your chicken beautifully. You can also use a rustic wooden platter for a more casual look. Avoid using patterned plates, as they can distract from the main attraction. It's all about letting your chicken shine!
Garnish Game: Adding a Touch of Elegance
A sprinkle of fresh herbs, a squeeze of lemon juice, or a few sprigs of rosemary can elevate your presentation. You can also use slices of lemon or orange for a touch of colour. Just remember, less is more when it comes to garnishes. You want to enhance, not overwhelm the beauty of your chicken. A simple, elegant touch is all you need.
side dish Symphony: Creating a Balanced Meal
No chicken dinner is complete without the perfect side dishes. Roasted vegetables, creamy mashed potatoes, or a simple green salad are classic choices. For a more adventurous touch, try a couscous salad with dried fruits and nuts, or a quinoa salad with roasted vegetables. Remember to choose side dishes that complement the flavour of your chicken and create a balanced meal, bringing all the elements together for a truly satisfying culinary experience.
(Part 8) FAQs: Answering Your Chicken Baking Queries
You've mastered the art of baking juicy, flavorful chicken, but you still have a few lingering questions. Fear not! I've compiled a list of frequently asked questions to help you navigate any challenges you might encounter and make your chicken baking journey as smooth as possible.
1. How do I tell if my chicken is cooked through?
The best way to determine if your chicken is cooked through is by using a meat thermometer. Insert the thermometer into the thickest part of the thigh, making sure it doesn't touch bone. The chicken is cooked through when the internal temperature reaches 165°F (74°C). This ensures that the chicken is safe to eat and cooked to perfection.
2. What if my chicken is overcooked?
Overcooked chicken will be dry and tough. There's not much you can do to salvage it, but you can prevent this from happening in the future by using a meat thermometer and carefully monitoring the baking time. Pay attention to the signs of doneness and adjust the cooking time as needed.
3. How do I store leftover chicken?
Store leftover chicken in the refrigerator in an airtight container for up to 3-4 days. You can also freeze leftover chicken for up to 2-3 months. To reheat, bake or microwave until heated through. Proper storage helps ensure that your leftover chicken stays fresh and safe to eat.
4. Can I use frozen chicken?
Yes, you can use frozen chicken, but you'll need to adjust the baking time. Thaw the chicken in the refrigerator overnight, then pat it dry and proceed with your recipe as usual. Just remember to add extra time for cooking, as frozen chicken will take longer to cook through.
5. Can I bake chicken with other ingredients?
Absolutely! You can bake chicken with a variety of ingredients, such as vegetables, herbs, and spices. Just make sure to adjust the baking time and temperature accordingly. The possibilities are endless, so don't be afraid to experiment and create your own unique chicken recipes.
Now that you've equipped yourself with the ultimate guide to baking juicy, flavorful chicken, you're ready to create culinary masterpieces in your own kitchen. So go forth, experiment, and enjoy the journey of flavour! And remember, with a little practice and passion, you'll be surprised at how delicious and versatile this humble bird can be. Happy baking, and bon appétit!
Everyone is watching

Perfect Rice Every Time: The Ultimate Guide to Cooking Rice
Cooking TipsAs a self-proclaimed foodie, I've always been a bit obsessed with rice. It's the foundation of countless cuisi...

Ultimate Guide to Cooking the Perfect Thanksgiving Turkey
Cooking TipsThanksgiving. Just the word conjures up images of overflowing tables laden with delicious food, the scent of r...

The Ultimate Guide to Cooking Asparagus: Tips, Techniques, and Recipes
Cooking TipsAsparagus. The mere mention of this spring delicacy conjures up images of vibrant green spears, crisp and burs...

Can You Cook Spaghetti with Gasoline? (The Shocking Truth)
Cooking TipsWe've all seen those crazy internet trends. You know, the ones that make you wonder, "Did someone actually try...

Chorizo and Eggs Recipe: The Ultimate Guide
Cooking TipsRight, let’s talk about chorizo and eggs. You know, that classic Spanish dish that's always a winner. It's th...