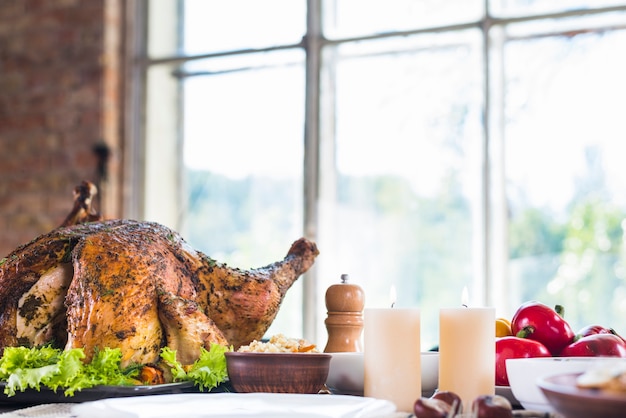
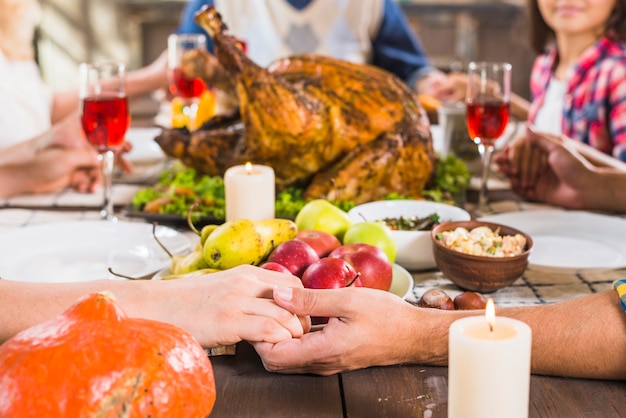
Ah, the humble turkey. It's the star of the show at countless Christmas dinners, a symbol of festive gatherings, and a culinary challenge that can leave even the most seasoned cook feeling a little anxious. But fear not, my fellow foodies! With a little knowledge and a dash of confidence, you can conquer the art of roasting a turkey that's juicy, flavorful, and perfectly cooked. As a seasoned home cook with more than my fair share of turkey triumphs and (let's be honest) a few regrettable mishaps, I've learned a thing or two about achieving that perfect roast. And getting the cooking temperature right is absolutely key to a delicious and successful bird. So, grab a cuppa, settle in, and let's dive into the world of turkey cooking, together.
We'll explore everything from choosing the right turkey to mastering the art of checking its temperature, and I'll share some of my tried-and-true tips and tricks along the way. After all, who doesn't love a good story, especially when it comes to food?
Part 1: Choosing Your Turkey
The journey to a perfect roast starts with selecting the right bird. It's like picking the perfect ingredients for any dish – you want a turkey that will shine, not one that leaves your guests feeling underwhelmed. Here's what to consider when choosing your Thanksgiving hero:
1. Fresh or Frozen?
The eternal dilemma! It's like choosing between a classic cup of tea and a rich espresso (don't get me started on that debate!). Personally, I prefer the flavor of fresh turkeys, but both options have their pros and cons. Fresh turkeys tend to be more flavorful, but require extra planning as they need to be thawed before cooking. frozen turkeys, on the other hand, offer convenience but can sometimes be a little drier. Ultimately, it boils down to personal preference and what works best for your schedule.
2. Size Matters
This is crucial. Don't get caught off guard by a turkey that's larger than your oven or your appetite! Before you head to the butcher or the supermarket, determine how much turkey you'll need based on your guest list. A good rule of thumb is to allow about 1 pound of turkey per person. So, if you're expecting 10 guests, you'll want a turkey that's around 10 pounds. This will ensure everyone has enough to enjoy without having a mountain of leftovers (though a little leftover turkey never hurt anyone).
3. Check for Quality
Don't just grab the first turkey you see! Take a moment to examine your chosen bird. Look for a turkey that's plump and firm, with a nice, even colour. Avoid any turkeys that have a foul smell or any signs of discoloration. Trust your nose and your instincts, and you'll know if something's not quite right.
Part 2: Prepping Your Turkey
You've got your perfect turkey, now it's time to get it ready for the oven. This is where you can really make your bird sing!
1. Brining Your Bird
Brining is a bit of a controversial topic in the culinary world, but I'm a firm believer in its power. It involves soaking the turkey in a saltwater solution, which helps to lock in moisture and infuse the meat with flavor. Think of it as a spa treatment for your turkey. There are countless recipes out there, but I prefer a simple salt and water brine. Just be sure to give your turkey enough time to soak – 12 hours for a smaller turkey and up to 24 hours for a larger one. The longer, the better!
2. Pat It Dry
After your turkey's had its brine bath, pat it dry thoroughly with paper towels. This is essential for achieving a beautifully crispy skin, which is an absolute must for any good roast turkey. I like to take it a step further and use a hairdryer on a low setting to really get that moisture out. Don't be shy!
3. Stuffing Time
This is a matter of personal preference. Some cooks love stuffing their turkey, others prefer to cook it separately. If you're going the stuffing route, stuff the turkey loosely and avoid overfilling it. You don't want to trap any moisture inside, which could lead to a dry bird. Remember, stuffing needs to reach an internal temperature of 165°F (74°C) for safety.
Part 3: Getting Ready to Roast

The moment has arrived! You've chosen your turkey, prepped it with love, and now it's time to get that bird ready for the oven. Here's how to create the perfect roasting environment:
1. Choosing Your Oven Rack
Place your turkey on a rack in your roasting pan. This allows air to circulate around the bird, ensuring even cooking. You want that beautiful golden-brown colour all over, not just on one side! It's also a good idea to use a roasting pan that's large enough to hold the turkey comfortably, without it touching the sides.
2. The Art of Butter Basting
This is my favorite part – time for a little butter love! Take a generous amount of butter (real butter, please, not margarine!) and slather it all over the turkey. This not only adds flavour but also helps to keep the bird moist. Feel free to get creative and add herbs and spices like rosemary, thyme, and garlic to your butter for an extra boost of flavor.
3. Covering Up
A little protection goes a long way! Cover the turkey with a loose tent of foil for the first part of the roasting time. This traps moisture and prevents the bird from drying out too quickly. But don't forget to remove the foil for the last hour or so of cooking time to allow the skin to crisp up. This creates that irresistible crispy skin that everyone loves.
Part 4: Temperature Matters
Now we're getting to the heart of the matter - the turkey cooking temperature. This is the key to a perfectly cooked bird, so don't underestimate its importance. Here's what you need to know:
1. Oven Temperature
Preheat your oven to 325°F (163°C). This temperature ensures even cooking and prevents the turkey from burning before it's cooked through. Resist the urge to crank up the heat! Slow and steady roasting is the name of the game.
2. turkey internal temperature
This is where the magic happens. The turkey is considered safe to eat when it reaches an internal temperature of 165°F (74°C). But it's not just about safety; you also want to ensure that the breast meat is cooked through but still juicy, and the legs are tender and flavorful.
3. Don't Forget the Thermometer
A meat thermometer is your best friend when roasting a turkey. It's the only way to know for sure that your bird is cooked through. Insert the thermometer into the thickest part of the thigh, making sure it doesn't touch any bone. If you're using a digital thermometer, be patient and let it settle for a few seconds before reading the temperature.
Part 5: Roasting Time
Now let's talk about how long to roast your turkey. It's a little bit of a dance, but don't worry, I'll guide you through it.
1. Turkey Size Matters
The roasting time will vary depending on the size of your turkey. A good rule of thumb is to allow about 15 minutes per pound of turkey. So, if you have a 10-pound turkey, you're looking at about 2.5 hours of roasting time. This is just a guideline, however, so make sure to use your thermometer to check the internal temperature.
2. Check the Temperature
Don't rely solely on the roasting time. Use your trusty meat thermometer to check the internal temperature. The turkey is done when the thickest part of the thigh reaches 165°F (74°C).
3. Resting is Key
Once the turkey is cooked, let it rest for at least 20 minutes before carving. This allows the juices to redistribute throughout the meat, resulting in a more tender and flavorful turkey. Cover the bird loosely with foil to keep it warm while it rests.
Part 6: Turkey cooking tips
Here are a few more tips to ensure your turkey is a culinary masterpiece. These are the tips I've learned over the years, the ones I swear by:
1. Keep an Eye on the Skin
As the turkey is roasting, keep a watchful eye on the skin. It should be a beautiful golden brown. If it's starting to look too dark, you can tent the turkey with foil to prevent further browning. You want that perfect golden hue, not a burnt mess!
2. Baste Regularly
Basting the turkey with pan juices every 30 minutes or so helps to keep it moist and flavorful. Use a basting spoon or a turkey baster for this. You'll be amazed at the difference it makes.
3. Don't Overcrowd the Oven
If you're also roasting vegetables or other dishes, make sure there's enough space in the oven for the air to circulate freely. Overcrowding the oven can lead to uneven cooking and a turkey that's not cooked through.
4. Don't Open the Oven Door Too Often
Every time you open the oven door, you let out heat, which can affect the cooking temperature. Try to resist the urge to check on the turkey too frequently. Patience is a virtue in the kitchen, and it will be rewarded with a perfectly cooked turkey.
Part 7: turkey carving
Alright, the moment of truth has arrived: time to carve that beautiful turkey. But before you get all butcher-like, here's a step-by-step guide to help you navigate the carving process like a pro:
1. Gather Your Tools
You'll need a sharp carving knife and a fork to hold the turkey steady. A carving board or a large platter will also come in handy.
2. Let's Get This Party Started
Start by carving the breast meat. Using your carving knife, carefully slice along the bone of the breastbone, making sure to go all the way to the end. Then, use your fork to hold the turkey steady and slice the breast meat into thin slices.
3. Don't Forget the Legs
Next, let's tackle the legs. Use your knife to slice around the joint where the leg meets the thigh. Then, carefully remove the leg and thigh from the turkey. You can use your carving knife to slice the leg and thigh into smaller pieces.
4. Don't Be Afraid to Ask for Help
If you're feeling a little intimidated by the carving process, don't hesitate to ask for help. There's no shame in getting a second pair of hands to help you out.
Part 8: Leftovers, Anyone?
Let's be honest, one of the best things about a roast turkey is the leftovers. They're so versatile and delicious, you'll be dreaming of turkey sandwiches for days.
1. Store It Properly
Once you've carved your turkey, it's important to store it properly. Place the leftovers in airtight containers in the fridge and use them within 3 to 4 days.
2. Don't Throw Away the Bones
Those leftover bones can be used to make a delicious turkey stock. Simply simmer the bones with vegetables and herbs for a few hours. The result is a rich, flavorful stock that can be used in soups, stews, or sauces.
3. Get Creative
There are endless possibilities when it comes to using leftover turkey. Make sandwiches, salads, soups, or even turkey pot pie.
FAQs
1. What if my turkey is not cooked through?
If your turkey is not cooked through, it's important to continue cooking it until it reaches an internal temperature of 165°F (74°C). You can also check the turkey for doneness by piercing the thickest part of the thigh with a fork. If the juices run clear, it's done. If they're pink, it needs to cook a bit longer.
2. Can I cook my turkey in a slow cooker?
While it's possible to cook a turkey in a slow cooker, it's not recommended. Slow cookers don't reach high enough temperatures to cook a turkey safely.
3. How do I keep my turkey moist?
Brining your turkey is a great way to keep it moist. You can also use a turkey roasting bag or tent the turkey with foil for the first part of the cooking time. Basting the turkey regularly with pan juices will also help to keep it moist.
4. What if my turkey is dry?
If your turkey is dry, you can try to rehydrate it by adding a little bit of broth or gravy. You can also make a turkey salad or soup.
5. How do I know if my turkey is overcooked?
You'll know your turkey is overcooked if the breast meat is dry and tough. You may also notice that the skin is dark and crispy.
And there you have it! My guide to the perfect turkey cooking temperature. Happy cooking, and enjoy your festive feast!
Everyone is watching

Prime Rib Roast Cooking Time Chart: Per Pound Guide
Cooking TipsPrime rib roast. Just the name conjures images of lavish dinners, crackling fires, and hearty laughter. It’s ...

How Long to Bake Potatoes in the Oven (Perfect Every Time)
Cooking TipsBaked potatoes are a staple in my kitchen. They're incredibly versatile, delicious, and surprisingly easy to m...

Perfect Rice Every Time: The Ultimate Guide to Cooking Rice
Cooking TipsAs a self-proclaimed foodie, I've always been a bit obsessed with rice. It's the foundation of countless cuisi...

The Ultimate Guide to Cooking Asparagus: Tips, Techniques, and Recipes
Cooking TipsAsparagus. The mere mention of this spring delicacy conjures up images of vibrant green spears, crisp and burs...

Ultimate Guide to Cooking the Perfect Thanksgiving Turkey
Cooking TipsThanksgiving. Just the word conjures up images of overflowing tables laden with delicious food, the scent of r...