There's a certain magic in a perfectly cooked sunny-side up egg. The golden-yellow yolk, glistening and runny, the crisp, white edges, and the irresistible aroma - it's a simple breakfast dish that evokes memories of lazy mornings and sunshine-filled days. But achieving that picture-perfect sunny-side up egg can be a bit of a culinary puzzle. It's a delicate dance between heat, time, and a watchful eye. Over the years, I've learned from countless trials and errors, experimenting with different pans, heat levels, and even egg varieties. Now, I'm ready to share my secrets, the techniques I've honed to ensure every sunny-side up egg I make is a masterpiece of flavour and texture. So, grab your frying pan, crack open some fresh eggs, and let's embark on this culinary adventure together.
Part 1: choosing the right eggs

The Importance of Freshness
Let's be honest, the heart and soul of a sunny-side up egg lies in the yolk. And a fresh egg is the key to a vibrant, silky yolk, the kind that melts in your mouth with every bite. The older the egg, the thinner the yolk becomes, and the more likely it is to break or spread during cooking. Think of it this way: a fresh egg is a little like a perfectly plump grape, while an older egg is more like a slightly deflated balloon. The freshness makes a world of difference in the final result. If you have access to local farms, I highly recommend sourcing your eggs from them. You can even check the date stamp on the carton for an indication of freshness.
The Size Matters
While any size egg can technically be used, I find medium-sized eggs to be the sweet spot for sunny-side ups. They offer a nice balance of size and yolk richness. Large eggs can sometimes lead to a more spread-out yolk, requiring slightly adjusted cooking times. On the other hand, small eggs may cook too quickly, leaving you with a slightly tough yolk. So, for that perfect golden yolk, medium-sized eggs are my go-to choice.
Part 2: The Perfect Pan for the Job
The type of pan you choose plays a crucial role in achieving that coveted crispy edge and runny yolk. cast iron skillets are my personal favourites for sunny-side up eggs. They distribute heat evenly and retain heat for a longer time, ensuring a consistent cook. This is essential for achieving those crispy edges on the whites and a gently cooked yolk. I find a 10-inch skillet is the ideal size for cooking 2-3 eggs at a time, leaving enough room for them to cook evenly without crowding each other.
Seasoning the Cast Iron: A Love Story
If you’re venturing into the world of cast iron for the first time, seasoning your pan is a crucial step. Seasoning is like a protective shield, creating a non-stick layer on the pan's surface. It involves creating a polymerized oil layer that prevents rust and makes your pan a non-stick wonder. It's a process that takes a little time but pays off in deliciousness. Here's a simple guide to seasoning your cast iron skillet:
- Wash it with care: Give your pan a good wash with hot, soapy water and dry it thoroughly. Remember, cast iron is a bit like a precious heirloom – treat it with care!
- Oil it up: Coat the entire surface of the pan with a thin layer of vegetable oil. I usually opt for canola or grapeseed oil, as they have a high smoke point.
- Bake it good: Place your oiled pan in an oven preheated to 400°F (200°C) for a full hour. Let the heat work its magic.
- Cool it down: Turn off the oven and let the pan cool completely inside the oven. This slow, gradual cooling helps the oil polymerize, creating that protective layer.
- Repeat for perfection: Repeat this process 2-3 times to build a well-seasoned, non-stick surface on your pan.
Preheating Your Pan: The Key to Success
Once your cast iron skillet is seasoned and ready to go, preheating is essential. I usually heat my skillet over medium heat for 5-7 minutes, ensuring it reaches a temperature that allows for quick, even cooking without overcooking the yolk. You want your pan to be hot enough to sizzle a drop of water instantly. This is a good indicator that your pan is ready for its starring role in the sunny-side up saga.
Part 3: Cracking and Cooking – A Gentle Touch
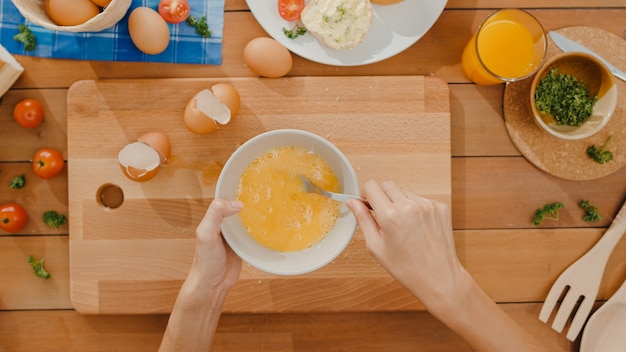
Now comes the fun part – cracking those eggs! Gently crack each egg onto a flat surface, like a countertop or cutting board, to avoid breaking the yolk. It's a good idea to crack them over a bowl to catch any errant shells or yolk bits. You can use a spatula to gently lift out any shell fragments if needed. You want to ensure your eggs enter the pan with all their yolk-y goodness intact!
Adding a Little Fat: A Touch of Luxury
While it may seem like an unnecessary step, adding a bit of fat to your pan is a game-changer for sunny-side up eggs. I prefer to use a neutral oil like grapeseed oil or avocado oil, as they have a high smoke point and won't impart any flavour to the eggs. Just a teaspoon or two, enough to lightly coat the bottom of the pan, is all you need. This thin layer of fat creates a barrier between the egg and the pan, preventing sticking and ensuring a smooth release.
The Gentle Placement
Now comes the moment of truth. Once the oil is shimmering, carefully slide your eggs into the pan. Don't overcrowd the pan. I find 2-3 eggs at a time is the perfect number for a 10-inch skillet, allowing each egg to cook evenly and develop those crisp edges. Gently place the eggs in the pan, ensuring they lie flat and undisturbed.
Part 4: The Art of the Cook – Patience and Precision
Here's where many people go astray. The biggest mistake people make is stirring or moving the eggs during cooking. Remember, the goal is to let the whites set around the yolk, creating a beautiful ring of golden brown. Leave them be, let them do their thing, and resist the temptation to fidget!
The Importance of Low Heat: The Key to Runny Perfection
Cooking sunny-side up eggs on low heat is crucial for achieving that perfectly runny yolk. I usually keep the heat at medium-low, creating a gentle, even cook. You want the whites to set without the yolks hardening. Think of it as a slow, gentle dance, allowing the heat to work its magic without rushing the process.
Part 5: The Perfect Doneness – Signs to Watch For
You'll know your eggs are almost ready when the whites have set, turning opaque and slightly firm, while the yolk remains jiggly, a vibrant golden hue. At this point, I use a spatula to carefully check the bottom of the eggs. If they're nicely browned, they're ready to be enjoyed.
The "Test of the Jiggle"
Another good test is to gently shake the pan. The yolks should still jiggle, indicating they're still runny and gloriously delicious. If you see the yolks starting to solidify or turn a pale yellow, it's a sign they're overcooked and you need to take them off the heat immediately.
Timing is Key: The Art of Observation
The cooking time will vary depending on your stovetop, pan, and the heat level. It usually takes about 3-4 minutes to cook sunny-side up eggs to perfection. But every stove is unique, so keep a watchful eye on your eggs. Be prepared to adjust the cooking time if needed, ensuring your eggs achieve that perfect balance of crisp whites and runny yolk.
Part 6: The Flip – A Risky Move
Now, this is a tricky maneuver. For the most perfectly runny yolk, flipping the egg is not recommended. It's best to let the yolk cook gently, undisturbed, until it reaches the desired doneness. But if you're craving a slightly more cooked yolk or a crispier edge on the white, flipping the egg at the very end of the cooking process can be a fun challenge.
The Slide Method: A Gentle Touch
I prefer the simple slide method for flipping my eggs. Using a flat spatula, gently slide it under the egg, lifting it slightly and flipping it over. It takes a bit of practice, but with a little patience, you'll be a master flipper in no time.
Flip with Caution: The Delicate Yolk
Remember, if you're flipping, be extra careful, especially if you're using a hot pan. The yolk is delicate and susceptible to breaking. Flip it quickly and gently, and be prepared for a bit of splatter. If the yolk does break, don't worry! Your eggs are still delicious. Just adjust your expectations and enjoy the culinary journey.
Part 7: Serving Time – The Grand Finale
Once your eggs are cooked to your liking, it's time to transfer them to a plate. I like to use a spatula to gently slide the eggs onto the plate, preventing sticking or breakage. If you've flipped your eggs, allow them to rest for a few moments, allowing the heat to distribute evenly.
The Perfect Accompaniments: A Symphony of Flavors
Sunny-side up eggs are a culinary canvas, ready to be adorned with a symphony of flavors. I love to pair them with a simple toast, some roasted vegetables, or a side of crispy bacon. You can also add a sprinkle of salt and pepper, a dash of fresh herbs like chives or parsley, or a dollop of sour cream or yogurt for extra flavour.
Part 8: Don’t Be Afraid to Experiment: Unleash Your Creativity
While I've shared my tried-and-true method, I encourage you to experiment! Try adding cheese to your eggs, cooking them in different types of pans, or even experimenting with different herbs and spices. The key is to have fun, explore your culinary creativity, and discover what makes your sunny-side up eggs truly special.
Part 9: Troubleshooting Common Sunny-Side Up Mishaps
Even the most seasoned chefs have their culinary hiccups. Here are some common problems you might encounter while cooking sunny-side up eggs and how to avoid them.
The Watery Whites
If you find your eggs have watery whites, it's likely that you cooked them on too low a heat or the pan wasn't hot enough. Next time, ensure you preheat your pan thoroughly before adding the eggs. Remember, a hot pan is essential for setting those whites quickly and evenly.
The Hardened Yolk
A hardened yolk is a sign of overcooking. To prevent this, keep a close eye on your eggs and remove them from the heat as soon as the whites have set. Remember, the yolk should remain jiggly and runny.
The broken yolk
Don’t panic if you break a yolk! It happens to the best of us. Even if your sunny-side up eggs aren’t perfect, they’re still delicious. You can always add some seasoning or toppings to mask any imperfections.
The Sticking Problem
If your eggs are sticking to the pan, it's likely because the pan wasn’t hot enough, or you didn’t use enough fat. Try adding a little more fat to the pan before cooking your eggs, or consider using a non-stick pan. A good quality non-stick pan can be a great asset for sunny-side up eggs.
The Burnt Edges
Burnt edges happen when the pan is too hot. If you see the whites starting to brown too quickly, reduce the heat. It's also essential to keep a close eye on your eggs and take them off the heat as soon as they’re cooked to your liking. The key is to prevent the whites from burning while ensuring the yolk remains runny.
Part 10: Sunny-Side Up Eggs: FAQs
Here are answers to some common questions about cooking sunny-side up eggs:
1. How do I prevent my sunny-side up eggs from spreading?
The key to preventing spreading is a combination of factors: use fresh eggs, preheat your pan thoroughly, and cook them over low heat. You can also gently tilt the pan while cooking, allowing the runny yolk to pool in the center, preventing the whites from spreading excessively.
2. Why do my sunny-side up eggs have a white ring around the yolk?
The white ring is a sign of overcooking. It happens when the heat is too high or the eggs are cooked for too long. To prevent this, cook your eggs over medium-low heat and remove them from the heat as soon as the whites have set.
3. What's the best way to season my sunny-side up eggs?
The beauty of sunny-side up eggs is their versatility! A classic combination is salt and pepper, but you can also get creative with herbs like chives, parsley, or dill, or a sprinkle of paprika. Some people even like to add a dollop of sour cream, yogurt, or avocado to their eggs. The possibilities are endless!
4. Can I use a non-stick pan for sunny-side up eggs?
Absolutely! Non-stick pans can be a great option for sunny-side up eggs. Just ensure you preheat it thoroughly before adding the eggs and use a small amount of oil or butter to prevent sticking.
5. How do I tell if my sunny-side up eggs are done?
You'll know your eggs are done when the whites have set and are starting to turn opaque, and the yolk is still jiggly. You can also gently shake the pan. The yolks should still jiggle, indicating they're still runny. If you see the yolks starting to solidify or turn a pale yellow, it's time to take them off the heat.
Cooking the perfect sunny-side up egg is a journey of patience, observation, and a bit of culinary artistry. With a little practice and a watchful eye, you can master this classic breakfast dish and enjoy the ultimate comfort food experience. So, crack open those eggs, grab your trusty pan, and let your culinary adventure begin!
Everyone is watching

Prime Rib Roast Cooking Time Chart: Per Pound Guide
Cooking TipsPrime rib roast. Just the name conjures images of lavish dinners, crackling fires, and hearty laughter. It’s ...

How Long to Bake Potatoes in the Oven (Perfect Every Time)
Cooking TipsBaked potatoes are a staple in my kitchen. They're incredibly versatile, delicious, and surprisingly easy to m...

Perfect Rice Every Time: The Ultimate Guide to Cooking Rice
Cooking TipsAs a self-proclaimed foodie, I've always been a bit obsessed with rice. It's the foundation of countless cuisi...

The Ultimate Guide to Cooking Asparagus: Tips, Techniques, and Recipes
Cooking TipsAsparagus. The mere mention of this spring delicacy conjures up images of vibrant green spears, crisp and burs...

Ultimate Guide to Cooking the Perfect Thanksgiving Turkey
Cooking TipsThanksgiving. Just the word conjures up images of overflowing tables laden with delicious food, the scent of r...