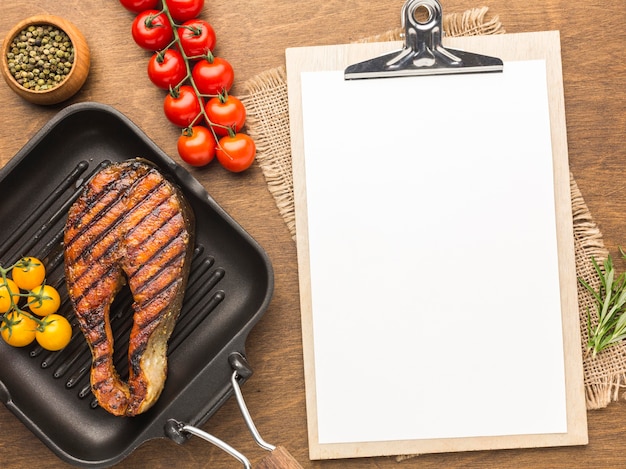
There’s a reason ribs are a barbecue staple. That satisfying crackle as they emerge from the smoker, the way the meat pulls away from the bone with a gentle tug, that melt-in-your-mouth tenderness – it’s pure culinary bliss. But getting those perfect ribs, especially nailing that ideal temperature, can feel like a recipe for disaster. You might find yourself staring at the thermometer, wondering if they’re done, or worse, ending up with dry, tough ribs that are more akin to chewing on a rubber band. Trust me, I’ve been there, countless times. I’ve spent hours in the kitchen, experimenting with different methods, and let me tell you, finding the perfect rib temperature is a game-changer.
This article is your comprehensive guide to achieving that perfect rib temperature, whether you’re a seasoned barbecue pro or a newbie just dipping your toes into the world of smoking. We’ll be covering everything from the different rib types and their ideal temperatures to the best tools to use, how to tell if your ribs are done without a thermometer (yes, it’s possible!), and even some tips and tricks for getting that mouthwatering bark and tender, juicy meat. So grab a drink, settle in, and get ready to unlock the secrets to the most delicious ribs you’ve ever tasted.
Part 1: The Rib Rundown: Knowing Your Meat
Before we dive into the nitty-gritty of rib temperatures, it’s essential to understand the different types of ribs you’ll encounter and their unique characteristics. This knowledge will help you choose the right ribs for your recipe and ensure you cook them to perfection. You’ll also discover which types might be best for beginners, and which might require a little more experience.
1.1 Baby back ribs: The Classic Choice
Let’s start with the most popular choice: baby back ribs. These ribs come from the upper part of the hog’s back, resulting in a smaller, more compact rack with a higher proportion of meat to bone. They’re known for their tender, juicy meat and a delicate flavour, making them a popular choice for both casual and fancy gatherings. The best part? They cook faster than their beefy counterparts, meaning you can enjoy a delicious meal sooner.
My personal experience? I find baby back ribs are ideal for beginner cooks. Their smaller size and faster cooking time mean you're less likely to overcook them, and they always impress with their tender texture. They're the perfect starting point for anyone venturing into the world of ribs.
1.2 spare ribs: A Meat Lover’s Delight
Moving on to spare ribs, we’re venturing into the territory of bigger, bolder flavour. These ribs come from the lower part of the hog’s back and include a portion of the belly, resulting in a meatier rack with a higher fat content. This extra fat adds a richness and depth of flavour to the ribs, and the larger size allows for more meat to chew on. Don’t be intimidated by the size; these ribs are well worth the extra time and effort.
Spare ribs are for those who love a good, hearty meal. They’re the kind of rib you can really sink your teeth into. Be warned, though, they need a little more attention to ensure even cooking and to prevent dryness. A good smoker or grill is ideal, but they can also be roasted in the oven. Just remember to check the internal temperature carefully.
1.3 St. Louis Ribs: The Trimmed and Ready Option
If you’re looking for a more manageable option that’s already prepped and ready to cook, St. Louis ribs are your best bet. These ribs are essentially spare ribs that have been trimmed to remove the tougher membrane and the cartilage. This results in a more consistent, uniform rack that’s easier to work with and cooks more evenly. They’re a great option for beginners, offering a balance of flavour and convenience.
Think of St. Louis ribs as the "Goldilocks" of ribs: not too big, not too small, just right. They offer a great balance of flavor and convenience. You're less likely to struggle with uneven cooking, making them a great option for first-time rib cookers. The trimming also removes the tougher, less palatable parts, resulting in a more consistent, flavorful experience.
1.4 Country Ribs: A Unique Cut
If you’re feeling adventurous and want to try something different, country ribs are worth exploring. These ribs are cut from the bottom part of the hog’s chest and have a distinct bone structure that separates them from the other rib types. They’re meatier and often have a more robust flavour due to their location, but they can be a little tougher than their baby back counterparts. They’re a great choice for slow cooking and can be used in various dishes, from pulled pork sandwiches to hearty stews.
Country ribs are for the experienced rib cook who loves a challenge. They offer a unique flavour profile and a hearty texture, but they require a longer cooking time and careful attention to ensure they don’t become too tough. If you’re up for the task, the rewards are well worth the effort.
Part 2: The Temperature Talk: Getting It Right
Now that you’ve got a grasp on the different rib types, let’s get down to the business of temperature. Reaching the perfect rib temperature is key to achieving that succulent, melt-in-your-mouth tenderness that makes ribs so irresistible. It's also about preventing dry, overcooked ribs - a culinary tragedy we all want to avoid. While many people rely on the trusty thermometer, there are other techniques to help you determine if your ribs are done to perfection.
2.1 Internal Temperature: The Ultimate Gauge
The internal temperature of your ribs is the most reliable indicator of doneness. Aiming for the right internal temperature ensures that the meat is cooked through while staying juicy and tender. Here’s a handy table outlining the ideal internal temperatures for different rib types:
| Rib Type | Internal Temperature (Fahrenheit) | Internal Temperature (Celsius) |
|---|---|---|
| Baby Back Ribs | 190-200°F | 88-93°C |
| Spare Ribs | 190-205°F | 88-96°C |
| St. Louis Ribs | 190-205°F | 88-96°C |
| Country Ribs | 195-210°F | 91-99°C |
Remember, these are just guidelines. Your ideal temperature might vary depending on your cooking method, personal preference, and the specific cut of ribs you’re using. It’s always a good idea to check the ribs using the other methods we’ll discuss later to confirm they’re cooked to your liking.
2.2 The Importance of the Bone: A Sign of Doneness
The bones play a significant role in determining if your ribs are done. As the ribs cook, the connective tissues and cartilage surrounding the bones break down, resulting in a tender and juicy rib. To check for doneness, try gently twisting the bone at the end of a rib. If it easily separates from the meat, your ribs are cooked through.
This is a technique I learned from my grandfather, a true barbecue master. He would always say, "If the bone comes out clean, the ribs are ready." It's a simple test, but it's incredibly effective, especially when you're dealing with ribs that might have a thick layer of meat. It gives you a sense of how tender the meat is and whether it's ready for eating.
2.3 The Wiggle Test: A Simple and Effective Method
Another way to check for doneness is by performing the wiggle test. If your ribs are cooked properly, they should be tender and move freely. To perform the test, gently push on the meat between two ribs. If the meat moves and jiggles readily, your ribs are done. This test works because the collagen in the meat breaks down as the ribs cook, making the meat more tender and easier to move.
The wiggle test is a great way to assess tenderness without relying solely on internal temperature. It's a simple, hands-on approach that helps you get a feel for the ribs and understand their texture. If you're cooking ribs over an open fire or a grill, this test can be particularly useful, as it allows you to quickly assess doneness without having to use a thermometer.
2.4 The Bend Test: Feeling for Tenderness
The bend test is a great way to assess the tenderness of your ribs. Take a rib and gently bend it in the middle. If the rib bends easily without breaking, it’s cooked through. This method is a bit more aggressive than the wiggle test, but it’s a good way to check for the right level of tenderness.
The bend test is especially helpful for larger ribs, like spare ribs, where the meat can be quite thick. It gives you a good sense of how much the connective tissue has broken down and how tender the meat is. Just be careful not to over-bend the ribs, as this could break them.
Part 3: Tools of the Trade: Mastering the Temperature Game
Now that you’re equipped with the knowledge about rib types and doneness, it’s time to discuss the tools that will help you achieve the perfect rib temperature. Having the right tools at your disposal makes a world of difference in your cooking journey, helping you achieve consistent results and prevent those disastrous overcooked or undercooked ribs.
3.1 meat thermometer: The Essential Ingredient
A meat thermometer is an absolute must-have for any serious rib cook. It allows you to accurately measure the internal temperature of your ribs, ensuring they reach the desired doneness without overcooking. There are various types of meat thermometers available, from traditional analog thermometers to digital ones with Bluetooth connectivity that allow you to monitor the temperature from afar. Choose one that is accurate, easy to use, and fits your budget.
I personally prefer a digital thermometer with a long probe. It allows me to check the internal temperature without having to remove the ribs from the smoker or grill. The Bluetooth functionality is a bonus, allowing me to monitor the temperature remotely, so I can focus on other tasks while the ribs cook. But whatever you choose, a good meat thermometer is a valuable investment for any rib enthusiast.
3.2 Smoker: A Smoker’s Delight
For that classic smoky flavour and melt-in-your-mouth tenderness, a smoker is an essential tool. Smokers are designed to cook food at low temperatures over long periods, allowing the smoke to permeate the meat and create a unique flavour profile. There are various types of smokers available, from offset smokers to pellet grills, each with its own set of features and benefits. Choose the one that suits your cooking style and budget.
The smoky flavour imparted by a smoker is truly unique and elevates the rib-cooking experience to another level. But it's not just about the flavour. The low and slow cooking process in a smoker helps to break down the connective tissue in the ribs, resulting in incredibly tender, juicy meat. If you're serious about ribs, a smoker is a worthy investment.
3.3 Grill: A Versatile Option
If you’re not ready to invest in a smoker, a grill is a versatile alternative for cooking ribs. You can use a gas grill, charcoal grill, or even an electric grill to achieve great results. The key is to maintain a low and slow cooking temperature, ideally around 225°F (107°C). Use wood chips or chunks to create a smoky flavour, and remember to rotate the ribs regularly to ensure even cooking.
Grilling offers a good balance of flavour and convenience. While it might not produce the same intense smoky flavour as a smoker, you can still create delicious ribs with a smoky aroma. A grill also offers flexibility, allowing you to cook other foods alongside your ribs. And don't underestimate the versatility of a grill: you can cook ribs directly over the coals for a more intense char, or use indirect heat for a more gentle, even cook.
3.4 Oven: A Reliable Backup
Sometimes, the oven can be a reliable backup for cooking ribs. While it might not deliver the same smoky flavour as a smoker or grill, it can still yield delicious results. The trick is to cook the ribs at a low temperature, around 250°F (121°C), for several hours to achieve the desired tenderness. You can even place a pan of water in the oven to create a moist environment and prevent the ribs from drying out.
The oven is a great option for those who don't have a smoker or grill. It offers a controlled environment for cooking ribs, allowing you to maintain a consistent temperature. You can also use the oven to create a crispy bark by cooking the ribs uncovered for the last hour or so. While the oven might not deliver the same smoky flavor, it's a reliable way to produce tender, flavorful ribs.
Part 4: The Art of Ribs: Techniques for Perfection
Now that you’ve got the tools, it’s time to delve into the techniques that will help you achieve those perfect, fall-off-the-bone ribs. It's about understanding the nuances of cooking ribs and mastering the art of low and slow cooking. It's also about embracing the slow process and allowing the time to create that tender, juicy magic.
4.1 The Power of Low and Slow: Patience is Key
Low and slow cooking is the key to achieving tender, juicy ribs. Cooking ribs at a low temperature, around 225°F (107°C), allows the connective tissues to break down, resulting in melt-in-your-mouth tenderness. This process takes time, typically several hours, so be patient and let the magic happen. The slower you cook, the more tender the ribs will be.
I've learned that patience is truly a virtue when it comes to cooking ribs. It's tempting to rush the process, especially when you're eager to taste those delicious results. But trust me, the slow and steady approach is the best way to ensure your ribs achieve that perfect tenderness. It's also a great opportunity to relax and enjoy the process, savoring the aroma of those slow-cooking ribs.
4.2 The Importance of Wrap Time: Locking in Moisture
Wrapping your ribs is an essential step in achieving maximum tenderness and juicy results. After a few hours of cooking, you’ll want to wrap the ribs in foil to create a steamy environment that helps break down the connective tissues further and prevents the ribs from drying out. The foil acts as a barrier, trapping the moisture and allowing the ribs to cook evenly.
Think of wrapping as a way to give your ribs a little "spa treatment." The steam created inside the foil helps to soften the meat and makes it incredibly tender. It's a great way to ensure your ribs don't dry out during the cooking process, especially if you're using a smoker or grill.
4.3 The Sauce Strategy: Balancing Flavor and Texture
Adding sauce to your ribs is a matter of personal preference, but it can elevate the flavour profile and add a touch of sweetness and tanginess. If you’re using a sauce, apply it towards the end of the cooking process to prevent the sugar in the sauce from burning. You can also apply sauce directly to the ribs during the last 30 minutes of cooking, allowing it to caramelize and create a beautiful glaze.
Sauce is where you can really personalize your rib experience. Experiment with different sauce styles, from sweet and tangy to smoky and spicy. Find a sauce that complements your dry rub and enhances the natural flavour of the ribs. And don't be afraid to experiment! A little creativity can go a long way when it comes to rib sauce.
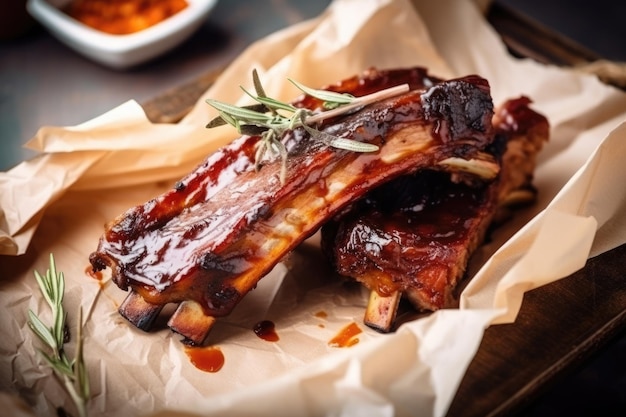
4.4 The Finishing Touch: Achieving that Delicious Bark
The bark is the crispy, flavorful crust that forms on the outside of the ribs during cooking. It’s a testament to the quality of the cook and adds a layer of texture and complexity to the rib experience. To achieve a perfect bark, let the ribs cook uncovered during the last hour or so of cooking, allowing the surface to dry and caramelize. The result? A delectable combination of tender meat and a crispy, flavorful bark.
The bark is the real showstopper, the signature touch that elevates ribs from good to amazing. It's a crispy, flavorful layer that provides a satisfying contrast to the tender meat. To achieve that perfect bark, you need to allow the ribs to cook uncovered during the final stage, allowing the moisture to evaporate and the sugars to caramelize. It's a bit of a balancing act, but the rewards are well worth it.
Part 5: The Rib-a-licious Recipes: Getting Inspired
Now that you’ve got all the knowledge and techniques, it’s time to get inspired with some rib-a-licious recipes. From classic BBQ rubs to flavorful sauces, these recipes will guide you on your journey to rib-cooking mastery. Don't be afraid to experiment and make your own twists on these classic recipes.
5.1 The Classic Dry Rub: A Simple Yet Powerful Blend
A good dry rub is the foundation for delicious ribs. It adds flavor and helps create a beautiful bark during the cooking process. This classic dry rub combines sweet, smoky, and savory flavours for a perfect balance:
- 1 tablespoon paprika
- 1 tablespoon brown sugar
- 1 tablespoon garlic powder
- 1 tablespoon onion powder
- 1 tablespoon chili powder
- 1 teaspoon black pepper
- 1 teaspoon salt
- 1 teaspoon cumin
Combine all ingredients in a bowl and rub generously over the ribs. Let the rub sit for at least 30 minutes, or preferably overnight, to allow the flavours to penetrate the meat. You can adjust the proportions of the ingredients to create your own unique flavor profile.
This dry rub is a great starting point for beginners. It's simple to make and provides a balanced flavor that complements most rib types. However, if you're feeling adventurous, you can try adding other spices like cayenne pepper, smoked paprika, or even a pinch of brown mustard powder to create a more complex flavor profile.
5.2 The Sweet and Tangy barbecue sauce: A Southern Delight
A sweet and tangy barbecue sauce is a classic pairing for ribs. It adds a touch of sweetness, acidity, and a hint of smokiness. Here’s a simple recipe to get you started:
- 1 cup ketchup
- 1/2 cup apple cider vinegar
- 1/4 cup brown sugar
- 2 tablespoons Worcestershire sauce
- 1 tablespoon smoked paprika
- 1 teaspoon garlic powder
- 1 teaspoon onion powder
- 1/2 teaspoon black pepper
- 1/4 teaspoon cayenne pepper (optional)
Combine all ingredients in a saucepan and bring to a simmer over medium heat. Cook for 10 minutes, stirring occasionally, until the sauce has thickened slightly. Let the sauce cool before applying to the ribs.
This sauce is a great example of how simple ingredients can create a complex and delicious flavor. The combination of ketchup, apple cider vinegar, and brown sugar provides a perfect balance of sweet, tangy, and smoky flavors. You can adjust the amount of cayenne pepper to create a sauce that's as spicy or mild as you like. And don't be afraid to experiment with other ingredients. A splash of bourbon, a pinch of ginger, or a few drops of hot sauce can add a unique twist to your barbecue sauce.
Part 6: Frequently Asked Questions: Answering Your Rib Dilemmas
Let’s address some of the most common questions about ribs and the perfect rib temperature. Whether you're a seasoned rib cook or a newbie, there are always those burning questions that pop up during the rib-cooking process. Let's dive into some of the most frequently asked questions to make your rib-cooking journey a smooth and successful one.
6.1 What if My Ribs Are Overcooked?
While overcooked ribs can be a bit tough and dry, there are ways to salvage them. You can try re-wrapping them in foil with some extra moisture, like a few tablespoons of apple cider vinegar or broth, and continuing to cook them for another 30 minutes. This might help soften the meat and restore some moisture. However, if the ribs are severely overcooked, they might not be salvageable. In that case, it’s best to use them for another dish, like pulled pork sandwiches or a hearty stew.
Overcooked ribs are a common problem, but don't despair. Sometimes, a little extra moisture and a bit more time in the oven can revive those dry, tough ribs. If you're worried about overcooking, it's always a good idea to check the internal temperature frequently, especially during the final stages of cooking.
6.2 How Long Can Ribs Be Cooked for?
Ribs can be cooked for extended periods, but it’s generally recommended to cook them for at least 4-5 hours to achieve maximum tenderness. However, they can be cooked for up to 8 hours or even longer, depending on the size of the ribs and your preferred level of tenderness. Just remember to check the internal temperature and use the other doneness indicators to ensure they are cooked through. Overcooking can lead to dry, tough ribs.
The beauty of ribs is that they can be cooked for a long time, allowing you to focus on other tasks while they slowly cook to perfection. Just remember that the longer you cook them, the more tender they'll become. It's a good idea to check the internal temperature regularly to avoid overcooking, but don't be afraid to let those ribs simmer for a few extra hours if you want a super tender and flavorful result.
6.3 Can Ribs Be Cooked in the instant pot?
While an Instant Pot isn’t traditionally used for ribs, you can cook them in an Instant Pot for a faster, more convenient method. However, it’s important to note that instant pot ribs won’t have the same smoky flavour as ribs cooked in a smoker or grill. You can use a dry rub or sauce to enhance the flavour. Cooking time will vary depending on the size of the ribs, but you can expect a cook time of about 45 minutes to an hour on high pressure, followed by a natural release of pressure for 15 minutes. Check the internal temperature to ensure the ribs are cooked through.
The Instant Pot is a great option for a quick and easy rib meal. It's especially useful for those who don't have a smoker or grill, or for when you're short on time. While you won't get the same smoky flavor, you can still create delicious, tender ribs. Just remember to check the internal temperature carefully and adjust the cooking time based on the size of your ribs.
6.4 What Happens if My Ribs Are Undercooked?
Undercooked ribs can be a food safety hazard, so it’s crucial to ensure they reach the minimum safe internal temperature of 145°F (63°C). Undercooked ribs might also be tough and chewy, as the connective tissues haven’t had enough time to break down. If your ribs are undercooked, you can simply continue cooking them until they reach the desired temperature. Just remember to check the internal temperature regularly to avoid overcooking.
Undercooked ribs are not only unpleasant to eat, they can also be dangerous. Always ensure your ribs reach the safe internal temperature to prevent foodborne illness. If you're unsure whether your ribs are cooked through, it's better to err on the side of caution and continue cooking them until they reach the desired temperature.
6.5 Can I Use a Digital Thermometer to Check for Doneness?
Yes, you can absolutely use a digital thermometer to check for doneness. They offer a precise and accurate reading, ensuring your ribs are cooked through. Make sure to insert the thermometer into the thickest part of the meat, avoiding any bones, to get an accurate reading. Remember to clean the thermometer thoroughly after use to prevent contamination.
A digital thermometer is a valuable tool for any rib cook. It provides accurate and reliable readings, eliminating the guesswork and ensuring your ribs are cooked to perfection. Just remember to calibrate your thermometer regularly to ensure accurate readings and follow the manufacturer's instructions for cleaning and sanitation.
Part 7: Beyond the Temperature: Mastering the Art of Ribs
Achieving the perfect rib temperature is just one part of the rib-cooking puzzle. Mastering other aspects, like selecting the right ribs, applying dry rubs and sauces, and understanding the nuances of cooking methods, will take your rib game to the next level. It's about understanding the subtle interplay of different elements that come together to create those perfect ribs.
7.1 Choosing the Right Ribs: Getting the Best Cuts
Selecting the right ribs is crucial for achieving optimal results. Look for ribs that are evenly marbled with fat, as this will help keep the meat moist and tender during cooking. Avoid ribs that are too dry or have excessive fat, as this can lead to uneven cooking and a less flavorful result.
Just like with any cut of meat, the quality of the ribs you choose will significantly impact the final result. Ribs with a good amount of marbling will cook more evenly and remain juicy, while dry ribs tend to become tough and dry. Take the time to select ribs that are well-marbled and free from excessive fat for the best results.
7.2 The Importance of a Good Dry Rub: Enhancing Flavor
A dry rub is the foundation for delicious ribs. It adds flavor and helps create a beautiful bark during the cooking process. Experiment with different dry rub recipes to find your favorite combination of sweet, savory, smoky, and spicy flavors. Don’t be afraid to get creative and personalize your rubs!
A dry rub is more than just seasoning; it's a flavor infusion. It helps to create a delicious, crispy bark and enhances the natural flavor of the ribs. Don't be afraid to experiment with different spices and herbs to find your perfect blend. Remember, a good dry rub is essential for achieving those truly outstanding ribs.
7.3 Mastering the Sauce: Balancing Flavors
While a good dry rub is essential, the sauce is what truly brings the rib experience to life. Experiment with different sauce styles, from sweet and tangy to spicy and smoky. You can even make your own sauce from scratch using a variety of ingredients. The key is to find a sauce that complements the dry rub and enhances the natural flavour of the ribs.
Sauce is the finishing touch that can really make your ribs sing. It adds a layer of complexity and elevates the flavor profile. Don't be afraid to experiment with different sauces, from classic BBQ to tangy vinegar-based sauces to spicy, smoky concoctions. The possibilities are endless, and the right sauce can make your ribs truly unforgettable.
7.4 Understanding Cooking Methods: Embracing Variety
Different cooking methods can produce different results. While low and slow cooking in a smoker is the traditional method for achieving tender, smoky ribs, grilling, oven-roasting, and even using an Instant Pot can also yield delicious results. Experiment with different methods to find your favorite techniques and discover new ways to enjoy ribs.
Cooking ribs is about exploring the different techniques and finding what works best for you. Don't be afraid to experiment and try new methods. You might discover a new favorite technique, or even find that a combination of methods, like smoking and grilling, results in the best ribs you've ever tasted. Embrace the variety and have fun exploring different ways to cook ribs.
Part 8: The Rib-Cooking Journey: A culinary adventure
Cooking ribs is more than just following a recipe. It’s a culinary journey of experimentation, discovery, and the pursuit of perfection. Every cook is an opportunity to learn and refine your skills, and every batch of ribs is a chance to create something truly special. So, embrace the process, have fun, and don’t be afraid to get a little messy. After all, the best rib experiences are the ones that leave you wanting more!
Remember, the perfect rib temperature is just one piece of the puzzle. It’s about combining the right techniques, ingredients, and a touch of passion to create a rib experience that’s truly unforgettable. So grab your smoker, grill, or oven, gather your ingredients, and let's embark on a rib-cooking adventure!
Everyone is watching

Prime Rib Roast Cooking Time Chart: Per Pound Guide
Cooking TipsPrime rib roast. Just the name conjures images of lavish dinners, crackling fires, and hearty laughter. It’s ...

How Long to Bake Potatoes in the Oven (Perfect Every Time)
Cooking TipsBaked potatoes are a staple in my kitchen. They're incredibly versatile, delicious, and surprisingly easy to m...

Perfect Rice Every Time: The Ultimate Guide to Cooking Rice
Cooking TipsAs a self-proclaimed foodie, I've always been a bit obsessed with rice. It's the foundation of countless cuisi...

The Ultimate Guide to Cooking Asparagus: Tips, Techniques, and Recipes
Cooking TipsAsparagus. The mere mention of this spring delicacy conjures up images of vibrant green spears, crisp and burs...

Ultimate Guide to Cooking the Perfect Thanksgiving Turkey
Cooking TipsThanksgiving. Just the word conjures up images of overflowing tables laden with delicious food, the scent of r...