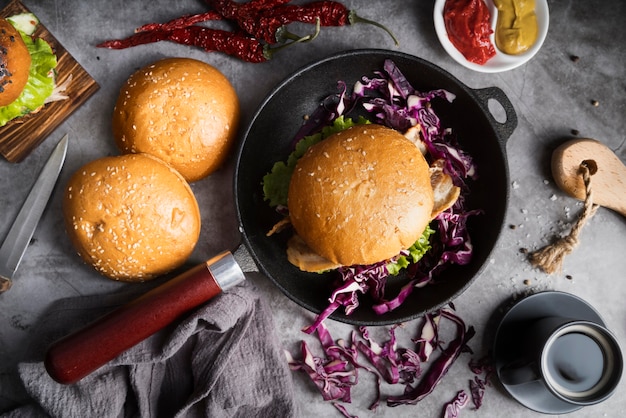
Ah, the burger. A culinary classic, a timeless favorite, and a source of endless debate. Is it a sandwich? Is it a meal? Is it a symbol of summer barbecues and lazy weekends? I say, it's all of those things and more. And when it comes to burgers, I'm a firm believer that the pan-seared method reigns supreme. It's the key to unlocking that perfectly crisp exterior and the irresistibly juicy interior. But here's the million-dollar question: how long do you cook them for? That's the quest we're embarking on today, folks. Get ready to elevate your burger game with this comprehensive guide, packed with insider tips and personal anecdotes, straight from my culinary journey.
(Part 1) The Anatomy of a Perfect Pan-Seared Burger

Let's start with the foundation, the building blocks of your burger masterpiece. It's not just about throwing some ground meat in a pan; it's about choosing the right ingredients and understanding how they work together.
The Meat: The Heart of the Matter
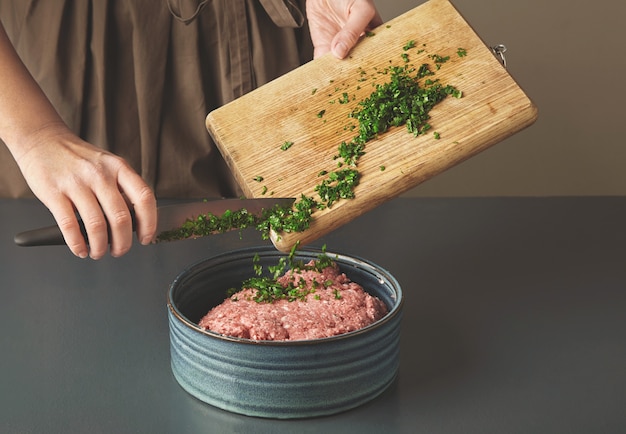
First things first, the meat. Now, I'm a bit of a traditionalist when it comes to burgers. I'm all about that classic beef flavor. Personally, I gravitate towards a blend of 80/20, meaning 80% lean and 20% fat. This combination strikes the perfect balance: juicy enough to satisfy your cravings without being overly greasy. You want that fat to render and create those delectable, crispy edges. And don't underestimate the power of ground chuck. Its natural marbling contributes to a richer, more flavorful burger that melts in your mouth.
Seasoning: Less is More
Now, let's talk seasoning. I'm a firm believer in the "less is more" philosophy when it comes to burgers. Salt and pepper – those are your best friends. Use a good quality coarse sea salt for that satisfying crunch and freshly ground black pepper for that sharp, aromatic punch. For me, that's all you need to let the natural flavor of the beef shine through. But hey, if you're feeling adventurous, a sprinkle of garlic powder or onion powder can add another layer of complexity. It's your burger, your rules.
Shaping Your Patty: Precision Matters
Finally, the shape. I've experimented with all sorts of shapes and sizes over the years. But I always come back to the classic, humble round patty. Why? Because it cooks evenly and allows for a nice, even sear. Aim for a thickness of about 1/2-inch. This ensures that your burger cooks through without drying out. Remember, we're aiming for a juicy, tender burger with a crispy, flavorful crust.
(Part 2) The Art of Pan-Searing: Unleashing the Flavor

Now that we've prepped our burger, it's time to unleash the magic of pan-searing. This is where the real artistry begins. It's not about just throwing the patty in a pan and calling it a day; it's about understanding the nuances of heat, technique, and timing.
Choosing the Right Pan: Cast Iron vs. Stainless Steel
First, the pan. I'm a loyal cast iron devotee. Its ability to retain heat and create that signature crispy crust is unparalleled. But a good quality stainless steel pan can also work wonders. The key is to choose a pan that heats up evenly and can hold its heat consistently throughout the cooking process. We want to create that beautiful, caramelized crust that distinguishes a pan-seared burger from the rest.
Mastering the Heat: Finding the Sweet Spot
Next, the heat. Medium-high heat is where the magic happens. Too low, and your burger will just steam instead of sear. Too high, and you risk burning the outside while leaving the inside raw. It's a delicate dance, folks. You want to achieve that perfect balance where the outside gets that beautiful brown crust while the inside stays juicy and tender.
The Technique: A Gentle Touch
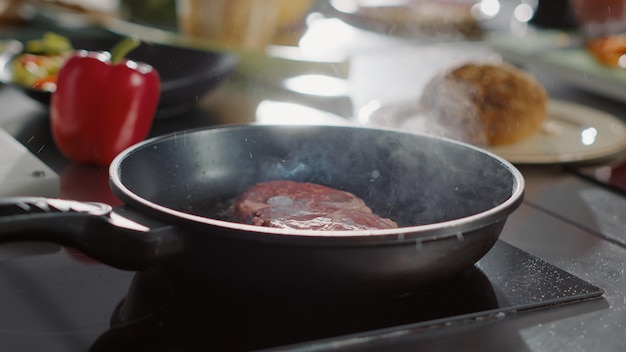
Now, for the technique. I like to start by getting my pan screaming hot. Then I add just a touch of oil, enough to coat the bottom of the pan. Let that oil shimmer and heat up, and then gently place your burger in the pan. This is crucial: don't press down on the burger! Let the natural heat do its work. Allow it to cook undisturbed for about 3-4 minutes per side. This is the golden rule, the foundation for that perfect sear. Resist the urge to flip it too early. Give it time to develop a beautiful, crispy crust.
(Part 3) The Importance of Resting: Letting the Juices Redistribute

You've seared your burger, it's looking flawless, but hold your horses! Don't reach for that knife just yet. Resting is the often-overlooked hero of the burger world. And let me tell you, it's a crucial step. Remember those raw-in-the-middle disasters I mentioned? That was before I embraced the power of resting.
Why Resting Matters: A Science of Juiciness
During the resting period, the juices redistribute throughout the burger. This ensures that it's cooked evenly and allows the flavors to meld together. You'll end up with a burger that's juicy and tender, with every bite bursting with flavor. Let it rest for a good 5-7 minutes before you slice it up. I know it's hard to wait, but trust me, the extra patience will be richly rewarded.
(Part 4) The Perfect Doneness: A Journey to Your Ideal Burger
Now comes the big question: how long do you cook it for? Well, it's not a one-size-fits-all answer. Your personal preference and the thickness of your patty play a significant role. But don't worry, I've got you covered with a handy cheat sheet.
A Guide to Doneness: Finding Your Sweet Spot
Here's a table that outlines the general cooking times for different levels of doneness:
| Doneness | internal temperature | Time (per side) |
|---|---|---|
| Rare | 125°F (52°C) | 3-4 minutes |
| Medium-Rare | 130°F (54°C) | 4-5 minutes |
| Medium | 140°F (60°C) | 5-6 minutes |
| Medium-Well | 150°F (66°C) | 6-7 minutes |
| Well-Done | 160°F (71°C) | 7-8 minutes |
This is just a guideline, though. The best way to ensure that your burger is cooked to your liking is to use a meat thermometer. It's the ultimate tool for achieving burger perfection.
(Part 5) The Add-Ons: Elevating Your Burger Experience
Alright, your burger is cooked to perfection, and it's enjoying its well-deserved rest. Now it's time to think about the add-ons, the toppings that will transform your burger into a culinary masterpiece. This is where things get really fun.
The Classics: A Symphony of Flavors
I'm a fan of the classics. Lettuce, tomato, onion, and pickles – these staples bring a refreshing crunch and a burst of flavor. They're like the supporting cast that helps your burger star shine. And let's not forget the cheese! A good cheddar or Swiss adds a creamy richness that complements the savory beef.
The Adventurous: Exploring New Frontiers
But if you're feeling a bit adventurous, the world of burger toppings is your oyster. Think caramelized onions, roasted peppers, or even a bit of heat with some spicy jalape??os. The possibilities are endless!
The Sauce: Adding that Final Touch
And then there's the sauce. I tend to keep it simple with ketchup and mustard. But if you're feeling fancy, you could try aioli, sriracha mayo, or even a homemade burger sauce. It's all about finding what tickles your taste buds.
(Part 6) The Bun: The Perfect Canvas for Your Creation
Your burger is ready, your add-ons are prepped, but we can't forget the bun. It's the final piece of the puzzle, the canvas for your masterpiece. And trust me, a good bun can make or break your burger experience.
The Ideal Bun: Finding the Right Texture and Flavor
I'm a big fan of brioche buns. They're soft, buttery, and they hold up beautifully to the juices of the burger. But if you're feeling adventurous, try a pretzel bun, a ciabatta roll, or even a gluten-free bun. It's all about finding the right texture and flavor for your taste.
Toasting the Bun: Adding That Crispy Crunch
And don't forget to toast your bun! It gives it a satisfying, crispy texture and helps absorb the delicious flavors of the burger. You can toast it in a pan, in the oven, or under the broiler. Just make sure it's golden brown and slightly crunchy.
(Part 7) The Final Assembly: Bringing It All Together
Okay, we're almost there! You've got your perfectly cooked burger, your add-ons are ready, and your bun is toasted to perfection. It's time to assemble your masterpiece.
The Method: Building a Burger Tower
I like to start by placing my burger on the bottom bun. Then I add my cheese, if I'm using it. Follow that with the lettuce, tomato, onion, and pickles. Finish it off with a generous drizzle of ketchup and mustard. And then, carefully close the bun.
The Presentation: A Culinary Art Form
Now, it's time to enjoy your creation. I like to cut my burger in half, so I can see all the delicious layers. And I always serve it with a side of fries. It's the perfect way to round out the meal.
(Part 8) The After-Dinner Clean-Up: A Farewell to Flavor
You've devoured your burger. You're satisfied, you're happy, and you're probably ready for a nap. But before you crash, there's one more important step: the after-dinner clean-up. Let's be honest, cooking can be messy.
Cleaning the Pan: A Labor of Love
Start by cleaning your pan. Cast iron needs a bit more TLC. You'll need to scrub it with hot water and soap. Don't use harsh detergents, though. And once it's clean, dry it completely before storing it. Stainless steel is a bit easier. Just wash it with hot water and soap, and dry it thoroughly.
Washing the Dishes: A Final Act of Respect
Next, wash all the dishes. The burger parts, the add-ons, the bun, the plate, the utensils... it's a lot of washing, but it's a small price to pay for a delicious meal.
FAQs: Answering Your Burning Questions
I know you're probably brimming with questions by now. Here are some of the most common ones.
- Q: What if I don't have a meat thermometer?
- A: You can still gauge the doneness by pressing on the burger. If it feels soft and springy, it's rare. If it feels firm, it's medium-rare. If it feels very firm, it's medium. And if it feels hard, it's well-done. But I'd still recommend investing in a meat thermometer. It's a small investment that can make a big difference.
- Q: Can I use frozen patties?
- A: You can, but they'll take longer to cook. And the texture won't be as good as freshly ground meat.
- Q: How do I know if my pan is hot enough?
- A: Add a drop of water to the pan. If it sizzles and evaporates immediately, the pan is hot enough.
- Q: What if my burger sticks to the pan?
- A: Make sure the pan is hot enough and that you've added enough oil. And don't press down on the burger when you're cooking it. Let the heat do its work.
- Q: What if my burger is too dry?
- A: It's probably because you overcooked it. Next time, try cooking it for a shorter amount of time. And make sure you rest it before slicing it up.
Everyone is watching

Perfect Rice Every Time: The Ultimate Guide to Cooking Rice
Cooking TipsAs a self-proclaimed foodie, I've always been a bit obsessed with rice. It's the foundation of countless cuisi...

Prime Rib Roast Cooking Time Chart: Per Pound Guide
Cooking TipsPrime rib roast. Just the name conjures images of lavish dinners, crackling fires, and hearty laughter. It’s ...

The Ultimate Guide to Cooking Asparagus: Tips, Techniques, and Recipes
Cooking TipsAsparagus. The mere mention of this spring delicacy conjures up images of vibrant green spears, crisp and burs...

Ultimate Guide to Cooking the Perfect Thanksgiving Turkey
Cooking TipsThanksgiving. Just the word conjures up images of overflowing tables laden with delicious food, the scent of r...

How Long to Bake Potatoes in the Oven (Perfect Every Time)
Cooking TipsBaked potatoes are a staple in my kitchen. They're incredibly versatile, delicious, and surprisingly easy to m...
