A perfectly cooked ham is a culinary triumph, a centerpiece that can transform a simple meal into a festive feast. But achieving that "just right" level of doneness can be a bit of a culinary mystery. You don't want a dry, overcooked ham, and you definitely don't want a ham that's still raw in the middle. To help you navigate this ham-cooking adventure, I've put together a comprehensive guide, drawing from years of experience in the kitchen, to help you achieve those delicious results every time.
(Part 1) Deciphering the Ham: Understanding Types and Sizes

First things first, we need to understand what kind of ham we're dealing with. The world of hams can feel a bit overwhelming, but it's actually quite straightforward once you break it down.
The Bone-in vs. Bone-out Divide
Hams are generally categorized as either bone-in or bone-out. bone-in hams, as the name suggests, still have the bone intact, while bone-out hams have been meticulously deboned, resulting in a more compact and convenient option. Bone-in hams tend to be more flavorful and juicier, while bone-out hams are easier to slice and carve.
Size Matters: From Petite to Plump
The weight of your ham is another important factor to consider. From petite 5-pound hams to hefty 15-pound behemoths, the size will directly impact the cooking time. Smaller hams cook faster, while larger hams require a longer cooking time to ensure even doneness.
Ham Types: A Quick Look
- spiral-sliced ham: These hams are already pre-sliced and often pre-cooked. They require minimal cooking time and are perfect for a quick and easy meal. Simply reheat and enjoy!
- fresh ham: This type of ham is uncooked and requires a longer cooking time. It's typically used for roasting or grilling and offers a more intense, "from-scratch" flavor experience.
- cured ham: These hams are cured with salt and other seasonings, which preserves them and adds a distinct, salty flavor profile. They can be cooked from raw or already pre-cooked.
(Part 2) Calculating Cooking Time: The Key to Success

Now that we've identified our ham, let's delve into the crucial element: cooking time. This is where the real magic happens, so pay attention!
The General Rule of Thumb: A Starting Point
The general rule of thumb for cooking ham is 15-20 minutes per pound. This applies to both bone-in and bone-out hams. For a 10-pound ham, you'd aim for 2.5 to 3.3 hours of cooking time (10 pounds x 15-20 minutes per pound). This guideline provides a solid starting point for your cooking journey.
Adjusting for pre-cooked hams: A Shorter Ride
If you're dealing with a pre-cooked ham, your cooking time will be significantly shorter. These hams typically only need to be reheated, and the time can vary depending on the desired level of warmth. Check the package instructions for specific reheating guidelines.
Understanding Temperature and Doneness
The recommended internal temperature for fully cooked ham is 145 degrees Fahrenheit. This ensures the ham is safe to eat and that it has reached the perfect level of doneness. Always use a meat thermometer to check the internal temperature of the ham, as visual cues alone can be misleading.
(Part 3) Cooking Methods: Choosing the Right Approach

Now that we've tackled the cooking time, let's explore the different methods you can use to cook your ham into a culinary masterpiece.
The Classic Roast: Tried and True
Roasting is the classic method for cooking ham, and for good reason. It allows the ham to cook evenly and develop a beautiful golden-brown crust. Simply place your ham in a roasting pan, cover it with foil, and roast it at a low temperature (325 degrees Fahrenheit) until it reaches the desired internal temperature of 145 degrees Fahrenheit.
slow cooking: Effortless Flavor and Tenderness
For a hands-off approach, slow cooking is your best friend. It's the ultimate set-it-and-forget-it method, allowing the ham to simmer in its own juices, resulting in a tender and flavorful dish. Simply place your ham in a slow cooker, cover it with liquid (such as apple juice, cider, or water), and cook on low for 6-8 hours, or on high for 3-4 hours.
instant pot: Speed and Convenience
For those who crave speed and convenience, the Instant Pot is a modern marvel. It can cook a ham in a fraction of the time compared to traditional methods, while still achieving excellent results. Simply place your ham in the Instant Pot, add a cup of liquid, and cook on high pressure for 60-90 minutes, depending on the size of the ham. Allow the pressure to release naturally for 10 minutes before releasing the remaining pressure manually.
Grilling: Adding a Smoky Touch
If you're a fan of smoky flavors, grilling your ham can elevate its taste profile. Just ensure that the grill is preheated to medium heat and cook the ham until it reaches an internal temperature of 145 degrees Fahrenheit. Be careful not to overcook the ham on the grill, as it can become dry.
(Part 4) Essential Tools: Equipping Your Kitchen for Success
Now that we've tackled the cooking methods, let's gather the tools you'll need to make this culinary adventure a breeze.
The Roasting Pan: Your Culinary Canvas
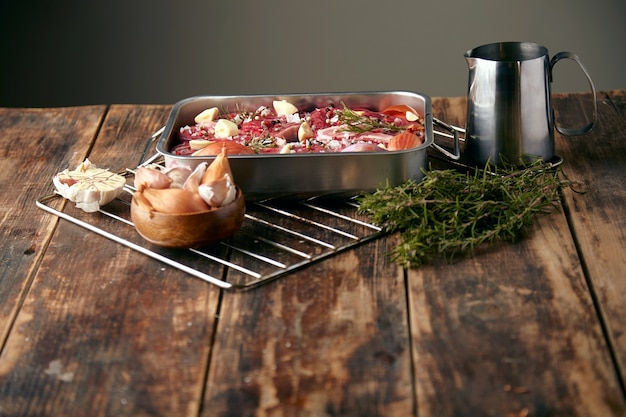
A good roasting pan is essential for creating a beautiful and evenly cooked ham. It should be large enough to accommodate your ham and have high sides to prevent any spills or splatters. Choose a pan with a rack to elevate the ham and allow for even cooking and air circulation.
The Meat Thermometer: Your Ham's Guardian
A reliable meat thermometer is crucial for ensuring your ham is cooked to perfection. It's the best way to check for doneness and avoid any undercooked or overcooked mishaps. Look for a digital thermometer with a probe that's long enough to reach the center of the ham.
The Food Processor: Making Glaze Dreams Come True
If you're looking to create a stunning glaze for your ham, a food processor can be your culinary sidekick. It's a breeze to combine all your glaze ingredients into a smooth and flavorful concoction. The food processor's ability to chop and blend ingredients quickly and evenly ensures a consistent and delicious glaze.
The Basting Brush: Spreading the Flavor
A basting brush is an essential tool for applying glaze to your ham. It allows you to evenly distribute the glaze, ensuring that every inch of your ham is coated in deliciousness. Choose a basting brush with silicone bristles that are heat-resistant and easy to clean.
(Part 5) Mastering the Glaze: A Symphony of Flavors
The glaze is the finishing touch that transforms a simple ham into a culinary masterpiece. It's a chance to unleash your creativity and add a burst of flavor to your dish.
Classic brown sugar glaze: A Timeless Delight
A simple brown sugar glaze is a classic for a reason. It's easy to make, delivers a rich sweetness, and complements the ham perfectly. Simply combine brown sugar, mustard, and a touch of water or apple cider in a saucepan, bring to a simmer, and cook until the glaze thickens.
honey mustard glaze: Sweet and Tangy Harmony
For a sweet and tangy twist, try a honey mustard glaze. The combination of honey and mustard creates a complex flavor profile that's both satisfying and addictive. Combine honey, mustard, a touch of apple cider vinegar, and a pinch of ground ginger in a saucepan, bring to a simmer, and cook until the glaze thickens.
pineapple glaze: A Tropical Twist
If you're feeling adventurous, a pineapple glaze can add a tropical touch to your ham. It's a delicious combination of sweet, tart, and tangy flavors that's sure to impress. Combine pineapple juice, brown sugar, and a touch of orange zest in a saucepan, bring to a simmer, and cook until the glaze thickens.
maple glaze: A Taste of Autumn
For a taste of autumn, a maple glaze is a fantastic choice. It's naturally sweet and boasts a rich depth of flavor that enhances the ham's natural goodness. Combine maple syrup, Dijon mustard, and a touch of apple cider vinegar in a saucepan, bring to a simmer, and cook until the glaze thickens.
Tips for Glaze Success:
- Start applying glaze during the last 30 minutes of cooking. This allows the glaze to caramelize and create a beautiful crust.
- Don't be afraid to experiment with different flavors and combinations. The possibilities are endless!
- Remember to baste your ham regularly with the glaze to ensure even distribution and maximum flavor.
(Part 6) Checking for Doneness: A Culinary Detective
As the ham cooks, it's crucial to keep an eye on its progress and ensure it's cooked to the perfect level of doneness.
The Thermometer Tells the Tale
The most reliable method for checking doneness is using a meat thermometer. Insert the thermometer into the thickest part of the ham, avoiding any bone, and ensure it reads an internal temperature of 145 degrees Fahrenheit. Don't rely on visual cues alone, as the ham may appear cooked when it's not.
Visual Clues: Signs of Doneness
While a thermometer is the gold standard, there are a few visual cues that can hint at doneness. Look for a golden-brown crust on the ham and check for a clear, not pink, juice when you pierce it with a fork. However, remember that these are just indicators, and the thermometer is the ultimate arbiter of doneness.
Resting is Key
Once your ham has reached the desired internal temperature, it's essential to let it rest for at least 15 minutes before slicing. This allows the juices to redistribute, resulting in a more tender and flavorful ham. Cover the ham loosely with foil while it rests to keep it warm and prevent it from drying out.
(Part 7) Serving Up Your Culinary Triumph
Your ham is cooked to perfection, rested, and ready to be unveiled. It's time to serve it up and bask in the glory of your culinary triumph.
A Feast for the Eyes and Palate
Present your ham on a beautiful platter, surrounded by your favorite side dishes. A classic combination is mashed potatoes, green beans, and a refreshing cranberry sauce. You can also add a touch of elegance by garnishing the platter with fresh herbs, like rosemary or thyme.
Let the Feast Begin
Cut your ham into generous slices, ensuring that each guest gets a piece of the flavorful and tender meat. Enjoy the warmth of shared meals and the satisfaction of a perfectly cooked ham.
(Part 8) ham leftovers: Transforming Them into Culinary Magic
Let's face it, leftovers are a reality of any grand feast, including a ham dinner. But don't despair! Ham leftovers can be transformed into a delicious array of dishes.
The Classic Ham Sandwich: A Culinary Comfort
A ham sandwich is a classic for a reason. It's simple, satisfying, and a perfect way to use leftover ham. Combine ham with your favorite bread, cheese, and condiments for a quick and easy meal.
Ham and bean soup: A Hearty and Comforting Dish
Ham and bean soup is a hearty and comforting dish that's perfect for cold days. The ham adds a savory depth of flavor to the soup, making it even more satisfying. Simply simmer leftover ham with beans, vegetables, and broth until the soup is thick and flavorful.
ham and cheese quiche: A Savory Breakfast Delight
Ham and cheese quiche is a delicious and versatile dish that can be enjoyed for breakfast, lunch, or dinner. The ham adds a salty flavor to the quiche, balancing the sweetness of the crust and the creaminess of the filling. Combine leftover ham with cheese, eggs, and a flaky crust for a savory and satisfying dish.
Ham and potato salad: A summertime classic
Ham and potato salad is a summertime classic that's perfect for picnics and potlucks. The ham adds a savory flavor to the salad, making it a more substantial and satisfying dish. Combine cooked ham with potatoes, mayonnaise, mustard, celery, and onions for a classic picnic favorite.
Ham fried rice: A Global Fusion Delight
Ham fried rice is a global fusion dish that combines the best of both Asian and Western cuisines. The ham adds a savory and salty flavor to the rice, creating a truly delicious dish. Combine leftover ham with cooked rice, vegetables, and soy sauce for a quick and easy meal.
(Part 9) FAQs: Addressing Your Ham-Related Queries
Here are some frequently asked questions about ham cooking, along with detailed answers to guide you further.
1. Can I Cook a Ham from Frozen?
It's not recommended to cook a ham from frozen. While it's technically possible, the ham might not cook evenly, and you risk ending up with a tough and dry result. Always thaw your ham in the refrigerator for a few days before cooking, or if you're pressed for time, you can thaw it in a cold-water bath, changing the water every 30 minutes.
2. How Do I Know if My Ham is Fully Cooked?
The best way to ensure your ham is cooked through is to use a meat thermometer. Insert it into the thickest part of the ham, avoiding any bone, and check that it reaches an internal temperature of 145 degrees Fahrenheit. If you don't have a thermometer, you can check for doneness by piercing the ham with a fork. If the juice runs clear, not pink, your ham is cooked through. However, a thermometer is always the most reliable method.
3. What Do I Do if My Ham is Overcooked?
An overcooked ham might be a bit dry, but it's still edible. You can try to salvage it by adding a sauce or glaze to rehydrate it. You can also use the overcooked ham in recipes that call for cooked ham, such as ham and bean soup or ham and cheese quiche.
4. Can I Freeze Leftover Ham?
Yes, you can freeze leftover ham for up to 3 months. Wrap it tightly in plastic wrap or aluminum foil and place it in a freezer-safe container or bag. Once you're ready to use it, thaw the ham in the refrigerator overnight.
5. What Are Some Side Dishes That Go Well with Ham?
There are many side dishes that complement ham perfectly. Some classic choices include mashed potatoes, green beans, sweet potatoes, cranberry sauce, and fruit salad. You can also experiment with more creative options, such as roasted vegetables, rice pilaf, or a salad with a vinaigrette dressing.
(Part 10) Embracing the culinary journey: A Final Thought
cooking a ham is a journey that involves a bit of planning, a dash of creativity, and a whole lot of love. By following these tips, you can create a culinary masterpiece that will impress your guests and leave them wanting more. Remember, the most important ingredient is to enjoy the process and have fun with it. Happy cooking!
Everyone is watching

Prime Rib Roast Cooking Time Chart: Per Pound Guide
Cooking TipsPrime rib roast. Just the name conjures images of lavish dinners, crackling fires, and hearty laughter. It’s ...

How Long to Bake Potatoes in the Oven (Perfect Every Time)
Cooking TipsBaked potatoes are a staple in my kitchen. They're incredibly versatile, delicious, and surprisingly easy to m...

Perfect Rice Every Time: The Ultimate Guide to Cooking Rice
Cooking TipsAs a self-proclaimed foodie, I've always been a bit obsessed with rice. It's the foundation of countless cuisi...

The Ultimate Guide to Cooking Asparagus: Tips, Techniques, and Recipes
Cooking TipsAsparagus. The mere mention of this spring delicacy conjures up images of vibrant green spears, crisp and burs...

Ultimate Guide to Cooking the Perfect Thanksgiving Turkey
Cooking TipsThanksgiving. Just the word conjures up images of overflowing tables laden with delicious food, the scent of r...
