Have you ever stared at a raw ham in your kitchen, a bit overwhelmed by the prospect of turning it into a delicious centerpiece for your next gathering? Don’t worry, you’re not alone. cooking a ham can seem intimidating, especially when you’re faced with all those different types and cooking methods. But fear not! This guide will walk you through every step, from choosing the right ham to mastering the perfect cooking temperature, leaving you confident and ready to create a succulent masterpiece.
Part 1: Choosing Your Ham: The Foundation of a Delicious Meal
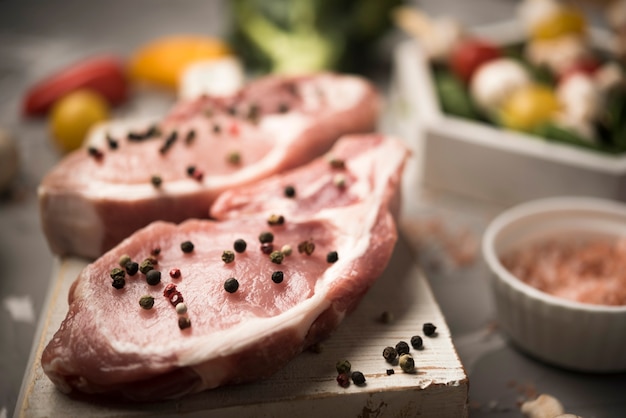
1. A Ham for Every Occasion: Understanding the Different Cuts
The first step is picking the right ham for your needs. There’s a ham out there for every occasion, from a quick weeknight dinner to a grand holiday feast. Here’s a breakdown of the most popular types:
- spiral-sliced ham: This is my go-to choice for a stress-free meal. They’re already pre-cooked and come with a beautiful spiral cut, making them a breeze to slice and serve. Think of them as the ham for people who love convenience. Plus, the spiral cut means it heats up quickly and evenly.
- bone-in ham: These are the classic, whole hams, often requiring a bit more time and attention. They’re usually uncooked and need time in the oven, but they tend to be more flavourful and moist, offering that traditional ham experience. They’re also a great canvas for adding flavour with glazes and rubs.
- canned ham: Perfect for a quick meal or adding to other dishes, these hams are pre-cooked and already seasoned, making them a great shortcut. Think of them as a pantry staple for those moments when you need a quick protein boost.
2. The Ham Label: Your Guide to a Perfect Cook
Before you even think about turning on the oven, you need to understand what’s written on that ham label. It’s like a secret code revealing all the information you need to cook the ham perfectly. Here’s what to look for:
- "Cooked" vs. "Uncooked": This is the most crucial piece of information. A “cooked” ham means it's already safe to eat, and you’re basically just warming it up. An “uncooked” ham needs proper cooking to be safe for consumption.
- "Curing" Information: If you’re dealing with an uncooked ham, pay attention to the “curing” method. It’ll tell you how the ham was preserved, whether it’s salt-cured, dry-cured, or something else. This gives you clues about its flavour and texture.
- Weight and Size: Knowing the size and weight of your ham is key for calculating cooking time and oven temperature. It’s like having a roadmap to a successful ham journey.
Part 2: The perfect ham Cooking Temperature: Unveiling the Secrets to Juiciness

3. The Importance of internal temperature: Safety First, Deliciousness Always
When it comes to cooking a ham, temperature is king. You need to ensure it reaches the right temperature, not just for safety but also for deliciousness.
- uncooked hams: The USDA recommends an internal temperature of 145°F (63°C) for uncooked ham to kill any harmful bacteria. It’s important to use a meat thermometer to check the internal temperature in the thickest part of the ham. Don’t just rely on the timer!
- pre-cooked hams: For pre-cooked hams, the recommended internal temperature is 140°F (60°C). This ensures the ham is heated through and safe to eat.
4. Oven Temperature: Finding the Sweet Spot
Now, let’s talk about ovens. Finding the right oven temperature is essential for a perfectly cooked ham.
- Uncooked Hams: For uncooked hams, I usually preheat my oven to 325°F (160°C). This allows the ham to cook evenly and prevents it from drying out. It’s a gentle heat that helps the ham retain its moisture.
- Pre-cooked Hams: For pre-cooked hams, I dial it down to 300°F (150°C). You’re basically just warming it up, so you don’t want to overdo it.
5. Timing is Key: Let the Ham Take Its Time
Cooking a ham is a marathon, not a sprint. Patience is key here. The cooking time for a ham depends on its weight and size.
- Uncooked Hams: I recommend around 15-20 minutes per pound of ham. This ensures the ham cooks through and becomes deliciously tender.
- Pre-cooked Hams: It’s usually just 10-15 minutes per pound. Remember, you’re just warming it up, so the cooking time is shorter.
Don’t just rely on the clock, though. That trusty meat thermometer is your best friend. It’ll tell you when your ham has reached the perfect internal temperature, ensuring it’s safe and juicy.
Part 3: cooking techniques: Exploring Your Options
6. The Classic oven method: A Reliable Stand-by
For those who love the tried-and-true method, the oven is your best friend. It’s a reliable approach for cooking most hams. Here’s my go-to process:
- Preheating is Crucial: Preheat your oven to the correct temperature (remember, it’s 325°F for uncooked hams and 300°F for pre-cooked ones).
- Place the Ham in a roasting pan: You want to make sure the pan is large enough to accommodate the ham. Don’t overcrowd it!
- Add Liquid to the Pan: This helps keep the ham moist during cooking. I usually add a cup or two of water, apple juice, or even pineapple juice for extra flavour.
- Cover with Foil: This helps the ham cook more evenly and prevents it from drying out. I usually cover it for the first half of the cooking time.
- Basting: Every hour or so, I baste the ham with the juices from the pan to keep it moist and add flavour.
- Uncover and Brown: For the last half hour of cooking, I remove the foil to allow the ham to brown nicely.
7. The slow cooker method: A Gentle Touch for Maximum Flavor
For a more hands-off approach, the slow cooker is a fantastic option. It’s perfect for those busy weekdays or for adding a subtle smoky flavour to your ham. Here’s how I do it:
- Choosing the Right Slow Cooker: Make sure you have a slow cooker that’s large enough to fit your ham.
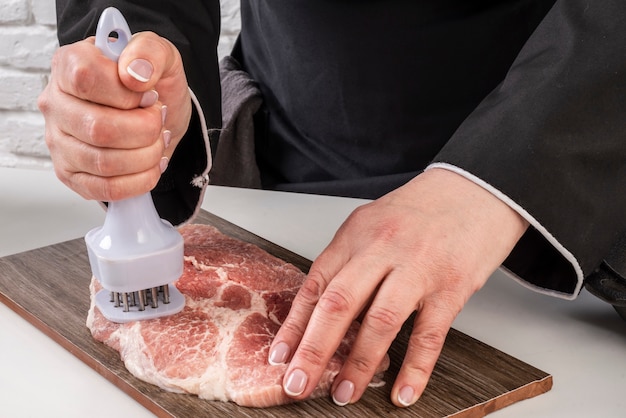
- Prepping the Ham: I usually trim any excess fat from the ham and score the surface to create a nice glaze.
- Adding Liquid: I pour a cup or two of liquid like apple juice, pineapple juice, or even beer into the slow cooker.
- Cooking Time: For uncooked hams, I usually cook it on low for 6-8 hours. For pre-cooked hams, I reduce the cooking time to 2-3 hours.
8. The instant pot Method: Speed and Convenience at Your Fingertips
Looking for a super-fast way to cook your ham? The Instant Pot is your new best friend. It can transform a plain ham into a delicious meal in no time. Here’s how I make it happen:
- Prepping the Ham: I usually score the ham and add a few flavour-enhancing ingredients like brown sugar, mustard, or spices.
- Adding Liquid: I pour a cup or two of liquid into the Instant Pot, like apple juice, pineapple juice, or even water.
- Pressure Cooking: For uncooked hams, I usually pressure cook for 40-60 minutes, depending on the weight of the ham. For pre-cooked hams, I reduce the pressure cooking time to 10-15 minutes.
- Natural Release: After the pressure cooking cycle is complete, let the pressure release naturally for 15 minutes before releasing the remaining pressure manually. This helps ensure the ham is tender and cooked evenly.
Part 4: Glazing Your Ham: Elevating Your Creation
9. The Art of Glazing: Adding a Touch of Sweetness and Shine
A good ham glaze can make all the difference. It adds a beautiful sheen and a burst of delicious flavour, transforming your ham into a culinary masterpiece. I love to experiment with different glaze recipes, but here are a few of my favourites:
- honey mustard glaze: This is a classic, sweet and tangy glaze that pairs perfectly with ham. It’s a perfect balance of sweetness and tanginess.
- Maple Syrup Glaze: This glaze adds a touch of sweetness and a beautiful golden brown colour to your ham. It’s a great choice for those who prefer a more subtle sweetness.
- brown sugar glaze: This is a simple and classic glaze that's perfect for those who prefer a more subtle flavour. It’s a reliable choice that never disappoints.
- pineapple glaze: This glaze adds a touch of tropical sweetness and a lovely tanginess to your ham. It’s a unique and refreshing flavour combination.
10. Glaze Application: The Finishing Touch
Once your ham is almost done cooking, it’s time to glaze it. This is where the magic happens. Here’s what I do:
- Prepare the Glaze: I usually make my glaze in advance and keep it warm in a saucepan on the stovetop.
- Remove the Ham: Remove the ham from the oven or slow cooker and place it on a cutting board.
- Apply the Glaze: I use a pastry brush to apply a thin layer of glaze over the entire surface of the ham.
- Return to the Oven or Slow Cooker: Place the ham back in the oven or slow cooker and bake for another 15-20 minutes until the glaze is set and caramelized. This creates a beautiful, glossy finish.
Part 5: Serving and Storing Your Ham: The Finishing Touches
11. The Art of Slicing: Presentation Matters
Now that your ham is cooked to perfection, it’s time to showcase it. I love to slice my ham thinly and arrange it on a platter for a beautiful presentation. You can get creative here. Here are a few tips:
- Spiral-Sliced Hams: These are already pre-sliced, making it easy for you to present them beautifully. Simply arrange them on a platter, adding a few sprigs of fresh parsley or rosemary for decoration.
- Bone-In Hams: For bone-in hams, I use a sharp carving knife to slice them evenly. You can keep the bone in for presentation or remove it and arrange the slices on a platter.
12. Accompanying Delights: Pairing Your Ham with Perfection
A delicious ham deserves a feast of delicious side dishes. I love to pair my ham with classic sides like:
- Roasted Vegetables: Roasted vegetables, like Brussels sprouts, carrots, and potatoes, add a touch of sweetness and crunch to complement the salty ham.
- Macaroni and Cheese: Macaroni and cheese is always a crowd-pleaser, and it pairs perfectly with the savory flavour of ham.
- sweet potato Casserole: This sweet and creamy side dish adds a touch of sweetness to balance out the salty ham.
- green bean casserole: A classic side dish that's always a hit, offering a creamy and comforting flavour.
13. Storing Leftovers: A Guide for Savory Ham Delights
leftover ham is a culinary treasure. It’s so versatile, you can use it to create delicious sandwiches, salads, or even incorporate it into other dishes. Here’s how to store it properly:
- Refrigerate: Refrigerate leftover ham in an airtight container within 2 hours of cooking. It should last for 3-4 days in the refrigerator.
- Freezing: To freeze leftover ham, wrap it tightly in plastic wrap and then in aluminum foil. It should last for 2-3 months in the freezer.
Part 6: FAQs
1. What happens if my ham is not cooked to the correct internal temperature?
It’s important to cook your ham to the recommended internal temperature to ensure it's safe to eat. If the ham is not cooked to the right temperature, there's a risk of food poisoning. The symptoms of food poisoning can include nausea, vomiting, diarrhoea, and abdominal cramps. If you experience any of these symptoms after eating ham, it's essential to seek medical attention immediately.
2. Can I reheat a cooked ham?
Yes, you can reheat a cooked ham. The best way to do this is to reheat it in the oven at 325°F (160°C) for 15-20 minutes, or until it reaches an internal temperature of 140°F (60°C). You can also reheat it in the microwave, but be sure to cover it with a damp paper towel to prevent it from drying out.
3. What if my ham is too salty?
If your ham is too salty, there are a few things you can do to balance out the flavour. You can try soaking the ham in cold water for 30 minutes before cooking it. This will help to draw out some of the saltiness. Alternatively, you can serve the ham with sweet or tangy sides, such as pineapple chunks, apple sauce, or sweet potato casserole.
4. Can I use a ham that has been frozen?
Yes, you can use a ham that has been frozen. Just be sure to defrost it thoroughly in the refrigerator before cooking it. You can also defrost it in the microwave, but be sure to follow the manufacturer's instructions carefully.
5. Is it better to cook a ham with the skin on or off?
It's up to you whether you cook a ham with the skin on or off. If you're leaving the skin on, you can score it in a criss-cross pattern to help it crisp up during cooking. If you're removing the skin, you can trim any excess fat and then cook the ham as usual.
Now, armed with this knowledge, you’re ready to conquer the world of ham cooking. Remember, it’s all about choosing the right cut, mastering the temperature, and experimenting with flavours. So go ahead, unleash your inner culinary maestro, and impress your loved ones with a delicious and perfectly cooked ham. Happy cooking!
Everyone is watching

Prime Rib Roast Cooking Time Chart: Per Pound Guide
Cooking TipsPrime rib roast. Just the name conjures images of lavish dinners, crackling fires, and hearty laughter. It’s ...
How Long to Bake Potatoes in the Oven (Perfect Every Time)
Cooking TipsBaked potatoes are a staple in my kitchen. They're incredibly versatile, delicious, and surprisingly easy to m...
Perfect Rice Every Time: The Ultimate Guide to Cooking Rice
Cooking TipsAs a self-proclaimed foodie, I've always been a bit obsessed with rice. It's the foundation of countless cuisi...
The Ultimate Guide to Cooking Asparagus: Tips, Techniques, and Recipes
Cooking TipsAsparagus. The mere mention of this spring delicacy conjures up images of vibrant green spears, crisp and burs...
Ultimate Guide to Cooking the Perfect Thanksgiving Turkey
Cooking TipsThanksgiving. Just the word conjures up images of overflowing tables laden with delicious food, the scent of r...