As a seasoned home baker, I’ve spent countless hours experimenting with different baking temperatures to achieve the perfect loaf. The journey has been filled with both triumphs and disasters, but each experience has taught me valuable lessons about the intricate relationship between heat and bread. Every oven is unique, but there's a general range of temperatures that consistently produces fantastic results. So, let's dive into the world of baking temperatures and uncover the secrets to crafting exceptional bread.
(Part 1) The Importance of Temperature

Think of temperature as the conductor of your baking symphony. It orchestrates the rise of the dough, the browning of the crust, and the development of flavor. Getting it right is crucial for achieving a bread that's not only visually appealing but also boasts a delightful texture and mouthwatering aroma.
The Science Behind Baking Temperatures
At its core, baking is a process of controlled heat transfer. As heat penetrates the dough, it activates the yeast, causing it to release carbon dioxide gas. This gas creates tiny air pockets within the dough, leading to a light and airy texture. Simultaneously, the heat encourages the gluten proteins to form strong bonds, providing the structure to hold those air pockets in place.
The specific temperature you choose determines the rate of these reactions. A higher temperature will accelerate the yeast activity and gluten development, resulting in a quicker rise and a more robust texture. Conversely, a lower temperature will slow down the process, yielding a softer, more delicate crumb.
Let's illustrate this with an example. Imagine baking a sourdough bread. A lower temperature around 350°F (175°C) allows the yeast and sourdough starter to work their magic slowly, resulting in a tangy flavor and a delicate, open crumb. However, if you bake it at a higher temperature, say 450°F (230°C), the yeast will work faster, creating a denser crumb with a more pronounced crust.
The Golden Rule of Bread Baking
A good rule of thumb is to bake most bread at temperatures ranging from 350°F to 450°F (175°C to 230°C). However, this is just a starting point, and the ideal temperature will vary depending on the type of bread you're baking and your personal preferences.
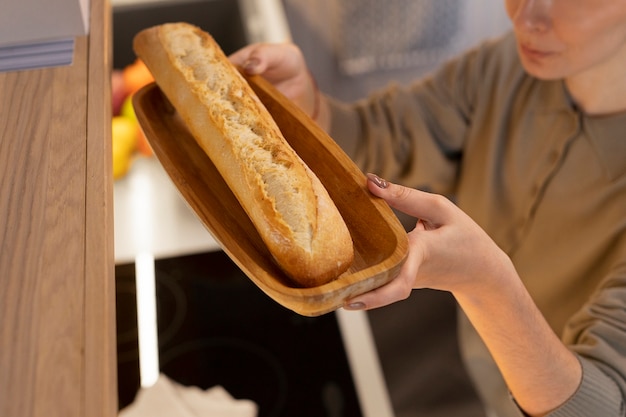
For instance, a crusty baguette benefits from a higher temperature to encourage rapid browning and a satisfyingly crunchy outer layer. On the other hand, a soft, fluffy white bread prefers a lower temperature to allow for a gentle rise and a delicate crumb.
(Part 2) Understanding Your Oven

Every oven has its quirks, and knowing yours is crucial for achieving consistent results. The age of your oven, its brand, and even the way you position your baking trays can all influence the actual temperature inside.
Calibrating Your Oven
Before embarking on any bread-baking adventure, it's essential to calibrate your oven. This involves checking its accuracy with an oven thermometer, available at most kitchen supply stores. Place the thermometer in the centre of the oven rack, and preheat it to the desired temperature. Compare the thermometer reading to the oven's setting. If there's a significant discrepancy, you'll need to adjust your baking times accordingly.
For example, if your oven is consistently running 25°F hotter than its setting, you might need to reduce the baking time by 5-10 minutes. However, it's best to start with small adjustments and monitor the results carefully. It's all about finding the sweet spot for your particular oven.
Remember, a well-calibrated oven is your best friend in achieving consistent baking results. It ensures that the bread cooks evenly and develops the desired texture and browning.
Oven Placement and Baking Trays
The position of your baking tray also influences the temperature. Top racks tend to be hotter, while bottom racks are cooler. Consider the heat distribution in your oven and choose the most appropriate rack for your bread.
The material of your baking tray can also make a difference. Dark-coloured trays tend to absorb more heat than light-coloured ones, potentially leading to uneven browning. If you notice your bread browning too quickly on the bottom, try using a lighter-coloured tray or placing a baking sheet on the rack below to reflect some heat upwards.
By understanding the nuances of your oven and making informed choices about tray placement and material, you can create a more consistent baking environment, leading to more predictable results.
(Part 3) Baking Different Breads at Different Temperatures

While the general range of 350°F to 450°F holds true for most breads, specific types require adjustments for optimal results.
Loaves with a Soft Crumb
For loaves that you desire to have a soft and tender crumb, a lower temperature of 350°F to 375°F (175°C to 190°C) is often preferred. This allows for a slower rise, giving the yeast time to produce more carbon dioxide gas, leading to a delicate and airy texture. Examples include:
- White bread: A classic white bread baked at a lower temperature will have a soft, pillowy crumb and a slightly thinner crust.
- Brioche: This rich, buttery bread benefits from a gentle bake that allows the eggs and butter to shine through, resulting in a luxuriously soft and airy texture.
- Sourdough bread: Sourdough flour thrives at lower temperatures, allowing the sourdough starter to develop its characteristic tang and create a light, open crumb.
Loaves with a Crispy Crust
If you crave a crust that's golden brown and delightfully crunchy, a higher temperature of 400°F to 450°F (200°C to 230°C) is your best bet. The intense heat encourages rapid browning and creates a satisfyingly crispy outer layer. Some examples include:
- Baguettes: The classic French baguette is known for its crisp crust and chewy interior. Baking it at a high temperature helps develop this signature texture.
- Ciabatta: This rustic Italian bread is baked at a high temperature to create a slightly chewy crust and a light, airy interior.
- Focaccia: This flatbread, often topped with herbs and olive oil, benefits from a high temperature to achieve a crispy, slightly charred crust and a soft interior.
Yeast-Free Breads
For yeast-free breads, such as soda bread or quick breads, the temperature range is generally lower, around 350°F to 400°F (175°C to 200°C). This allows the batter to cook through evenly without burning the outside before the inside is fully cooked.
A good example is soda bread, which relies on baking soda for its leavening. Baking it at a lower temperature ensures that the soda bread cooks through evenly without becoming dry or crumbly.
(Part 4) Mastering the Baking Time
Once you've settled on the perfect baking temperature, you need to pay close attention to the baking time. This will vary depending on the size and shape of your loaf, the type of bread, and your oven's performance.
The Importance of a Reliable Recipe
A well-tested recipe will provide a good starting point for your baking time. However, it's essential to remember that ovens vary, so some adjustments might be necessary. It's always wise to err on the side of caution and check the bread's doneness earlier than recommended.
For example, a recipe might call for a 30-minute bake time. However, your oven might be slightly hotter, so you might need to adjust the time to 25 minutes or even less. The key is to monitor the bread's progress carefully.
Signs of a Perfectly Baked Loaf
Here are some telltale signs that your bread is ready to come out of the oven:
- The Crust is Golden Brown: A beautifully golden brown crust indicates that the bread has reached its peak browning and is ready to be enjoyed. The crust should be a deep golden brown, indicating that the bread has been cooked thoroughly.
- The Bread Sounds Hollow: When you tap the bottom of the loaf, it should sound hollow. This indicates that the inside is fully cooked and no longer moist. This hollow sound signals that the bread has reached a dry center, a crucial sign of doneness.
- A Thermometer Reads 200°F: Insert a thermometer into the thickest part of the loaf. If it reads 200°F, it's ready to be taken out of the oven. This accurate reading ensures that the interior of the bread is fully cooked, providing a safe and delicious loaf.
It's worth noting that these are general guidelines, and the specific signs of doneness can vary depending on the type of bread you are baking. It's always a good idea to check for additional cues, such as the texture of the bread, its overall appearance, and your personal experience.
(Part 5) The Art of Adjusting Baking Times
Every oven is unique, and baking times can vary significantly. Don't be afraid to experiment and adjust the recommended baking time based on your oven's performance and the bread's appearance.
Monitoring the Baking Process
Keep a watchful eye on your bread as it bakes. You can use a baking thermometer to check its internal temperature, or you can simply peek inside the oven every few minutes to observe the browning and gauge the progress. This active observation is key to ensuring that your bread bakes to perfection.
Adjusting the Baking Time
If you notice the crust browning too quickly, you can reduce the oven temperature slightly or cover the bread with foil for the remaining baking time. This will help prevent over-browning and ensure that the bread cooks evenly. Alternatively, if the bread seems undercooked, you can increase the baking time by a few minutes. Remember, it's better to undercook than to overcook, as you can always bake it for a bit longer if needed.
By being attentive and making small adjustments as needed, you can create a beautiful loaf of bread that is perfectly cooked and golden brown.
(Part 6) The Magic of a dutch oven
For those who appreciate a perfectly risen loaf with a beautiful, crispy crust, using a Dutch oven is a game-changer. It creates a humid environment, similar to a professional bakery, which fosters a magnificent rise and a delightful crust. The heat is also more evenly distributed, resulting in a more consistently baked loaf.
The Dutch Oven Baking Method
The process involves preheating the Dutch oven in the oven, then transferring the shaped dough to the hot pot. The lid is then placed on top, creating a sealed environment that traps steam and allows the dough to rise beautifully. After a certain period, the lid is removed to allow the crust to crisp up.
For example, you can preheat your Dutch oven at 450°F (230°C) for 30 minutes. Then, carefully transfer your shaped sourdough dough to the hot pot, cover with the lid, and bake for 30 minutes. After 30 minutes, remove the lid and continue baking for another 15 minutes, or until the crust is golden brown and the bread sounds hollow when tapped.
The Benefits of Using a Dutch Oven
Here are some advantages of using a Dutch oven for baking bread:
- Exceptional Rise: The humid environment within the Dutch oven promotes a magnificent rise, resulting in a light and airy crumb. This environment traps steam, creating a moist environment that encourages the dough to rise to its full potential.
- Crisp Crust: The steam trapped inside the pot creates a beautiful, crispy crust that's both appealing and satisfying. The steam helps create a chewy, well-developed crust that is both visually appealing and delicious.
- Even Baking: The heat distribution in a Dutch oven is more even, ensuring that the bread bakes consistently throughout. The Dutch oven's thick walls distribute heat more evenly, leading to a more consistent bake, especially helpful for breads that are dense or have complex shapes.
While a Dutch oven can be a wonderful tool for baking bread, it's not a necessity. You can absolutely achieve fantastic results with a conventional oven. However, if you're looking to elevate your baking game and create bread with an exceptional rise and a beautiful crust, using a Dutch oven is well worth the investment.
(Part 7) Baking with Different Types of Dough
The ideal baking temperature can also vary depending on the type of dough you're working with.
Yeast Doughs
Yeast doughs typically require a higher temperature, around 375°F to 400°F (190°C to 200°C), to encourage rapid yeast activity and a beautiful rise. This temperature range helps create a light and airy crumb while promoting browning and crust development. The higher temperature helps the yeast work quickly, resulting in a well-risen bread.
Sourdough Doughs
Sourdough doughs tend to be more tolerant of higher temperatures, and baking them at 450°F (230°C) for the first 20 minutes can yield a fantastic crust. This high initial temperature encourages browning and crust development before the dough has a chance to overproof. The temperature can then be reduced to 400°F (200°C) for the rest of the baking time. The initial high heat creates a beautiful, crispy crust, while the reduced temperature allows for a slower bake and a more developed flavor.
Pizza Dough
Pizza dough is typically baked at a very high temperature, often around 500°F to 600°F (260°C to 315°C). This intense heat creates a thin, crispy crust and a beautifully charred bottom. For home ovens, a pizza stone can help achieve these high temperatures. A pizza stone absorbs and retains heat, creating a more even cooking surface that helps achieve a crispy crust.
Baking at these high temperatures creates a crust that is both crispy and chewy, with a delicious char on the bottom. For those who love a perfectly cooked pizza, baking at these high temperatures is essential.
(Part 8) Experiment and Discover Your Perfect Temperature
Baking is an art, and the perfect baking temperature is a matter of personal preference. Experiment with different temperatures, oven positions, and baking times to discover what works best for you and your oven. It's a journey of exploration and discovery, and the more you bake, the more you'll learn.
Don't Be Afraid to Adjust
Don't be afraid to deviate from the recipe's instructions if you feel that your oven needs a slight adjustment. Pay attention to the signs of a well-baked loaf and adjust the temperature or baking time accordingly. It's a process of trial and error, but the results are worth it. Experimenting with your oven and baking techniques is the best way to master the art of bread baking.
Trust Your Instincts
As you gain experience, you'll develop an intuitive sense of when your bread is ready. Trust your instincts, and don't be afraid to pull it out of the oven a few minutes earlier if you feel it's starting to brown too quickly. Over time, you will develop a keen eye for knowing when a loaf of bread is perfectly baked.
(Part 9) FAQs
1. How do I know if my oven is running too hot or too cold?
The best way to determine your oven's accuracy is to use an oven thermometer. Place the thermometer in the centre of the oven rack and preheat it to the desired temperature. Compare the thermometer reading to the oven's setting. If there's a significant discrepancy, you'll need to adjust your baking times accordingly.
2. Should I preheat my oven for bread baking?
Absolutely! Preheating your oven is crucial for achieving consistent baking results. It ensures that the oven reaches the desired temperature and heats the air evenly, promoting a beautiful rise and a perfectly cooked loaf. Preheating allows the oven to reach the correct temperature and provides a more even heat distribution for the bread to bake evenly.
3. Can I bake bread in a conventional oven instead of a Dutch oven?
Yes, you can absolutely bake bread in a conventional oven. While a Dutch oven creates a more humid environment and promotes a fantastic rise, a conventional oven can still produce excellent results with proper temperature and time management. Conventional ovens can produce delicious bread, especially with careful attention to temperature, time, and the use of a baking stone or a baking sheet.
4. What should I do if my bread is browning too quickly?
If your bread is browning too quickly, you can reduce the oven temperature slightly or cover the bread with foil for the remaining baking time. This will help prevent over-browning and ensure that the bread cooks evenly. Reducing the temperature or covering the bread with foil can help regulate the browning process and prevent the crust from becoming too dark.
5. What if my bread is undercooked?
If your bread seems undercooked, you can increase the baking time by a few minutes. Check the bread's doneness regularly by tapping the bottom and listening for a hollow sound. You can also use a thermometer to measure the internal temperature. Baking for a few minutes longer, checking for a hollow sound when tapped, and using a thermometer to measure the internal temperature can all help ensure the bread is fully cooked.
Finding the perfect baking temperature for your bread is a journey of experimentation and discovery. With a little practice, you can master the art of baking bread that is both delicious and beautiful.
Everyone is watching

Prime Rib Roast Cooking Time Chart: Per Pound Guide
Cooking TipsPrime rib roast. Just the name conjures images of lavish dinners, crackling fires, and hearty laughter. It’s ...

How Long to Bake Potatoes in the Oven (Perfect Every Time)
Cooking TipsBaked potatoes are a staple in my kitchen. They're incredibly versatile, delicious, and surprisingly easy to m...

Perfect Rice Every Time: The Ultimate Guide to Cooking Rice
Cooking TipsAs a self-proclaimed foodie, I've always been a bit obsessed with rice. It's the foundation of countless cuisi...

The Ultimate Guide to Cooking Asparagus: Tips, Techniques, and Recipes
Cooking TipsAsparagus. The mere mention of this spring delicacy conjures up images of vibrant green spears, crisp and burs...

Ultimate Guide to Cooking the Perfect Thanksgiving Turkey
Cooking TipsThanksgiving. Just the word conjures up images of overflowing tables laden with delicious food, the scent of r...
