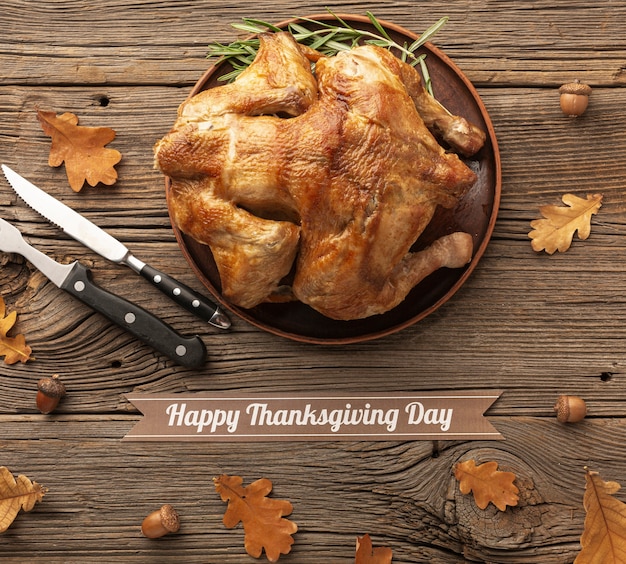
Christmas dinner. The mere mention conjures up images of a beautifully roasted turkey, the centerpiece of a festive feast. But let's face it, the pressure of getting that turkey perfectly cooked can be daunting. The fear of a dry, rubbery bird lurking beneath the golden-brown skin is enough to send any cook into a panic. But don't worry, my fellow foodies! I'm here to share my secrets to ensure a juicy, delicious turkey that will have your guests singing your praises.
Over the years, I've learned that the key to a truly exceptional turkey lies in finding the right cooking temperature. It's not just about achieving food safety, but about unlocking the turkey's full potential for flavor and moisture. It's about that perfect balance of crispy skin and tender, succulent meat.
So, get your aprons ready, because we're about to embark on a journey to turkey perfection. From the science behind temperature to practical tips and tricks, I'll guide you through every step of the process. Let's get cooking!
(Part 1) turkey temperature 101: Why It Matters

Imagine you're baking a cake. You wouldn't just toss it into a hot oven and hope for the best, would you? The same principle applies to cooking a turkey. We can't just rely on time alone; we need to carefully control the temperature to ensure a beautifully cooked bird.
1. Food Safety First: It's Not Just a Suggestion
Think of the turkey temperature as a safety net for your feast. The minimum safe internal temperature for a turkey is 165°F (74°C). This ensures that any harmful bacteria are eliminated, protecting your loved ones from foodborne illness. A trusty digital meat thermometer is your best friend in this process. It's the only way to be absolutely sure that your turkey is cooked through and safe to eat. I always keep mine handy in the kitchen, ready for action!
2. Juicy, Not Dry: The Art of Moisture Retention
No one wants to serve a dry, overcooked turkey. Think of the turkey's moisture like a precious resource that we want to protect. Cooking at too high a temperature for too long can literally "squeeze" the moisture out of the meat, leaving you with a disappointing result. By cooking at a lower temperature for a longer period, we allow the turkey to cook slowly and evenly, retaining its natural juices. This is the secret to that succulent, melt-in-your-mouth texture that we all crave.
3. Even Cooking: The Quest for Uniform Doneness
Imagine a turkey where the breast is perfectly cooked, but the legs are still a bit raw. Not ideal, right? The right temperature ensures that the turkey cooks evenly from the inside out, preventing those frustrating raw spots that can ruin a perfectly good bird. Every part of the turkey will reach the desired doneness, resulting in a consistently delicious meal.
(Part 2) Finding the Right Temperature: A Guide to Success

Now that we understand the importance of temperature, let's delve into the specifics. The ideal temperature for roasting a turkey varies slightly depending on the size and weight of the bird. But don't fret! I'll break it down for you.
1. The General Rule: 325°F (163°C) - A Good Starting Point
For most turkeys, a roasting temperature of 325°F (163°C) is a great starting point. This temperature allows for gentle, even cooking without drying out the meat. It's a safe bet that will usually produce excellent results.
2. Smaller Birds: 350°F (177°C) - A Boost for Faster Cooking
If you're dealing with a smaller turkey (under 10 pounds), you can bump up the temperature to 350°F (177°C). This will help the turkey cook a bit faster, ensuring that the breast doesn't dry out before the rest of the bird is cooked. Just keep a close eye on it to avoid overcooking.
3. Larger Birds: 300°F (149°C) - Slower Cooking for Even Distribution
For those hefty turkeys (over 15 pounds), it's best to stick with a lower temperature of 300°F (149°C). This slower cooking time will ensure that the entire bird, especially those thick legs, cooks evenly and doesn't end up with a dry breast. Remember, patience is key when working with a larger turkey.
(Part 3) The Turkey Timetable: Planning Your Roast
Okay, so we've nailed the temperature. Now, let's talk about time. Planning your roasting time is crucial for a perfectly cooked turkey. Here's a general guideline based on turkey weight, but remember, these are just estimates. Always rely on your trusty meat thermometer for final confirmation!
Turkey Weight and Roasting Time:
| Turkey Weight (pounds) | Roasting Time (hours) |
|---|---|
| 8-12 | 2.5-3.5 |
| 12-16 | 3.5-4.5 |
| 16-20 | 4.5-5.5 |
Keep in mind that several factors can affect cooking time, such as the shape of your turkey, the size of your roasting pan, and whether you're stuffing the bird. This is why checking the temperature frequently, especially during the last hour of cooking, is crucial. It's better to err on the side of caution and check often than to risk an undercooked turkey.
(Part 4) The Secret to juicy turkey: Basting and Brining
We've established the temperature and time, but now let's talk about a couple of techniques that will take your turkey to the next level of deliciousness. Basting and brining are like superpowers for turkey juiciness.
1. Basting: The Moisture Boost - Giving Your Turkey a Spa Treatment
Basting is like giving your turkey a little spa treatment. It involves periodically pouring the pan juices over the bird while it's roasting. This helps to keep the skin moist, preventing it from drying out and giving the turkey a beautiful golden-brown crust. Think of it as a delicious, continuous shower for your bird.
You can use the pan juices, melted butter, or even a mixture of herbs and spices for basting. I like to use a basting brush for even distribution. Just be careful not to over-baste, as this can lead to a soggy skin. We want a crispy, flavorful crust, not a soggy mess!
2. Brining: The Moisture Miracle - A Secret Weapon for Tenderness
Brining is a bit more involved, but it can truly transform your turkey. This technique involves soaking the turkey in a salt solution for several hours or overnight. The salt draws moisture from the surrounding air into the meat, making it more tender and succulent. It's like giving your turkey a deep, hydrating soak. The result is a symphony of flavors and textures that will make your guests swoon.
You can add your own flavor twists to your brine with herbs, spices, or even citrus fruits. It's a fun way to personalize your turkey and experiment with different flavor profiles. While brining isn't for everyone, if you're seeking the ultimate juicy turkey, it's a technique worth trying.
(Part 5) The Art of Resting: Patience is Key - Letting the Turkey Relax
You've worked hard to cook the perfect turkey. Now comes a crucial step that many overlook - resting. This is not just about letting the turkey cool down; it's about allowing the juices to redistribute, ensuring that the meat is evenly cooked and tender throughout. Think of it as giving your turkey a chance to relax after its culinary journey.
After removing the turkey from the oven, cover it loosely with foil and let it rest for at least 15-20 minutes before carving. I know it might feel like an eternity, but trust me, it's worth the wait. The resting time allows the juices to redistribute throughout the meat, resulting in a juicier, more flavorful turkey.
(Part 6) Beyond the Basics: The Perfect Turkey Trifecta - The Art of Selection
Okay, we've covered the basics of cooking temperature, time, and resting. But there's more to the story. Here are some extra tips and tricks that will elevate your turkey from good to glorious. Let's dive into the art of selecting the right turkey.
1. Choosing the Right Turkey: A Matter of Size and Shape - Finding Your Ideal Bird
Not all turkeys are created equal. When selecting your turkey, consider these factors:
- Size: Choose a turkey that's appropriately sized for your group. A general rule of thumb is about 1 pound per person. If you have a large crowd, don't be afraid to go for a bigger bird. You can always freeze any leftovers!
- Shape: Opt for a turkey with a wide breast and a long, narrow body. This shape allows for even cooking and prevents a dry breast. Think of it as the perfect physique for a turkey.
- Fresh or Frozen: Fresh turkeys are usually more expensive but often offer a richer flavor. frozen turkeys are readily available and can be thawed in the refrigerator. Just be sure to plan ahead as thawing takes time. There's nothing worse than realizing your turkey isn't thawed in time!
2. Mastering the Roasting Pan: The Secret to Even Cooking - The Right Vessel for Your Turkey
Your roasting pan plays a key role in achieving even cooking. Here's what to consider:
- Size: Choose a pan that's large enough to accommodate your turkey without crowding. The turkey should fit comfortably in the pan with plenty of space around it for airflow. Crowding can prevent even cooking and result in uneven doneness.
- Material: Roasting pans come in different materials, but a good quality stainless steel or enameled cast iron pan is a reliable choice. They distribute heat evenly and are easy to clean. Avoid using a pan that's too thin, as it can lead to uneven cooking and hot spots.
- Rack: A roasting rack is essential for lifting the turkey off the bottom of the pan, allowing hot air to circulate around the bird and ensure even cooking. This prevents the turkey from sitting in its own juices, ensuring a crispy skin and a beautifully cooked bird.
3. Flavouring Your Turkey: The Magic of Herbs and Spices - Adding Flavor to Your Bird
Let's talk about flavor! A simple combination of herbs and spices can transform your turkey into a culinary masterpiece. Don't be afraid to experiment and create your own unique blend.
Here are some of my personal favorites:
- Classic: A simple mix of fresh rosemary, thyme, and sage is a timeless classic. It's a perfect balance of earthy and aromatic flavors that complements the turkey beautifully.
- Citrus Burst: Add a tangy twist with lemon zest, orange zest, and a sprig of fresh thyme. The citrus notes brighten up the flavor profile, adding a refreshing touch.
- Spicy Kick: For a touch of heat, try a blend of paprika, cayenne pepper, and garlic powder. This blend adds a subtle warmth that complements the turkey without being overpowering. Just remember to adjust the amount of cayenne pepper to your personal preference.
Don't be afraid to experiment and create your own signature spice blend! The possibilities are endless, so have fun with it and let your creativity shine through.
(Part 7) Doneness Decoded: Checking for Perfection - The Moment of Truth
The moment of truth has arrived. Checking for doneness is a crucial step in ensuring a safe and delicious turkey. Using a meat thermometer is the most reliable way to ensure your turkey is cooked through and safe to eat. Don't rely on guesswork; always use a thermometer to get an accurate reading.
1. The Golden Rules of Thermometry: Accurate Reading, Safe Eating
Insert the thermometer into the thickest part of the turkey breast, making sure it's not touching any bone. The internal temperature should reach 165°F (74°C). If the breast has reached this temperature, you can be confident that the entire turkey is cooked through. Remember, accuracy is key. Don't just stick it in and pull it out right away. Give it a few seconds to register the correct temperature.
2. The Temperature Tells the Story: A Deeper Look at Doneness
The temperature of the turkey's thigh is also a good indicator of doneness. It should reach 180°F (82°C) for a perfectly cooked bird. Checking both the breast and the thigh ensures that the entire turkey is cooked to perfection.
(Part 8) The Aftermath: Keeping Your Turkey Warm and Delicious - The Final Touches
You've conquered the turkey, and now it's time to keep it warm and ready to be devoured. A few simple steps will ensure that your turkey stays delicious and ready for your guests.
1. The Warm Embrace: Keeping Your Turkey Toasty - Preserving the Heat
After removing the turkey from the oven, let it rest for 15-20 minutes. Then, transfer it to a serving platter and cover it loosely with foil. To keep it warm, you can place it in a preheated oven set to the lowest temperature (around 200°F/93°C). This will ensure that your turkey stays warm and juicy without overcooking.
2. Carving with Confidence: A Final Touch - A Skill for the Master Chef
Once the turkey has rested, it's time to carve. Use a sharp carving knife and follow the contours of the breast and legs. Carefully separate the dark and white meat, keeping the juices flowing. This is where those years of practice with your carving knife will come in handy! And don't forget to save the pan juices for a delicious gravy. Those juices are packed with flavor and are the secret ingredient to a truly amazing gravy.
(Part 9) FAQs: Your Turkey Questions Answered - Unlocking the Mysteries of Turkey Cooking
Let's address some frequently asked turkey questions. After all, everyone needs a little guidance when it comes to this culinary masterpiece.
1. What if my turkey is too small for the roasting pan?
No problem! You can use a smaller roasting pan or even a large baking dish. Just make sure the turkey fits comfortably and has enough space around it for air circulation. The key is to ensure that the heat can circulate around the bird, ensuring even cooking. Remember, the goal is to achieve that beautiful golden-brown crust and tender, juicy meat.
2. Can I stuff my turkey the night before?
It's best to stuff your turkey right before roasting. This prevents the stuffing from becoming dry and helps ensure that the turkey is cooked through. Stuffing your turkey ahead of time can lead to uneven cooking and food safety concerns. It's always better to be safe than sorry!
3. Can I use a digital thermometer to check the temperature of the stuffing?
Yes, absolutely! The stuffing should reach an internal temperature of 165°F (74°C) as well. This ensures that the stuffing is cooked through and safe to eat. It's always better to err on the side of caution when it comes to food safety.
4. How long can I keep cooked turkey in the refrigerator?
Cooked turkey can be stored in the refrigerator for 3-4 days. Make sure to wrap it tightly in plastic wrap or aluminum foil to prevent it from drying out. Leftovers can be used in a variety of dishes, such as sandwiches, salads, soups, and casseroles. It's a great way to extend the life of your delicious turkey.
5. What should I do with leftover turkey?
The possibilities are endless! You can use it for sandwiches, salads, soups, casseroles, and even turkey pot pie. Leftovers are an opportunity to get creative and explore new culinary adventures. Don't be afraid to experiment and find new ways to enjoy your delicious turkey.
And there you have it, my culinary comrades! With these tips and tricks, you'll be well on your way to crafting a juicy, flavorful, and unforgettable turkey feast that will impress your guests and leave them longing for more. Remember, cooking a turkey is about more than just getting the bird on the table; it's about creating a memorable experience that brings people together and celebrates the joy of good food and company. So, embrace the challenge, follow these steps, and get ready to create a truly unforgettable turkey masterpiece!
Everyone is watching

Prime Rib Roast Cooking Time Chart: Per Pound Guide
Cooking TipsPrime rib roast. Just the name conjures images of lavish dinners, crackling fires, and hearty laughter. It’s ...

How Long to Bake Potatoes in the Oven (Perfect Every Time)
Cooking TipsBaked potatoes are a staple in my kitchen. They're incredibly versatile, delicious, and surprisingly easy to m...

Perfect Rice Every Time: The Ultimate Guide to Cooking Rice
Cooking TipsAs a self-proclaimed foodie, I've always been a bit obsessed with rice. It's the foundation of countless cuisi...

The Ultimate Guide to Cooking Asparagus: Tips, Techniques, and Recipes
Cooking TipsAsparagus. The mere mention of this spring delicacy conjures up images of vibrant green spears, crisp and burs...

Ultimate Guide to Cooking the Perfect Thanksgiving Turkey
Cooking TipsThanksgiving. Just the word conjures up images of overflowing tables laden with delicious food, the scent of r...