There's nothing quite like the aroma of burgers sizzling on a hot grill, is there? It evokes memories of summer days, family gatherings, and pure grilling bliss. But achieving that perfect burger, with its beautiful char, juicy interior, and mind-blowing flavour, is an art form. It all comes down to nailing the grill temperature.
I've been grilling for years, experimenting with techniques, temperatures, and even some crazy wood chip combinations. Through trial and error, I've learned a thing or two about what works and what doesn't. This guide is my way of sharing that grilling wisdom, along with insider tips and tricks, to help you become a burger grilling pro. We'll explore the science behind grilling, uncover the ideal temperature range, and even tackle some common grilling blunders.
(Part 1) The Science Behind the Perfect Burger

Before we dive into the specific temperature recommendations, let's delve into the science behind that perfect burger. It's not just about throwing meat on a hot grill and hoping for the best. There's a whole process at play, involving heat transfer, moisture retention, and even chemical reactions that contribute to the incredible flavour we all crave.
1.1. Heat Transfer: The Foundation of Grilling
Heat transfer is the cornerstone of grilling. It's what creates that irresistible char on the outside while keeping the inside juicy. There are three primary types of heat transfer:
- Conduction: This is like a game of hot potato, where heat travels from one object to another through direct contact. Imagine how a pan heats up on your stovetop. In grilling, this happens when the burger touches the hot grill grates, transferring heat directly to the meat.
- Convection: Think of this like a hot air balloon. Heat is transferred through the movement of fluids, like air or water. The hot air rising from a grill helps to cook the burger evenly from all sides.
- Radiation: Imagine the sun's rays. Heat travels through electromagnetic waves, like the heat you feel from the sun or a campfire. Infrared grills utilize this method, cooking food quickly and efficiently.
On a typical grill, a combination of these heat transfer methods is working in harmony. The hot grates conduct heat to the burger, the hot air convection cooks it evenly, and the radiated heat from the grill helps to cook the top and bottom simultaneously.
1.2. Moisture Retention: The Key to juicy burgers
As important as that char is, we also want a juicy, flavorful burger on the inside. This is where moisture retention comes into play. Temperature plays a crucial role here. If you cook a burger at too high a temperature, the outside will cook too quickly, leaving the inside dry and tough. On the other hand, a low temperature can lead to an overcooked, bland burger.
Our goal is to achieve that perfect balance – a delicious char without sacrificing the juicy, flavorful meat inside. This is where the art of grill temperature control comes in.
1.3. Chemical Reactions: The Science of Flavour
There's a whole chemistry lesson happening on your grill! As the burger cooks, the Maillard reaction, a chemical reaction between sugars and amino acids, takes place. This creates that beautiful brown crust and develops those incredible flavour compounds that make burgers so irresistible.
In addition to the Maillard reaction, the breakdown of fat and the caramelization of sugars also contribute to the rich, complex flavour profile we love. The heat transforms the ingredients, creating a symphony of flavours that tantalize our taste buds.
(Part 2) Why Grill Temperature Matters: Achieving Perfection

Now that we've explored the science behind grilling, let's talk about the crucial element: grill temperature. As I mentioned earlier, the perfect temperature is key to creating that balanced, delicious burger. It's not just about hitting a specific number on the thermometer, but about understanding how different temperatures affect your burger and choosing the right one for your desired outcome.
2.1. Different Temperatures, Different Results: A Grilling Spectrum
Think of it like a spectrum. A hot grill sears the outside, creating a crispy crust and locking in the juices. A cooler grill allows for a more gentle cook, perfect for thick patties or burgers with more delicate ingredients. Here's a breakdown of different temperature ranges and their effects:
- High Heat (450-550°F / 232-288°C): This is for achieving a quick sear, a crispy crust, and locking in juices. Ideal for thin patties or burgers with minimal toppings. It’s like a quick burst of heat, perfect for a thin burger that cooks rapidly.
- Medium Heat (350-450°F / 177-232°C): This strikes a balance between searing and slow cooking, creating a more even cook and a juicy interior. This is often the ideal temperature for most burgers. It provides that beautiful char without drying out the meat.
- Low Heat (250-350°F / 121-177°C): This is for thicker patties or burgers with lots of toppings, ensuring they cook through without burning the exterior. It’s the gentle touch for thick patties or burgers loaded with toppings, ensuring they cook evenly without scorching.
2.2. My Personal Preference: Medium Heat for the Win
Personally, I'm a huge fan of medium heat for my burgers. I find it delivers that perfect balance of char and juiciness. I usually aim for around 375°F (190°C). It’s like Goldilocks – not too hot, not too cool, just right!
However, everyone has their own preference. Experiment and discover what works best for you. The beauty of grilling is its flexibility, so don't be afraid to adjust things and see what results you get.
(Part 3) Finding the Sweet Spot for Your Burger: A Step-by-Step Guide

Now that we’ve established the importance of grill temperature, how do you find that perfect sweet spot for your burger? Here's a step-by-step guide to help you get started:
3.1. Preheating is Key: A Hot Grill is a Happy Grill
Always preheat your grill for at least 15 minutes before you start grilling. This ensures that the grates are hot and ready to sear your burgers perfectly. You’ll know your grill is ready when you can hold your hand about an inch above the grates for 5 seconds without discomfort. A good preheat is crucial for that beautiful sear and consistent cooking.
3.2. Know Your Burger: Size Matters
The size and thickness of your burger will influence the cooking time and the best temperature to use. For thinner patties, you’ll want a higher temperature to avoid overcooking. For thicker patties, a lower temperature will help ensure even cooking.
Consider the toppings too. A burger with lots of toppings will take longer to cook through, so you’ll want to adjust your grilling time accordingly. Think of it like this: a thinner patty needs a quick, intense heat, while a thick patty needs a more gentle approach.
3.3. Check the Doneness: internal temperature Matters
The best way to know if your burger is cooked to your liking is to use a meat thermometer. Here are the recommended internal temperatures for different levels of doneness:
| Doneness | Internal Temperature (°F) | Internal Temperature (°C) |
|---|---|---|
| Rare | 125-130 | 52-54 |
| Medium Rare | 130-135 | 54-57 |
| Medium | 140-145 | 60-63 |
| Medium Well | 150-155 | 66-68 |
| Well Done | 160 | 71 |
Remember, these are just guidelines. The ideal temperature will vary depending on your personal preference and the type of burger you’re making.
If you don’t have a meat thermometer, you can use the “finger test”. This involves pressing the center of the burger and feeling for firmness:
- Rare: Soft and spongy
- Medium Rare: Soft but slightly firmer
- Medium: Firm and springy
- Medium Well: Very firm
- Well Done: Hard and dry
However, keep in mind that the finger test is a rough estimate, so it’s always best to use a meat thermometer for accuracy.
3.4. Don’t Forget the Grill Marks: The Sign of a Well-Cooked Burger
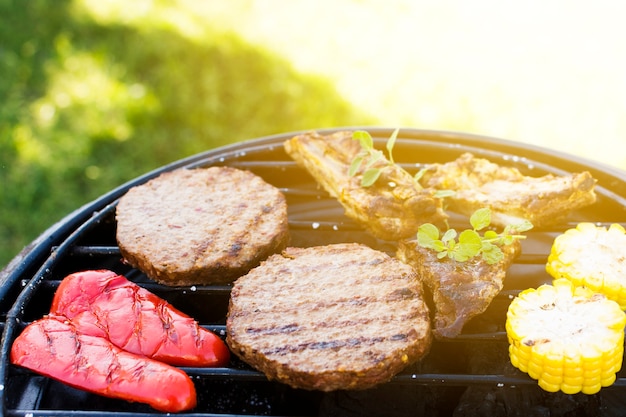
Those beautiful grill marks are more than just aesthetics. They're a sign of a well-cooked burger. To achieve those perfect grill marks, you need to ensure your grill is hot and that you're rotating the burger at the right time.
I usually grill for 3-4 minutes per side for a medium-rare burger. Then, I rotate the burger 90 degrees and cook for another 1-2 minutes to create those signature crosshatch marks.
(Part 4) Common grilling mistakes and How to Avoid Them: Learning From Our Errors
We've all been there, haven't we? We've all made some grilling mistakes, but that's how we learn. Here are some common grilling blunders to avoid and tips to help you conquer those burger grilling challenges:
4.1. Overcrowding the Grill: Give Your Burgers Space
Don’t try to cram all your burgers onto the grill at once. This will lower the temperature, making it difficult to achieve a good sear. Instead, grill your burgers in batches, giving each one enough space to cook evenly. Crowded burgers are like a traffic jam – they slow down the cooking process and won't get that beautiful sear.
4.2. Not Using a Meat Thermometer: Get Accurate Results
I know it's tempting to just eyeball it, but using a meat thermometer is the best way to ensure your burgers are cooked to perfection. This will save you from dry, overcooked burgers or those rare, undercooked ones. A meat thermometer takes the guesswork out of grilling and ensures that your burgers are cooked to your liking.
4.3. Not Letting the Burger Rest: Give It a Break
Once your burger is cooked, let it rest for 5-10 minutes before slicing and serving. This will allow the juices to redistribute, resulting in a more juicy and tender burger. Resting is like giving your burger a chance to breathe, allowing the juices to redistribute throughout the meat.
4.4. Flipping Too Often: Let It Be
Don’t be tempted to flip your burger every minute. This will disrupt the cooking process and make it difficult to achieve a nice crust. Instead, flip your burger only once or twice, depending on the thickness of the patty. Resist the urge to flip too often, and let the burger develop a nice crust on each side.
4.5. Not Cleaning the Grill: A Clean Grill is a Happy Grill
A clean grill is a happy grill. Before you start grilling, give your grates a good scrub with a wire brush to remove any food residue. This will prevent your burgers from sticking and give you those beautiful grill marks. A clean grill ensures that your burgers don't stick and that you get those signature grill marks.
(Part 5) Tips and Tricks for the Perfect Burger: Elevate Your Grilling Game
Now that you've got the basics down, here are some extra tips and tricks to take your burger game to the next level:
5.1. Seasoning Matters: A Touch of Flavour
Don’t underestimate the power of seasoning. A simple sprinkle of salt and pepper can make a world of difference. But feel free to get creative. Experiment with herbs, spices, and even a little bit of garlic powder.
Adding a pinch of smoked paprika, a dash of thyme, or a touch of cayenne pepper can create a truly unique flavour profile.
5.2. Don’t Overwork the Meat: Gentle Handling
Overworking the meat will result in a tough burger. Just form your patties gently, making sure they’re about ?? inch thick. You can use a burger press to create evenly shaped patties.
The key is to handle the meat as little as possible to ensure a tender, juicy burger.
5.3. The Art of the Bun: Toast It Right
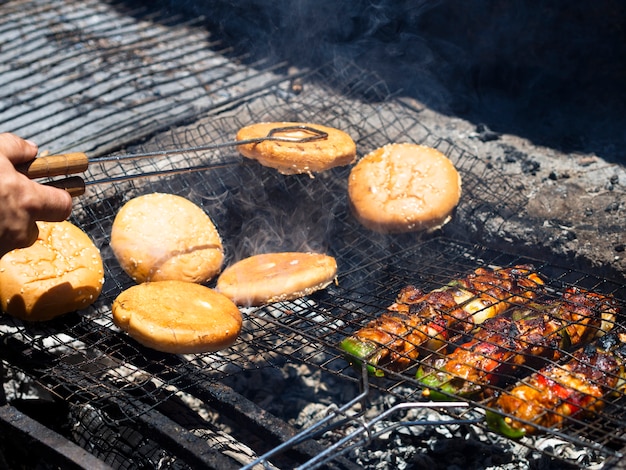
Don’t forget about the bun! Toasting the bun adds a delightful crunch and enhances the overall flavour. For a gourmet touch, try toasting the bun on the grill for a few minutes, giving it that smoky flavour.
A toasted bun elevates the burger experience, adding a satisfying texture and a smoky aroma.
5.4. Experiment with Toppings: Let Your Creativity Shine
Toppings are where you can really let your creativity shine. Classic choices like lettuce, tomato, and onion never fail, but there are countless possibilities. Try a slice of avocado, caramelized onions, bacon, or even a dollop of homemade guacamole.
Don't be afraid to experiment with different toppings, from traditional to gourmet. A burger is a blank canvas for your culinary creativity.
5.5. Grill It Like a Pro: Take It to the Next Level
If you’re feeling really ambitious, try grilling your own burger toppings. Grilled pineapple, onions, or peppers add a whole new dimension of flavour to your burgers.
Grilling your toppings adds a smoky flavour and creates a more cohesive flavour profile for your burger.
(Part 6) Beyond the Basic Burger: Get Creative
Once you’ve mastered the art of the classic burger, it’s time to explore some exciting variations. Here are a few ideas to get you started:
6.1. Go Gourmet: Elevate Your Burger
Elevate your burger game with premium ingredients. Try a wagyu beef patty, a truffle aioli, or a slice of artisanal cheese.
Don't be afraid to splurge on high-quality ingredients. A gourmet burger is a special treat that will impress your guests.
6.2. Get Creative with Flavours: Explore Different Flavour Profiles
Experiment with different spices and herbs. Try adding some smoked paprika to your burger mix or incorporating some fresh rosemary into your toppings.
Flavour is subjective, so find what you love. There are endless combinations to explore, from bold and spicy to earthy and aromatic.
6.3. Think Outside the Bun: Break the Mould
Break the mould and try serving your burgers on something other than a bun. A bed of arugula, a slice of grilled bread, or even a lettuce wrap are all delicious alternatives.
Think creatively about how you present your burgers. There are many ways to enjoy a burger without using a bun.
(Part 7) Burger Grilling FAQs: The Answers You Need
Let’s answer some common burger grilling questions to help you become a true grilling maestro.
7.1. How do I keep my burgers from sticking to the grill?
Oil your grill grates before you start grilling. This will create a non-stick surface and help your burgers release easily.
A light coating of oil on the grates prevents sticking and ensures that your burgers cook evenly without tearing.
7.2. Should I use a gas grill or a charcoal grill?
It’s a matter of preference. Gas grills offer more precise temperature control, while charcoal grills provide a smoky flavour. Experiment with both and see which you prefer.
Both gas and charcoal grills have their pros and cons. It depends on what you prioritize: precise temperature control or smoky flavour.
7.3. How long should I grill my burgers?
The grilling time depends on the thickness of the patty and the desired level of doneness. Use a meat thermometer to ensure your burgers are cooked to your liking.
The thickness of the patty and your desired level of doneness will determine how long to grill your burgers. A meat thermometer is your best friend for ensuring accurate cooking.
7.4. What’s the best way to clean my grill after grilling?
Once your grill is cool, use a wire brush to scrub the grates. You can also use a grill cleaner to remove any stubborn residue.
Regular cleaning of your grill ensures that it remains in good condition and produces delicious results.
7.5. Can I grill my burgers in advance?
Yes, you can grill your burgers ahead of time and reheat them later. Just be sure to store them in an airtight container in the refrigerator. To reheat, simply place them on a baking sheet in a preheated oven at 350°F (177°C) until heated through.
Grilling your burgers in advance is a great time-saving tip, but be sure to store them properly and reheat them thoroughly.
(Part 8) Grilling for the Soul: More Than Just Food
At the end of the day, grilling is more than just cooking food. It’s about creating memories, sharing meals with loved ones, and enjoying the simple pleasures of life.
So, fire up your grill, gather your favourite ingredients, and let the good times roll. Remember, there’s no right or wrong way to grill. It’s about having fun, experimenting, and finding what works best for you. Happy grilling!
Everyone is watching

Perfect Rice Every Time: The Ultimate Guide to Cooking Rice
Cooking TipsAs a self-proclaimed foodie, I've always been a bit obsessed with rice. It's the foundation of countless cuisi...

Prime Rib Roast Cooking Time Chart: Per Pound Guide
Cooking TipsPrime rib roast. Just the name conjures images of lavish dinners, crackling fires, and hearty laughter. It’s ...

The Ultimate Guide to Cooking Asparagus: Tips, Techniques, and Recipes
Cooking TipsAsparagus. The mere mention of this spring delicacy conjures up images of vibrant green spears, crisp and burs...

Ultimate Guide to Cooking the Perfect Thanksgiving Turkey
Cooking TipsThanksgiving. Just the word conjures up images of overflowing tables laden with delicious food, the scent of r...

How Long to Bake Potatoes in the Oven (Perfect Every Time)
Cooking TipsBaked potatoes are a staple in my kitchen. They're incredibly versatile, delicious, and surprisingly easy to m...
