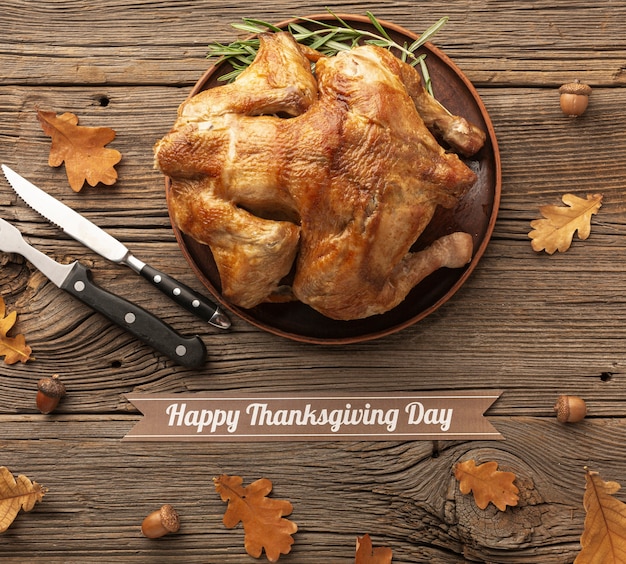
Right, let's talk turkey! What's Thanksgiving without a magnificent, golden-brown bird taking centre stage, right? We all dream of a turkey that's juicy, succulent, and cooked to absolute perfection. That's the kind of turkey that makes everyone go "wow" and leaves you feeling like a culinary hero. Well, let me tell you, after years of trial and error, I've finally cracked the code, and I'm here to share my secrets for a flawless thanksgiving turkey.
Part 1: The Turkey

Choosing the Right Bird
First things first, you need to choose the right bird. Now, I'm a big fan of free-range turkeys - they tend to have a bit more flavour, especially if they've been allowed to roam and peck at the ground. But honestly, whatever you choose, make sure it's fresh, plump, and has a good amount of white meat and dark meat. You want a balance of textures and flavours for your thanksgiving feast.
Size Matters
Don't forget about size! A good rule of thumb is about 1lb of turkey per person. You don't want to end up with a tiny bird that's devoured before anyone gets a second helping, or a massive one that takes forever to cook and leaves you with a mountain of leftovers.
What to Look for
When you're at the butcher or supermarket, take a moment to really look at the turkey. Here are a few things to consider:
The skin: Look for a turkey with smooth, unblemished skin.
The breast: The breast should be full and plump, not flat or sunken.
The legs: The legs should be firm and well-shaped, not thin or spindly.
Part 2: The Prep

Brining: The Secret Weapon
Now, this is where things get really interesting. Brining is, in my opinion, the key to juicy, flavourful turkey. It's a simple process, really. You basically soak the turkey in a salt water solution for a few hours, which helps to tenderise the meat and lock in moisture. It's like giving your turkey a spa day, making it super hydrated and ready to shine in the oven.
Here's what you need to know about brining:
The Brine Recipe: A simple brine is made with salt, water, and a few aromatics like peppercorns, bay leaves, and even a few sprigs of thyme or rosemary. Some people add sugar to their brine, but I find that the salt does the job just fine.
Brining Time: You can brine a turkey for anywhere from 4 to 24 hours. A shorter brine, like 4-8 hours, is great for a smaller turkey or if you're short on time. For a larger turkey, 12-24 hours is ideal.
Storing the Brine: You'll need a container large enough to hold the turkey completely submerged in the brine. A large stockpot or even a cooler works great. Make sure the container is clean and food-safe.
After the Brine: After brining, remove the turkey from the brine and pat it dry with paper towels. This helps ensure the skin gets nice and crispy when roasted.
The Great Stuffing Debate
Ah, stuffing! Now, this is a controversial topic. Some people swear by stuffing the turkey, others (like me) prefer to cook it separately. It's all about personal preference, really.
Here's a breakdown of the pros and cons:
Stuffing the Turkey: The classic approach, stuffing the turkey adds a lot of flavour and moisture. However, it can also make the turkey take longer to cook, as the stuffing needs to reach a safe internal temperature.
Cooking Stuffing Separately: This method allows the stuffing to cook thoroughly and ensures a safer final product. Plus, you can cook the stuffing in a casserole dish or even a bread loaf pan, which makes for a prettier presentation.
Giving the Bird a Spa Day
Before you pop the turkey in the oven, give it a good wash and dry it thoroughly. This will help ensure the skin crisps up nicely. Then, rub it all over with some butter or olive oil and season it generously. Don't be shy with the salt and pepper! I like to add a little bit of garlic powder, onion powder, and paprika for extra flavour.
Part 3: The Roast

Oven Temperature and cooking time
Right, now it's time to get your oven preheating. For a perfect roast, 325 degrees Fahrenheit (165 degrees Celsius) is the sweet spot. It's a low and slow method that allows the turkey to cook evenly and the juices to redistribute, resulting in a more succulent bird.
As for cooking time, well, that depends on the size of your turkey. A good rule of thumb is to allow about 15 minutes per pound. But it's best to use a meat thermometer to ensure your turkey is cooked through.
Don't Forget the Thermometer
Now, don't just rely on your oven timer, folks! Use a meat thermometer to ensure the turkey is cooked through. The USDA recommends an internal temperature of 165 degrees Fahrenheit (74 degrees Celsius) for both the breast and thigh. I find it's best to check the temperature in both areas to make sure it's perfectly cooked.
roasting tips
Here are a few tips for achieving a perfect roast:
Use an oven-safe roasting pan. This will help to ensure even cooking and prevent the turkey from sticking.
Don't overcrowd the pan. If you're roasting a large turkey, you might need to use a second roasting pan.
Don't be afraid to experiment with seasonings. I've found that adding a little bit of citrus zest or fresh herbs can really elevate the flavour. Try a lemon-herb rub or a combination of rosemary and thyme.
Check the turkey regularly. It's important to make sure the turkey is cooking evenly. If it's browning too quickly, you can cover it with foil.
Don't be afraid to ask for help. If you're feeling overwhelmed, don't hesitate to ask a friend or family member for assistance.
Part 4: Let It Rest
Once the turkey is cooked, don't be tempted to carve it straight away! Let it rest for at least 15 minutes, covered with tin foil. This allows the juices to redistribute, resulting in a much more succulent and juicy turkey. Think of it as giving the turkey a chance to relax and recover from its oven journey.
Part 5: Carving the Turkey
Finally, it's time to carve the turkey! This is where practice makes perfect. A sharp carving knife is essential. I like to start with the breast, working my way down to the legs and thighs. If you're feeling adventurous, you can try carving out individual slices, but remember, the most important thing is to serve a beautiful, well-presented turkey.
Carving Tips
Use a sharp knife: A dull knife will tear the meat and make for an uneven carve.
Start with the breast: This is the easiest part to carve. Just slice it across the grain of the meat.
Work your way down: Once you've carved the breast, move on to the legs and thighs. You can cut the legs off at the joint, then carve the thighs into smaller pieces.
Don't be afraid to ask for help: If you're feeling overwhelmed, ask a friend or family member to help you carve the turkey.
Part 6: Gravy Time
Now, no Thanksgiving turkey is complete without gravy! I'm a big fan of making gravy from the turkey drippings, as it adds a wonderful depth of flavour. You can add a splash of wine, a few herbs, and even a little bit of flour to thicken it up.
Making the Best Gravy
Use Turkey Drippings: The drippings from the roasting pan are full of flavor.
Deglaze the Pan: After you remove the turkey, add a little bit of wine or broth to the pan and scrape up the browned bits. This will add even more flavor to your gravy.
Thicken the Gravy: You can thicken your gravy with flour, cornstarch, or even a roux. Just whisk a few tablespoons of your thickening agent into a little bit of cold liquid, then whisk it into the hot drippings.
Season to Taste: Once your gravy is thickened, season it with salt, pepper, and any other herbs or spices you like.
Part 7: Leftovers
Don't forget about the leftovers! turkey sandwiches are a classic, but you can also use leftover turkey in soups, salads, and even casseroles. There's no need to waste a single morsel of that delicious turkey.
Leftover turkey recipes
turkey soup: A hearty and comforting soup, perfect for a cold day.
turkey salad: A classic sandwich filling, made with leftover turkey, mayonnaise, celery, and onion.
Turkey Casserole: A delicious and easy casserole, made with leftover turkey, vegetables, and cheese.
Part 8: Tips and Tricks
Here are a few extra tips to help you nail your Thanksgiving turkey:
Use an oven-safe roasting pan. This will help to ensure even cooking and prevent the turkey from sticking.
Don't overcrowd the pan. If you're roasting a large turkey, you might need to use a second roasting pan.
Don't be afraid to experiment with seasonings. I've found that adding a little bit of citrus zest or fresh herbs can really elevate the flavour. Try a lemon-herb rub or a combination of rosemary and thyme.
Check the turkey regularly. It's important to make sure the turkey is cooking evenly. If it's browning too quickly, you can cover it with foil.
Don't be afraid to ask for help. If you're feeling overwhelmed, don't hesitate to ask a friend or family member for assistance.
Part 9: FAQs
1. How long do I need to brine my turkey?
I usually brine my turkey for about 12 hours. This is enough time for the salt to penetrate the meat and tenderize it. You can also brine for longer, up to 24 hours, but be careful not to over-brine.
2. What if my turkey is too big for my oven?
If your turkey is too big for your oven, you can roast it in two parts. Simply roast the breast separately from the legs and thighs. You can also try roasting the turkey upside down to ensure the breast cooks evenly.
3. What if my turkey is not fully cooked?
If your turkey is not fully cooked, you can continue to roast it until it reaches the desired temperature. Just be sure to check it regularly and don't overcook it.
4. What can I do with leftover turkey?
The possibilities are endless! You can use leftover turkey in sandwiches, soups, salads, casseroles, or even pizza. Get creative and have fun with it!
5. Can I freeze leftover turkey?
Absolutely! Just make sure to wrap it tightly in plastic wrap or aluminum foil and freeze it for up to 3 months.
Part 10: My Thanksgiving Turkey Story
You know, every year, I tell myself I'm going to be completely relaxed and organised for Thanksgiving. But, like clockwork, there's always that moment where I'm frantically stuffing the turkey, while the gravy is bubbling over on the stove, and the guests are starting to arrive. It's a chaotic, but wonderful, tradition.
But, you know what? Every year, I manage to pull it off. And when I see the smiles on everyone's faces as they tuck into my juicy, perfectly cooked turkey, I know it was all worth it.
So, there you have it, my friends! My complete guide to Thanksgiving turkey perfection. Remember, it's not about being a culinary master, it's about sharing a delicious meal with those you love. Now, go forth and conquer your Thanksgiving turkey!
Everyone is watching

Perfect Rice Every Time: The Ultimate Guide to Cooking Rice
Cooking TipsAs a self-proclaimed foodie, I've always been a bit obsessed with rice. It's the foundation of countless cuisi...

Prime Rib Roast Cooking Time Chart: Per Pound Guide
Cooking TipsPrime rib roast. Just the name conjures images of lavish dinners, crackling fires, and hearty laughter. It’s ...

The Ultimate Guide to Cooking Asparagus: Tips, Techniques, and Recipes
Cooking TipsAsparagus. The mere mention of this spring delicacy conjures up images of vibrant green spears, crisp and burs...

Ultimate Guide to Cooking the Perfect Thanksgiving Turkey
Cooking TipsThanksgiving. Just the word conjures up images of overflowing tables laden with delicious food, the scent of r...

How Long to Bake Potatoes in the Oven (Perfect Every Time)
Cooking TipsBaked potatoes are a staple in my kitchen. They're incredibly versatile, delicious, and surprisingly easy to m...
