Let's talk steak, and more specifically, the king of steaks – tenderloin. There's just something about a perfectly cooked tenderloin that makes my mouth water. It's the epitome of juicy, succulent, and melt-in-your-mouth deliciousness. You know the feeling, right? That first bite, the way the juices run down your chin…pure heaven!
But, let's be real, cooking a tenderloin can be a bit intimidating. I've definitely had my fair share of mishaps – dry, tough, overcooked…you name it! But over the years, I've learned a thing or two, and now, I can confidently say that cooking a tenderloin is within everyone's reach. So, grab a glass of your favourite red wine, put on some relaxing tunes, and let's dive into the world of tenderloin together!
(Part 1) The Right Cut for the Job

First things first, you need to choose the right tenderloin. This is like choosing the right weapon for the battle ahead, right? And trust me, this is a battle worth fighting!
Picking the perfect tenderloin
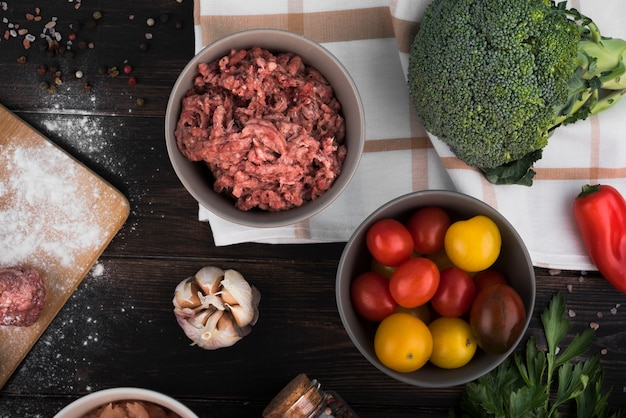
The key to a great tenderloin is a good cut. You want a tenderloin that's thick and marbled with just the right amount of fat. Don't be afraid to ask your butcher for advice. They're the experts, after all! A good butcher will be happy to help you choose the perfect tenderloin for your needs, and they can even trim it for you to ensure it cooks evenly.
Here's what to look for:
- Color: A good tenderloin should be a deep red color, with a bit of marbling. Avoid any cuts that are too pale or too dark, as this could indicate that the meat has been improperly stored.
- Fat: Look for a tenderloin that has a good amount of marbling, which means there are streaks of fat running through the meat. This fat adds flavour and keeps the meat moist during cooking. A tenderloin with minimal marbling may end up dry and tough.
- Texture: The tenderloin should be firm to the touch, but not too hard. Avoid any tenderloins that feel soft or spongy, as this can be a sign of poor quality or spoilage.
Size Matters
Now, let's talk size. How much you buy really depends on how many people you're feeding. But, I find it's always better to overestimate than underestimate. Trust me, leftovers are never a bad thing! You can always slice the tenderloin into smaller pieces later and serve them with different sides, so don't be afraid to get a bit extra.
Here’s a little guide I use:
| Guests | Tenderloin Size |
|---|---|
| 2-3 | 1-1.5 lbs |
| 4-6 | 2-3 lbs |
| 7-9 | 3-4 lbs |
You can always freeze any leftovers for another delicious meal later. Just wrap the tenderloin tightly in plastic wrap or aluminum foil and freeze for up to 3 months. To thaw, place it in the refrigerator overnight or thaw it in a bowl of cold water.
(Part 2) The Art of Preparation

Alright, so you’ve got your tenderloin. Now, let's get down to business with the preparation. This is where the magic really happens!
Seasoning the Beast
I'm a firm believer in keeping things simple when it comes to seasoning. I mean, why overcomplicate things? A good quality tenderloin needs very little to shine.
My go-to seasoning is a simple mix of salt, pepper, and a touch of garlic powder. But, feel free to get creative and add other spices you enjoy. Paprika, onion powder, herbs, even a little bit of chili powder can add some zing. Just remember, a little goes a long way!
Here are some additional seasoning ideas:
- Herbs: Fresh rosemary, thyme, or oregano are fantastic with beef.
- Smoked Paprika: Adds a rich, smoky depth of flavour.
- Mustard: A good Dijon mustard can add a tangy kick to your tenderloin.
Patting Dry is Key!
Once you’ve seasoned your tenderloin, it’s time to pat it dry. This is a crucial step that many people miss, but it’s so important. The water on the surface of the meat can hinder the browning process and lead to a tough, chewy steak. So, make sure to pat it dry with paper towels before searing!
Rest, Rest, Rest!
One of the best things you can do for a tenderloin is to let it rest before cooking. It allows the meat to come to room temperature, making it easier to cook evenly. Aim for at least 30 minutes, or even an hour if you have the time. You can thank me later!
(Part 3) The Art of Searing

Now comes the fun part – searing! This is where we create that beautiful crust and lock in the flavour. So, let’s get to it!
Hot and Heavy
You need a hot pan, like super hot. Cast iron is my personal favourite, but any heavy-bottomed pan will do. Make sure it’s screaming hot before you even think about adding your tenderloin.
Adding Oil
Don't skimp on the oil! You need enough to coat the bottom of the pan and ensure your tenderloin gets a good sear on all sides. I usually use a neutral oil, like canola or vegetable oil. Don't use olive oil, as it has a low smoke point and will start to smoke and burn before the pan is hot enough.
Searing Perfection
Here's the key to searing a tenderloin: you want to sear it for a short amount of time on each side, about 3-4 minutes per side. This will create a beautiful crust and lock in the juices. Don't overcrowd the pan or you'll lower the temperature and make the meat steam instead of sear.
You can use tongs to help you sear the tenderloin evenly. Rotate the tenderloin every minute or so to ensure a consistent crust on all sides.
(Part 4) Time to Cook it Low and Slow
After searing, we're going to cook the tenderloin low and slow. This ensures it's cooked perfectly throughout, without getting tough or dry. Let’s get to it!
The Oven is Your Friend
You can finish cooking your tenderloin in the oven, set to a low temperature. I usually cook it at 325 degrees Fahrenheit for about 15-20 minutes, depending on the size and thickness of the meat. The key is to use a meat thermometer to ensure it's cooked to your desired level of doneness.
Place the tenderloin on a wire rack set over a baking sheet to allow air to circulate around the meat and cook evenly.
Resting is Crucial
Once the tenderloin is cooked, let it rest for at least 10 minutes before slicing. This allows the juices to redistribute throughout the meat, making it even more tender and juicy. You can cover it loosely with foil to keep it warm.
(Part 5) Doneness is Everything!
Alright, here comes the moment of truth! Checking the doneness of your tenderloin. You want to ensure it’s cooked perfectly – not too raw, not too well done!
Using a Thermometer
I'm a big fan of using a meat thermometer. It's the most reliable way to check for doneness and avoid overcooking. You want the internal temperature of the tenderloin to reach the following temperatures:
- Rare: 125-130°F
- Medium-rare: 130-135°F
- Medium: 140-145°F
- Medium-well: 150-155°F
- Well-done: 160°F
Insert the meat thermometer into the thickest part of the tenderloin, making sure it doesn't touch any bone.
The Finger Test
If you don't have a meat thermometer, you can use the finger test. Press on the centre of the tenderloin. If it feels soft, it's rare. If it feels firm, it's medium. But, remember, this is just a rough guide. It's best to use a meat thermometer to ensure your tenderloin is cooked to your liking.
(Part 6) Serving with Style
You’ve got your tenderloin cooked to perfection. Now, let’s talk about serving it up in style!
Slicing and Dicing
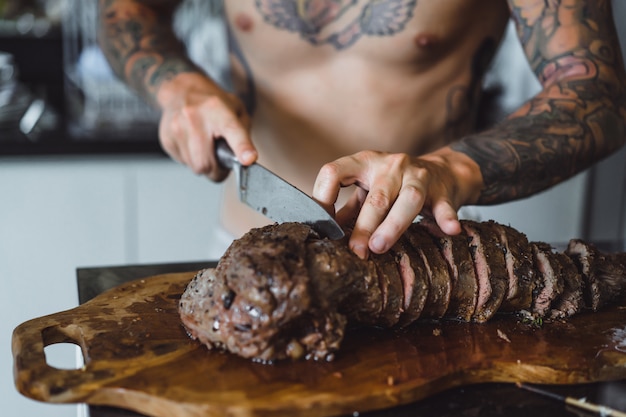
Once your tenderloin has rested, it’s time to slice it! I find that a sharp, serrated knife works best. Slice it against the grain, which means slicing across the muscle fibers, to make it even more tender and easier to chew.
You can slice the tenderloin into thick medallions, or you can cut it into thinner pieces for a more delicate presentation.
side dishes to Compliment
The beauty of tenderloin is that it pairs beautifully with a wide variety of side dishes. Here are a few of my favourites:
- mashed potatoes: Classic and comforting. You can't go wrong with creamy mashed potatoes!
- Roasted Vegetables: roasted asparagus, broccoli, or Brussels sprouts add a nice earthy counterpoint to the richness of the tenderloin.
- Sautéed Mushrooms: A simple and elegant side dish. I love the earthy flavour of sautéed mushrooms!
- Garlic Bread: Who doesn't love a side of garlicky bread with their steak? It's a perfect way to soak up all the delicious juices.
- Salad: A fresh salad with a light vinaigrette adds a nice contrast to the richness of the tenderloin.
- Creamed Spinach: A rich and creamy side dish that complements the tenderloin perfectly.
(Part 7) Tenderloin Variations
Let’s be real, there's no single “right way” to cook tenderloin. Get creative and experiment! Here are a few ideas to get you started.
Mediterranean Flavours
Try this: Season your tenderloin with a mix of herbs like rosemary, thyme, and oregano, add a touch of lemon zest, and a sprinkle of olive oil. Pair it with a Mediterranean salad, and you've got yourself a taste of paradise. You can also add a few slices of lemon to the pan during the searing process for a burst of citrus flavour.
Asian Inspiration
For an Asian twist, marinade your tenderloin in a mixture of soy sauce, ginger, garlic, and honey. Then, sear it in a hot pan and serve it with stir-fried vegetables and a side of rice. You can also add a touch of sesame oil to the marinade for a nutty flavour.
Spicy Kick
Looking for a bit of heat? Try a Cajun or Southwestern-inspired tenderloin. Season it with a blend of paprika, cumin, chili powder, and cayenne pepper. Serve it with black beans, corn, and a side of guacamole. You can also add a touch of smoked paprika to the seasoning for a deeper flavour.
Creamy Sauce
Elevate your tenderloin with a creamy sauce. While the tenderloin is resting, deglaze the pan with a little red wine or beef broth, scraping up any browned bits. Add a dollop of cream and simmer until thickened. Pour the sauce over the sliced tenderloin and serve with your favourite sides.
(Part 8) FAQs: Your Tenderloin Questions Answered
I know, you’ve got questions. Let’s tackle them head-on!
1. What is the best way to store tenderloin?
You want to keep your tenderloin fresh. So, store it in the refrigerator for up to 3 days. If you need to keep it longer, wrap it tightly in plastic wrap or aluminum foil and freeze it for up to 3 months. To thaw the tenderloin, place it in the refrigerator overnight or thaw it in a bowl of cold water. Don't thaw it at room temperature, as this can lead to bacteria growth.
2. Can you cook tenderloin in a slow cooker?
You can, but it's not ideal. Tenderloin is best cooked quickly over high heat to develop a nice crust and lock in the juices. A slow cooker tends to cook the meat at a lower temperature, which can result in a less flavorful and tender steak. However, if you're short on time, you can cook it in a slow cooker, but make sure to sear it in a pan first to develop a crust.
3. What if my tenderloin is too thick?
No worries! You can easily slice your tenderloin into thinner pieces. This will help it cook more evenly and reduce the cooking time. Just be sure to sear the pieces on all sides before cooking them in the oven.
4. Can you grill a tenderloin?
Absolutely! Grilling is a fantastic way to cook a tenderloin. Just make sure your grill is preheated to high heat, and cook the tenderloin for about 5 minutes per side, or until it reaches your desired level of doneness. You can also use indirect heat for a more even cook. If you're using a gas grill, preheat the grill with all burners on high heat. If you're using a charcoal grill, use a chimney starter to get the coals glowing hot and then spread them evenly over the bottom of the grill.
5. How do you reheat leftovers?
You can reheat leftover tenderloin in a skillet over medium heat or in the oven at 350 degrees fahrenheit for about 10 minutes. You can also add a little bit of broth or water to the skillet to help keep the meat moist. You can also reheat slices of tenderloin in the microwave, but this may result in a slightly drier texture.
(Part 9) Final Thoughts
Alright, there you have it! The ultimate guide to perfectly cooked tenderloin.
Remember, the key is to use high-quality meat, season it simply, and cook it to your desired level of doneness. And don't be afraid to experiment! There are endless possibilities when it comes to cooking tenderloin.
So, next time you're looking for a special occasion meal, give this guide a try. I promise, you won't be disappointed. Happy cooking!
Everyone is watching

Perfect Rice Every Time: The Ultimate Guide to Cooking Rice
Cooking TipsAs a self-proclaimed foodie, I've always been a bit obsessed with rice. It's the foundation of countless cuisi...

Prime Rib Roast Cooking Time Chart: Per Pound Guide
Cooking TipsPrime rib roast. Just the name conjures images of lavish dinners, crackling fires, and hearty laughter. It’s ...

The Ultimate Guide to Cooking Asparagus: Tips, Techniques, and Recipes
Cooking TipsAsparagus. The mere mention of this spring delicacy conjures up images of vibrant green spears, crisp and burs...

Ultimate Guide to Cooking the Perfect Thanksgiving Turkey
Cooking TipsThanksgiving. Just the word conjures up images of overflowing tables laden with delicious food, the scent of r...

How Long to Bake Potatoes in the Oven (Perfect Every Time)
Cooking TipsBaked potatoes are a staple in my kitchen. They're incredibly versatile, delicious, and surprisingly easy to m...
