Ah, the strip steak. A classic for a reason, right? I mean, who doesn't love a juicy, perfectly seared piece of this delectable cut? But let's be real, cooking a steak to perfection can be a bit of a culinary tightrope walk. You've got your well-done folks, your medium-rare enthusiasts, and then everyone else who just wants a good, juicy steak without the stress of overcooking it.
Well, fear not, my fellow steak lovers! I'm here to spill all my secrets to mastering the art of strip steak cooking, from choosing the right cut to nailing that perfect sear. This guide is all about ensuring you get that perfect, juicy steak every single time, so grab your apron, and let's get cooking!
(Part 1) choosing the right steak

Finding the Perfect Strip
First things first, let's talk about the steak itself. Now, I'm all for supporting local butchers, but you can definitely find some decent strip steaks in the supermarket too. Just remember, you want to look for a cut that's got a good amount of marbling, which is basically those beautiful streaks of fat that'll make your steak extra juicy and flavorful. You'll know you've got a good one when you see it.
Here's a closer look at what to consider when choosing your strip steak:
- Marbling: The more marbling, the better! Look for a steak with evenly distributed marbling throughout. This will add richness and tenderness to your steak. A good butcher can point you in the right direction if you're unsure.
- Colour: The steak should be a deep, rich red colour. Avoid any grey or brown spots, as these indicate that the meat may not be fresh.
- Texture: The steak should feel firm and springy to the touch. It shouldn't be mushy or overly soft.
The Importance of Thickness
Don't underestimate the thickness of your steak, folks! You want one that's at least an inch thick, maybe even a bit thicker. Why? Because a thicker steak allows for more even cooking, preventing it from getting too dry. Trust me, there's nothing worse than a dry, tough steak! It's all about getting that perfect balance between a nice sear and a juicy, tender center.
(Part 2) Prepping for Perfection

Let It Rest
Right, once you've got your beautiful steak, let it hang out at room temperature for about 30 minutes. It's all about getting it to that perfect temperature. This will also help ensure more even cooking. Think of it like warming up your car before you hit the road. You want to avoid shocking the steak with sudden temperature changes, which can lead to uneven cooking.
Seasoning Secrets
Now, the seasoning. This is where you can really personalize your steak. A simple sprinkle of salt and pepper will always do the trick, but if you're feeling adventurous, you can try different herbs and spices. I've experimented with smoked paprika, garlic powder, and even a little bit of cayenne pepper for a bit of kick. Just be sure to season liberally on both sides and even a little bit on the edges!
Don’t Forget the Oil
One thing I always do before cooking my steak is to give it a good rub with a high-heat oil like avocado oil or grapeseed oil. This helps create a beautiful sear and keeps the steak from sticking to the pan. You want that nice, crispy crust without having your steak stick to the pan like glue. Don't be shy, a good coat of oil is your friend!
(Part 3) cooking techniques

The Power of the Sear
Alright, time for the star of the show – the sear! You're going to want a cast iron skillet or a grill that's nice and hot. We're talking smoking hot! You want that steak to sizzle and sear, creating those beautiful, crispy edges. This is where the magic happens, folks. That sear locks in the juices and develops a gorgeous crust that adds so much flavor.
Tips for a Perfect Sear:
- Heat: Your pan or grill should be scorching hot before you add the steak. You're aiming for a pan that's almost too hot to touch. Don't be afraid to let it get super hot!
- Don’t overcrowd the pan: Give your steak plenty of space to cook evenly. If you're cooking multiple steaks, cook them in batches. You don't want to overcrowd the pan, or the steaks will steam instead of sear, and you'll lose that beautiful crust.
- Don’t move it!: Resist the urge to fiddle with the steak once you've placed it on the pan. Let it cook undisturbed for a few minutes before flipping. This is crucial for getting that nice, even sear.
- Flip only once: A good sear on both sides is all you need for a perfectly cooked steak. Resist the urge to flip it multiple times. You'll end up overcooking the steak and losing the juiciness.
The Right Temperature
Now, the temperature is crucial. It's not just about how long you cook the steak; it's about getting that internal temperature just right. This is where a meat thermometer becomes your best friend.
Here's a quick guide to steak temperatures, but remember, these are just guidelines. Ultimately, you want to cook the steak to your personal preference:
| Doneness | Internal Temperature (°F) |
|---|---|
| Rare | 125-130 |
| Medium Rare | 130-135 |
| Medium | 140-145 |
| Medium Well | 150-155 |
| Well Done | 160 |
Don’t Overdo It
Remember, your steak will continue to cook even after you take it off the heat, so don’t go overcooking it! This is where a lot of people go wrong. They take the steak off the heat when it's still a little undercooked, but then it continues to cook and ends up overdone. So, err on the side of caution, and take it off the heat a few degrees below your desired temperature.
(Part 4) Rest and Serve
Let It Rest Again
Once your steak is cooked to your liking, let it rest on a cutting board for at least 5 minutes before cutting. This allows the juices to redistribute throughout the steak, resulting in a more tender and juicy piece of meat. This step is essential for that perfect, melt-in-your-mouth experience.
Cutting Tips
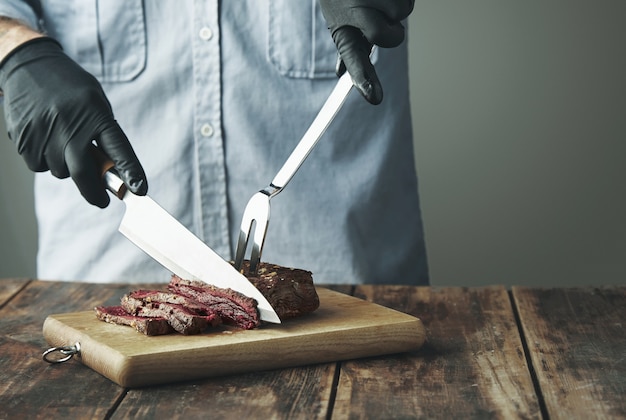
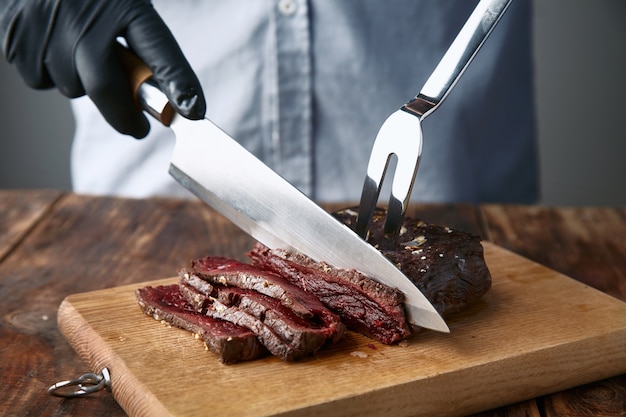
Now, when it comes to cutting your steak, you want to cut against the grain. This means slicing perpendicular to the muscle fibres, resulting in more tender bites. It's all about getting those nice, even pieces that are easy to chew.
What to Serve It With
Well, there's nothing quite like a perfectly cooked strip steak, but you can definitely elevate it with some amazing sides. Personally, I love a simple salad, some roasted vegetables, and a good bottle of red wine. But there are endless possibilities. You can go classic with mashed potatoes and asparagus, get creative with a chimichurri sauce, or even try a spicy Asian-inspired slaw.
(Part 5) Common steak mistakes
Overcrowding the Pan
We've talked about this already, but it's worth repeating. You want to give your steak plenty of room to breathe in the pan, so don't overcrowd it. If you're cooking multiple steaks, cook them in batches. You want each steak to have its own space to sear properly.
Flipping Too Often
Again, resist the urge to flip your steak every two seconds. Let it sit undisturbed for a few minutes on each side. You'll get a much better sear and a more evenly cooked steak.
Not Using a Thermometer
This is a mistake I used to make all the time. Don't rely on your gut feeling when it comes to cooking steak. Invest in a good meat thermometer! You'll be able to cook your steak to perfection every time. It's a game-changer for consistent results.
Not Letting It Rest
I've also made this mistake, and it's a real bummer! Give your steak a good rest after cooking. It will help the juices redistribute, resulting in a more tender and flavorful piece of meat. It's a simple step but makes a huge difference.
(Part 6) The Grill Master’s Guide
Getting Your Grill Ready
If you're grilling your steak, make sure your grill is nice and hot! Get those coals blazing or crank up the gas. A good hot grill will sear the steak beautifully and create those delicious grill marks. It's all about that intense heat that sears the outside while keeping the inside juicy and tender.
The Grill Marks
To get those perfect grill marks, you need to make sure your grill grates are clean. Give them a good scrub with a wire brush, and then heat them up. You want those grates nice and hot, so the steak gets those lovely grill marks.
Don’t Forget the Thermometer
Even when you're grilling, using a meat thermometer is still important. It helps ensure your steak is cooked to your liking. You want to make sure the steak is cooked evenly throughout, not just on the outside.
(Part 7) Beyond the Basics
Pan-Seared with Herb Butter
This is a real crowd-pleaser! After you've seared your steak, you can add a knob of herb butter to the pan. Let it melt and then baste the steak with the butter. It adds a burst of flavor and richness. You can use store-bought herb butter or make your own with your favorite herbs.
Steak Fajitas
Who doesn't love fajitas? After you've seared your steak, cut it into strips and toss them with bell peppers and onions. Serve it all with tortillas, salsa, and guacamole. It's a fun and flavorful way to enjoy your steak.
Steak Salad
This is a lighter option. Slice your cooked steak thin and add it to a bed of mixed greens with your favourite toppings like cherry tomatoes, cucumbers, and a vinaigrette dressing. It's a great way to enjoy a hearty steak without feeling too heavy.
(Part 8) FAQs
1. What’s the best cut of steak for grilling?
For grilling, I always recommend a strip steak. It's got a good amount of marbling and a nice, thick cut, making it perfect for grilling. It holds up well to the heat and develops that beautiful, crispy crust.
2. How long should I sear a steak?
A good sear on each side should take about 3-4 minutes. But remember, it depends on the thickness of the steak and the heat of your pan or grill. You'll want to keep a close eye on it and make sure it's getting a good, even sear.
3. How do I tell if my steak is done?
The best way to tell if your steak is done is to use a meat thermometer. But you can also use the “finger test”. Press on the centre of your steak. If it feels firm, it's medium-well. If it's soft, it's medium-rare. Just remember, this is a rough guide, and a meat thermometer is always more accurate.
4. Can I cook a steak on a cast iron pan?
Absolutely! A cast iron pan is great for cooking steak. Just make sure it's nice and hot before you add the steak. You want that pan screaming hot for a perfect sear.
5. What’s the best way to store leftover steak?
Wrap the leftover steak tightly in plastic wrap and store it in the refrigerator for up to 3 days. You can also freeze it for up to 3 months. Just make sure to wrap it tightly to prevent freezer burn.
There you have it, folks! My ultimate guide to cooking the perfect strip steak. You've got the tools, the tips, and the knowledge – now it's time to get cooking. Remember, practice makes perfect! So fire up that grill, heat up that pan, and get ready to enjoy a steak that's juicy, tender, and absolutely delicious. Happy cooking!
Everyone is watching

Prime Rib Roast Cooking Time Chart: Per Pound Guide
Cooking TipsPrime rib roast. Just the name conjures images of lavish dinners, crackling fires, and hearty laughter. It’s ...

How Long to Bake Potatoes in the Oven (Perfect Every Time)
Cooking TipsBaked potatoes are a staple in my kitchen. They're incredibly versatile, delicious, and surprisingly easy to m...

Perfect Rice Every Time: The Ultimate Guide to Cooking Rice
Cooking TipsAs a self-proclaimed foodie, I've always been a bit obsessed with rice. It's the foundation of countless cuisi...

The Ultimate Guide to Cooking Asparagus: Tips, Techniques, and Recipes
Cooking TipsAsparagus. The mere mention of this spring delicacy conjures up images of vibrant green spears, crisp and burs...

Ultimate Guide to Cooking the Perfect Thanksgiving Turkey
Cooking TipsThanksgiving. Just the word conjures up images of overflowing tables laden with delicious food, the scent of r...
