Ah, the standing rib roast. Just the name evokes images of a beautifully golden-brown roast, glistening with juices, surrounded by happy faces ready to dig in. It's a dish that screams "special occasion" – Christmas, Easter, a birthday, or just a Tuesday night when you feel like spoiling yourself. But let's be honest, a standing rib roast can be a bit intimidating, especially for a home cook. So much depends on getting it right – the roasting, the seasoning, the resting. But fear not! I'm here to walk you through it, sharing my personal experiences and tips to help you achieve that perfect, melt-in-your-mouth masterpiece.
Part 1: Choosing the Right Roast
First things first, you need to pick the right roast. This isn't just about grabbing the first one you see at the butcher's. Choosing the right roast is crucial to your success. Imagine biting into a dry, tough roast - not exactly the experience you're aiming for! So let's make sure you're starting with the right piece of meat.
Understanding the Cuts
A standing rib roast, also known as a prime rib roast, comes from the rib section of the beef. It's a prime cut, meaning it's highly prized for its tenderness and marbling. Think of it as the "filet mignon" of the beef world.
The most common cut is the "standing rib roast," which includes bones, while the "ribeye roast" is boneless. The "rib roast" refers to the whole cut, while the "prime rib roast" specifically denotes a high-quality cut from the "prime" section of the beef.
Now, you might be wondering, "Why bother with the bones?" Well, the bones actually contribute to the flavor of the roast, as they impart a rich, savory taste during cooking. Plus, the bones act as a natural "heat sink," helping to keep the roast from overcooking.
However, if you're looking for a more manageable and easier-to-carve option, the boneless "ribeye roast" is a good choice. It's a great option for smaller gatherings or if you're not a fan of carving around bones.
What to Look For
Here's what to keep in mind when choosing your roast:
- Marbling: The more marbling (those lovely streaks of fat), the juicier and more flavorful your roast will be. Think of marbling as nature's built-in butter, adding richness and tenderness to every bite. A roast with good marbling will be more forgiving if you accidentally overcook it, as the fat will help to keep it moist.
- Color: The meat should be a deep red colour, with a slightly firm texture. Avoid any discolouration, dryness, or softness, which could indicate poor quality or spoilage. A good butcher will be able to guide you on the best cuts and advise you on the quality of the meat.
- Bone Size: If you're going for the traditional standing rib roast, consider the size of the bones. A larger rib roast will have more bones, contributing to more flavour, but also more bone to meat ratio. This can be a good thing if you're looking for a more substantial meal. On the other hand, a smaller roast will be more manageable and easier to carve, perfect for a smaller gathering.
- Weight: The weight of the roast dictates how many people it can serve. A good rule of thumb is 1-1.5 pounds of meat per person. For a family gathering, a 4-6 pound roast should be sufficient. But if you're expecting a crowd, you might want to go for a larger roast.
Once you've chosen your roast, it's time to move on to the fun part: seasoning!
Part 2: Seasoning Your Roast
Now, onto the exciting part: seasoning! This is where you can really get creative and personalize your roast. My go-to seasoning is a simple blend of salt, pepper, and garlic powder, but feel free to experiment. Let's face it, a little bit of spice goes a long way in elevating the flavor of any dish.
Simple Salt and Pepper
Don't underestimate the power of a good salt and pepper rub. Salt draws out the moisture, helping to create a beautifully crusty exterior, while pepper adds a bit of heat and depth. It's the classic combination for a reason, and it never fails to deliver.
Garlic and Herb Blend
For a more flavorful rub, add some garlic powder, onion powder, dried herbs like rosemary, thyme, and oregano. The combination of garlic and herbs creates a fragrant and aromatic seasoning that adds a delicious depth of flavor to the roast. Be sure to use freshly ground peppercorns for the best flavor. Freshly ground peppercorns have a more intense flavor than pre-ground pepper, making a noticeable difference in the final dish.
Experiment with Spices
If you're feeling adventurous, you can add a touch of chili powder, paprika, or even a pinch of cayenne pepper for a kick. Don't be afraid to experiment and find what you like best. Maybe you'll discover your new signature spice blend!
The Art of Seasoning
Here's my approach to seasoning:
- Pat Dry: Pat the roast dry with paper towels to ensure the seasoning adheres properly. Moisture can prevent the seasoning from sticking, so it's important to make sure the surface is dry.
- Season Liberally: Don't be shy with the seasoning! A generous coating will add depth and richness to the roast. A little bit of seasoning goes a long way, but don't be afraid to go for it. The roast can handle it!
- Let It Sit: Once you've seasoned the roast, let it sit at room temperature for at least 30 minutes, allowing the flavours to develop. This also helps the roast cook more evenly. Giving the seasoning time to penetrate the meat allows for a more flavorful and evenly cooked roast.
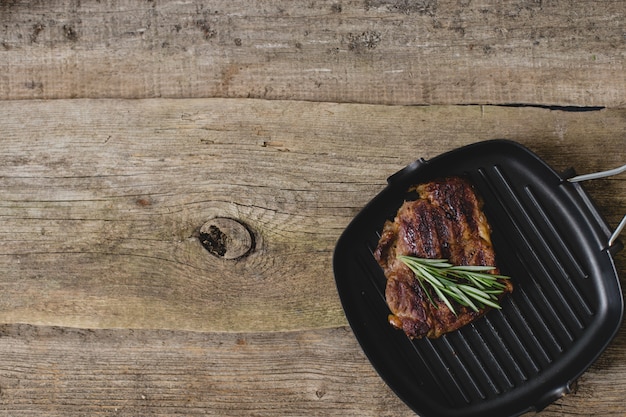
Part 3: Roasting Your Roast
Now comes the moment of truth - roasting your magnificent roast. It's a bit of a dance, juggling temperature, time, and patience. But with a bit of practice, you'll become a seasoned pro in no time. Let's talk about the art of roasting!
Roasting Technique
I prefer to roast my rib roast in a convection oven. It circulates hot air, ensuring even cooking and a beautiful golden-brown crust. Convection ovens are great for roasting because they distribute heat more evenly, resulting in a more consistently cooked roast. However, a conventional oven will do just fine. If you're using a conventional oven, make sure to rotate the roast halfway through cooking to ensure even browning.
Temperature and Timing
The key is to roast the meat low and slow, allowing it to cook evenly and retain its moisture. Here's my approach:
- Preheat Oven: Preheat your oven to 450°F (232°C). Starting with a high temperature allows for a good sear, which creates a delicious crust on the outside of the roast.
- Sear the Roast: Place the seasoned roast in a roasting pan and sear it on all sides for 15-20 minutes, to create a delicious crust. This step is crucial for achieving a beautiful, crispy exterior.
- Reduce Heat: Reduce the oven temperature to 325°F (163°C). Now, it's time to slow down the cooking process and allow the roast to cook evenly throughout.
- roasting time: Allow about 15-20 minutes per pound of roast for medium-rare. For a more well-done roast, add an additional 5-10 minutes per pound. Remember, the longer you cook the roast, the more well-done it will become.
- Resting Time: Once the roast is cooked to your desired level of doneness, remove it from the oven and let it rest, covered with foil, for at least 15-20 minutes. This allows the juices to redistribute, resulting in a more tender and flavorful roast. Resting is a crucial step that's often overlooked. It allows the juices to reabsorb into the meat, resulting in a more succulent and flavorful roast.
Part 4: Checking for Doneness
How do you know when your roast is ready? There are a few methods you can use. You don't want to end up with a roast that's too raw or too well-done. It's important to check for doneness to ensure your roast is cooked to perfection.
Using a meat thermometer
This is the most accurate way to check for doneness. Insert the thermometer into the thickest part of the roast, making sure it doesn't touch any bones. The thermometer should be inserted horizontally, not vertically, and it should be placed in the thickest part of the roast, away from any bones.
Here's a guide to recommended temperatures:
| Doneness | internal temperature (°F) | Internal Temperature (°C) |
|---|---|---|
| Rare | 125-130 | 52-54 |
| Medium-Rare | 130-135 | 54-57 |
| Medium | 135-140 | 57-60 |
| Medium-Well | 140-145 | 60-63 |
| Well-Done | 145-150 | 63-66 |
Remember, these are just guidelines. The perfect level of doneness for your roast is a matter of personal preference.
The Touch Test (Not Recommended)
This method involves pressing on the roast to gauge its doneness. While it can be a good indicator, it's not as reliable as using a meat thermometer. The touch test can be misleading, as the temperature of the meat can be affected by the surrounding air and the time it's been out of the oven.
For a reliable and accurate result, stick to using a meat thermometer. It's the most accurate and consistent method for checking doneness.
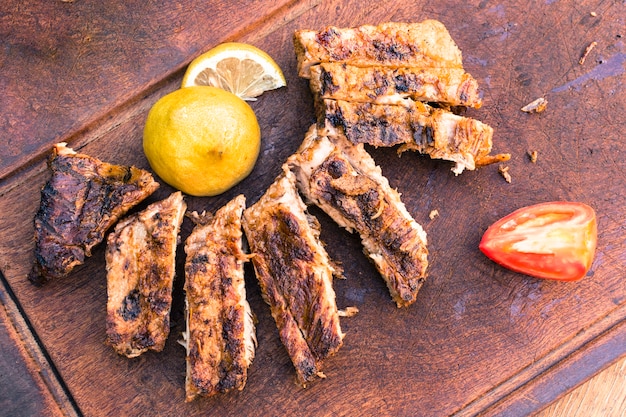
Part 5: Carving the Roast
The moment has arrived! Carving a standing rib roast can seem daunting, but it's actually quite straightforward. With a few simple tips and techniques, you can carve a standing rib roast like a pro.
Tools of the Trade
You'll need a sharp carving knife and a carving fork to help you lift and hold the meat as you carve. A sharp knife is essential for clean, even slices, while a carving fork helps to secure the roast in place while you're carving.
If you don't have a carving fork, you can use two forks, or even a pair of tongs to hold the roast in place. Just make sure you're using tools that are sturdy enough to handle the weight of the roast.
The Carving Technique
Here's how to carve a standing rib roast:
- Place the Roast: Place the roast on a cutting board, making sure it's secure. You want to make sure the roast is stable and won't move while you're carving. A good cutting board will provide a stable surface and prevent the roast from sliding around.
- Carve the Bones: Starting at one end of the roast, cut along the bone, separating the meat from the ribs. This is the first step in carving a standing rib roast. It involves carefully separating the meat from the bones, creating individual rib sections.
- Slice the Meat: Holding the roast with your carving fork, slice the meat perpendicular to the bone, creating even slices. Once you've removed the meat from the bones, you can start slicing the roast. Cut perpendicular to the bone, creating thin, even slices that will be easy to serve.
- Serve: Arrange the slices on a platter and serve with your favourite sides. You can either arrange the slices in a fan shape or simply place them in a pile on the platter. Serve the roast hot with your favourite sides.
And there you have it - a beautifully carved standing rib roast, ready to be enjoyed by your guests!
Part 6: Serving Your Masterpiece
You've put in the effort, now it's time to enjoy the fruits of your labor. A standing rib roast is best served hot, but you can also reheat it later if you have leftovers.
Let's talk about the delicious sides that complement this incredible dish.
side dishes
The beauty of a standing rib roast is that it pairs perfectly with a variety of side dishes. Here are a few suggestions:
- Roasted Vegetables: roasted asparagus, Brussels sprouts, or carrots bring a vibrant touch to your meal. The combination of roasted vegetables and a rich, savory roast is a classic pairing that always pleases.
- Creamy mashed potatoes: A classic comfort food that complements the richness of the roast. creamy mashed potatoes are a classic side dish that goes well with any roast, but especially with a standing rib roast.
- green bean casserole: A festive and comforting side dish, perfect for special occasions. Green bean casserole is a popular side dish that is often served at holiday meals. It's a comforting and festive dish that pairs well with a standing rib roast.
- Mushroom Gravy: A rich and savory gravy that elevates the flavors of the roast. A good mushroom gravy is a must-have for any standing rib roast. It adds a rich and savory flavor that complements the meat perfectly.
With these delicious sides, your standing rib roast meal will be a hit with everyone at the table.
Part 7: Storing Leftovers
No one wants to see a delicious rib roast go to waste! Properly storing your leftovers ensures you can enjoy it for days to come. There's nothing worse than a dry, tough leftover roast, so it's important to store it properly to maintain its flavor and texture.
Storing in the Fridge
Store the remaining roast in an airtight container in the refrigerator for up to 3-4 days. An airtight container will help to prevent the roast from drying out and absorbing flavors from other foods in the refrigerator.
Reheating Leftovers
There are a few ways to reheat your roast:
- Oven: Preheat oven to 325°F (163°C) and reheat the roast for 15-20 minutes, or until heated through. This method is great for reheating the entire roast, as it allows the meat to cook evenly and prevent drying out.
- Microwave: Reheat in the microwave on medium power for a few minutes, but be careful as it can dry out the meat. The microwave can be a quick and convenient way to reheat leftovers, but it's important to be careful not to overcook the roast, which can make it dry and tough.
- slow cooker: Add the leftover roast to a slow cooker with a little broth or gravy and cook on low heat for several hours until heated through. This is a good way to make the meat even more tender. This method is a good option for reheating larger quantities of leftover roast, as it allows the meat to cook slowly and evenly, while also adding moisture.
Experiment with different methods to find the one that works best for you.
Part 8: FAQs
Let's address some common questions about standing rib roast:
1. How Do I Prevent a Rib Roast From Drying Out?
The key to preventing a rib roast from drying out is to cook it at a low temperature and ensure it's properly rested. A meat thermometer will help you gauge the doneness, and allow you to remove the roast from the oven before it overcooks. Roasting at a low temperature allows the meat to cook evenly and retain its moisture. Resting the roast after cooking allows the juices to redistribute throughout the meat, preventing it from drying out.
2. How Long Should I Rest a Rib Roast?
It's crucial to rest a rib roast for at least 15-20 minutes after cooking. This allows the juices to redistribute, resulting in a more tender and flavorful roast. The resting time allows the muscle fibers to relax, allowing the juices to reabsorb into the meat, resulting in a more succulent and flavorful roast.
3. Can I Roast a Rib Roast in a Slow Cooker?
While you can technically roast a rib roast in a slow cooker, it's not the ideal method. Slow cookers are better suited for smaller cuts of meat, as they don't provide the even heat distribution needed for a large roast. Slow cookers are designed for slow, moist cooking, which is great for smaller cuts of meat, but not ideal for a large roast. A standing rib roast requires a more intense heat to create a good sear and cook evenly throughout.
4. Can I Freeze a Rib Roast?
Yes, you can freeze a standing rib roast for up to 3-4 months. To freeze, wrap the roast tightly in plastic wrap and then aluminum foil. Thaw it in the refrigerator for a few days before cooking. Freezing a rib roast is a great way to save it for later. Just make sure to wrap it tightly to prevent freezer burn and thaw it completely in the refrigerator before cooking.
5. What are Some Good Substitutes for a Standing Rib Roast?
If you can't find a standing rib roast, you can substitute it with a boneless ribeye roast, chuck roast, or even a whole pork loin. Just adjust the cooking time and temperature accordingly. If you can't find a standing rib roast, there are a few other cuts of meat that can be used as substitutes. A boneless ribeye roast is a good option, as it has a similar flavor and texture to a standing rib roast. A chuck roast is also a good choice, but it will require a longer cooking time. A whole pork loin is another option, but it will have a different flavor and texture than a beef roast.
No matter which substitute you choose, be sure to adjust the cooking time and temperature according to the specific cut of meat.
Part 9: Conclusion
A standing rib roast is a truly impressive dish that will leave your guests speechless. With this guide, you're well equipped to conquer the challenge of cooking this magnificent roast. So, gather your ingredients, put on your apron, and get ready to create a memorable meal that will be the talk of the town. Remember, it's not about perfection, it's about the joy of cooking and sharing a delicious meal with loved ones. Enjoy!
Everyone is watching

Prime Rib Roast Cooking Time Chart: Per Pound Guide
Cooking TipsPrime rib roast. Just the name conjures images of lavish dinners, crackling fires, and hearty laughter. It’s ...

How Long to Bake Potatoes in the Oven (Perfect Every Time)
Cooking TipsBaked potatoes are a staple in my kitchen. They're incredibly versatile, delicious, and surprisingly easy to m...

Perfect Rice Every Time: The Ultimate Guide to Cooking Rice
Cooking TipsAs a self-proclaimed foodie, I've always been a bit obsessed with rice. It's the foundation of countless cuisi...

The Ultimate Guide to Cooking Asparagus: Tips, Techniques, and Recipes
Cooking TipsAsparagus. The mere mention of this spring delicacy conjures up images of vibrant green spears, crisp and burs...

Ultimate Guide to Cooking the Perfect Thanksgiving Turkey
Cooking TipsThanksgiving. Just the word conjures up images of overflowing tables laden with delicious food, the scent of r...