(Part 1) The Story of St. Louis Ribs
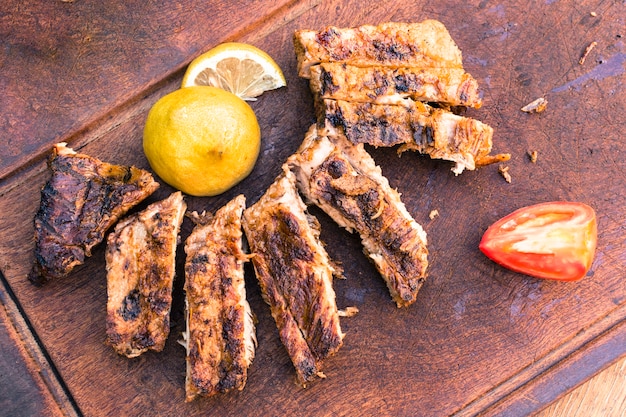
Before we dive into the grilling and smoking, let's take a moment to appreciate the history of these iconic ribs. Now, I'm not talking about some dusty old textbook here, I'm talking about the real story, the one passed down through generations of BBQ enthusiasts. You see, St. Louis ribs aren't just any ribs - they're a specific cut, and their story is intertwined with the city itself.
The Birth of a Cut: A Butcher's Innovation
Imagine the bustling meatpacking district of St. Louis in the early 20th century. Butchers, skilled and hardworking, were constantly striving to get the most out of their livestock. That's where the St. Louis rib story starts. You see, back then, they weren't just cutting the ribs from the loin, like you might find in other parts of the country. They were taking the entire rib rack, including the spare ribs, and removing the tough membrane and cartilage from the underside. This process, known as "St. Louis style," created a unique cut that revolutionized rib cooking.
This was a game-changer, creating a rib that was more manageable, easier to cook, and, crucially, produced a larger amount of meat. This clever technique, born out of necessity and resourcefulness, gave us the St. Louis rib we know and love today. It's a testament to the ingenuity of those early butchers and their commitment to quality.
The Rise of a Tradition: A City's Culinary Identity
Now, fast forward to the mid-20th century. St. Louis is becoming known for its vibrant BBQ scene, and these unique ribs become a cornerstone of the local culinary identity. Picture smoky barbecue joints popping up all over town, each with their own secret recipes and techniques. This is where the real magic happens.
Imagine the aroma of slow-smoked ribs, the crackle of wood in the pit, the convivial atmosphere. This is the heart and soul of St. Louis ribs. It’s about more than just food; it’s about community, tradition, and a shared love for good times and good eats. So, you see, when you cook St. Louis ribs, you’re not just grilling meat, you’re carrying on a legacy, a tradition that’s been passed down for generations. You're part of a culinary heritage that's rich with flavor and history.
(Part 2) Picking the perfect ribs: Choosing Your Weapon

Alright, now that we’ve had our history lesson, it’s time to get practical. Picking the right ribs is crucial. Don’t just grab the first pack you see; take your time and choose wisely. Here’s what to look for:
St. Louis vs. Baby Backs: Understanding the Differences
Now, this might sound like a debate between two rival gangs, but it’s really about understanding the differences between two popular rib cuts. St. Louis ribs, as we’ve established, are the classic choice for their size and meatiness. They’re typically thicker and wider, offering a hearty portion and a satisfying bite. They're perfect for feeding a crowd or indulging in a truly generous helping.
Baby back ribs, on the other hand, are smaller and leaner, with a more delicate flavour. They're a fantastic option for a smaller gathering or for those who prefer a lighter, more tender experience. They're also great for grilling, as their smaller size allows for more even cooking.
So, which one should you choose? It depends on your preferences and your guest list. If you’re looking for a showstopper that’s sure to impress, go for the St. Louis ribs. If you want something a little lighter and easier to manage, baby backs are a great option.
Ribs on Patrol: Inspecting Your Meat
Now, before you even think about putting those ribs in the smoker, take a good look at them. A good rib should be firm and springy to the touch, not soft or mushy. Look for a nice, even marbling of fat, which will help keep your ribs moist and flavourful during cooking. Remember, fat is your friend, it adds flavor and juiciness. But avoid ribs that are overly fatty, as they might be too greasy.
Finally, take a sniff. A fresh rack of ribs should have a pleasant, meaty smell, not a sour or off-putting odour. If you detect any off smells, it’s best to give those ribs a miss. Trust your nose, it’s a good indicator of freshness.
(Part 3) The Art of the dry rub: A Symphony of Flavors
Now we’re getting to the fun part: seasoning your ribs. The right dry rub can elevate your ribs from good to glorious. And I’m not talking about just sprinkling some salt and pepper on them. We’re talking about a symphony of flavours, a blend of spices that will awaken your taste buds and create a truly memorable experience.
The Basics: Laying Down the Foundation
A good dry rub starts with a solid base of salt and pepper. They’re the backbone of flavour, providing that essential saltiness and a touch of heat. Think of them as the foundation of your culinary masterpiece. Then comes the fun part: adding in your favourite spices. Now, I like to think of a dry rub like a good cocktail. You can go for a classic combination, or get creative with your own mix.
Here are some of my go-to spices: paprika for a smoky depth, garlic powder for a subtle bite, onion powder for sweetness, and cayenne pepper for a kick. You can also add other herbs like thyme, rosemary, or oregano for a touch of freshness. Remember, the key is to experiment and find what works best for you.
The Magic of Experimentation: Unleash Your Inner Chef
Don’t be afraid to play around with your spice combinations. You can use store-bought rubs, but I encourage you to create your own. It’s a great way to personalize your ribs and unleash your inner culinary genius. I’ve tried all sorts of things: brown sugar, smoked paprika, even a dash of mustard powder for a tangy twist. It’s all about finding what excites your taste buds.
Remember, the rub isn't just about flavour, it's also about creating a crust that will hold in moisture and enhance the smoky flavour during cooking. A good rub will create a beautiful bark on the outside of your ribs, making them visually appealing and incredibly flavorful. Think of it as a protective layer that helps lock in all those delicious juices.
(Part 4) The Smoking Ceremony: Building the Flames
Now, let’s talk about the heart and soul of St. Louis ribs: the smoking process. This is where the real magic happens, where those ribs transform from ordinary to extraordinary. But before we start firing up the smoker, we need to choose our fuel. And this is no ordinary choice, mate.
The Wood Whisperers: Choosing Your Smoke
Here’s where your personal taste comes into play. Different woods impart different flavours to your ribs. You can go for a classic hickory for a strong, smoky flavour, or opt for a milder wood like apple or cherry for a sweeter and more delicate taste. Experiment with different woods and see what you like best.
Personally, I’m a big fan of pecan wood. It gives a rich, slightly nutty flavour that complements the meat beautifully. But remember, it’s not just about the flavour; it’s also about the temperature. Different woods burn at different rates, so you’ll need to adjust your cooking time accordingly. You'll need to pay attention to the heat output of your chosen wood.
The Smoking Ritual: Getting Your Ribs Ready
Right, now that we’ve got our fuel sorted, it’s time to prepare those ribs for their smoky bath. First, you’ll want to apply your dry rub liberally to all sides of the ribs. Make sure to get it into every nook and cranny, so those flavours can really sink in. Then, place them in the smoker.
Remember, slow and low is the key here. Aim for a temperature of around 225-250 degrees Fahrenheit. Too high and you’ll end up with dry ribs. Too low and the cooking time will stretch out forever. Be patient, mate, good things take time. This is where the magic of slow cooking really shines through.
(Part 5) The Patience Game: Mastering the Smoke
Now, you’ve got your ribs in the smoker, the wood is smoldering, and the aroma of smoke is filling the air. This is the time to be patient, to let the magic happen. But don’t just stand there, mate. You’ve got to keep an eye on those ribs. It's a delicate dance, a balance between heat, time, and attention.
Smoke Signals: Monitoring Your Rib Progress
The key is to check on your ribs every hour or so, spritzing them with a mixture of apple cider vinegar and water. This helps keep them moist and tender, adding a touch of tanginess. It’s also a good opportunity to inspect the ribs for any signs of dryness or burning. This spritzing technique is essential for maintaining that juicy texture.
Another tip: use a meat thermometer to check the internal temperature. You want to cook your ribs until they reach an internal temperature of around 190 degrees Fahrenheit. At this point, they should be falling off the bone, juicy, and incredibly flavorful. This is the sweet spot, where the meat has become incredibly tender.
The Wrap Up: Achieving That Perfect Texture
Now, this is a controversial move, but it’s one I swear by. Once your ribs are close to being done, about 2-3 hours into the smoking process, wrap them in foil. This helps create a steamy environment that breaks down the connective tissue and results in incredibly tender meat. But be careful! Don’t overcook them. If you wrap them too early, you might lose that delicious smoke ring. This is where the art of timing and experience come into play.
And here’s another crucial tip: if your ribs seem to be getting too dry, add a little bit of liquid to the foil. It could be a splash of apple juice, beef broth, or even beer. This will keep those ribs moist and succulent, ensuring a perfect outcome. A little bit of moisture goes a long way when it comes to ribs.
(Part 6) The Glaze Game: Adding That Final Touch
Your ribs are cooked, they’re tender, they’re smoky, and they’re practically begging for a delicious glaze. This is the final step, the one that will push your ribs over the top. Now, a good glaze is more than just a sugary sauce, it’s a symphony of flavours, a combination of sweetness, tanginess, and a touch of heat that really makes those ribs sing.
The Sweet and Tangy: Building a Classic Glaze
The classic glaze is a combination of brown sugar, ketchup, apple cider vinegar, and a dash of Worcestershire sauce. This creates a balance of sweetness, tanginess, and a touch of umami flavour that complements the ribs beautifully. You can adjust the sweetness by adding more or less brown sugar, or the tanginess by adding more or less apple cider vinegar. It's all about finding the perfect balance for your taste.
I like to add a pinch of cayenne pepper for a hint of heat, but that’s completely up to you. You can also get creative with your glaze, using different fruits like cherries or peaches for a unique flavour twist. The world of glazes is your oyster!
The Glaze Application: Putting the Finishing Touches
Once your ribs are close to being done, about 30 minutes before you plan to take them off the smoker, brush them with the glaze. Then, return them to the smoker and let the glaze set. This will create a beautiful, glossy finish that will make your ribs irresistible.
A pro tip here: don’t be afraid to brush on a second or even third coat of glaze, especially if you’re looking for a really thick, sticky glaze. Just make sure to watch the temperature, as the sugar in the glaze can burn if it gets too hot. Be mindful of the heat and your glaze will shine.
(Part 7) The Rib-Worthy side dishes: Creating a Culinary Ensemble
Alright, you’ve got your amazing St. Louis ribs ready to go. Now, what about those sides? You can’t have a proper rib feast without some delicious accompaniments to complement those smoky flavours.
Classic Combos: The Perfect Sidekicks
Here’s the thing: you can’t go wrong with the classic side dishes. Think creamy coleslaw, tangy baked beans, crispy potato salad, and a simple green salad for a refreshing contrast. These dishes are tried and true, and they’ll definitely make your ribs shine. They're the perfect harmony to your rib masterpiece.
You can also add a touch of Southern charm with some hush puppies, cornbread, or mac and cheese. These dishes are perfect for soaking up all those delicious juices from your ribs. They're a real treat, and add a touch of Southern hospitality to your meal.
Think Outside the Box: Finding New Partners
Don’t be afraid to get creative with your side dishes. You can also pair your ribs with other dishes that complement their smoky flavours. Think about roasted vegetables like sweet potatoes or asparagus, grilled corn on the cob, or even a simple fruit salad for a refreshing touch. Break free from tradition and experiment with your sides.
Remember, the key is to create a balanced plate with a variety of textures and flavours. And don’t forget about the drinks! A cold beer or iced tea is the perfect way to cool down and enjoy your ribs.
(Part 8) The Rib-tastic Feast: Enjoying Your Creation
The moment has arrived, mate. Your St. Louis ribs are done, your sides are ready, and you’re ready to celebrate your culinary triumph. Take a deep breath, relax, and savor the fruits of your labour. It's time to reap the rewards of your hard work.
The Art of Presentation: Putting on the Finishing Touches
Before you dig in, take a moment to admire your work. Arrange your ribs and sides beautifully on a platter. Add a sprig of fresh rosemary or a few slices of lemon for a touch of elegance. And don’t forget to get a good photo of your masterpiece before everyone starts digging in. A little presentation goes a long way in making your meal even more special.
The Grand Finale: Savor Every Bite
Now, it’s time for the moment of truth. Grab a rib, take a bite, and let the flavours explode in your mouth. You’ll be greeted with a symphony of textures and tastes: the tender meat, the smoky bark, the sweet and tangy glaze. This is what it’s all about, mate. This is the joy of cooking, of creating something delicious, of sharing it with your loved ones.
And remember, cooking ribs is a journey. It’s about experimenting, learning, and discovering new flavours. Don’t be afraid to try new things, to push your culinary boundaries. And most importantly, have fun! After all, cooking should be an enjoyable experience.
FAQs
Okay, you’ve mastered the art of St. Louis ribs. Now, let’s tackle some common questions.
- What’s the difference between St. Louis ribs and baby back ribs?
- How do you know when St. Louis ribs are done?
- How long do St. Louis ribs take to cook?
- What is the best wood to use for smoking St. Louis ribs?
- What can I do if my St. Louis ribs are too dry?
St. Louis ribs are cut from the entire rib rack, including the spare ribs, and have the membrane and cartilage removed from the underside. This makes them larger, meatier, and easier to cook. Baby back ribs, on the other hand, are cut from the loin and are smaller, leaner, and more delicate.
St. Louis ribs are done when they reach an internal temperature of around 190 degrees Fahrenheit and are falling off the bone. You can also check for tenderness by gently pulling on a rib bone. If it comes away easily, your ribs are done.
The cooking time for St. Louis ribs can vary depending on the size of the rack, the temperature of your smoker, and the type of wood you’re using. Generally, you can expect to smoke St. Louis ribs for about 4-6 hours. The key is to be patient and let the meat cook slowly and evenly.
Hickory is a popular choice for smoking ribs, as it imparts a strong, smoky flavour. But you can also use other woods, such as apple, cherry, pecan, or oak, depending on your preference. Experiment with different woods to find your favorite smoky flavor.
If your ribs seem to be getting too dry, you can spritz them with a mixture of apple cider vinegar and water, or wrap them in foil during the last part of the cooking process. You can also add a little bit of liquid to the foil, like apple juice, beef broth, or beer. This will help keep those ribs moist and juicy. Don't fret, a few simple tricks can rescue even the driest ribs.
Now, you've got the knowledge, the tools, and the confidence to create your own rib masterpiece. Go forth, conquer the smoker, and enjoy the incredible flavors of St. Louis ribs!
Everyone is watching

Prime Rib Roast Cooking Time Chart: Per Pound Guide
Cooking TipsPrime rib roast. Just the name conjures images of lavish dinners, crackling fires, and hearty laughter. It’s ...

How Long to Bake Potatoes in the Oven (Perfect Every Time)
Cooking TipsBaked potatoes are a staple in my kitchen. They're incredibly versatile, delicious, and surprisingly easy to m...

Perfect Rice Every Time: The Ultimate Guide to Cooking Rice
Cooking TipsAs a self-proclaimed foodie, I've always been a bit obsessed with rice. It's the foundation of countless cuisi...

The Ultimate Guide to Cooking Asparagus: Tips, Techniques, and Recipes
Cooking TipsAsparagus. The mere mention of this spring delicacy conjures up images of vibrant green spears, crisp and burs...

Ultimate Guide to Cooking the Perfect Thanksgiving Turkey
Cooking TipsThanksgiving. Just the word conjures up images of overflowing tables laden with delicious food, the scent of r...